
PWAYTEK 1x2 4K60Hz 196FT
Contents
PWAYTEK HDMI Extender Splitter 1x2 4K@60Hz 196FT User Manual
Model: 1x2 4K60Hz 196FT | Brand: PWAYTEK
1. Overview
The PWAYTEK HDMI Extender Splitter 1x2 is designed to extend HDMI audio/video signals over long distances using a single CAT5e/6/7 cable. This device supports 4K@60Hz resolution and can transmit signals up to 60 meters (196 feet). It features a loop-out port on the transmitter, Power over Cable (POC) technology for simplified power, and IR pass-back functionality for remote control of source devices. This product is ideal for home entertainment, conference rooms, and digital signage applications requiring extended HDMI transmission.

Image: The PWAYTEK HDMI Extender Splitter 1x2 system, including the main transmitter unit, two receiver units, and two IR cables.
2. Key Features
- 4K HD Resolution: Supports video signal resolutions up to 4K@60Hz, providing higher pixel density and clearer image quality compared to 1080P.
- Extended Distance: Extends HDMI signals up to 60 meters (196 feet) over a single CAT5e/CAT6/CAT7 cable, ensuring high-quality signal transmission.
- POC Technology: Power over Cable (POC) allows for unilateral power supply, simplifying installation by powering the receiver units from the transmitter over the Ethernet cable.
- IR Infrared Control: Supports 20~60KHz IR Pass Back, enabling control of the source device from the remote display location.
- Power Switch: Includes a power button for enhanced product safety and convenient operation.
- HDMI Loop Out: Features an HDMI loop-out port on the transmitter for connecting a local display.
- EDID Management: Supports EDID copy function for optimal display compatibility.

Image: Key features of the extender, including 4K@60Hz resolution, 60m/196ft transmission distance, IR control, POC function, loop out, and EDID support.

Image: Visual comparison demonstrating the superior clarity and color rendering of 4K@60Hz YUV 4:4:4 resolution.
3. Package Contents
Please verify that all items listed below are included in your package:
- 1 x PW-HT247P2IR HDMI Extender Splitter Set (1 Transmitter, 2 Receivers)
- 1 x Power Adapter (DC 12V)
- 1 x IR TX Cable
- 2 x IR RX Cables
- 1 x Warranty Card
- 1 x User Manual

Image: All components included in the product package, laid out for inspection.
4. Setup Instructions
Follow these steps to set up your HDMI Extender Splitter:
- Connect HDMI Source: Connect your HDMI source device (e.g., PC, Blu-ray player, game console) to the HDMI IN port on the Transmitter unit using an HDMI cable.
- Connect Local Display (Optional): If you wish to have a local display near the source, connect it to the HD OUT (Loop Out) port on the Transmitter unit using an HDMI cable.
- Connect CAT Cable: Connect one end of a CAT5e/6/7 Ethernet cable to the UTP OUT port on the Transmitter unit. Connect the other end of the CAT cable to the UTP IN port on a Receiver unit. Repeat for the second Receiver unit if using both outputs.
- Connect Remote Displays: Connect each Receiver unit's HD OUT port to its respective remote display (e.g., TV, monitor) using an HDMI cable.
- Connect IR Cables:
- Connect the IR TX (Transmitter) cable to the IR OUT port on the Transmitter unit. Position the IR emitter head near the IR sensor of your source device.
- Connect the IR RX (Receiver) cable to the IR IN port on each Receiver unit. Position the IR receiver head where you will be pointing your remote control.
- Power On: Connect the provided 12V DC power adapter to the DC 12V port on the Transmitter unit. The PWR indicator light will illuminate. Since the system supports POC, the Receiver units will be powered via the CAT cable.
- Verify Connection: Ensure all connections are secure. Turn on all connected devices (source, displays). The STA (Status) indicator lights on both the Transmitter and Receiver units should illuminate, indicating a successful signal connection.
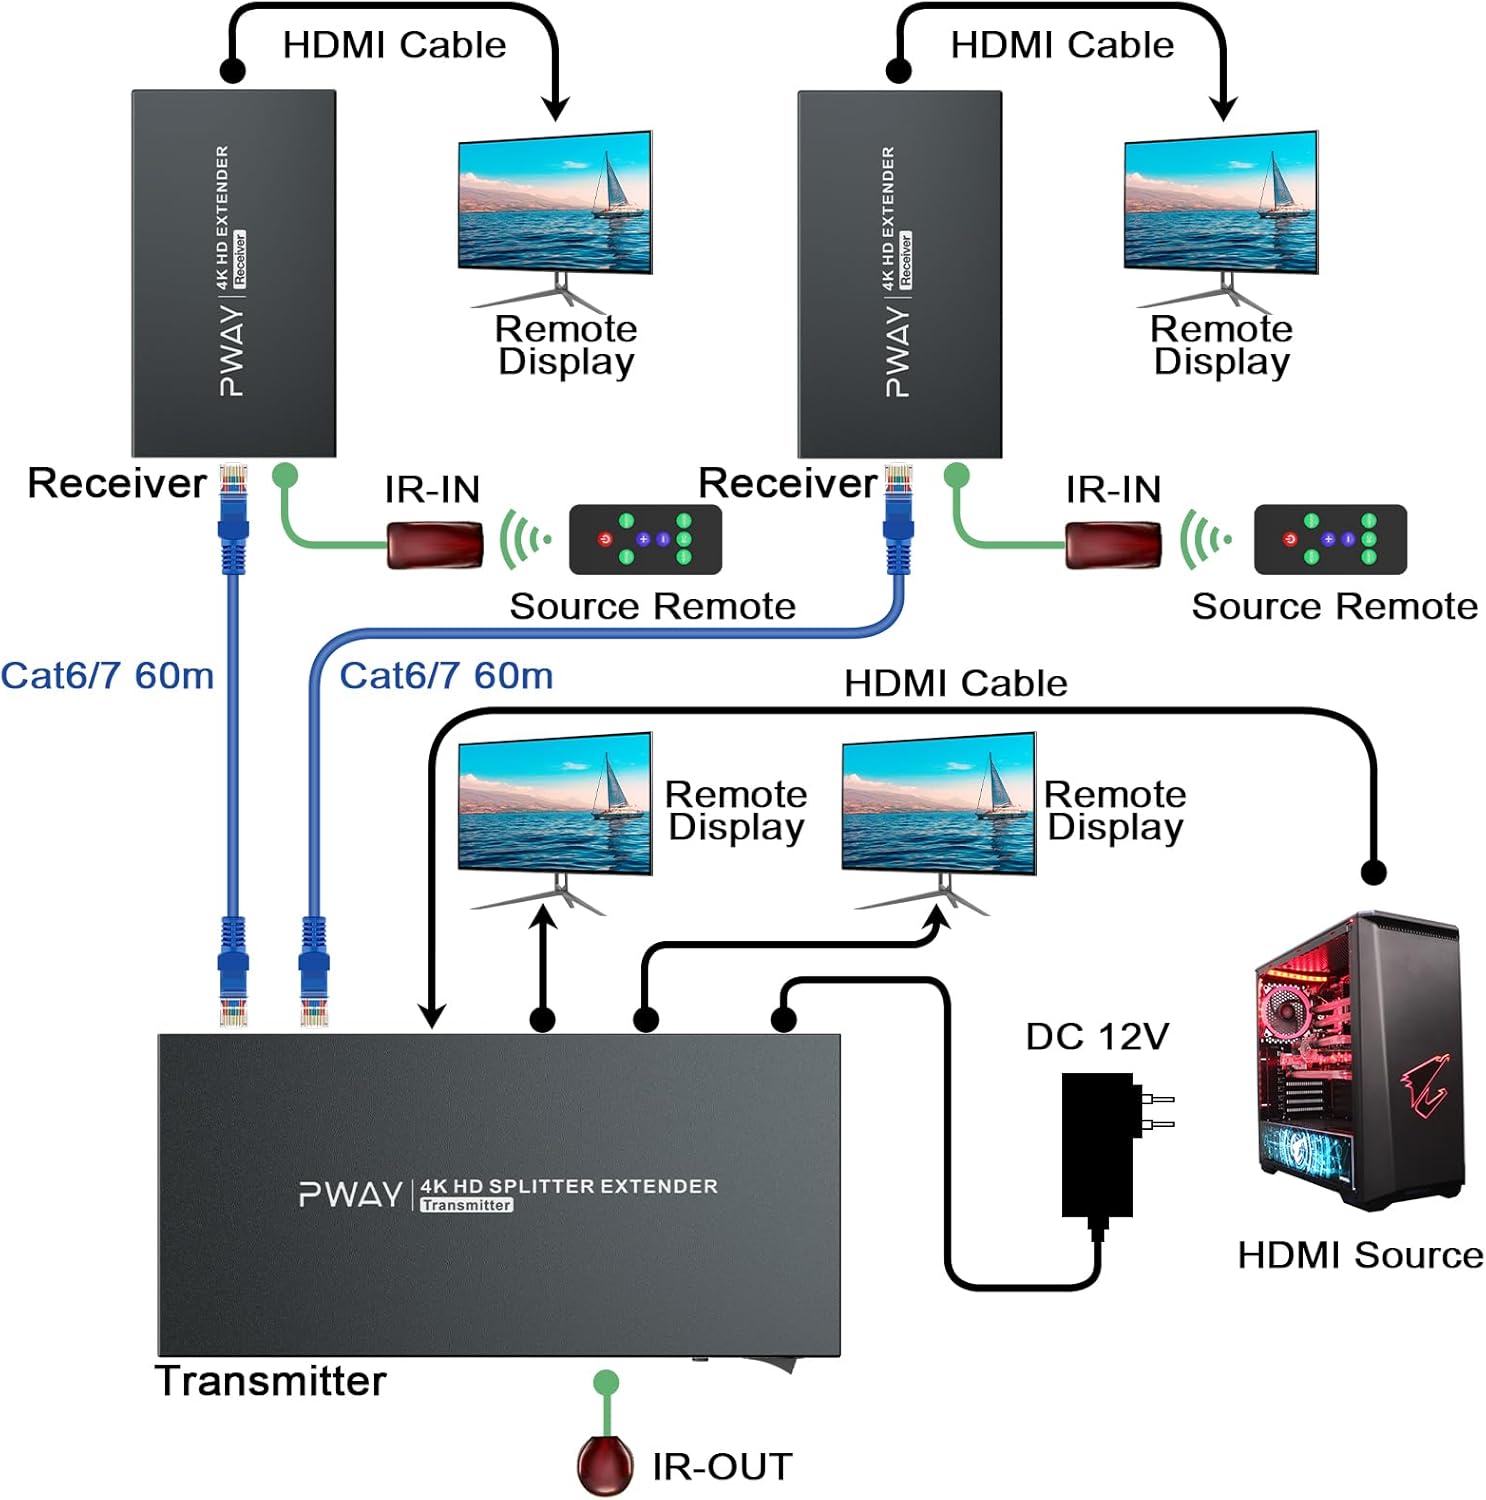
Image: A detailed diagram illustrating the correct wiring and connection sequence for the HDMI extender splitter system.

Image: Detailed view of the input and output ports on both the transmitter and receiver units, including power, HDMI, UTP, and IR connections.
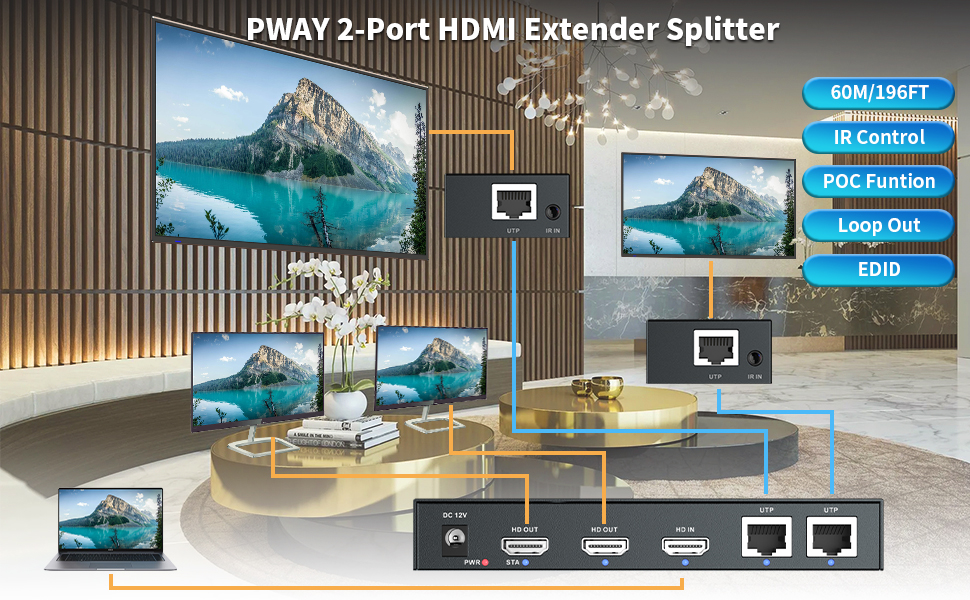
Image: An example setup demonstrating the use of the 2-port HDMI extender splitter in a typical home or office environment.
5. Operating Instructions
Once the setup is complete, the extender splitter operates automatically. Here are some specific functions:
- Power On/Off: Use the ON/OFF switch on the Transmitter unit to power the entire system on or off.
- IR Control: To control your HDMI source device from a remote display location, point your source device's remote control at the IR RX sensor connected to the Receiver unit. The signal will be transmitted back to the IR TX emitter near your source device.
- EDID Management: The EDID switch on the Transmitter unit allows you to manage the Extended Display Identification Data. This helps ensure compatibility between your source and display devices by allowing the source to recognize the optimal display settings. Refer to the specific EDID settings in the specifications section for advanced configuration.
- Loop Out Function: The HDMI loop-out port on the Transmitter allows you to connect a local monitor or TV, enabling you to view the source content simultaneously at the source location and the remote locations.
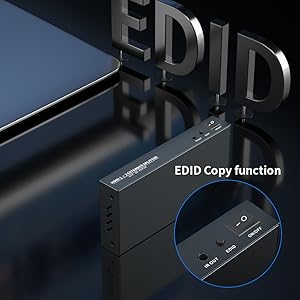
Image: Demonstrates the IR control function, allowing remote control of the source device from the display location.

Image: The EDID copy function switch, used to optimize display compatibility.
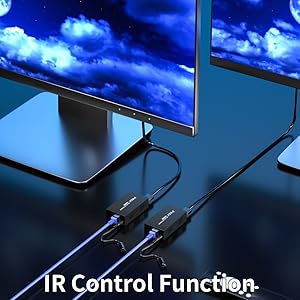
Image: The HDMI loop-out port, allowing a local display to be connected to the transmitter.
6. Maintenance and Care
To ensure the longevity and optimal performance of your HDMI Extender Splitter, please follow these maintenance guidelines:
- Cleaning: Use a soft, dry cloth to clean the exterior of the units. Do not use liquid cleaners or aerosol sprays, as they may damage the device.
- Ventilation: Ensure the units are placed in a well-ventilated area to prevent overheating. Do not block any ventilation openings.
- Handling: Handle the units with care. Avoid dropping or subjecting them to strong impacts.
- Environment: Keep the device away from excessive heat, humidity, dust, and direct sunlight.
- Cables: Regularly check all connected cables for any signs of damage or wear. Replace damaged cables immediately to prevent signal loss or potential hazards.
7. Troubleshooting
If you encounter issues with your HDMI Extender Splitter, refer to the following common problems and solutions:
| Problem | Possible Cause | Solution |
|---|---|---|
| No video output on remote display. | Loose cable connections. Incorrect cable type/length. Power issue. EDID incompatibility. | Check all HDMI and CAT cable connections. Ensure CAT5e/6/7 cable is used and within 60m (196ft) length. Verify the power adapter is connected and the PWR light is on. Try adjusting the EDID switch on the transmitter or power cycling all devices. |
| Poor video quality (flickering, distorted image). | Low quality/damaged CAT cable. Interference. Resolution mismatch. | Use a high-quality CAT6/7 cable. Ensure CAT cable is not running parallel to power lines. Check if source and display resolutions are compatible with the extender's capabilities (up to 4K@60Hz). |
| IR control not working. | IR cables incorrectly positioned. IR sensor/emitter blocked. IR frequency mismatch. | Ensure IR TX emitter is directly over the source device's IR sensor. Ensure IR RX receiver is in line of sight of your remote control. Verify the IR frequency of your remote is within the supported range (20~60KHz). |
| No audio. | Audio settings on source/display. HDMI cable issue. | Check audio output settings on your source device and input settings on your display. Try a different HDMI cable. |
8. Technical Specifications
| Feature | Specification |
|---|---|
| Product Dimensions | 9.92 x 7.8 x 3.74 inches |
| Item Weight | 1.59 pounds |
| ASIN | B0CCXZMDQT |
| Date First Available | August 3, 2023 |
| Manufacturer | PWAYTEK |
| Color | Black |
| Connector Type | HDMI |
| Compatible Devices | Monitor |
| Cable Type | HDMI, CAT5e/6/7 |
| Max Resolution | 4K@60Hz |
| Transmission Distance | Up to 60m (196ft) over CAT5e/6/7 |
| IR Frequency Range | 20~60KHz |
| Power Supply | DC 12V (POC supported) |
9. Warranty and Support
PWAYTEK products are designed for reliability and performance. This product comes with a standard warranty as per the terms specified on the included Warranty Card. Please retain your proof of purchase for warranty claims.
For technical support, troubleshooting assistance, or warranty inquiries, please contact PWAYTEK customer service through the contact information provided on the warranty card or the official PWAYTEK website. When contacting support, please have your product model number (1x2 4K60Hz 196FT) and purchase details ready.
We recommend visiting the official PWAYTEK store on Amazon for additional product information and updates: PWAYTEK Amazon Store
Ask a question about this manual
Ask about setup, troubleshooting, compatibility, parts, safety, or missing instructions. Manuals+ will review the question and use this page’s manual context to help answer it.