Introduction
The Wainlux JL3 is a versatile and high-precision laser engraving and cutting machine designed for a wide range of materials. Featuring advanced compressed spot laser technology, it delivers a focused and accurate beam for detailed engraving and efficient cutting. Its robust and modular design ensures ease of assembly, maintenance, and upgrades, making it suitable for both beginners and experienced users. This manual provides essential information for safe operation, setup, and maintenance of your JL3 laser engraver.
Safety Information
Operating a laser engraving machine involves potential risks. Please read and understand all safety warnings before use.
- Eye Protection: Always wear the provided laser safety goggles when the machine is in operation. Direct exposure to the laser beam can cause severe eye damage.
- Ventilation: Ensure adequate ventilation in your workspace. Laser engraving can produce smoke, fumes, and odors, which may be harmful if inhaled.
- Fire Hazard: Some materials are flammable when exposed to a laser. Do not leave the machine unattended during operation. Keep a fire extinguisher nearby.
- Material Compatibility: Only engrave or cut materials specified as safe for laser processing. Avoid materials that produce toxic fumes or are highly reflective.
- Children and Pets: Keep children and pets away from the operating area.
- Power Supply: Use only the recommended power adapter. Disconnect power before performing any maintenance or assembly.

Image: The Wainlux JL3 laser engraver shown with a pair of laser safety goggles, emphasizing the importance of eye protection during operation.
Package Contents
Upon opening the package, please verify that all components are present and undamaged.
- Wainlux JL3 Laser Engraving Machine Frame (pre-assembled modules)
- Laser Module (40W fixed-focus)
- Power Adapter
- USB Cable
- USB Stick (containing software and drivers)
- Safety Goggles
- User Manual (this document)
- Small material samples for testing (e.g., wood, acrylic)
- Assembly Tools (screws, wrenches, etc.)
Setup and Assembly
The JL3 laser engraver is designed for easy assembly with most components pre-installed. Follow these steps to set up your machine:
- Unpacking: Carefully remove all components from the packaging.
- Frame Assembly: The main frame consists of stainless steel and acrylic components. Connect the frame sections as per the diagrams in the quick start guide (usually included with the machine). Ensure all screws are tightened securely.
- Laser Module Installation: Mount the laser module onto the designated carriage on the X-axis. Ensure it is firmly attached and the cables are properly connected. The lifting frame allows for flexible adjustment of engraving distance.
- Cable Connections: Connect the power adapter to the machine and a suitable power outlet. Connect the USB cable from the machine to your computer if using a wired connection.
- Software Installation: Insert the provided USB stick into your computer. Install the self-developed application or other compatible software like LaserGRBL or LightBurn. Follow the on-screen instructions for installation.

Image: A fully assembled Wainlux JL3 laser engraving machine, ready for operation, demonstrating its robust frame and laser module.
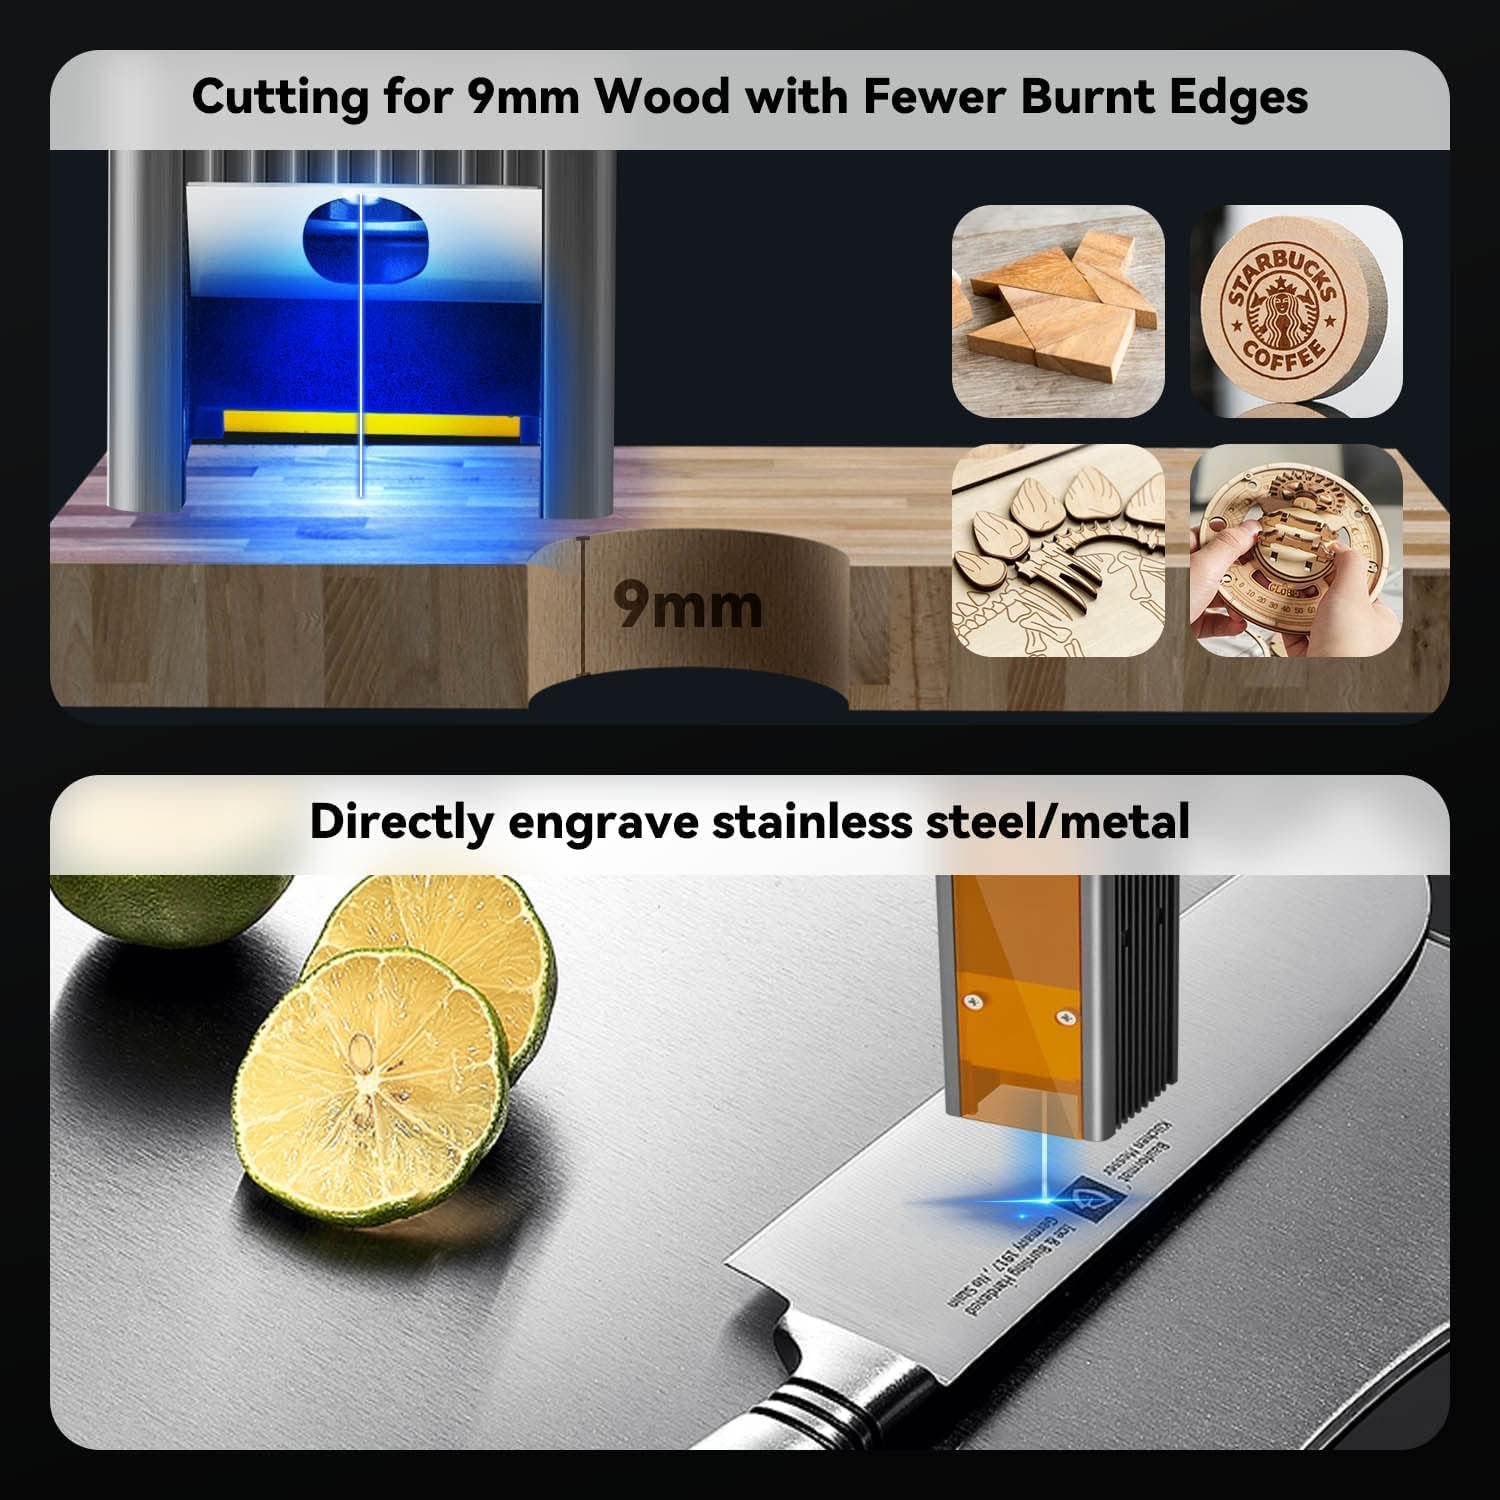
Image: A detailed view of the laser module, highlighting its smoke-proof design and the ultra-fine compressed spot technology for precise engraving.
Operating Instructions
The Wainlux JL3 offers flexible operation modes and wide material compatibility.
Software and Connectivity
- Supported Software: The machine is compatible with LaserGRBL and LightBurn. A self-developed application is also provided on the USB stick, ideal for beginners.
- Connectivity: Supports wireless data transfer via Bluetooth and wired connection via USB.
- Operating Systems: Compatible with Windows 7/8/10, Mac, iOS, and Android.
- File Formats: Supports JPEG, BMP, GIF, PLT, PNG, DXF, JPG, XJ, and HPGL engraving file formats.

Image: Illustration showing the Wainlux JL3's compatibility with various operating systems (Windows, Android, iOS/Mac OS) and connectivity options (USB, Bluetooth, Offline Use).
Engraving and Cutting Process
- Material Placement: Place the material to be engraved or cut within the engraving area (370 x 410 mm or 16.12 x 15.75 inches).
- Focus Adjustment: Use the lifting frame to adjust the laser module's height to achieve optimal focus on the material surface.
- Design Preparation: Load your design file into the chosen software. Adjust parameters such as laser power, speed, and number of passes according to the material and desired outcome.
- Start Operation: Initiate the engraving or cutting process from the software. Monitor the machine closely during operation.
The JL3 features an improved motion algorithm and increased motor speed, reaching up to 300mm/s for faster engraving. Its 0.05mm engraving accuracy ensures high-quality results.

Image: Demonstrates the ultra-fine laser engraving capabilities of the JL3, highlighting its 80mm/s engraving speed and 0.05mm engraving accuracy with an example of detailed fur engraving.
Supported Materials
The JL3 can engrave and cut a wide variety of materials, including but not limited to:
- Wood (e.g., 9mm pine boards)
- Bamboo
- Leather
- Acrylic
- Stainless Steel
- Other Metals (e.g., aluminum oxide)
- Circuit Boards
- Glass
- Paper, Cardboard
- Fabric

Image: Visual representation of the JL3's capability to cut 9mm wood with minimal burnt edges and directly engrave stainless steel/metal surfaces.
Maintenance
Regular maintenance ensures optimal performance and extends the lifespan of your JL3 laser engraver.
- Cleaning the Lens: Periodically clean the laser lens with a soft, lint-free cloth and lens cleaning solution. A dirty lens can reduce laser power and engraving quality.
- Cleaning the Machine: Wipe down the machine frame and rails to remove dust and debris. Keep the engraving area clear.
- Lubrication: Apply a small amount of lubricant to the guide rails and moving parts as needed to ensure smooth operation.
- Firmware Updates: Check for and install any available firmware updates to ensure your machine has the latest features and performance improvements.
Troubleshooting
This section addresses common issues you might encounter.
| Problem | Possible Cause | Solution |
|---|---|---|
| Laser not firing or weak output | Loose cable connection, dirty lens, incorrect focus, low power setting. | Check all connections. Clean the laser lens. Adjust focus. Increase laser power in software. |
| Machine not connecting to computer | Incorrect USB port, driver issue, Bluetooth not paired. | Try a different USB port. Reinstall drivers. Ensure Bluetooth is enabled and paired correctly. |
| Engraving quality is poor/inconsistent | Incorrect speed/power settings, material not flat, dirty lens, loose belts. | Adjust speed and power settings. Ensure material is flat and secured. Clean lens. Check and tighten belts. |
| Machine makes unusual noises | Lack of lubrication, debris on rails, loose components. | Lubricate rails. Clean rails. Check for and tighten any loose screws. |
Specifications
| Feature | Detail |
|---|---|
| Model Name | JL3 |
| Brand | Wainlux |
| Laser Power | 5W (Optical Output), 40W (Machine Power) |
| Engraving Area | 370 x 410 mm (approx. 16.12 x 15.75 inches) |
| Engraving Accuracy | 0.05 mm |
| Engraving Speed | Up to 300 mm/s |
| Connectivity | USB, Bluetooth |
| Compatible Operating Systems | Windows 7/8/10, Mac, iOS, Android |
| Supported File Formats | JPEG, BMP, GIF, PLT, PNG, DXF, JPG, XJ, HPGL |
| Product Dimensions | 60.5 x 60.3 x 15.6 cm |
| Item Weight | 2.65 kg |
| Frame Material | Stainless Steel, Acrylic |
Warranty and Support
Wainlux provides comprehensive support for your JL3 laser engraving machine.
- Warranty: A two-year warranty service is provided for machines purchased directly from the Wainlux manufacturer.
- Technical Support: Our after-sales team is available to respond to your email inquiries within 24 hours.
- Returns: We support unreasonable returns for 30 days, including replacement of spare parts and replacement of new machines (for non-human caused failures).
For technical assistance or warranty claims, please contact Wainlux customer support through the contact information provided on their official website or your purchase platform.


