
Bestier L101217Y-GRYW
Bestier LED TV Stand L101217Y-GRYW Instruction Manual
Model: L101217Y-GRYW | Brand: Bestier
Important Safety Information
Please read and understand all instructions before beginning assembly and use. Retain this manual for future reference.
- Two-Person Assembly: Assembly of this TV stand is recommended for two adults to ensure safety and ease.
- Weight Capacity: Do not exceed the maximum weight capacity for the top surface or shelves. Refer to the specifications section for details.
- Stable Placement: Place the TV stand on a flat, level, and stable surface to prevent tipping.
- Child Safety: Keep small parts and packaging materials away from children. Always use the included anti-tip hardware to secure the stand to a wall.
- Tool Use: Use appropriate tools as specified in the assembly instructions. Do not overtighten fasteners.
- Electrical Safety: Ensure all electrical connections for the LED lighting are properly secured and follow local electrical codes. Unplug the LED lights before cleaning or maintenance.
Package Contents
Verify that all parts and hardware are present before beginning assembly. If any items are missing or damaged, contact customer support.
Parts List (Illustrative)
- Top Panel
- Bottom Panel
- Side Panels (Left & Right)
- Middle Support Panels
- Adjustable Shelves
- Cabinet Doors
- Back Panels
- LED Light Strip & Remote Control
Hardware List (Illustrative)
- Cam Locks and Cam Dowels
- Wood Dowels
- Screws (various types)
- Hinges for Cabinet Doors
- Door Handles
- Shelf Pins
- Anti-Tip Hardware
Assembly Instructions
Before You Begin
- Clear a spacious area for assembly.
- Lay out all parts and hardware on a soft, clean surface to prevent scratches.
- Tools required: Phillips head screwdriver, hammer (optional, for dowels).
Step-by-Step Assembly
- Assemble the Base Frame: Attach the side panels to the bottom panel using cam locks and dowels. Ensure all connections are secure.
- Install Middle Supports: Insert the middle support panels into the designated slots, securing them with the appropriate hardware.
- Attach Top Panel: Carefully place the top panel onto the assembled frame, aligning the cam locks and dowels. Tighten all fasteners.
- Install Adjustable Shelves: Insert shelf pins into the desired height positions within the open compartments. Place the adjustable shelves onto the pins. This allows for flexible storage configurations.

Image: Adjustable shelf for customized storage.

Image: Detachable shelf with multiple height options.
- Attach Cabinet Doors: Install hinges onto the cabinet doors and then attach the doors to the main frame. Adjust hinges as needed for proper alignment. Secure door handles. These cabinets provide enclosed storage.

Image: Storage cabinets for concealed items.
- Install Back Panels: Secure the back panels to the rear of the stand using small nails or screws. Ensure the cable management holes are correctly positioned.
- Integrate Cable Management: Utilize the pre-drilled cable management holes in the back panels to organize and route wires from your electronic devices. This helps maintain a tidy appearance.

Image: Cable management hole for organized wiring.

Image: Overview of open display, cable management, and storage features.
- Install LED Lighting: Adhere the LED light strip to the designated areas (usually along the inner edges of the open compartments). Connect the power supply and remote receiver.
- Apply Anti-Tip Hardware: Secure the TV stand to a wall using the provided anti-tip hardware to prevent accidental tipping. Follow the instructions included with the anti-tip kit.
Once assembled, place your television and media devices on the stand. Ensure the weight is evenly distributed.
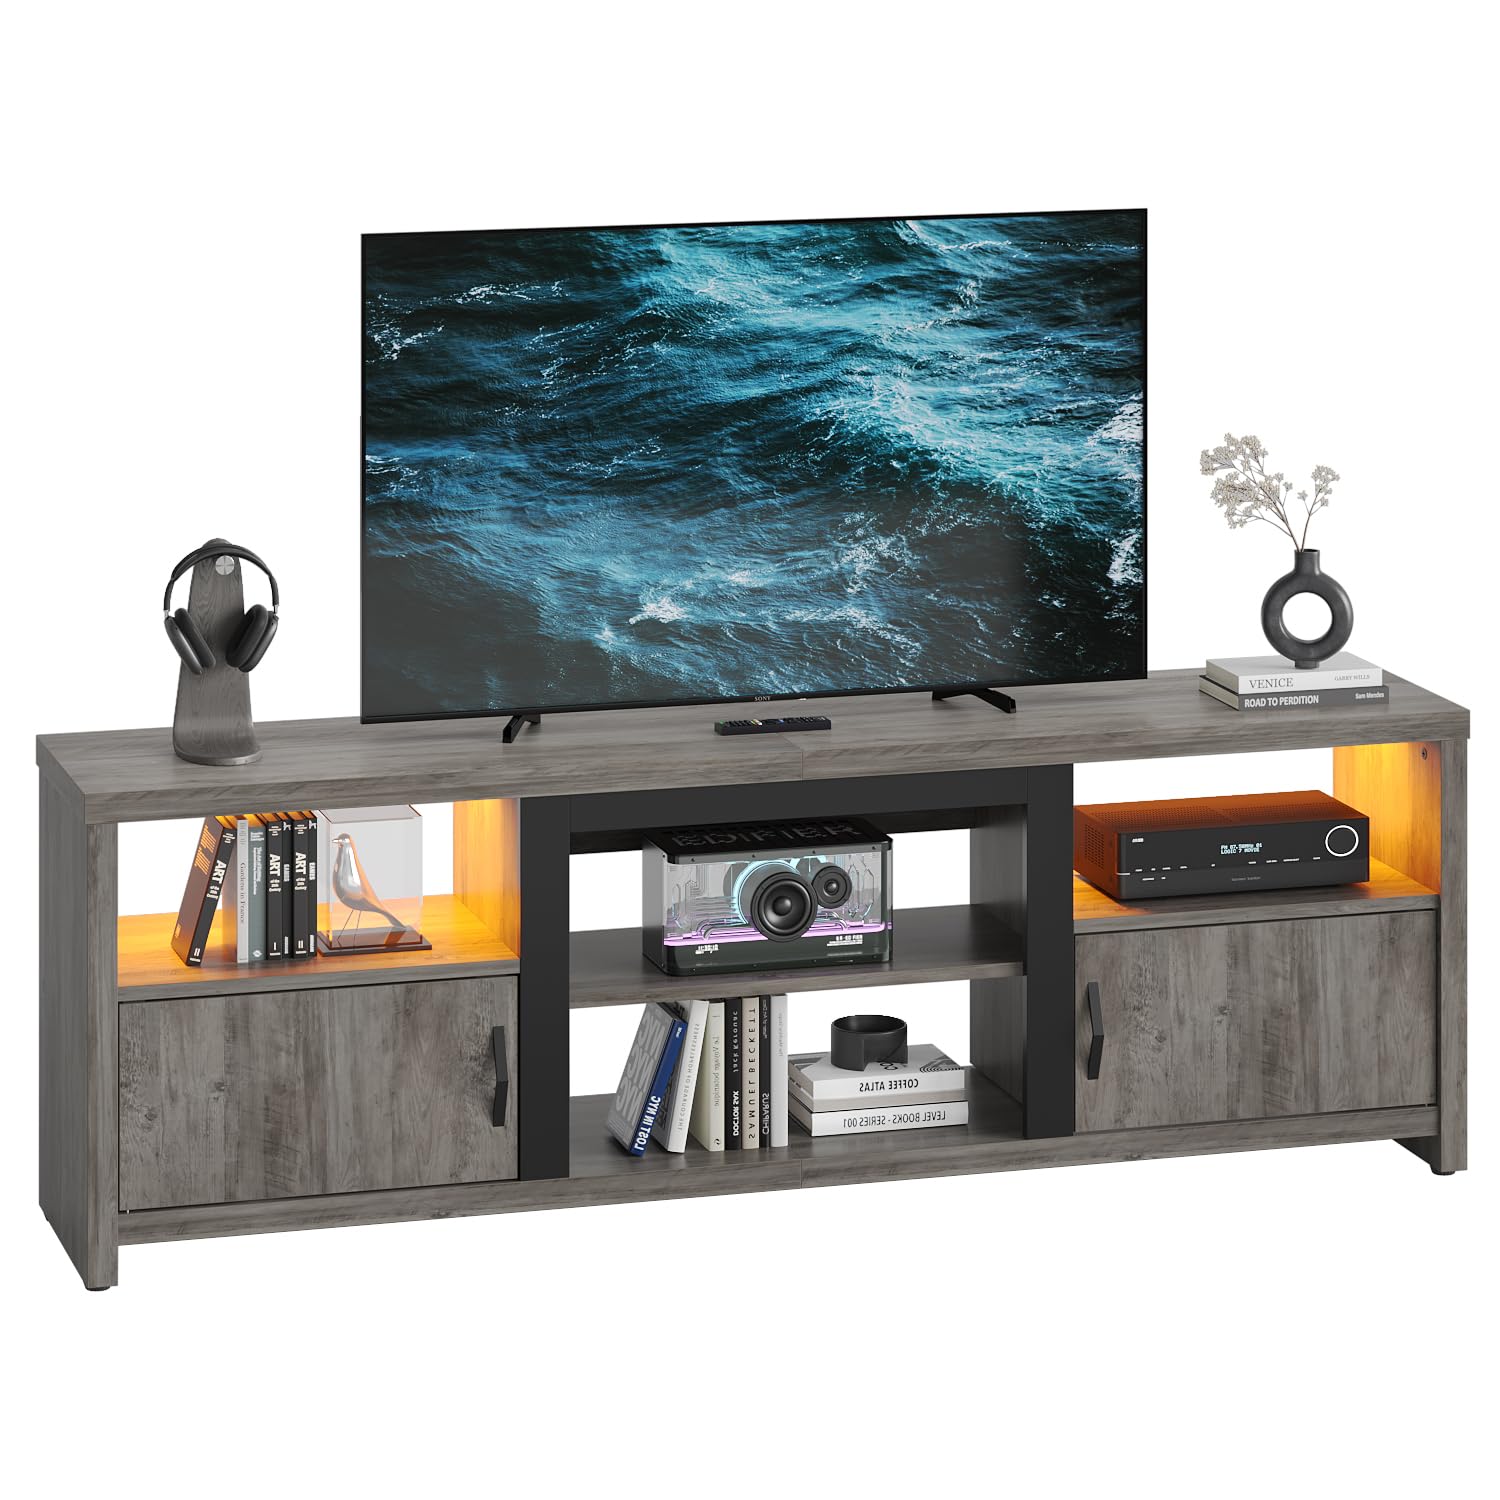
Image: Fully assembled Bestier LED TV Stand.
Operating Instructions
LED Lighting System
The Bestier LED TV Stand features integrated LED lighting with multiple color and dynamic modes, controlled by a remote.
- Power On/Off: Use the power button on the remote control to turn the LED lights on or off.
- Color Selection: Select from 20 static colors using the color buttons on the remote.
- Dynamic Modes: Choose from 22 dynamic modes (e.g., flash, strobe, fade, smooth) to create different lighting effects.
- Brightness Adjustment: Increase or decrease the brightness of the lights using the dedicated brightness control buttons.
- Speed Adjustment: For dynamic modes, adjust the speed of the effects using the speed control buttons.

Image: LED remote control and lighting options.
Video: Demonstration of the Bestier LED TV Stand's features, including LED lighting.
Maintenance and Care
Proper care will extend the life and appearance of your TV stand.
- Cleaning: Wipe surfaces with a soft, damp cloth. Avoid using harsh chemicals, abrasive cleaners, or polishes that may damage the finish.
- Spills: Clean up spills immediately to prevent staining or damage to the material.
- Fasteners: Periodically check all fasteners to ensure they remain tight. Retighten if necessary.
- LED Lights: Ensure the LED light strip and connections are free from dust. If the lights malfunction, check connections before troubleshooting.
- Avoid Direct Sunlight: Prolonged exposure to direct sunlight may cause fading or discoloration.
Troubleshooting
If you encounter issues with your Bestier LED TV Stand, refer to the following common problems and solutions.
- Stand is Unstable/Wobbly:
- Ensure all cam locks and screws are fully tightened.
- Verify the stand is on a level surface. Adjust floor glides if present.
- Cabinet Doors Do Not Align:
- Adjust the hinges. Most hinges allow for minor adjustments in height, depth, and side-to-side.
- Ensure the stand is level.
- LED Lights Not Working:
- Check if the power adapter is securely plugged into both the wall outlet and the LED strip connector.
- Ensure the remote control has working batteries and is pointed directly at the receiver.
- Verify the LED strip is properly connected to the receiver.
- Missing or Damaged Parts:
- Do not proceed with assembly. Contact Bestier customer support immediately for replacement parts.
Product Specifications
| Feature | Detail |
|---|---|
| Brand | Bestier |
| Model Name | L101217Y-GRYW |
| Product Dimensions | 70.8 x 14 x 23 inches (L x W x H) |
| Item Weight | 78.9 pounds |
| Material | P2 grade cellular board, Metal frame |
| Color | Wash White |
| Special Features | Adjustable Shelf, Durable, LED Lighting |
| Assembly Required | Yes |
| Room Type | Bedroom, Living Room, Playroom |
| UPC | 810117536923 |
Warranty and Support
Bestier is committed to providing quality products and customer satisfaction. This product comes with a standard manufacturer's warranty covering defects in materials and workmanship.
- Warranty Information: For specific warranty terms and conditions, please refer to the warranty card included with your product or visit the official Bestier website.
- Customer Support: If you have any questions, require assistance with assembly, or need to report missing/damaged parts, please contact Bestier customer support.
- Contact Information: Refer to the packaging or the Bestier official website for the most current customer service contact details.
Related documentsL101217Y-GRYW


Ask a question about this manual
Ask about setup, troubleshooting, compatibility, parts, safety, or missing instructions. Manuals+ will review the question and use this page’s manual context to help answer it.