1. Introduction
This instruction manual provides detailed guidance for the safe and proper installation, operation, and maintenance of your Mounting Dream MD2801-M Ultra Slim TV Wall Mount. Please read all instructions carefully before beginning installation to ensure correct setup and to prevent damage or injury. Keep this manual for future reference.
2. Safety Information
WARNING: Failure to read and follow all instructions can result in personal injury, property damage, or voiding of your warranty. If you do not understand these instructions, or have doubts about the safety of the installation, please contact customer service.
- Do not install this product on drywall alone. It must be mounted to wood studs or a concrete/brick wall.
- Ensure the mounting surface can safely support the combined weight of the mount and the television.
- Do not exceed the maximum weight capacity of 88 lbs (40 kg).
- Verify the VESA pattern of your TV is compatible with the mount (100x100mm to 400x400mm).
- Use appropriate safety gear during installation, including eye protection.
- Two people are recommended for installation to ensure safety and ease of handling.
3. Parts List
Verify all components are present and undamaged before beginning installation. Refer to the included hardware bags for specific labels.
| Component | Description | Quantity |
|---|---|---|
| Wall Plate Assembly | Main mounting bracket for wall | 1 |
| TV Brackets | Attaches to the back of the TV | 2 |
| Extension Arms | For larger VESA patterns | 4 |
| Hardware Kit | Various screws, washers, spacers, anchors | 1 set |
| Bubble Level | For accurate leveling | 1 |
| Cable Ties | For cable management | Included |
| Wall Plate Covers | To conceal drill holes | Included |
4. Setup & Installation
Pre-Installation Checklist
- Check TV Specifications: Ensure your TV is between 26-75 inches and weighs up to 88 lbs.
- Check VESA Pattern: Locate the 4 mounting holes on the back of your TV. Measure the horizontal and vertical distance between them. This mount supports VESA patterns from 100x100mm to 400x400mm.
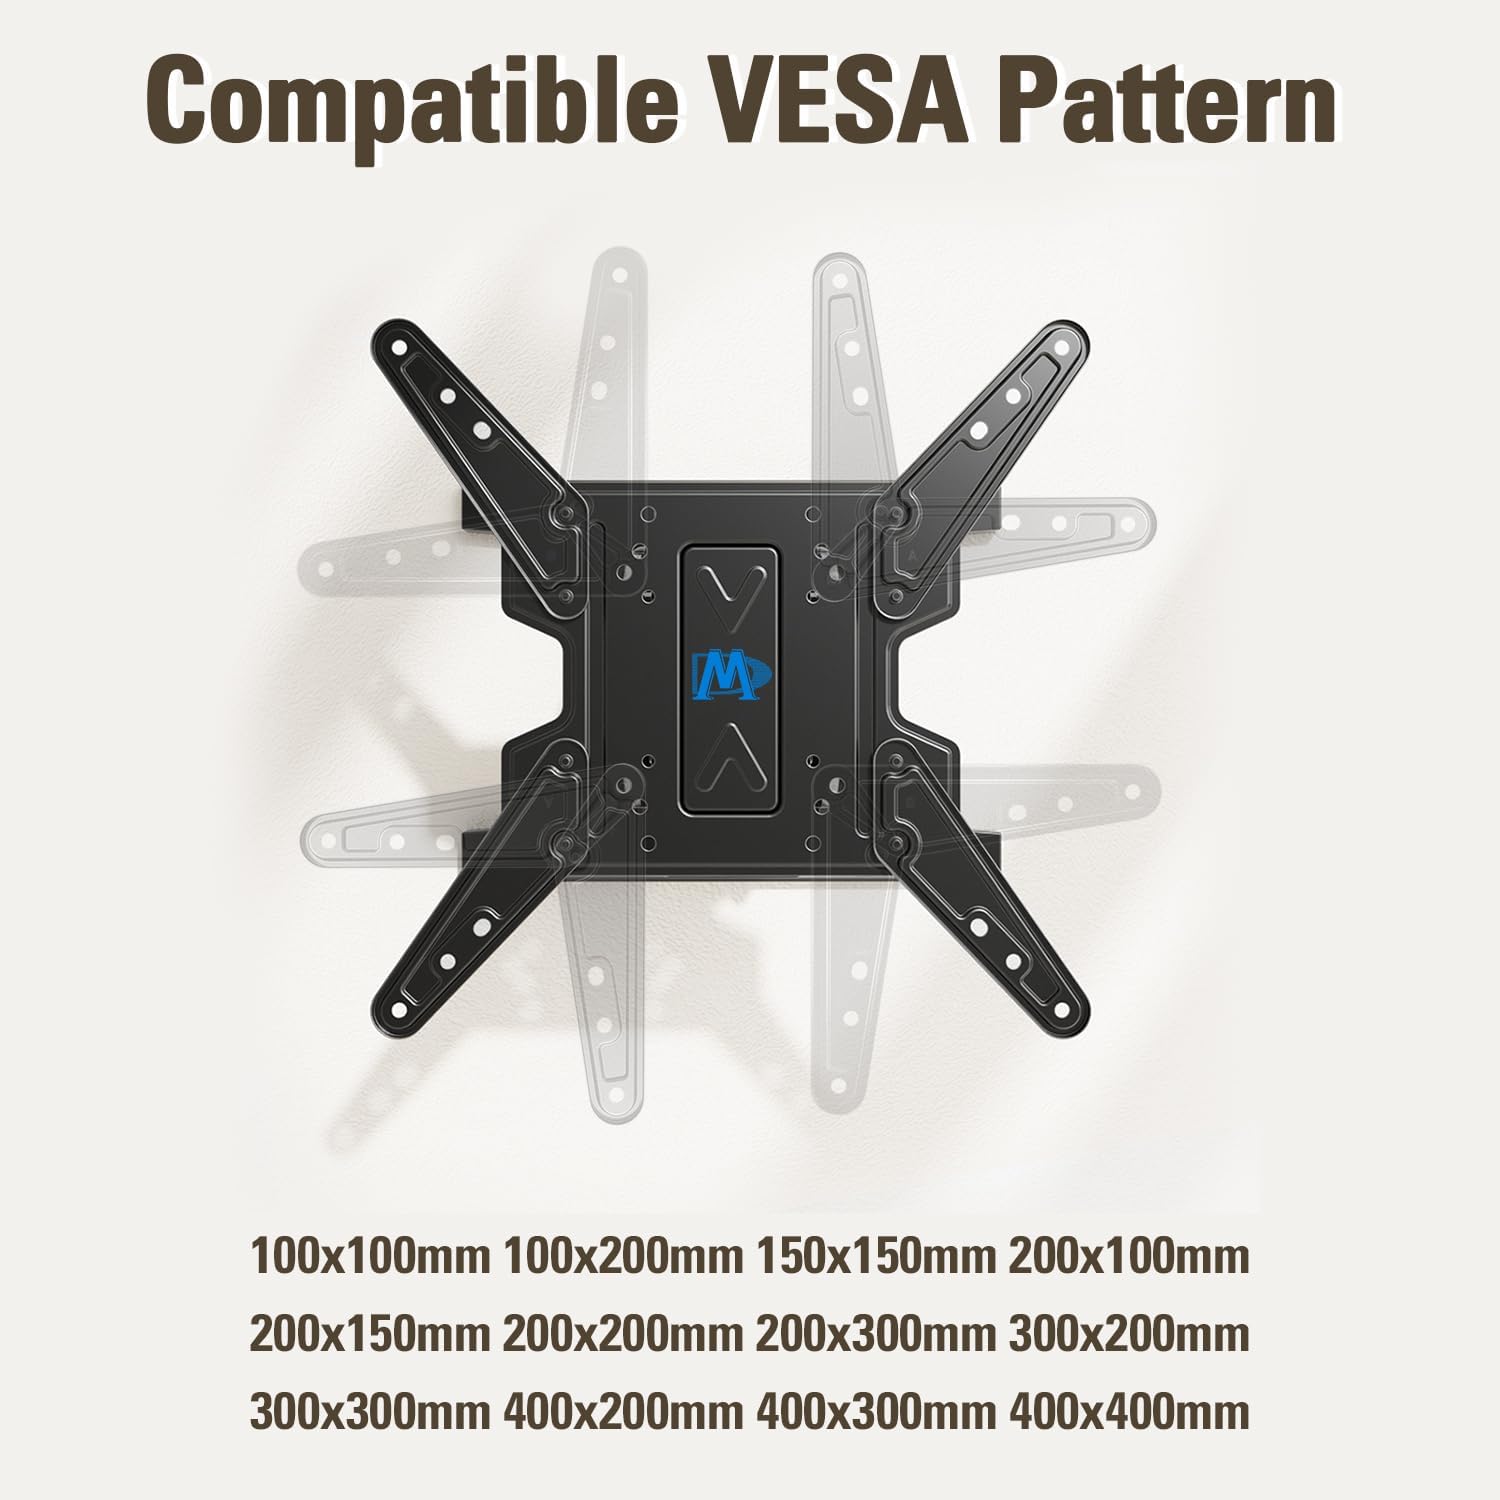
Image: Compatible VESA Pattern. This diagram illustrates how to measure the VESA pattern on your television, showing both horizontal and vertical dimensions.
- Check Wall Type: This mount is designed for installation on wood studs (up to 16 inches apart) or concrete/brick walls. It is NOT for drywall only. Concrete anchors are available upon request if needed.

Image: Compatible Wall Type. This image demonstrates the suitable wall types for installation: wood studs and concrete/brick walls, emphasizing that it is not for drywall only.
- Check Cable Outlet: Ensure the mount will not block any necessary cable outlets on the back of your TV or on the wall.

Image: Check Cable Outlet. This image shows the importance of ensuring the TV mount does not obstruct cable outlets for easy access.
Installation Steps
Follow these general steps for installation. Detailed diagrams are provided in the included paper manual.
- Attach TV Plate to TV: Secure the TV brackets to the back of your television using the appropriate screws, washers, and spacers from the hardware kit. Ensure the brackets are centered and securely fastened.
- Install Wall Plate to Wall: Locate and mark the drilling points on your wall. For wood studs, use a stud finder to ensure proper alignment. For concrete/brick, drill pilot holes and insert anchors (if required). Secure the wall plate firmly to the wall using the provided lag bolts. Use the bubble level to ensure the wall plate is perfectly horizontal.
- Hang and Secure TV to Wall Plate: Carefully lift the TV with the attached brackets and hook it onto the wall plate. Ensure the TV is securely seated. Tighten any safety screws or locking mechanisms to prevent accidental dislodgement.

Image: Easy 3-step Installation. This visual guide simplifies the installation process into three main steps: attaching the TV plate, installing the wall plate, and hanging the TV.
5. Operating & Adjustments
Your Mounting Dream TV mount offers various adjustments for optimal viewing comfort.
Tilt Adjustment
The mount allows for a tilt range of +3° to -15° to reduce glare and achieve a better viewing angle.
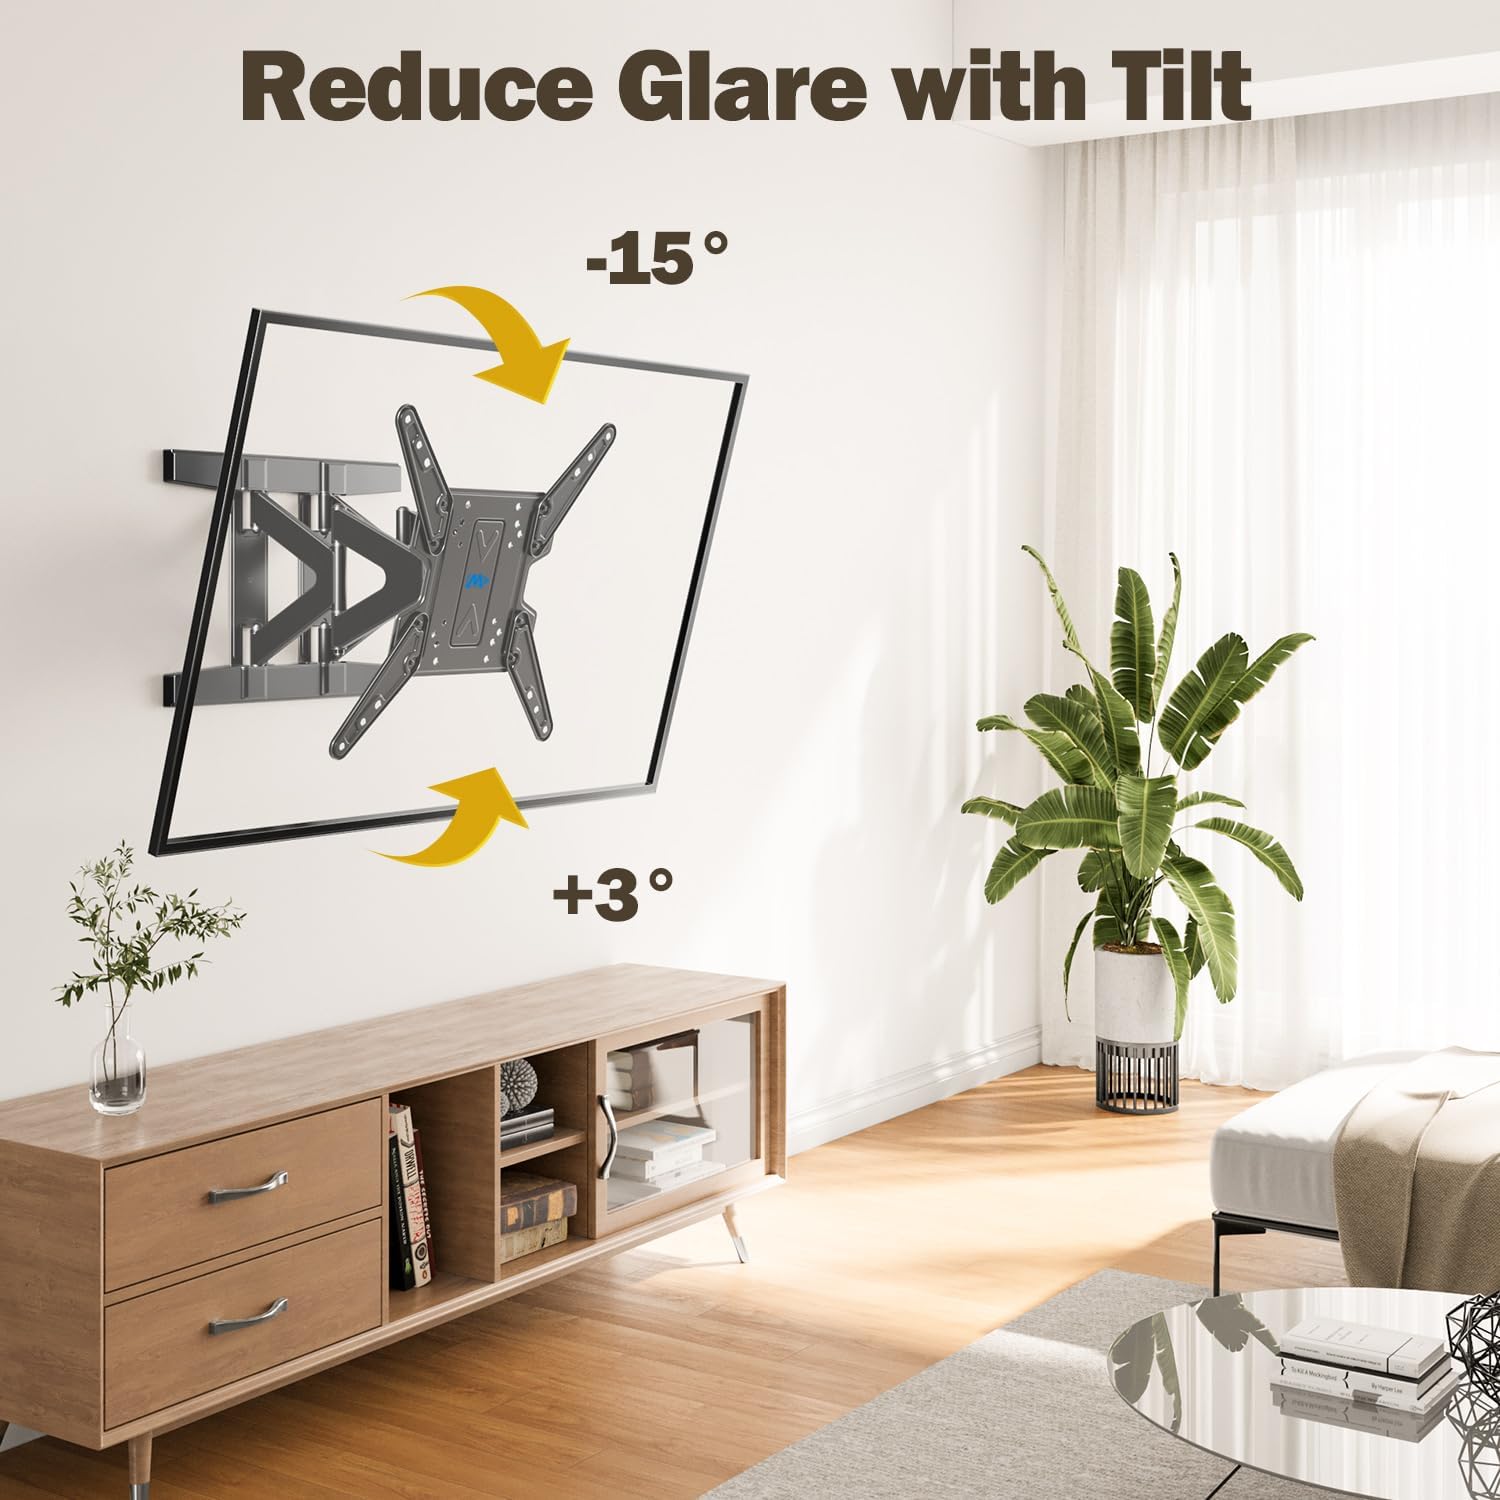
Image: Reduce Glare with Tilt. This image demonstrates how tilting the TV can help minimize screen glare for improved viewing.
The patented tilt adjustment design allows you to fix the TV at 0° tilt by inserting an M6 screw into the hole below the tilting bolt.
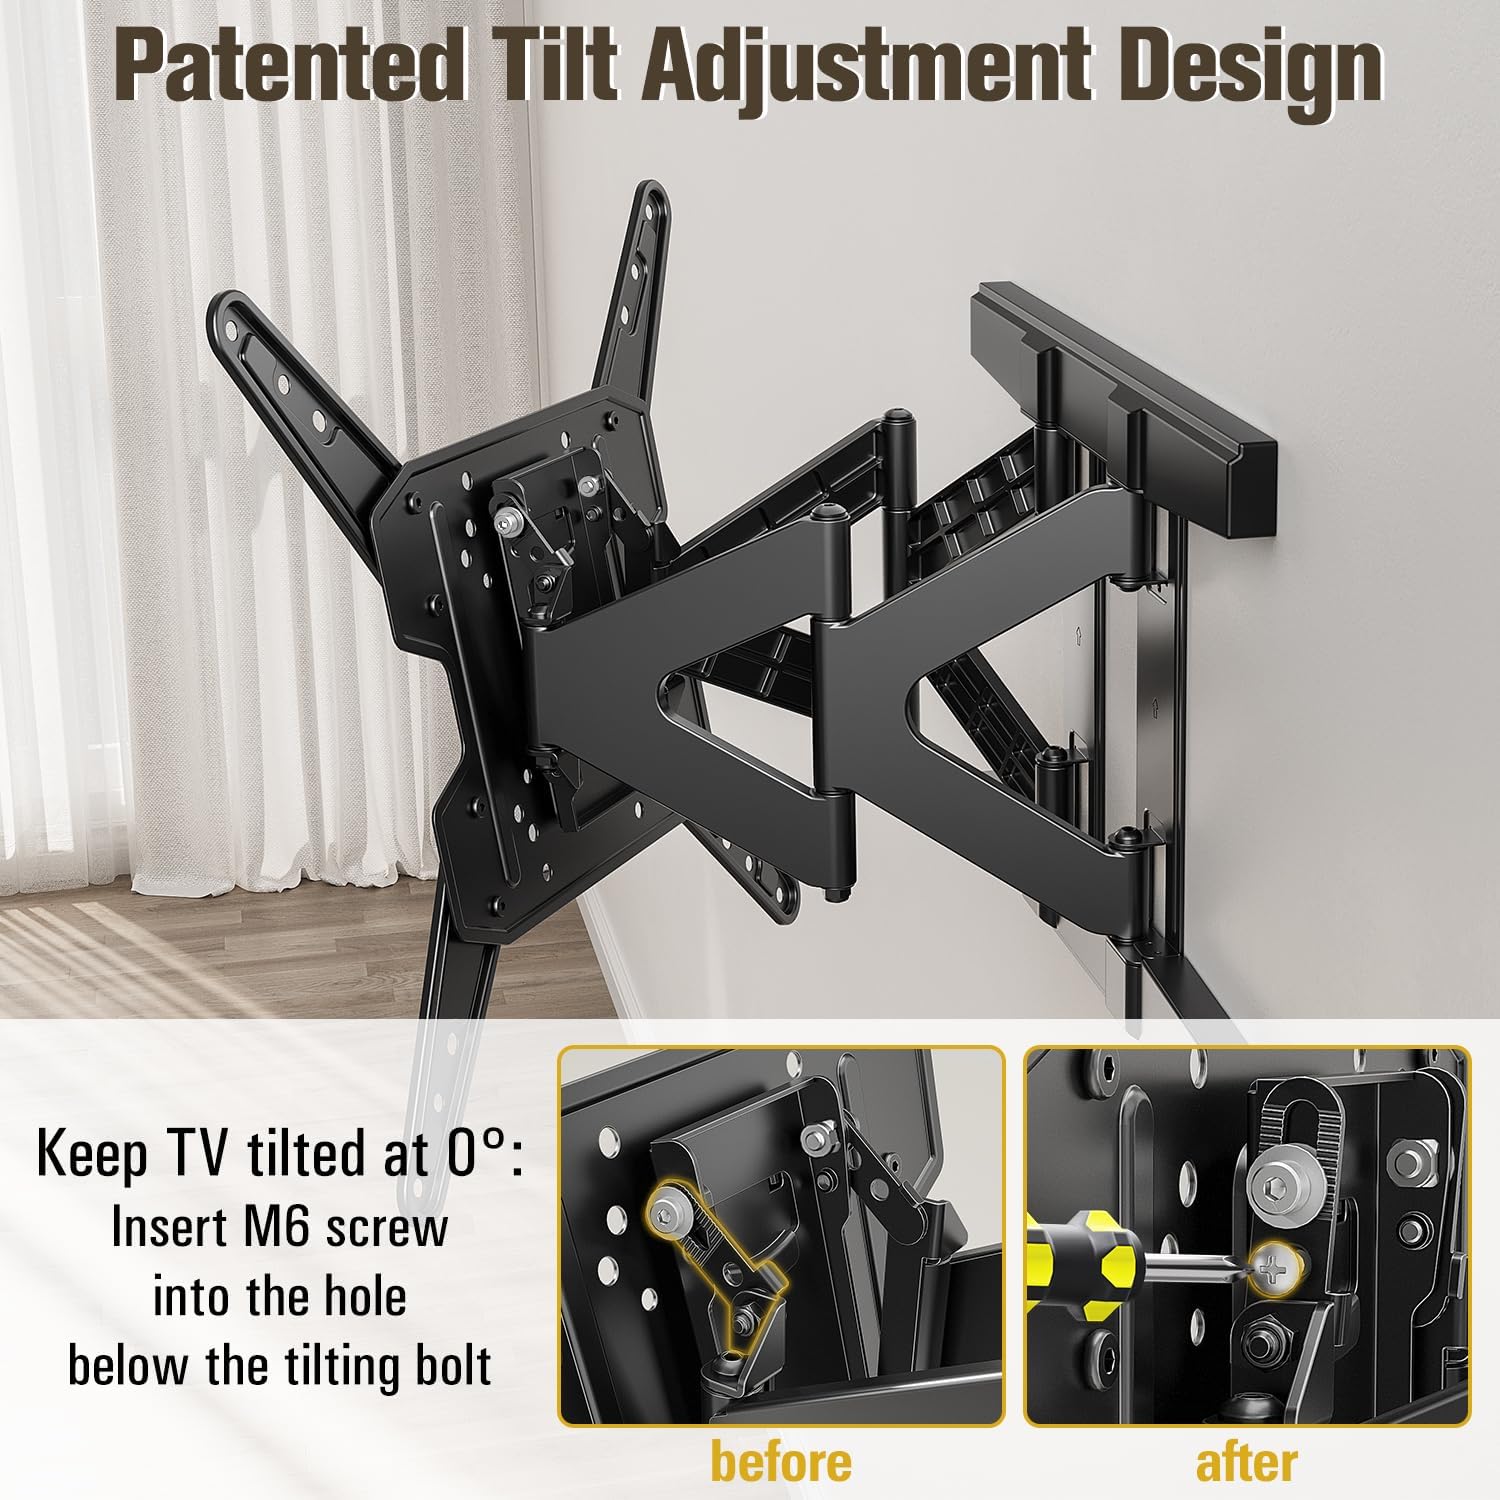
Image: Patented Tilt Adjustment Design. This image provides a detailed view of the tilt mechanism, showing how to secure the TV at a 0° tilt.
Swivel Adjustment
Swivel your TV up to ±45° (depending on TV size) for optimal viewing from various positions in the room.
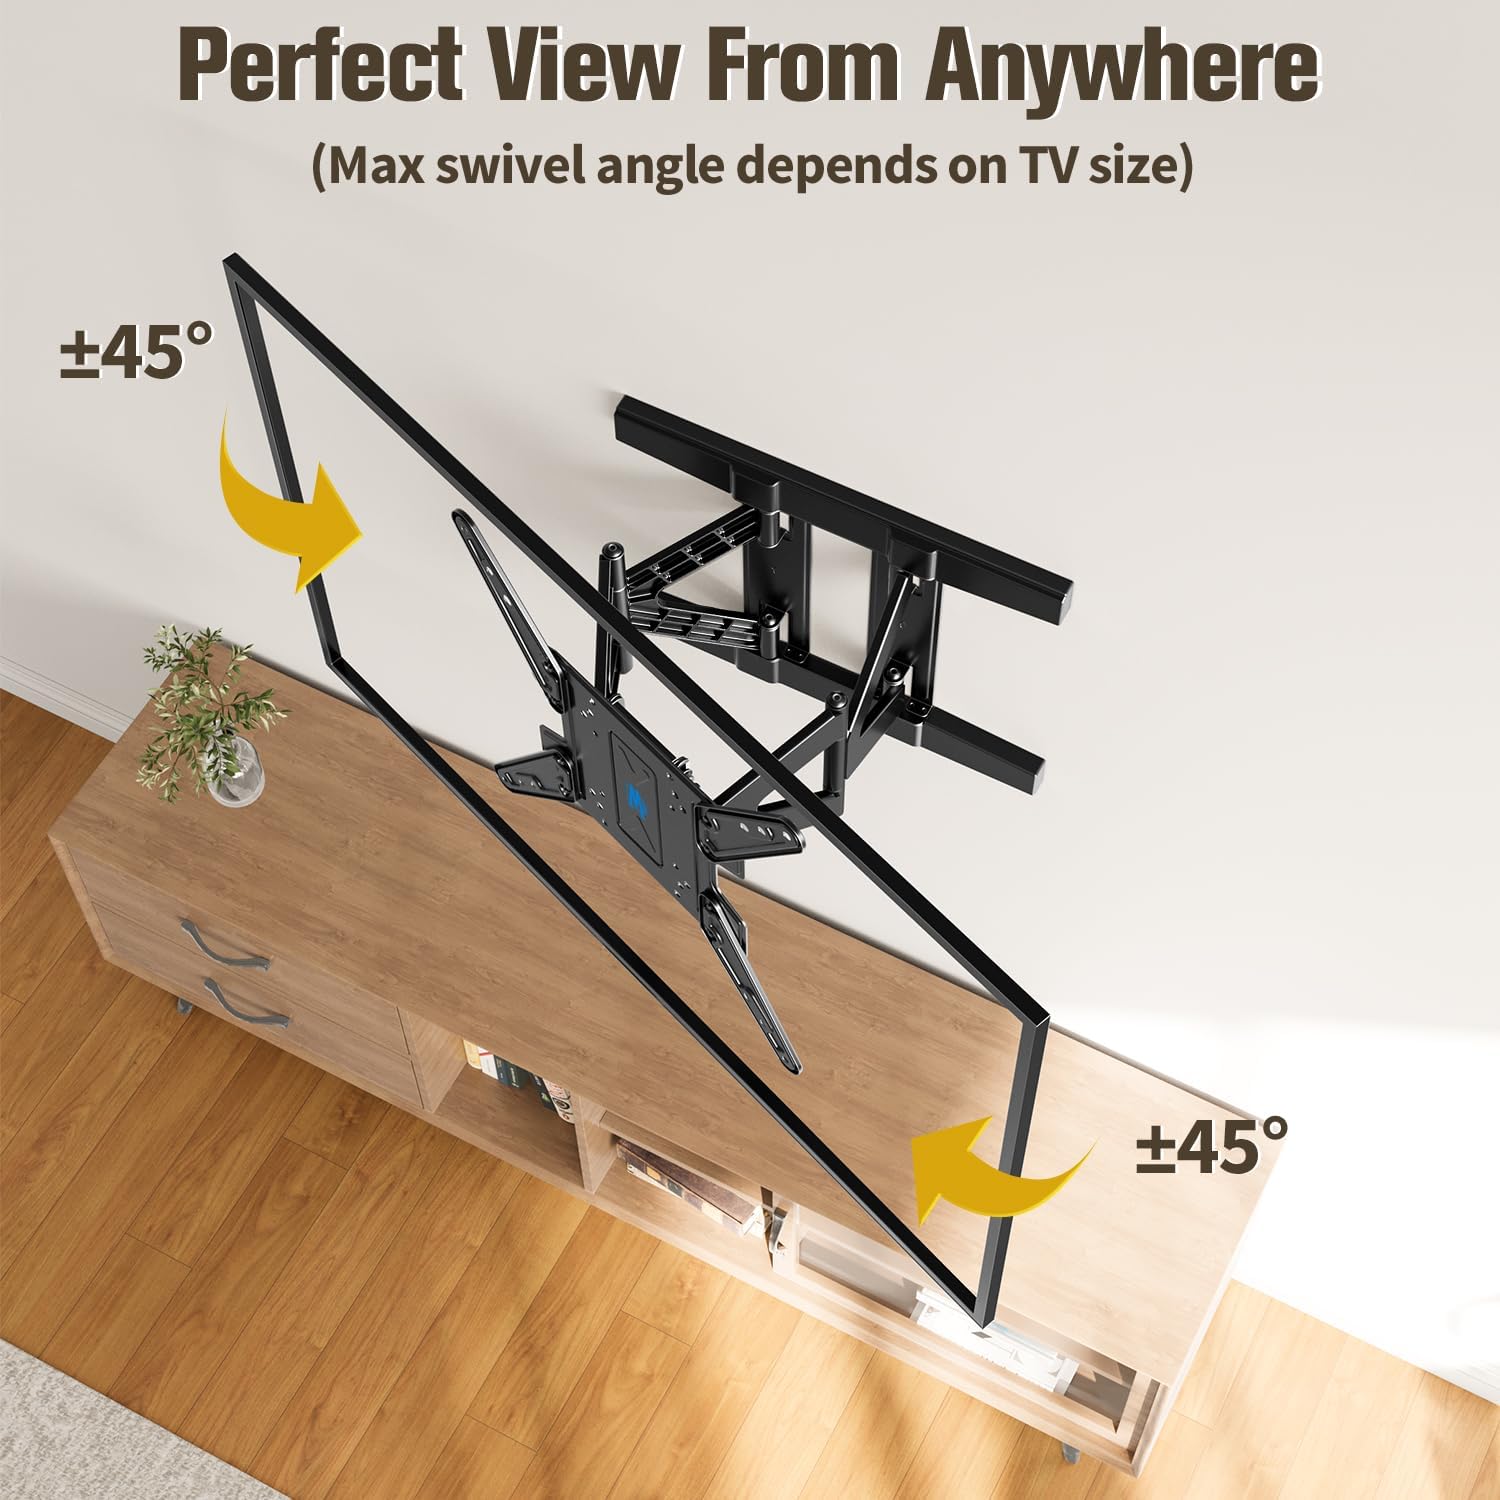
Image: Perfect View From Anywhere. This image illustrates the swivel capability of the mount, allowing the TV to be adjusted for optimal viewing from various angles in a room.
Level Adjustment
After installation, you can make minor level adjustments of ±4° to ensure your TV is perfectly horizontal.
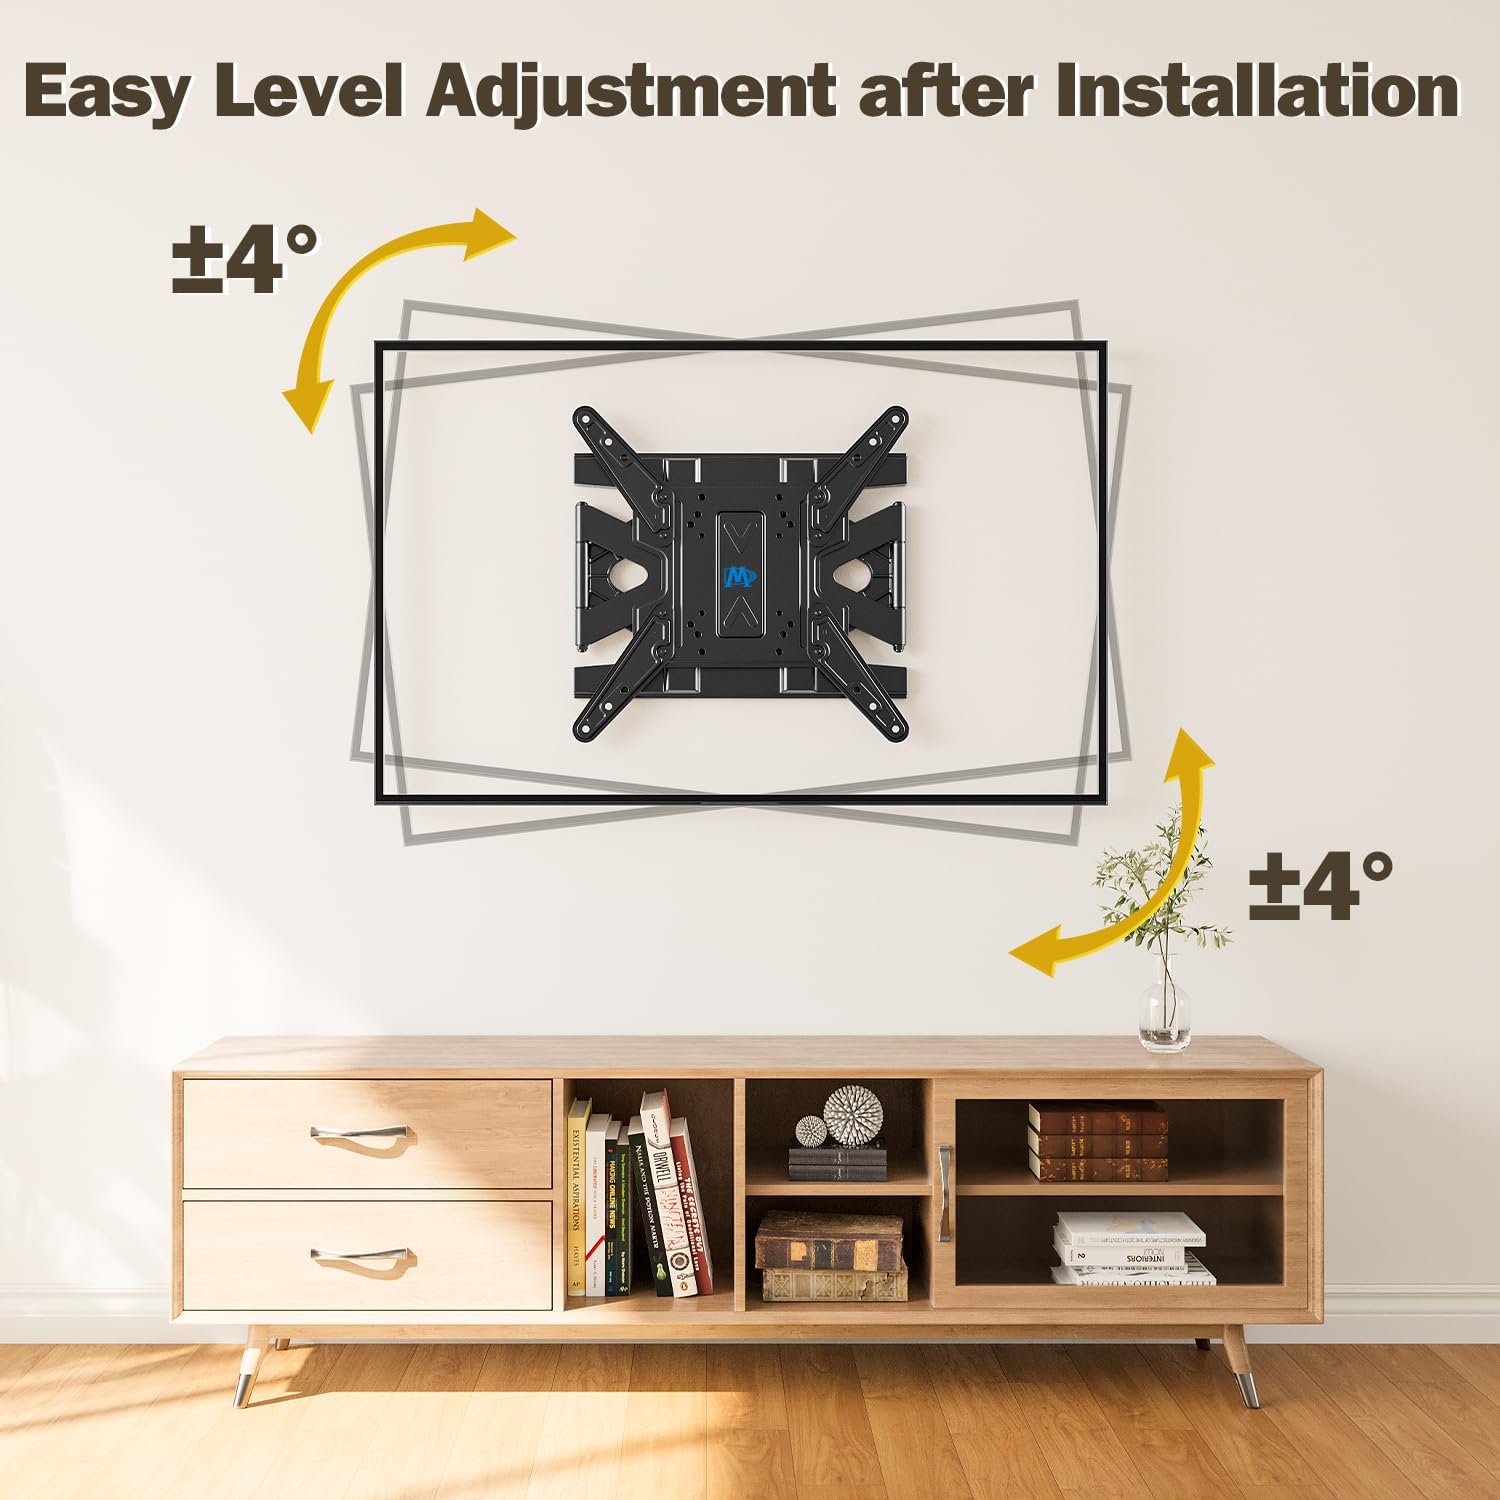
Image: Easy Level Adjustment after Installation. This image shows how the mount allows for minor rotational adjustments to ensure the TV is perfectly level after installation.
Extension and Retraction
The mount features an ultra-slim profile, retracting to just 1.38 inches from the wall. It can extend up to 12.9 inches for easy cable access and closer viewing.
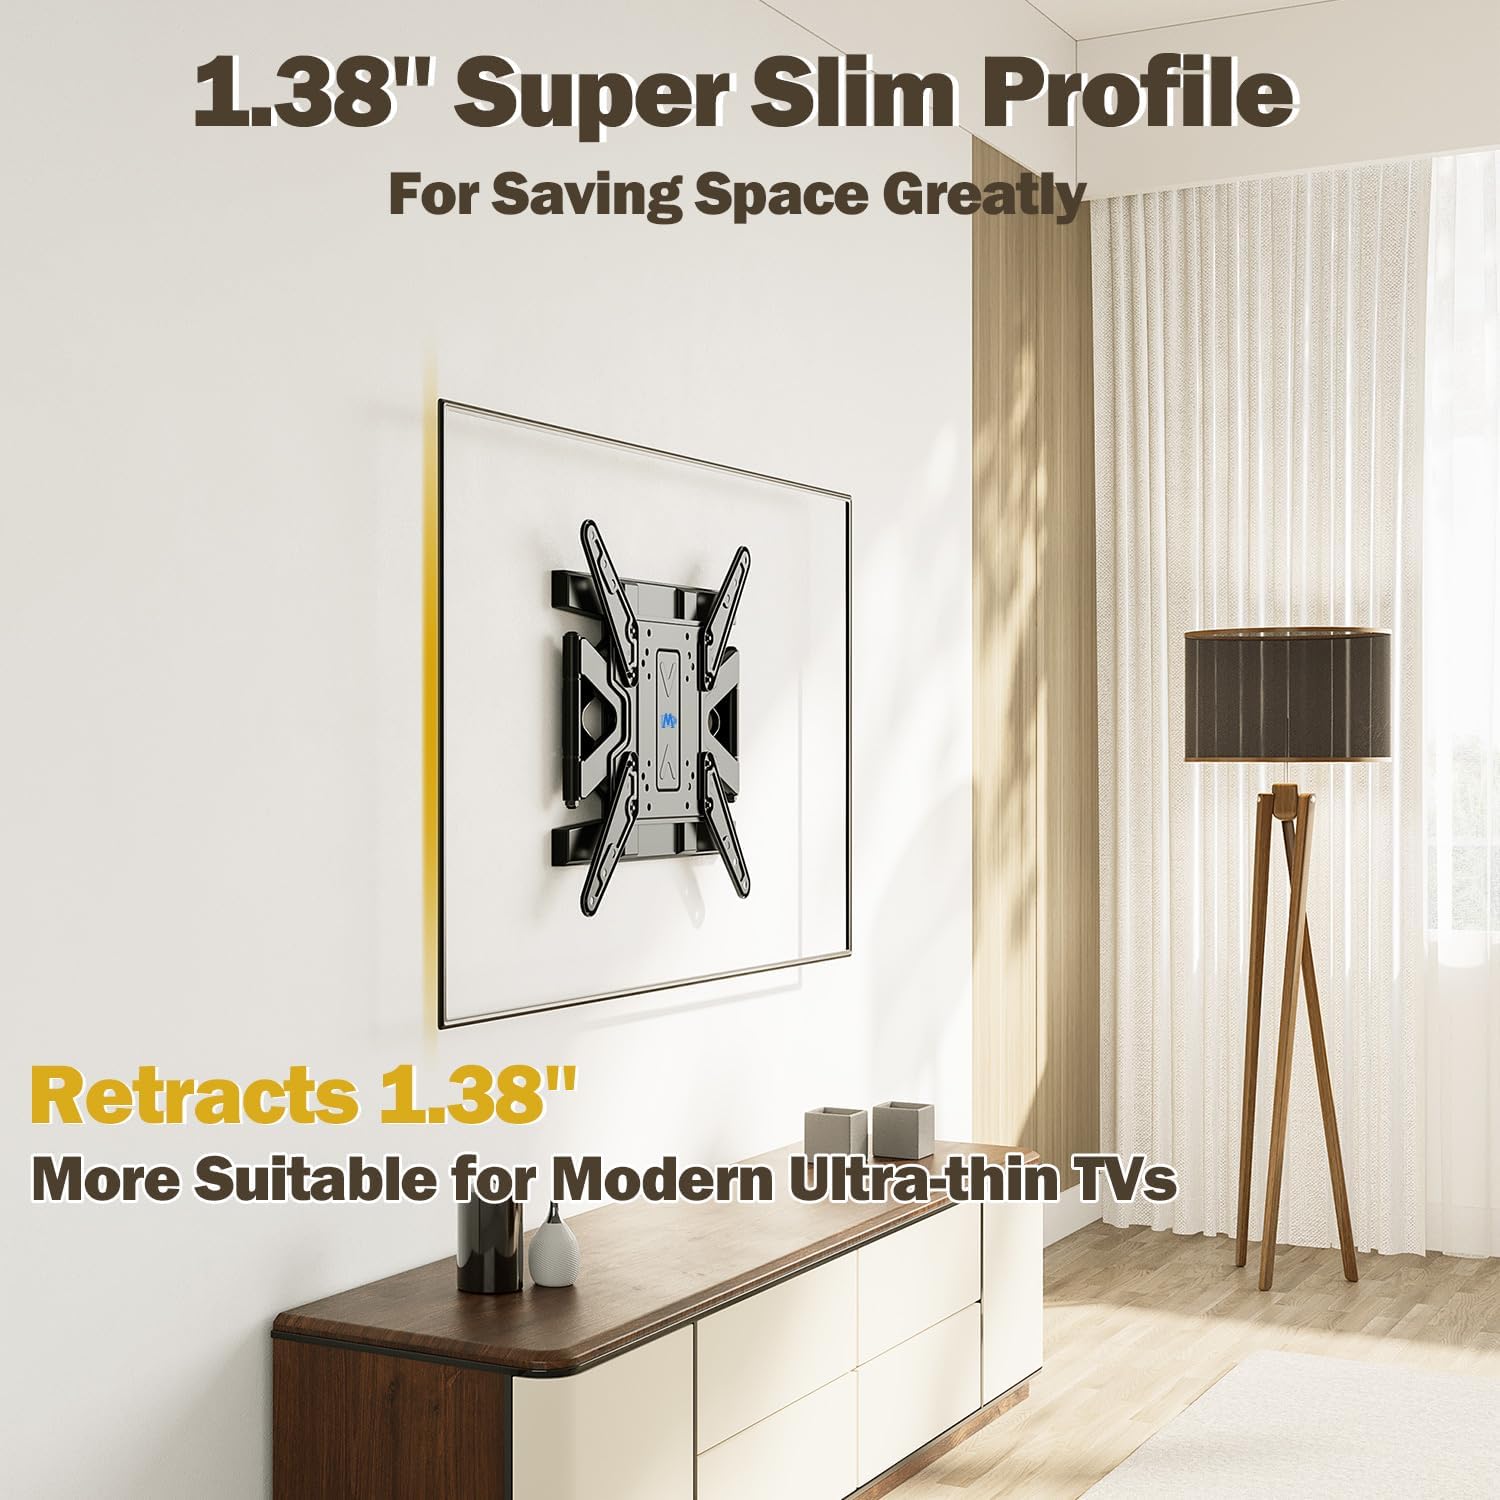
Image: 1.38" Super Slim Profile. This image highlights the minimal distance the TV sits from the wall when the mount is fully retracted, saving space and enhancing aesthetics.
Cable Management
Utilize the integrated cable management features and included cable ties to keep your cables organized and out of sight for a clean setup.
Video: MD2801-M Upgraded Ultra Slim TV Wall Mount. This video demonstrates the various features of the mount, including its slim profile, strong arm structure, tilt and swivel capabilities, level adjustment, and effective cable management solutions.
6. Maintenance
To ensure the longevity and safe operation of your TV wall mount, perform the following maintenance tasks:
- Periodic Checks: Every few months, check all screws and bolts to ensure they remain tight and secure. Retighten if necessary.
- Cleaning: Wipe the mount with a soft, dry cloth to remove dust. For stubborn marks, use a slightly damp cloth and mild detergent, then dry thoroughly. Avoid abrasive cleaners or solvents.
- Lubrication: The articulating joints are designed for smooth movement and generally do not require lubrication. If movement becomes stiff, contact customer support for advice.
7. Troubleshooting
If you encounter issues with your TV wall mount, refer to the following common problems and solutions:
- TV is not level after installation: Use the level adjustment feature (±4°) to fine-tune the TV's horizontal position. Refer to the 'Level Adjustment' section in this manual.
- Mount feels loose on the wall: Ensure all lag bolts securing the wall plate to the wall are fully tightened. If mounted to wood studs, confirm the bolts are properly seated in the center of the studs. If mounted to concrete/brick, ensure anchors (if used) are correctly installed and bolts are tight.
- TV does not fit the mount: Double-check your TV's VESA pattern against the mount's compatibility (100x100mm to 400x400mm) and ensure your TV's weight does not exceed 88 lbs.
- Mounting hardware missing or incorrect: Verify all parts against the 'Parts List'. If any parts are missing or incorrect, contact Mounting Dream customer service.
- TV inputs are blocked by the mount: This can sometimes occur depending on the TV model. Ensure you checked for this during the pre-installation checklist. If inputs are blocked, you may need to use right-angle adapters for your cables.
For further assistance, please contact Mounting Dream customer service.
8. Specifications
| Feature | Detail |
|---|---|
| Model Number | MD2801-M |
| Screen Size Compatibility | 26-75 inches |
| Weight Capacity | Up to 88 lbs (40 kg) |
| VESA Compatibility | 100x100mm to 400x400mm |
| Tilt Angle | +3° / -15° |
| Swivel Angle | +/-45° (max, depends on TV size) |
| Level Adjustment | +/-4° |
| Wall Distance (Retracted) | 1.38 inches |
| Wall Distance (Extended) | Up to 12.9 inches |
| Material | Alloy Steel |
| Color | Black |
9. Warranty & Support
Mounting Dream provides a 10-year warranty for this TV mount. Our US-based customer service team is available 7 days a week to assist with any questions regarding product use or installation.
For support, please visit the Mounting Dream Store on Amazon or refer to the contact information provided with your product packaging.


