Introduction
The Thermaltake SWAFAN GT14 PC Cooling Fan offers versatile cooling solutions with its innovative design featuring three types of detachable fan blades. This manual provides essential information for setup, operation, and maintenance to ensure optimal performance and longevity of your cooling fan.
Key Features
- 3 Types of Detachable Fan Blades: Easily swap between High Static Pressure, High Air Flow, and Reverse High Air Flow blades to suit various PC-building scenarios and cooling needs.
- High Static Pressure Blade: Delivers 3.33 mm-H2O static pressure and 100 CFM airflow under a 34.3 dB-A noise levels.
- High Air Flow Blade: Provides 109 CFM airflow and 2.76 mm-H2O static pressure under a 32.7 dB-A noise level.
- Reverse High Air Flow Blade: Achieves 2.48 mm-H2O static pressure and 107 CFM airflow under 36.1 dB-A noise level.
- Anti-Vibration Mounting System: Integrated rubber pads reduce fan vibration and noise, ensuring quiet operation.
Specifications
| Brand | Thermaltake |
| Model Number | CL-F157-PL14BL-A |
| Dimensions (LxWxH) | 6.4 x 6.4 x 3.2 inches |
| Item Weight | 1.3 pounds |
| Power Connector Type | 3-Pin |
| Voltage | 12 Volts |
| Wattage | 7.3 watts |
| Cooling Method | Fan |
| Compatible Devices | Desktop |
| Maximum Rotational Speed | 2000 RPM |
| Material | Copper |
Setup and Installation
Follow these steps to properly install your SWAFAN GT14 PC Cooling Fan and configure its fan blades.
1. Unboxing and Components
Upon unboxing, ensure all components are present:
- SWAFAN GT14 Fan (with High Static Pressure blade pre-installed)
- High Air Flow Fan Blade (x1)
- Reverse High Air Flow Fan Blade (x1)
- Mounting Screws
- Lubricant (for fan bearing maintenance)
- Power Splitter Cable (for daisy-chaining multiple fans)

Image: Thermaltake SWAFAN GT14 fan with its three types of detachable blades and accessories.
2. Swapping Fan Blades
The SWAFAN GT14 allows for easy swapping of fan blades to optimize for static pressure, airflow, or reverse airflow. The pre-installed blade is the High Static Pressure type.
- To remove a fan blade, gently press the center of the blade from the front until it detaches from the motor housing.
- Select your desired fan blade (High Air Flow or Reverse High Air Flow).
- Align the new fan blade with the motor housing and gently press it into place until it clicks securely.
- If needed, apply a small amount of the provided lubricant to the fan bearing before re-installing a blade.

Image: Visual guide for swapping between High Static Pressure, High Air Flow, and Reverse Air Flow fan blades.

Image: Thermaltake SWAFAN GT14 fan with the High Static Pressure blade installed, showing airflow direction.

Image: Thermaltake SWAFAN GT14 fan with the High Air Flow blade installed, showing airflow direction.
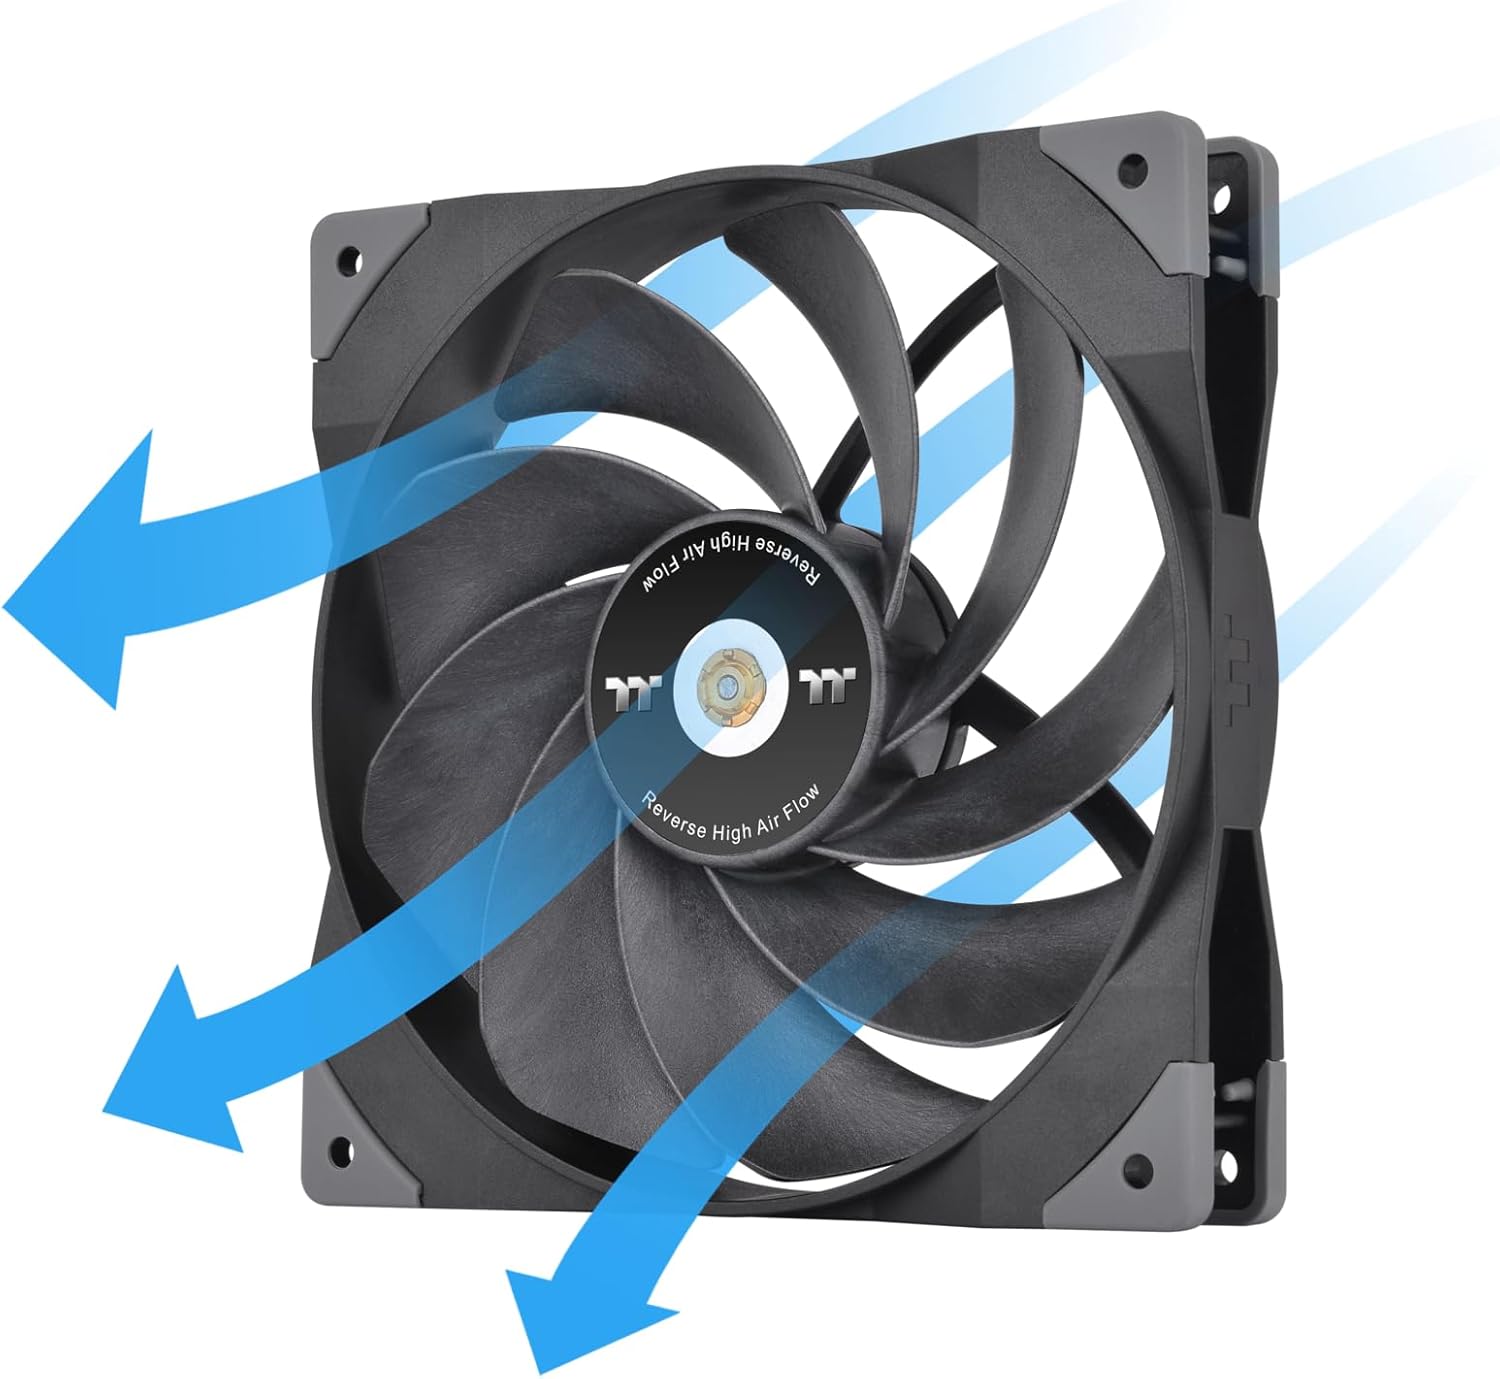
Image: Thermaltake SWAFAN GT14 fan with the Reverse High Air Flow blade installed, showing airflow direction.
3. Mounting the Fan
Mount the fan to your PC case or radiator using the provided screws. Ensure the fan is oriented correctly for your desired airflow direction (intake or exhaust).

Image: Two Thermaltake SWAFAN GT14 fans installed as exhaust in a PC case.

Image: Two Thermaltake SWAFAN GT14 fans mounted on a liquid cooling radiator.
4. Connecting Power
Connect the fan's 3-pin power connector to an available fan header on your motherboard. If installing multiple fans, use the provided power splitter cable to daisy-chain them for synchronized operation.
Video: This video demonstrates the installation process of a similar fan, including mounting to a case and connecting the lighting and fan speed cables to the motherboard. It shows how to connect multiple fans for synchronized lighting and speed control.
Operating the Fan
Once installed, your Thermaltake SWAFAN GT14 fan will operate based on the settings configured in your motherboard's BIOS or through compatible fan control software. Adjust fan curves to balance cooling performance and noise levels according to your preferences.
- Fan Speed Control: The fan speed can be controlled via PWM (Pulse Width Modulation) through your motherboard's fan headers.
- Noise Levels: The fan is designed with anti-vibration pads to minimize noise. Noise levels vary depending on the fan blade type and rotational speed.
Maintenance
Regular maintenance ensures the longevity and optimal performance of your fan.
- Cleaning: Periodically clean dust from the fan blades and housing using compressed air or a soft cloth. For thorough cleaning, detach the fan blades and rinse them with water, ensuring they are completely dry before re-installation.
- Lubrication: If the fan bearing becomes noisy or stiff, apply a small amount of the provided lubricant to the bearing.

Image: A detached fan blade being rinsed under water for cleaning.
Troubleshooting
If you encounter issues with your SWAFAN GT14, refer to these common troubleshooting tips:
- Fan Not Spinning:
- Check if the power cable is securely connected to the motherboard fan header.
- Verify that the fan header is enabled and configured correctly in your motherboard's BIOS/UEFI settings.
- Ensure the fan blade is properly seated and not obstructed.
- Excessive Noise:
- Confirm the fan blades are securely attached and not loose.
- Check for any obstructions (cables, debris) hitting the fan blades.
- Apply lubricant to the fan bearing if a grinding or rattling noise persists.
- Adjust fan speed settings in BIOS/UEFI or software to a lower RPM.
- Poor Cooling Performance:
- Ensure the correct fan blade type is installed for your application (e.g., High Static Pressure for radiators, High Air Flow for case ventilation).
- Verify the fan's airflow direction is optimal for your system's cooling configuration.
- Clean any dust buildup on the fan or radiator fins.
Warranty and Support
For warranty information and technical support, please refer to the documentation included in your product packaging or visit the official Thermaltake website.
- Manufacturer: Thermaltake
- Date First Available: July 24, 2023
- UPC: 841163086391


