1. Introduction
This manual provides detailed instructions for the safe and effective use of your TOYOGO Instant Print Kids Camera Q5-T. Please read this manual thoroughly before operating the device and retain it for future reference.
The TOYOGO Q5-T is a digital camera designed for children, featuring instant thermal printing, 1080p HD video recording, and dual 24MP lenses for both front and selfie photography. It includes a 64GB SD card for ample storage and supports various creative functions.
2. What's in the Box
Verify that all items listed below are present in your package:
- 1 x TOYOGO Instant Print Kids Camera
- 3 x Print Paper Rolls
- 1 x Replacement White Silicone Case
- 1 x USB Charging Cable
- 1 x 64GB Memory Card (SD Card)
- 1 x Cartoon Lanyard
- 1 x User Manual

Image: Contents of the TOYOGO Instant Print Kids Camera package, including the camera, paper rolls, silicone case, USB cable, SD card, lanyard, and manual.
3. Product Overview
Familiarize yourself with the camera's components:
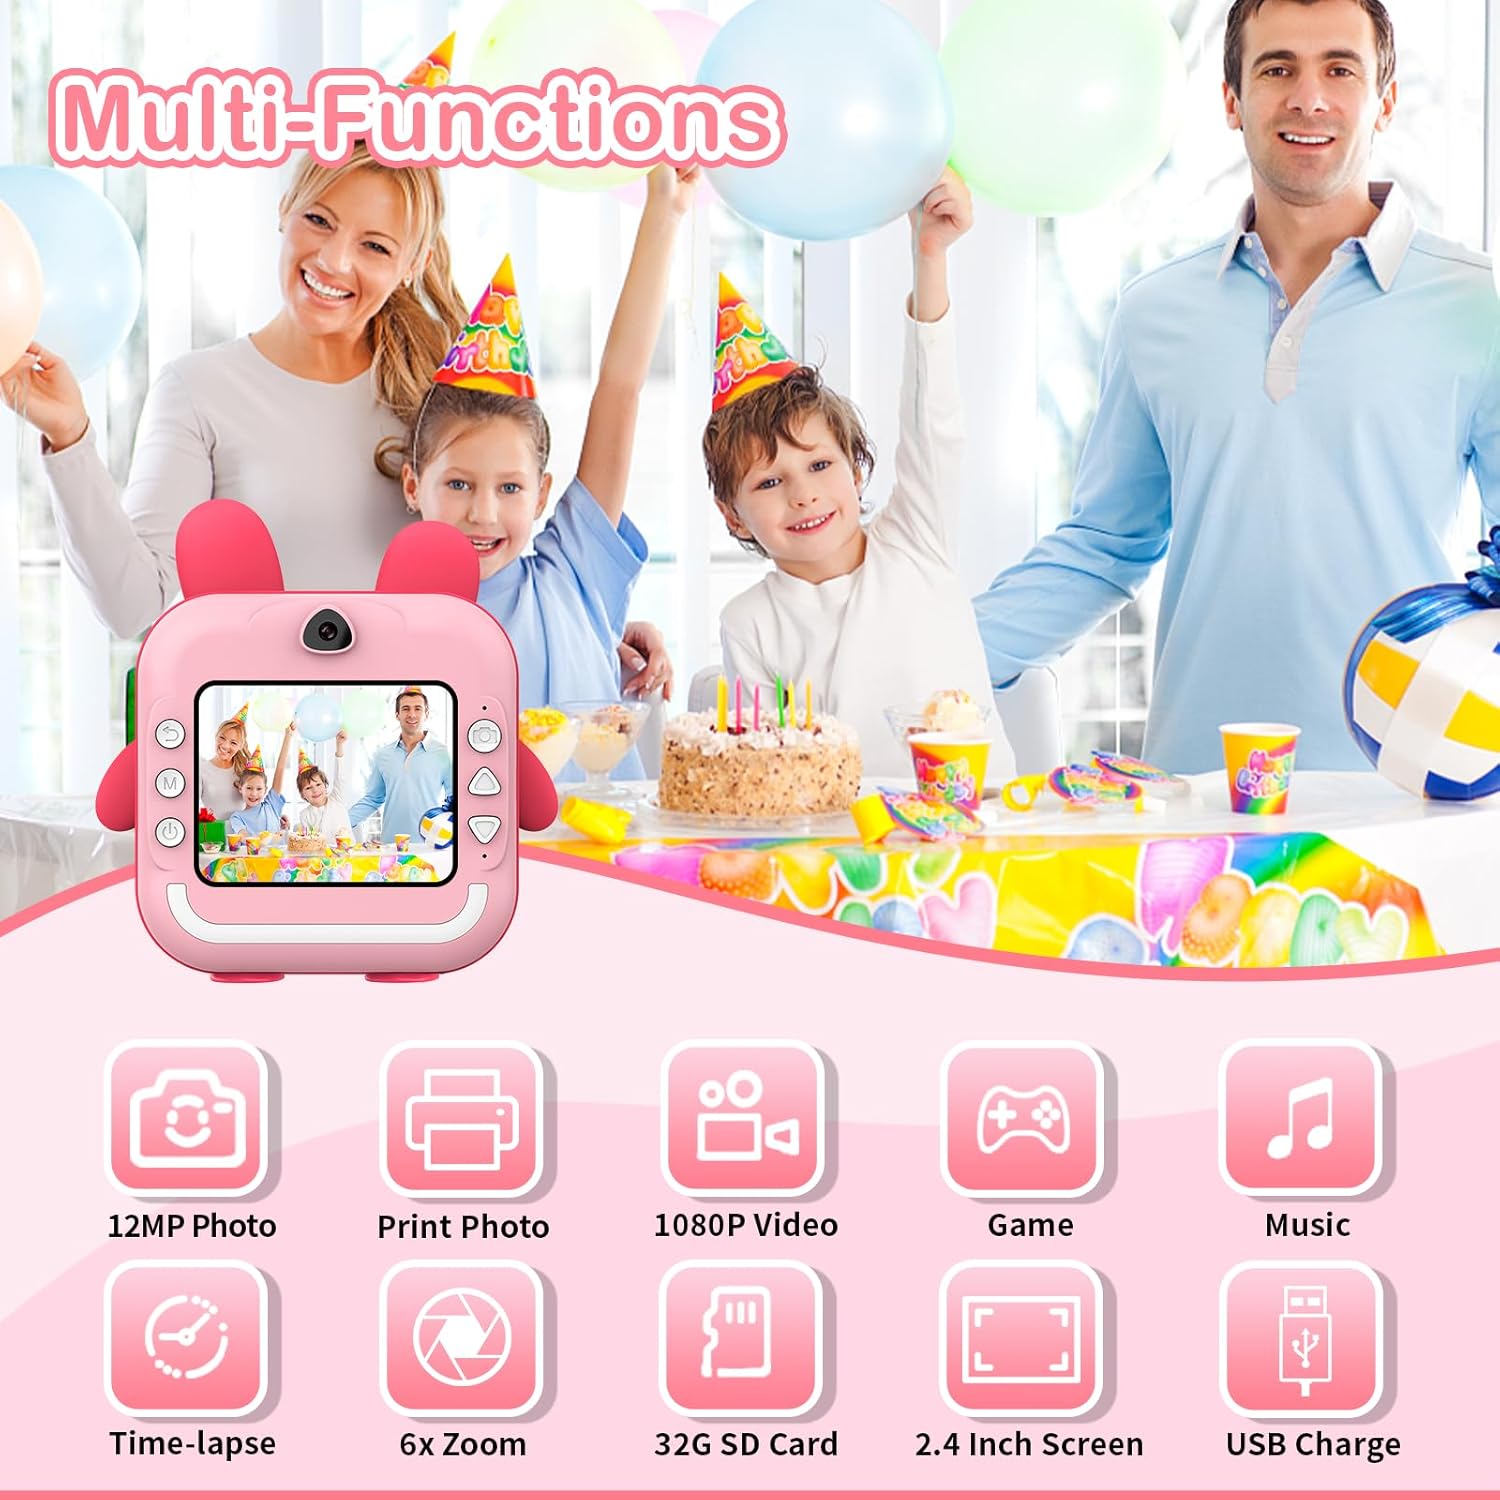
Image: Front view of the camera, showing the main lens, print output slot, and control buttons.
- Main Lens: For capturing photos and videos.
- Selfie Lens: Located on the front for self-portraits.
- Display Screen: 2.4-inch screen for viewing photos, videos, and navigating menus.
- Print Output Slot: Where printed photos emerge.
- Control Buttons: Power, Shutter, Navigation (Up, Down, Left, Right), Menu, Print.
- USB Port: For charging and data transfer.
- SD Card Slot: For inserting the memory card.
4. Setup
4.1 Charging the Camera
Before first use, fully charge the camera. Connect the provided USB charging cable to the camera's USB port and the other end to a standard USB power adapter (not included) or a computer's USB port. The charging indicator will illuminate during charging and turn off when complete.
The camera features an 800mAh rechargeable battery, providing approximately 3-4 hours of usage on a full charge.
4.2 Inserting the SD Card
The camera comes with a 64GB SD card. Locate the SD card slot on the side of the camera. Insert the SD card with the metal contacts facing down until it clicks into place. To remove, gently push the card in until it springs out.

Image: Illustration showing the insertion of the SD card and connecting the camera to a computer via USB for data transfer.
4.3 Loading Print Paper
The camera uses ink-free thermal print paper. Follow these steps to load a new roll:
- Step 1: Open the front flap of the camera where the print paper is housed.
- Step 2: Insert a new paper roll into the compartment, ensuring it is oriented correctly. The paper should feed from the bottom of the roll towards the print output slot.
- Step 3: Close the lid firmly. A small portion of the paper should protrude from the print output slot, indicating it is ready for printing.

Image: Visual guide demonstrating the three steps for loading thermal print paper into the camera.
5. Operating Instructions
5.1 Power On/Off
Press and hold the Power button to turn the camera on or off.
5.2 Taking Photos
In photo mode, frame your shot using the display screen. Press the Shutter button to capture an image. The camera supports 24MP high-definition color images.
- Dual Cameras: Switch between the main lens and the selfie lens using the designated button or menu option.
- Photo Frames: Access the menu to select from various fun photo frames to add creative borders to your pictures.
- Digital Zoom: Use the navigation buttons (typically Up/Down) to adjust the digital zoom level (up to 5x).

Image: Overview of camera functions, including photo capture, video recording, and entertainment options.
5.3 Recording Videos
Switch to video mode via the menu. Press the Shutter button to start recording 1080p HD video. Press it again to stop recording.
5.4 Printing Photos
After taking a photo, you can choose to print it instantly. The camera uses thermal printing technology, producing black and white images without ink. Printing takes approximately 3 seconds per photo.
- Instant Print: In photo review mode, select the print option to immediately print the displayed image.
- Print Quality: The camera allows selection of print quality (Low, Middle, High) to optimize paper usage or detail.

Image: The camera demonstrating its instant printing capability, producing a photo in 3 seconds.
5.5 App Printing (Bluetooth Connectivity)
The camera supports connection to a mobile phone via Bluetooth for printing photos stored on your phone. Download the "Fun Print" application from your mobile app store (available on iOS and Android).
- Step 1: Enable Bluetooth on your mobile phone and on the camera (via the camera's menu).
- Step 2: Open the "Fun Print" app on your phone and pair it with the camera.
- Step 3: Select photos from your phone's gallery within the app and use the print function to send them to the camera for printing.

Image: A smartphone screen showing the "Fun Print" app interface, connected to the camera for wireless printing.
Download the app: https://www.pgyer.com/UNhf
5.6 Games and MP3 Playback
The camera includes built-in games and supports MP3 playback. Navigate to the respective modes via the camera's menu. Ensure MP3 files are loaded onto the SD card for playback.
5.7 Time-lapse Function
Utilize the time-lapse feature to capture a series of photos at set intervals (e.g., 3s, 5s, 10s). This function is accessible through the camera's menu settings.
6. Maintenance
6.1 Cleaning
To clean the camera body, use a soft, dry cloth. For the lens, use a specialized lens cleaning cloth. Avoid using liquid cleaners or abrasive materials, as they may damage the camera.
6.2 Storage
Store the camera in a cool, dry place away from direct sunlight and extreme temperatures. When not in use for extended periods, ensure the battery is partially charged (around 50%) to prolong its lifespan.
7. Troubleshooting
| Problem | Possible Cause | Solution |
|---|---|---|
| Camera does not power on. | Battery is depleted. | Charge the camera using the provided USB cable. |
| Cannot take photos/videos. | SD card is full or not inserted correctly. | Check SD card insertion. Delete unnecessary files or replace the SD card. |
| Photos are not printing. | No print paper, paper loaded incorrectly, or print head issue. | Ensure paper is loaded correctly and sufficient. Check for any paper jams. |
| Poor print quality. | Low print quality setting, dirty print head, or low battery. | Adjust print quality settings. Clean the print head gently. Ensure battery is charged. |
| Bluetooth connection issues. | Bluetooth not enabled, camera/phone too far apart, or app issue. | Ensure Bluetooth is active on both devices. Keep devices close. Restart app/camera. |
8. Specifications
- Model: Q5-T
- Display: 2.4-inch screen
- Photo Resolution: Up to 24 MP
- Video Resolution: 1080p HD
- Printing Technology: Ink-free Thermal Printing
- Print Speed: Approximately 3 seconds per photo
- Battery: 800mAh Lithium Polymer (rechargeable)
- Storage: Supports SD Card (64GB included)
- Connectivity: USB, Bluetooth
- Dimensions: 12 x 11.5 x 4 cm
- Weight: 470 grams
- Optical Zoom: 6x
- Digital Zoom: Up to 5x
- Image Sensor Technology: CMOS
- Supported File Format: MP4 (for video)
9. Warranty and Support
For information regarding warranty and returns, please refer to the specific policies of your retailer or the manufacturer's official website. Generally, if you wish to return a product within 30 days of receipt due to a change of mind, consult the retailer's help page. If you have received a defective or damaged product, consult the retailer's help page for assistance. For specific information on purchases made through marketplaces, consult their respective help pages.
For technical support or further inquiries, please contact TOYOGO customer service through the contact information provided on the product packaging or the official TOYOGO website.


