1. Introduction
Welcome to the world of premium coffee with your new Krups Sensation C50 Automatic Coffee Machine. This manual provides comprehensive instructions for setting up, operating, and maintaining your machine to ensure optimal performance and longevity. Designed for ease of use and versatility, the Sensation C50 allows you to enjoy a wide range of coffee specialties, including filter coffee, with a simple touch.
Please read this manual carefully before first use and keep it for future reference.
2. Important Safety Instructions
- Always connect the appliance to a grounded power outlet.
- Do not immerse the appliance, power cord, or plug in water or any other liquid.
- Keep the appliance out of reach of children.
- Unplug the machine before cleaning and when not in use for extended periods.
- Do not operate the appliance if the power cord or plug is damaged.
- Use only cold, fresh water in the water tank.
- Be cautious of hot surfaces and steam during operation.
3. Product Overview
Familiarize yourself with the components of your Krups Sensation C50 coffee machine.
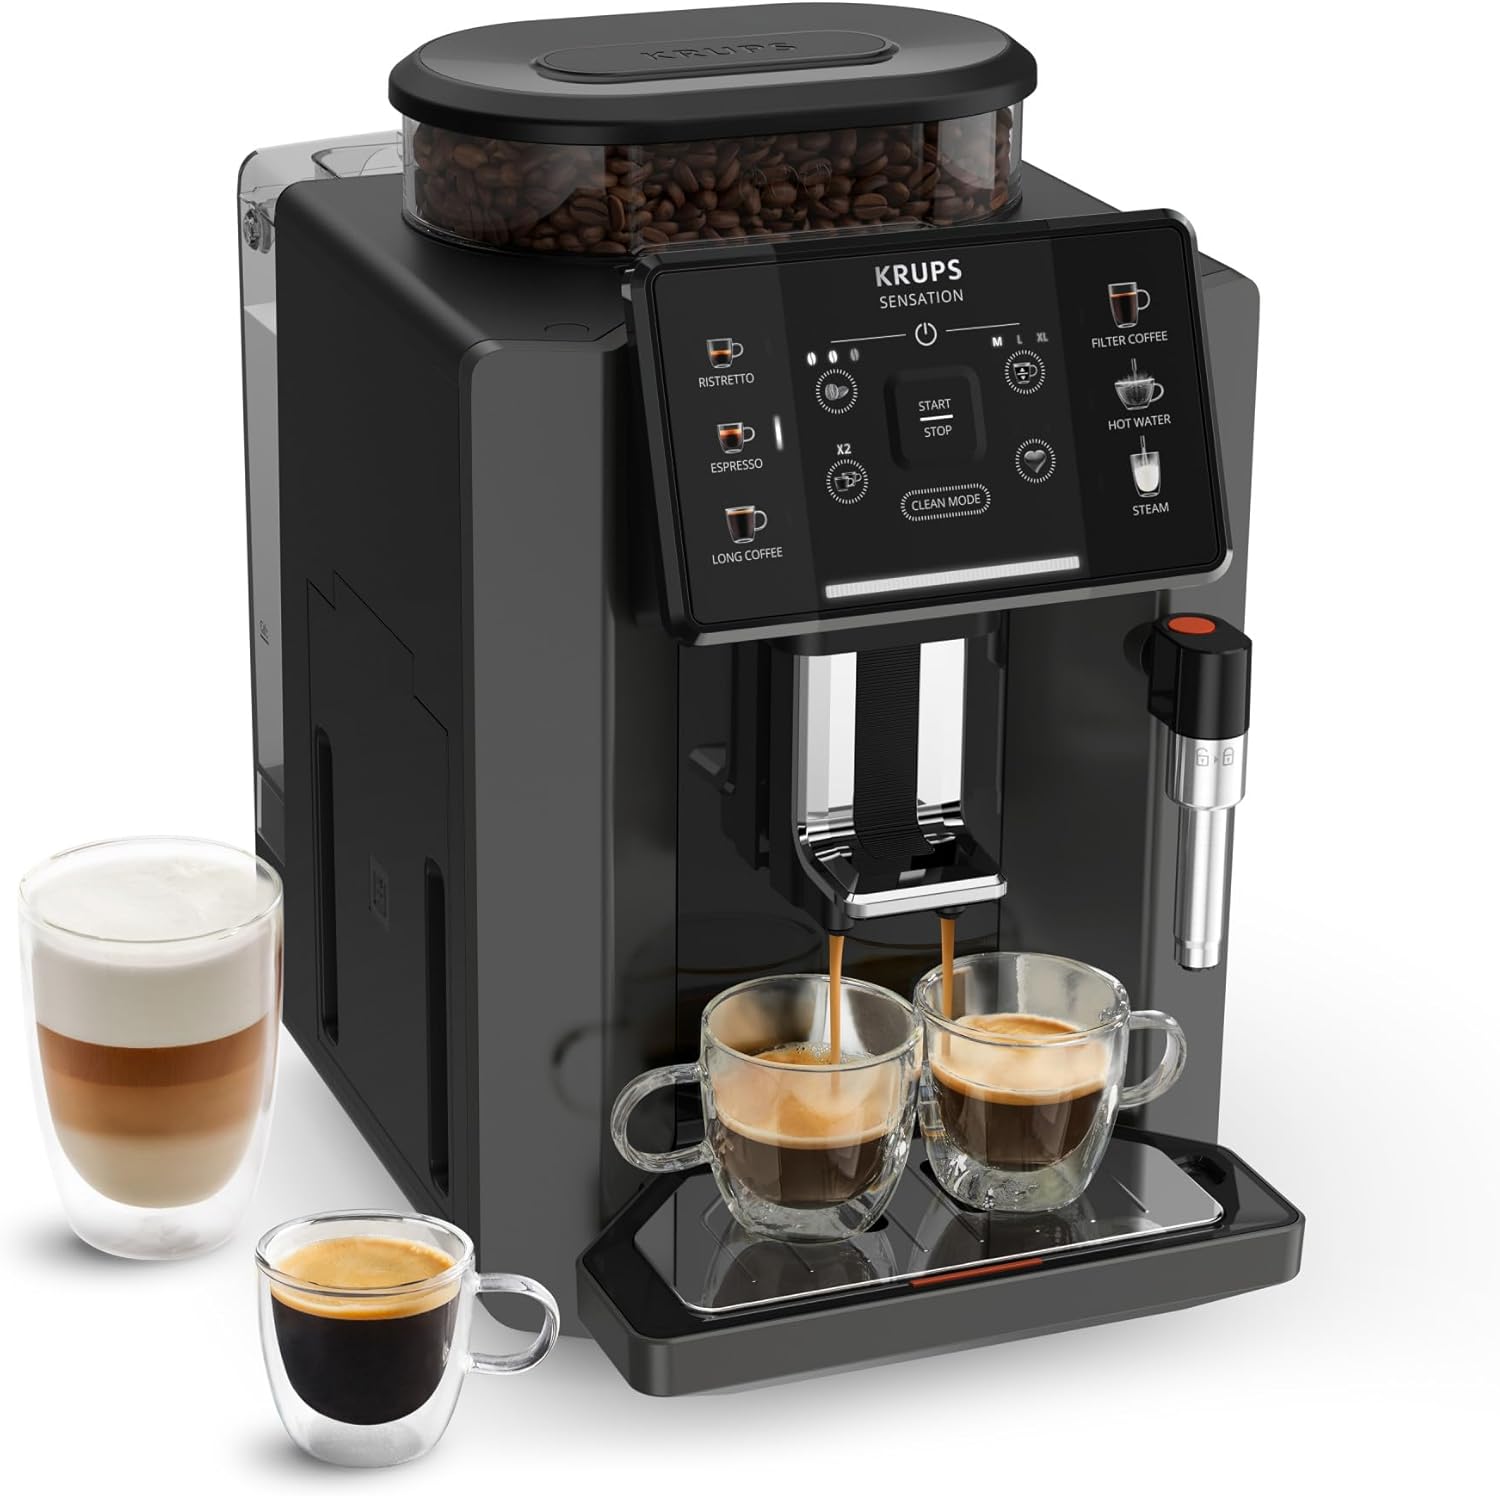
Figure 3.1: Krups Sensation C50 Automatic Coffee Machine with two cups of coffee and a glass of latte.
3.1 Key Components
- Bean Hopper: For whole coffee beans. Capacity: 260g.
- Water Tank: Removable tank for water. Capacity: 1.7 Liters.
- Touch Control Panel: Intuitive interface for selecting drinks and settings.
- Coffee Outlet: Where brewed coffee dispenses.
- Steam Nozzle: For frothing milk and dispensing hot water.
- Drip Tray: Collects excess liquid.
- Coffee Grounds Container: Collects used coffee pucks.

Figure 3.2: Dimensions of the Krups Sensation C50 coffee machine: 34.6 cm (depth) x 24 cm (width) x 36.4 cm (height). It also shows the 260g bean hopper and 1.7L water reservoir.
4. Setup and First Use
4.1 Unpacking and Placement
- Remove all packaging materials and protective films.
- Place the machine on a stable, flat, and heat-resistant surface, away from water sources and heat.
- Ensure adequate ventilation around the machine.
4.2 Filling the Water Tank and Bean Hopper
- Remove the water tank from the back of the machine.
- Fill the tank with fresh, cold water up to the MAX level.
- Place the water tank back into the machine securely.
- Open the bean hopper lid and fill with whole coffee beans. Close the lid.
4.3 Initial Rinse Cycle
- Plug the machine into a grounded power outlet.
- Press the power button to turn on the machine.
- The machine will prompt you to perform an initial rinse cycle. Follow the on-screen instructions.
- Place a container under the coffee outlet and steam nozzle to collect water.
- The rinse cycle cleans the internal circuits and prepares the machine for use.
5. Operating Instructions
The Krups Sensation C50 features an intuitive touch control panel for easy operation.

Figure 5.1: Close-up of the intuitive touch control panel, showing options for Ristretto, Espresso, Long Coffee, Filter Coffee, Hot Water, and Steam, along with intensity and volume customization.
5.1 Preparing Coffee Drinks
Your machine can prepare 5 pre-programmed coffee drinks and offers milk-based beverages via the steam nozzle.

Figure 5.2: Visual representation of the 5 pre-programmed coffee drinks: Ristretto, Espresso, Long Coffee, Filter Coffee, and Hot Water for tea.
- Place one or two cups under the coffee outlet. The machine is designed to accommodate various cup sizes.
- Select your desired drink from the touch panel (e.g., Espresso, Long Coffee, Filter Coffee).
- You can adjust coffee intensity (strength) and volume using the on-screen controls before pressing START.
- Press the START button to begin brewing.
- For two cups, select the desired drink and then press the x2 button if available for that drink.
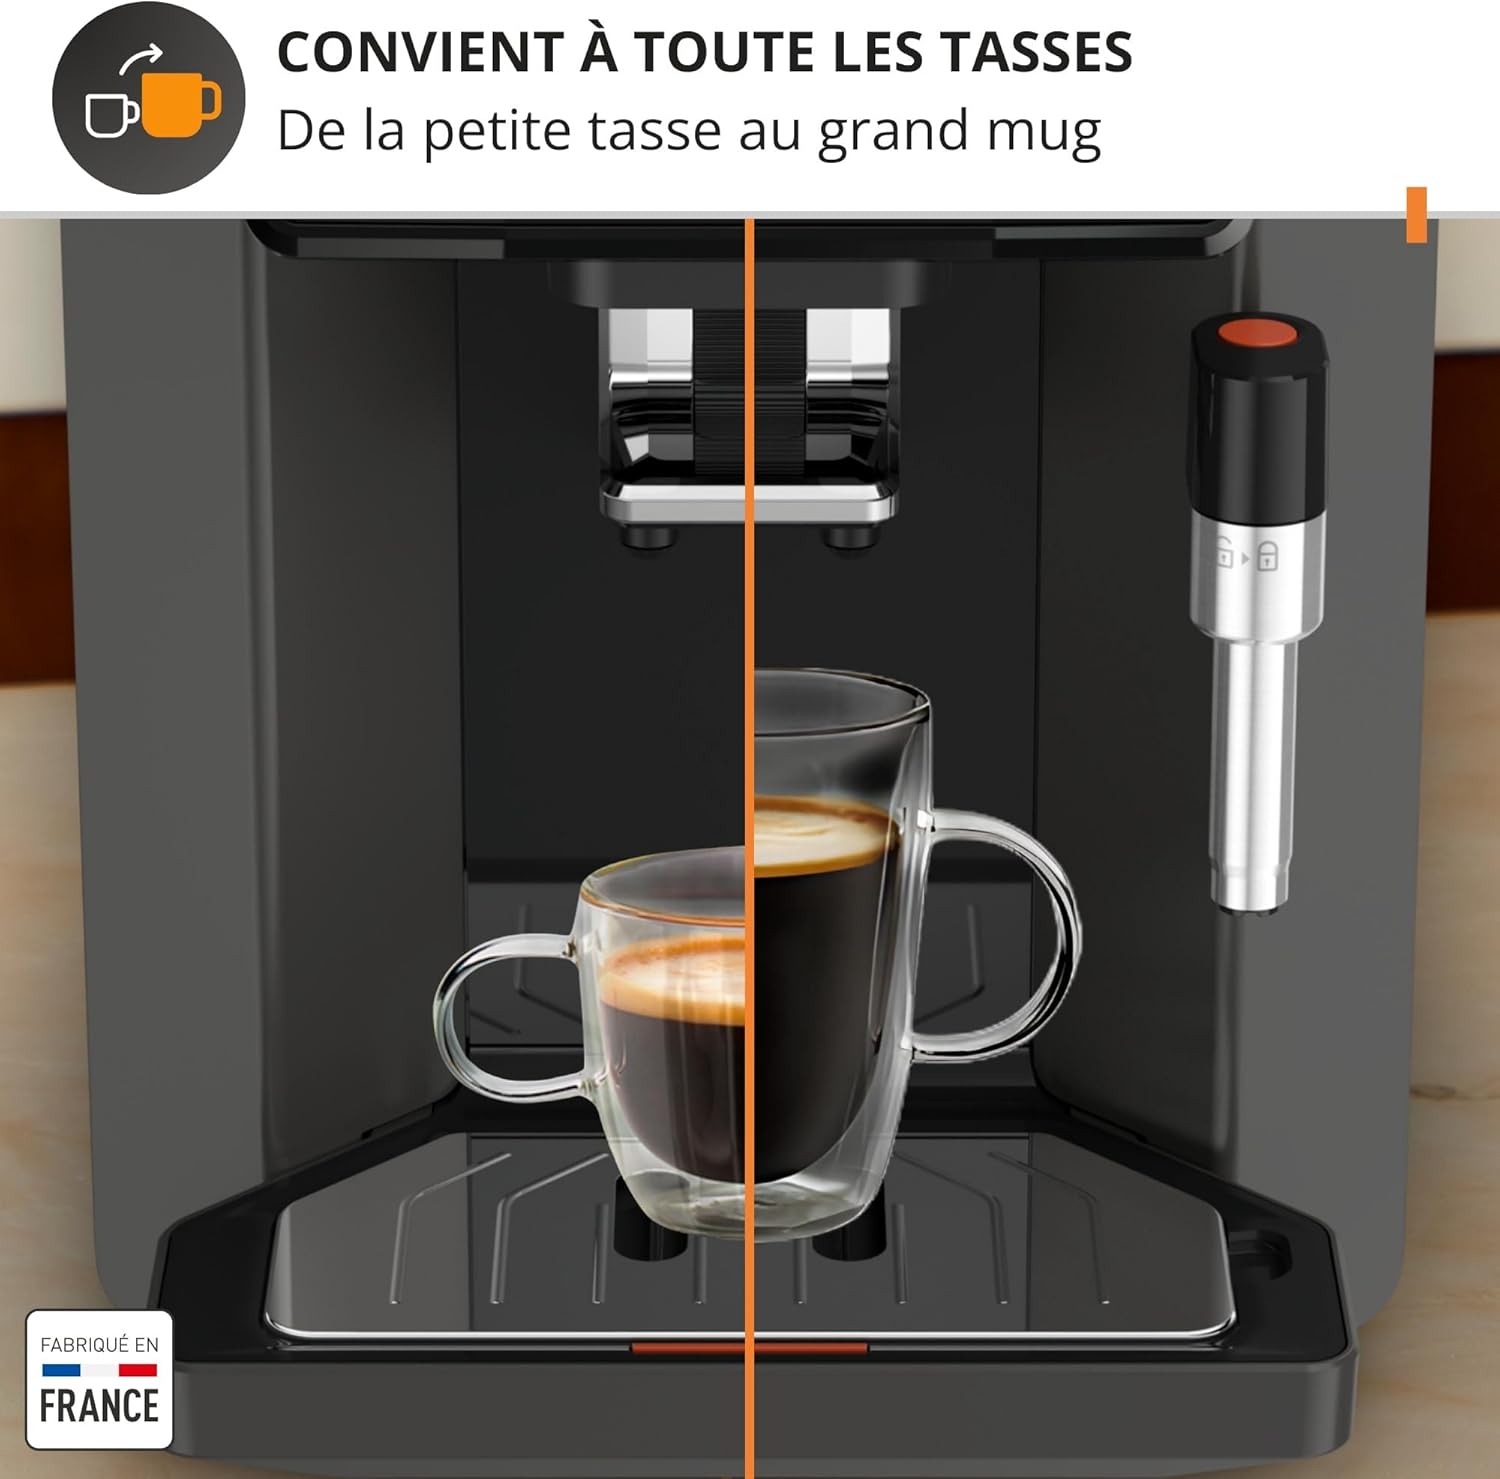
Figure 5.3: The adjustable coffee outlet allows the machine to fit various cup sizes, from small espresso cups to large mugs.
5.2 Preparing Milk-Based Drinks (Steam Nozzle)
The steam nozzle allows you to froth milk for cappuccinos and lattes, or dispense hot water for tea.

Figure 5.4: A hand holding a glass of milk being frothed by the steam nozzle, demonstrating easy milk foam creation.
- Fill a pitcher with cold milk.
- Position the steam nozzle into the milk.
- Select the STEAM option on the touch panel.
- Once frothing is complete, turn off the steam function.
- Immediately clean the steam nozzle after each use (see Maintenance section).
5.3 Memory Function
The machine allows you to save two different coffee settings as favorites for quick access.
- Adjust the intensity and volume for your desired coffee drink.
- Press and hold one of the memory buttons (A or B) until the setting is saved.
- To brew a saved favorite, simply press the corresponding memory button.
6. Maintenance and Cleaning
Regular cleaning ensures the longevity and optimal performance of your Krups Sensation C50.
6.1 Automatic Cleaning Cycle
The machine features a 100% automatic cleaning system, eliminating the need for manual disassembly of the brewing unit.

Figure 6.1: The touch panel showing the "CLEAN MODE" button and a cleaning tablet, illustrating the automatic cleaning process.
- The machine will prompt you when a cleaning cycle is required.
- Follow the on-screen instructions. This typically involves placing a cleaning tablet into the designated slot and starting the cycle.
- Ensure a container is placed under the coffee outlet to collect rinse water.
6.2 Daily Cleaning
- Drip Tray and Coffee Grounds Container: Empty and rinse daily.
- Water Tank: Rinse daily and refill with fresh water.
- Steam Nozzle: After each use, wipe the nozzle with a damp cloth and perform a short steam burst to clear any milk residue. The nozzle is easily removable for thorough cleaning.
6.3 Descaling
The machine will indicate when descaling is necessary. Use only Krups descaling solution or a recommended alternative.
- Follow the detailed instructions provided on the machine's display when the descaling alert appears.
- The process typically involves emptying the water tank, adding descaling solution and water, and running a cycle.
- Rinse the machine thoroughly after descaling by running several cycles with fresh water.
7. Troubleshooting
This section addresses common issues you might encounter with your coffee machine.
| Problem | Possible Cause | Solution |
|---|---|---|
| Machine does not turn on. | Not plugged in; power outage. | Check power cord connection; check power supply. |
| No coffee dispenses. | Water tank empty; bean hopper empty; machine needs descaling. | Fill water tank; fill bean hopper; perform descaling cycle. |
| Coffee is too weak/strong. | Incorrect grind setting; incorrect intensity setting. | Adjust grind fineness (finer for stronger); adjust intensity on touch panel. |
| Milk not frothing properly. | Steam nozzle clogged; milk not cold enough. | Clean steam nozzle thoroughly; use cold milk. |
| Machine displays an error message. | Specific internal issue. | Refer to the specific error code on the display and consult the full user manual or contact customer support. |
8. Specifications
- Brand: KRUPS
- Model Number: EA910810
- Color: Black
- Dimensions (L x W x H): 34.6 x 24 x 36.4 cm
- Weight: 7.5 kg
- Water Tank Capacity: 1.7 Liters
- Power: 1450 Watts
- Voltage: 220 Volts (AC)
- Material: Plastic, Metal
- Special Features: Filter coffee function, Automatic cleaning function, Metal brewing unit, Milk frother, Touch control panel.
- Country of Origin: France
9. Warranty and Support
Krups products are designed for durability and precision. This machine is manufactured in France, reflecting high-quality standards.
For detailed warranty information, please refer to the warranty card included with your product or visit the official Krups website. Krups is committed to repairability, with a network of recognized repair workshops available for up to 15 years at a fair price.
If you encounter any issues not covered in the troubleshooting section, please contact Krups customer support for assistance. Contact details can typically be found on the Krups website or in your product documentation.
Online Resources:
10. Official Product Videos
No official product videos from the seller are available for embedding in this manual based on the provided information.