1. Introduction
Thank you for purchasing the House Gem 36W Coffee Mug Warmer, Model DS1293. This device is designed to keep your beverages at an optimal drinking temperature, enhancing your daily experience. Please read this manual thoroughly before use to ensure safe and efficient operation. Keep this manual for future reference.
2. Important Safety Instructions
- Electrical Safety: This appliance operates on 110 Volts (AC) and consumes 36 watts. Ensure your power outlet matches these specifications. Do not use with damaged cords or plugs.
- Hot Surface: The heating plate becomes very hot during operation. Avoid direct contact with the heating plate to prevent burns. Always allow the device to cool down before handling or cleaning. A visible LED temperature display helps prevent accidental contact.
- Waterproof Design: The heating plate is designed to be waterproof for safe and easy cleaning. However, do not immerse the entire unit in water or other liquids.
- Automatic Shut-Off: For safety, the warmer features an automatic shut-off timer, configurable from 2 to 12 hours, with a default of 4 hours. Do not override this safety feature.
- UL Certified: This product is UL certified, guaranteeing quality and adherence to safety standards.
- Placement: Place the warmer on a stable, flat, heat-resistant surface, away from flammable materials. Ensure adequate ventilation around the unit.
- Children and Pets: Keep the device out of reach of children and pets.
- Intended Use: Use this appliance only for its intended purpose of warming beverages or candles.
3. Package Contents
- House Gem 36W Coffee Mug Warmer Unit (Model DS1293)
- Power Cord
- Instruction Manual
4. Product Overview
The House Gem Mug Warmer features a sleek design with intuitive controls and a digital display for temperature monitoring.

Image 4.1: Front view of the House Gem Mug Warmer, showing the heating plate, digital temperature display, and three control buttons.

Image 4.2: Detailed view of the control panel, highlighting the LED Digital Display, Light Switch, Timer Button (2-12 hours), and Power Button (130°F/150°F/176°F).

Image 4.3: Illustration of the waterproof heating panel and LED digital display.
Components:
- Heating Plate: The central surface where mugs are placed for warming. Features a "CAUTION: HOT SURFACE" warning.
- Digital Display: Shows the current temperature setting.
- Light Switch Button: Controls the LED indicator lights.
- Timer Button: Adjusts the automatic shut-off duration.
- Power/Temperature Button: Turns the unit on/off and cycles through temperature settings.
- LED Indicator Lights: Located beneath the control buttons, indicating the current temperature level (Red for High, Purple for Mid, Blue for Low).
5. Setup
- Unpack: Carefully remove all components from the packaging.
- Placement: Place the mug warmer on a flat, stable, and heat-resistant surface, such as a desk or countertop. Ensure it is not near any water sources or flammable materials.
- Connect Power: Plug the power cord into a standard 110V AC electrical outlet.
- Initial Cleaning: Before first use, wipe the heating plate with a damp cloth. Ensure it is completely dry before plugging in.
6. Operating Instructions
Powering On and Setting Temperature:
- Ensure the warmer is plugged in.
- Press the Power/Temperature Button () to turn on the device. The digital display will illuminate, and the unit will start heating.
- Press the Power/Temperature Button repeatedly to cycle through the three temperature settings:
- High: 176°F (80°C) - Indicated by Red LED lights.
- Mid: 150°F (65°C) - Indicated by Purple LED lights.
- Low: 130°F (55°C) - Indicated by Blue LED lights.
- Place your mug containing the beverage on the center of the heating plate. The warmer is designed to accommodate most cup sizes, including those without flat bottoms, due to its 5.2-inch heating plate area.

Image 6.1: Digital display and LED safety indicators for different temperature settings.

Image 6.2: Illustration of 36W rapid heating and temperature ranges: 150-176°F (High), 130-150°F (Middle), 105-130°F (Low).
Setting the Auto Shut-Off Timer:
- The warmer has a default auto shut-off time of 4 hours.
- Press the Timer Button () to adjust the shut-off time. You can customize it from 2 to 12 hours in 2-hour increments (2H, 4H, 6H, 8H, 10H, 12H).
- The digital display will show the selected timer setting briefly before returning to the temperature display.

Image 6.3: Illustration of the 2-12 hour intelligent timing feature and the option to turn off LEDs at night.
Controlling LED Indicator Lights:
- Press the Light Switch Button () to turn the LED indicator lights on or off. This is useful for nighttime use or in environments where ambient light is preferred.
Using with Various Beverages and Cups:
- The warmer is suitable for coffee, tea, milk, cocoa, and other hot beverages.
- It accommodates most cup sizes due to its 5.2-inch heating plate. For best results, use mugs with a flat bottom to maximize contact with the heating surface. However, the warmer can still achieve suitable temperatures with non-flat bottomed cups.

Image 6.4: The mug warmer keeping various beverages warm.
Candle Warming:
- The warmer can also be used to melt scented candles, releasing their fragrance without an open flame. Use the lowest temperature setting (130°F) for this purpose to prevent overheating the candle jar.

Image 6.5: The mug warmer used for warming a candle.
Important Reminder:
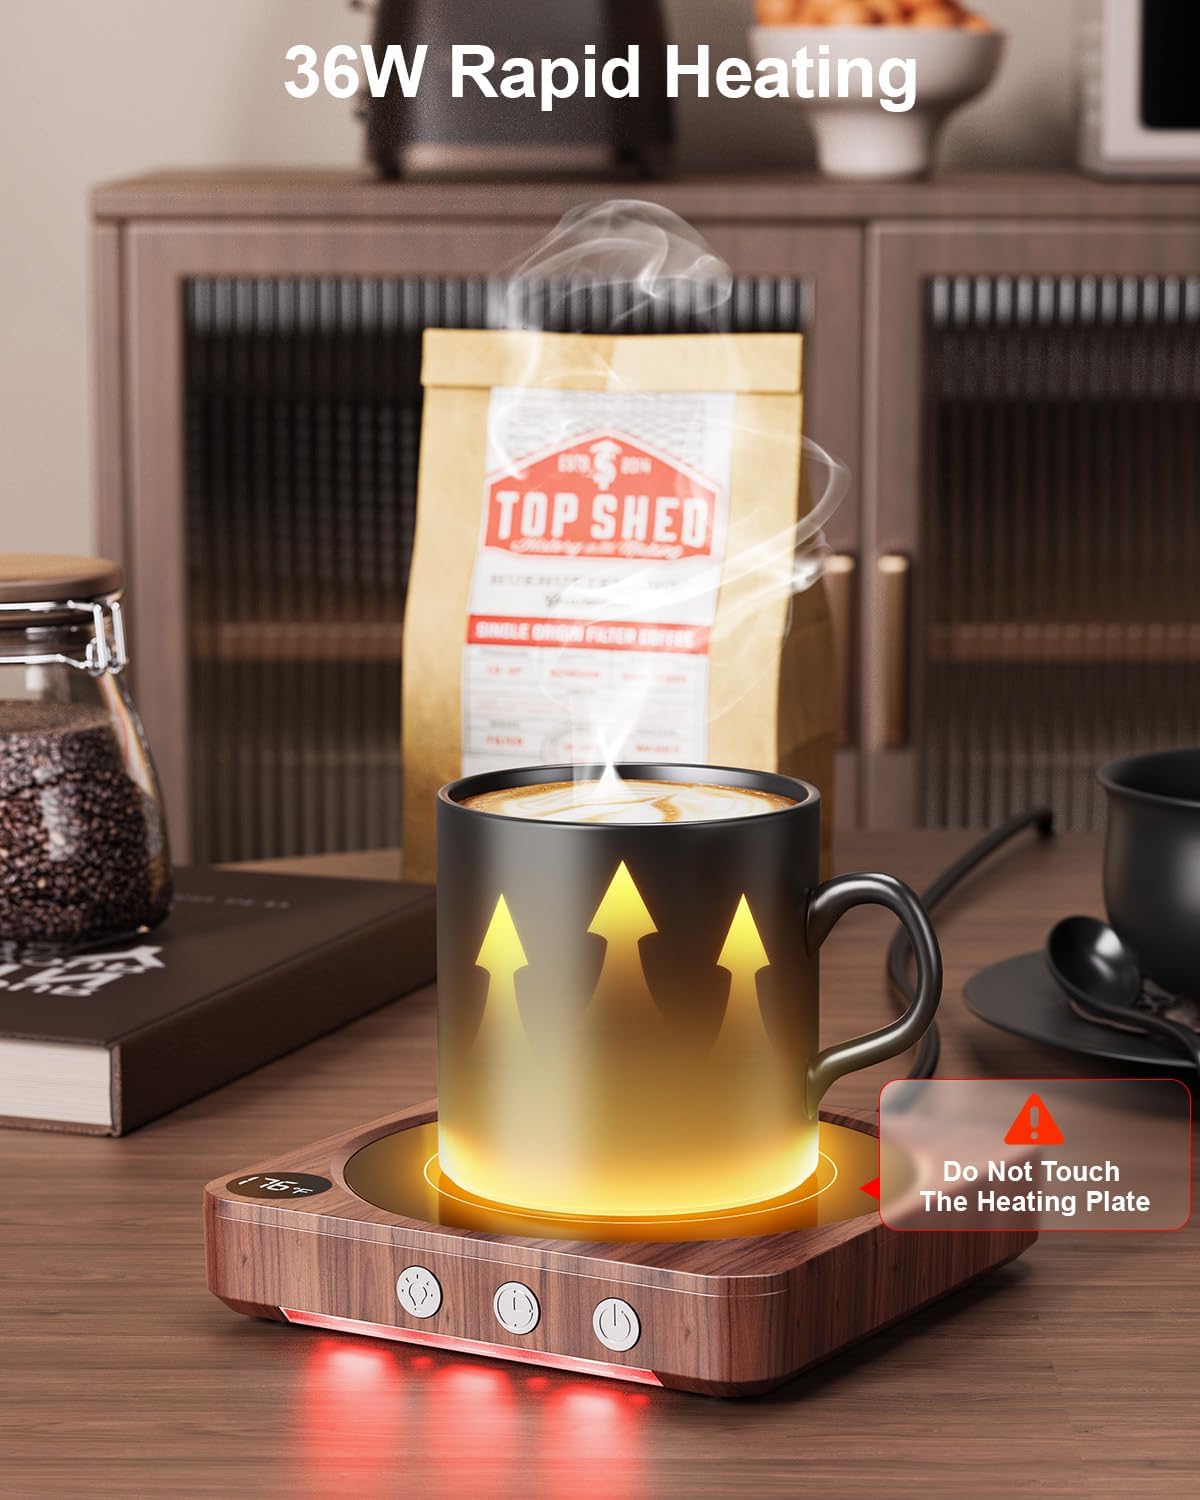
Image 6.6: Visual reminder to avoid touching the hot heating plate.
Always exercise caution. The heating plate is hot during and immediately after use. Do not touch the heating plate directly.
7. Maintenance and Cleaning
Regular maintenance ensures the longevity and optimal performance of your mug warmer.
- Cleaning the Heating Plate: The heating plate is waterproof. After ensuring the unit is unplugged and completely cool, wipe the surface with a damp cloth. For stubborn stains, a mild detergent can be used, followed by wiping with a clean, damp cloth. Dry thoroughly before next use.
- Cleaning the Body: Wipe the exterior body of the warmer with a soft, dry cloth. Do not use abrasive cleaners or immerse the unit in water.
- Storage: When not in use for extended periods, unplug the warmer and store it in a cool, dry place.
8. Troubleshooting
If you encounter any issues with your House Gem Mug Warmer, please refer to the following common problems and solutions:
| Problem | Possible Cause | Solution |
|---|---|---|
| Warmer does not turn on. | Not plugged in correctly. Power outlet malfunction. | Ensure the power cord is securely plugged into both the warmer and a working electrical outlet. Test the outlet with another device. |
| Beverage is not warm enough. | Incorrect temperature setting. Mug material or shape. | Increase the temperature setting. Use a mug with a flat bottom for better heat transfer. Ensure the mug is centered on the heating plate. |
| Warmer automatically turns off too soon. | Timer setting is too short. | Adjust the auto shut-off timer to a longer duration (up to 12 hours) using the Timer Button. |
| LED indicator lights are off. | Lights have been manually turned off. | Press the Light Switch Button to turn the LED indicators back on. |
If the problem persists after trying these solutions, please contact customer support.
9. Specifications
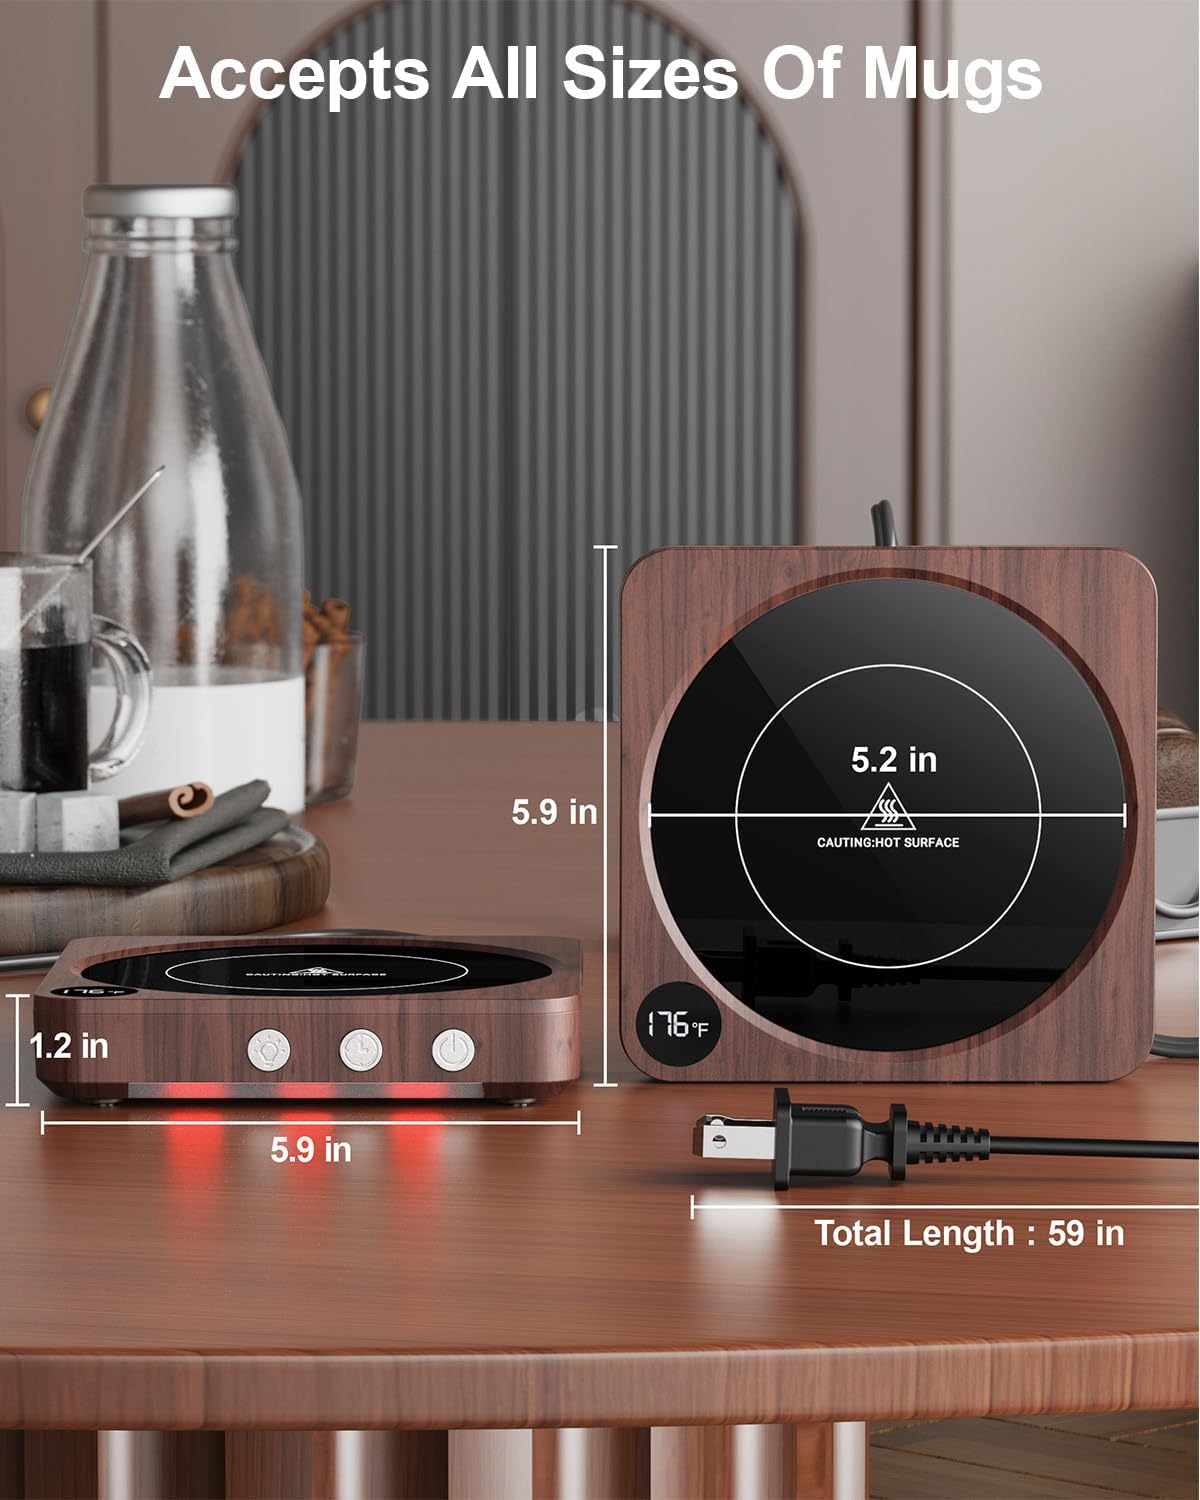
Image 9.1: Product dimensions and cord length.
| Feature | Specification |
|---|---|
| Model Number | DS1293 |
| Brand | House Gem |
| Power Source | Corded Electric |
| Voltage | 110 Volts (AC) |
| Wattage | 36 Watts |
| Temperature Settings | 130°F (Low), 150°F (Mid), 176°F (High) |
| Maximum Temperature | 176°F (80°C) |
| Auto Shut-Off Timer | 2-12 Hours (default 4 hours) |
| Heating Plate Diameter | 5.2 inches |
| Product Dimensions (L x W x H) | 5.86 x 5.86 x 1.21 inches |
| Item Weight | 1.01 pounds (458 Grams) |
| Material | Acrylonitrile Butadiene Styrene (ABS) |
| Certifications | UL Certified |
10. Warranty and Support
House Gem products are manufactured with quality and reliability in mind. For specific warranty details, please refer to the warranty card included with your purchase or visit the official House Gem website.
If you have any questions, require technical assistance, or need to report an issue, please contact House Gem customer support through the retailer's platform or the official brand contact channels.


