1. Safety Information
- This product is intended for children aged 3 to 12 years. Adult supervision is recommended during use.
- Do not disassemble or attempt to repair the camera. Contact support if issues arise.
- Keep the camera away from water and excessive moisture to prevent damage.
- Use only the provided USB cable for charging.
- The thermal print paper is a consumable item. Ensure replacements are compatible.
2. Package Contents
Verify that all items are present in your package:
- 1 x GREENKINDER X6 Kids Instant Print Camera
- 1 x 32GB MicroSD Card
- 3 x Rolls of Thermal Print Paper
- 1 x Lanyard
- 1 x USB-C Charging Cable
- 1 x Cartoon Sticker Set
- 5 x Color Pens
- 1 x User Manual
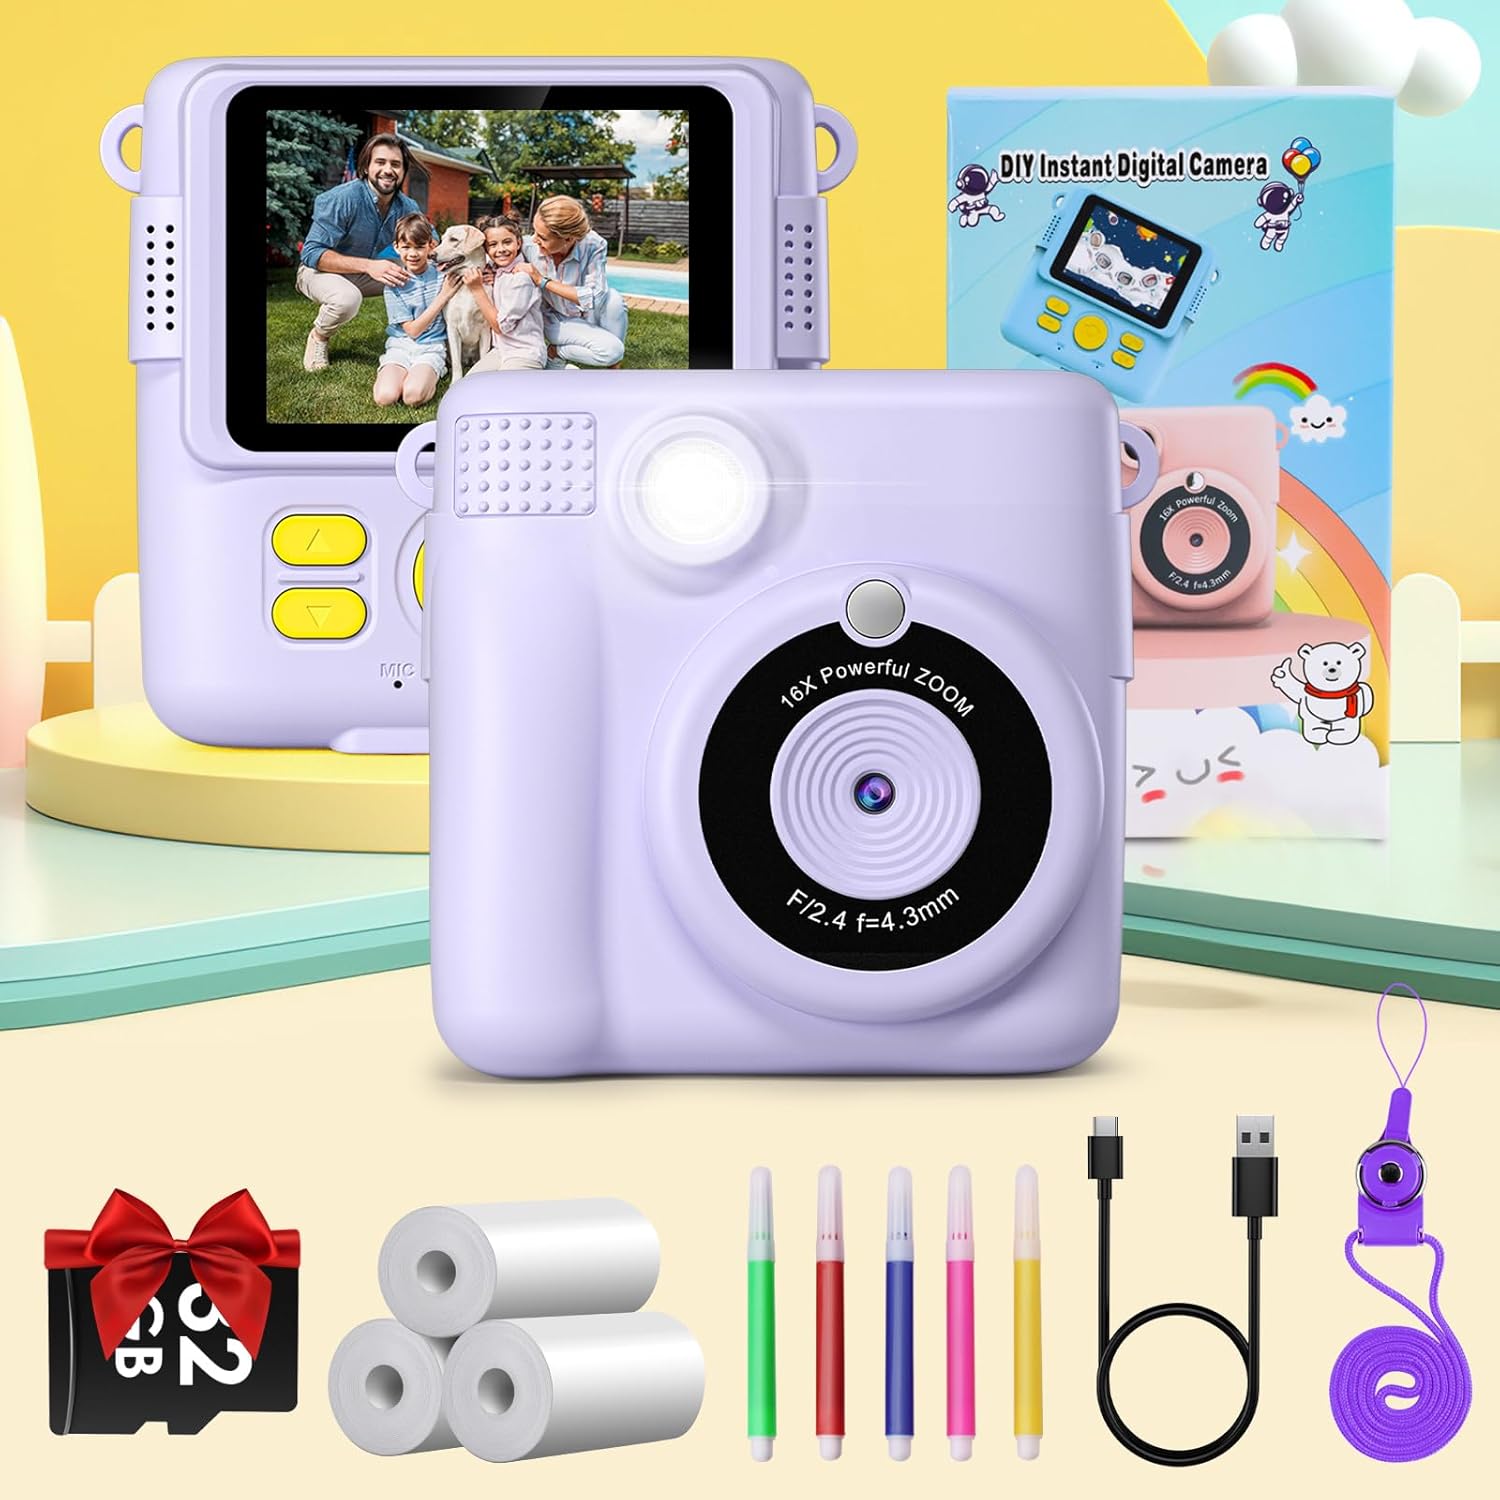
Figure 2.1: Complete package contents of the GREENKINDER X6 camera.
3. Product Overview
Familiarize yourself with the camera's components:

Figure 3.1: Front and rear views of the GREENKINDER X6 camera with key features highlighted.
- Lens: Main camera lens for capturing photos and videos.
- Flash: Provides illumination in low-light conditions.
- 2.4-inch LCD Screen: For viewing photos, videos, and navigating menus.
- Control Buttons: Power, Shutter, Navigation (Up/Down/Left/Right), OK/Menu.
- Print Output Slot: Where instant prints emerge.
- MicroSD Card Slot: For memory expansion (32GB card included).
- USB-C Port: For charging and data transfer.
4. Setup
4.1 Charging the Battery
The camera is equipped with a 1000mAh lithium-polymer battery. Before first use, fully charge the camera.
- Connect the provided USB-C cable to the camera's USB-C port.
- Connect the other end of the cable to a USB power adapter (not included) or a computer's USB port.
- The charging indicator light will illuminate. It will turn off or change color when charging is complete.
4.2 Inserting the MicroSD Card
A 32GB MicroSD card is included for storing photos and videos.
- Locate the MicroSD card slot on the side of the camera.
- Insert the MicroSD card with the gold contacts facing down until it clicks into place.
- To remove, gently push the card in until it clicks, then release, and it will spring out.
4.3 Loading Print Paper
The camera uses thermal print paper for instant black and white prints. Three rolls are included.
- Gently push the part of the camera with the lens upwards to open the paper compartment.
- Insert a roll of thermal print paper into the compartment, ensuring the paper feeds out from the top.
- Close the camera by pushing the two parts back together until they click securely.

Figure 4.1: Steps for loading thermal print paper.
5. Operating Instructions
5.1 Power On/Off
- To power on, press and hold the Power button for a few seconds.
- To power off, press and hold the Power button again until the screen turns off.
5.2 Basic Photography and Instant Printing
The camera allows for instant black and white prints using thermal technology.
- Turn on the camera.
- Frame your shot using the 2.4-inch LCD screen.
- Press the Shutter button to take a photo.
- The camera will automatically print the photo in black and white from the output slot.
5.3 Video Recording
Record moments in 1080P resolution.
- Navigate to video mode using the menu buttons.
- Press the Shutter button to start recording.
- Press the Shutter button again to stop recording.

Figure 5.1: Demonstrating 1080P video, time-lapse, and burst shooting features.
5.4 Special Features
- 16x Digital Zoom: Use the navigation buttons to zoom in or out before taking a photo.
- Flash: Activate or deactivate the flash for improved lighting in dark environments.
- Time-lapse: Set the camera to take photos automatically at intervals of 3, 5, or 10 seconds.
- Burst Shooting: Capture multiple photos in quick succession by holding down the shutter button.
- Games: The camera includes built-in puzzle games for entertainment. Access them via the menu.
- Filters and Frames: Apply various fun filters and decorative frames to your photos before printing or saving.

Figure 5.2: 16x Zoom and Flash functionality.

Figure 5.3: Examples of different frames and filters.
5.5 DIY Coloring
After printing black and white photos, use the included color pens to personalize them.

Figure 5.4: DIY coloring of instant prints.
6. Maintenance
6.1 Cleaning the Camera
- Use a soft, dry cloth to clean the camera body.
- For the lens, use a specialized lens cleaning cloth.
- Do not use liquid cleaners or abrasive materials.
6.2 Storing the Camera
- Store the camera in a cool, dry place away from direct sunlight.
- Remove the MicroSD card if storing for extended periods.
6.3 Battery Care
- Charge the battery regularly, even if the camera is not in frequent use, to maintain battery health.
- Avoid fully discharging the battery frequently.
6.4 Replacing Print Paper
When the print paper runs out, you can purchase compatible thermal print paper. Search for ASIN: B0C52Q298V for refills.
7. Troubleshooting
| Problem | Possible Cause | Solution |
|---|---|---|
| Camera does not turn on. | Low battery. | Charge the camera fully using the provided USB-C cable. |
| Cannot take photos/videos. | No MicroSD card inserted or card is full. | Insert a MicroSD card or delete old files to free up space. |
| Prints are blank or faded. | Print paper is incorrectly loaded or has run out. | Check paper orientation and ensure it is loaded correctly. Replace the paper roll if empty. |
| Camera freezes or is unresponsive. | Software glitch. | Press and hold the Power button for 10 seconds to force a restart. |
8. Specifications
| Feature | Detail |
|---|---|
| Brand | GREENKINDER |
| Model | X6 |
| Product Type | Instant Print Camera (DSLR type) |
| Color | Lilac |
| Screen | 2.4-inch LCD |
| Video Resolution | 1080p |
| Effective Still Resolution | 12 Megapixels |
| Digital Zoom | 16x |
| Connectivity Technology | USB-C |
| Memory | Supports MicroSD card (32GB included) |
| Battery Composition | Lithium-polymer (1000mAh) |
| Special Features | Time-lapse, Flash, Burst Shooting, Games, Filters, Frames |
| Item Weight | 250 Grams |
| Model Year | 2023 |
9. Warranty and Support
For warranty information or technical support, please refer to the contact details provided with your purchase or visit the official GREENKINDER website. Keep your purchase receipt as proof of purchase.


