1. Introduction
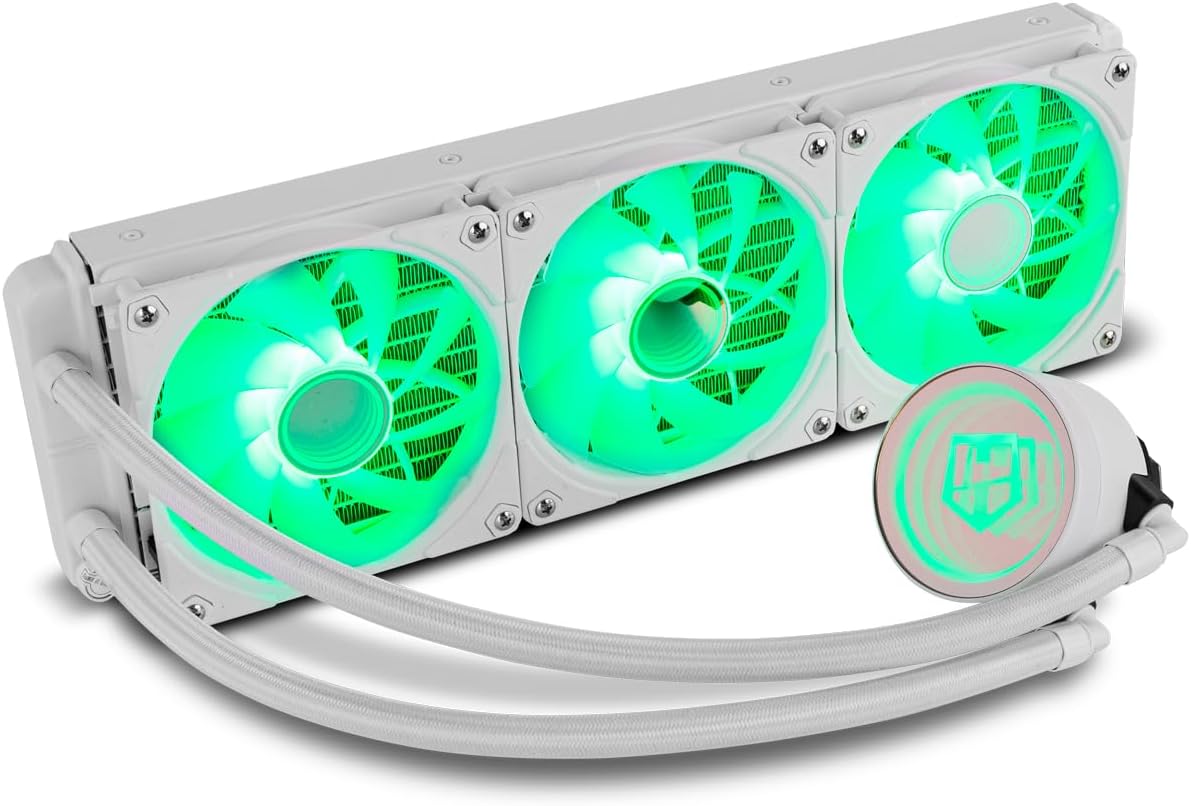
The NOX XTREME PRODUCTS HUMMER M-360 is an advanced All-In-One (AIO) liquid cooling system designed to provide efficient thermal management for high-performance computer processors. This system features a triple 120mm radiator, three PWM-controlled ARGB fans, and a pump with an infinite mirror effect, ensuring both optimal cooling and aesthetic appeal. It is compatible with a wide range of Intel and AMD sockets.
This manual provides detailed instructions for the proper installation, operation, and maintenance of your HUMMER M-360 liquid cooler. Please read this manual thoroughly before installation to ensure correct setup and to prevent damage to your components.

2. Package Contents
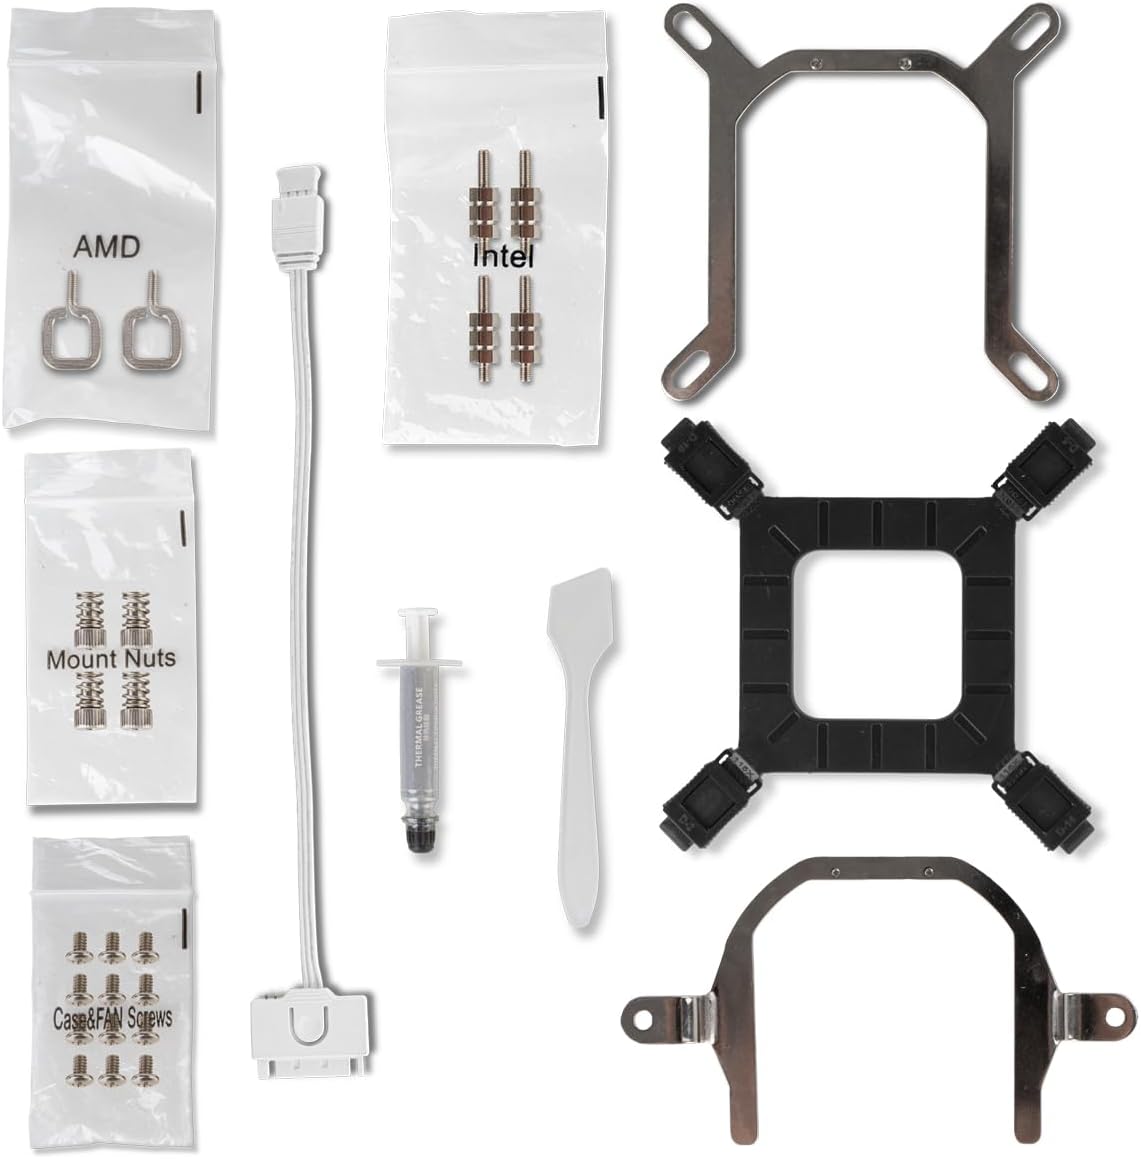
Verify that all components listed below are present in your package. If any items are missing or damaged, please contact your retailer or NOX XTREME PRODUCTS support.
- 1x HUMMER M-360 ARGB Liquid Cooler (Radiator with 3x 120mm ARGB PWM Fans and Pump/CPU Block)
- 1x Intel Mounting Bracket Kit (Backplate, Standoffs, Screws)
- 1x AMD Mounting Bracket Kit (Clips, Standoffs, Screws)
- 1x Thermal Paste Tube
- 1x Thermal Paste Spreader
- 1x PWM Fan Splitter Cable
- 1x ARGB Controller Cable (if applicable)
- User Manual
3. Specifications
| Feature | Specification |
|---|---|
| Brand | NOX XTREME PRODUCTS |
| Model Number | NXHUMMERM360ARGBW |
| Color | White |
| Compatible Devices | Computer (Intel & AMD CPUs) |
| Cooling Method | Liquid (Water) |
| Radiator Material | Aluminum |
| Pump Base Material | Copper |
| Fan Size | 3x 120mm |
| Max Fan Speed | 1500 RPM |
| Noise Level | 31.4 Decibels |
| Voltage | 12 Volts |
| Power | 12 Watts |
| Power Connector Type | 7 pins |
| Product Dimensions | 12.5L x 12W x 2.5H centimeters (Fan) |
4. Setup & Installation
Before beginning installation, ensure your computer is powered off and unplugged from the wall outlet. Refer to your motherboard manual for specific CPU socket information and clearances.
4.1 General Precautions
- Handle components with care to avoid damage.
- Ensure proper static discharge precautions are taken.
- Do not overtighten screws, as this can damage components.
4.2 CPU Block Mounting
The HUMMER M-360 supports both Intel and AMD platforms. Select the appropriate mounting hardware from the package contents.
4.2.1 Intel Installation (LGA 1700/1200/115X/2066/2011)
- Install the Intel backplate behind the motherboard, aligning the holes with the CPU socket.
- Screw in the appropriate Intel standoffs through the motherboard from the front.
- Apply a thin, even layer of thermal paste to the center of your CPU's Integrated Heat Spreader (IHS).
- Place the CPU block onto the standoffs, ensuring the mounting holes align.
- Secure the CPU block with the Intel mounting screws, tightening them in a diagonal pattern until snug. Do not overtighten.

4.2.2 AMD Installation (AM5/AM4/AM3+/AM3/AM2+/AM2/FM2+/FM2/FM1)
- Remove the existing plastic retention clips from the motherboard's AMD backplate, but keep the backplate in place.
- Screw in the appropriate AMD standoffs into the motherboard's backplate.
- Apply a thin, even layer of thermal paste to the center of your CPU's Integrated Heat Spreader (IHS).
- Place the CPU block onto the standoffs, ensuring the mounting holes align.
- Secure the CPU block with the AMD mounting screws, tightening them in a diagonal pattern until snug. Do not overtighten.

4.3 Radiator and Fan Installation
- Determine the optimal mounting location for the 360mm radiator within your PC case (e.g., top, front). Consider airflow direction (intake or exhaust).
- Mount the radiator to the chosen location using the long screws provided, ensuring the fans are oriented correctly for desired airflow.
- Connect the 4-pin PWM fan cables from the three fans to the included PWM splitter cable.
- Connect the PWM splitter cable to a CPU_FAN or AIO_PUMP header on your motherboard.
- Connect the 3-pin ARGB cables from the fans and pump to the ARGB controller cable, then connect the controller cable to a 5V ARGB header on your motherboard. Do not connect to a 12V RGB header, as this will damage the LEDs.
- Connect the pump's power cable (usually a 3-pin or SATA power connector) to an appropriate header on your motherboard (e.g., AIO_PUMP, PUMP_FAN) or directly to your power supply.

5. Operating Instructions
5.1 Initial Power-On
After completing the installation, double-check all connections. Power on your computer. The fans and pump should start operating, and the ARGB lighting should illuminate. Monitor your CPU temperatures using system monitoring software to ensure proper cooling performance.
5.2 ARGB Lighting Control
The HUMMER M-360 features Addressable RGB (ARGB) lighting on its fans and pump, offering a wide range of customizable effects and colors. The ARGB lighting can be controlled via your motherboard's ARGB software if your motherboard supports 5V ARGB headers. Compatible software includes:
- MSI Mystic Light Sync
- GIGABYTE RGB Fusion
- ASUS Aura Sync
Refer to your motherboard's manual for instructions on using its ARGB control software. If your motherboard does not have a 5V ARGB header, an external ARGB controller (not included) may be required for lighting customization.

5.3 PWM Fan Control
The 120mm fans are PWM (Pulse Width Modulation) controlled, allowing your motherboard to dynamically adjust fan speeds based on CPU temperature. This ensures optimal cooling performance while minimizing noise levels. You can configure fan curves through your motherboard's BIOS/UEFI settings or dedicated software.
6. Maintenance
Regular maintenance helps ensure the longevity and optimal performance of your liquid cooling system.
- Dust Removal: Periodically clean dust from the radiator fins and fan blades using compressed air or a soft brush. Accumulation of dust can impede airflow and reduce cooling efficiency.
- Cable Management: Ensure all cables are neatly routed and not obstructing airflow or fan operation.
- Inspect Tubing: Occasionally check the tubing for any signs of kinks, leaks, or damage. While AIO coolers are sealed, visual inspection is a good practice.
- Pump Operation: Listen for any unusual noises from the pump. A constant, low hum is normal, but grinding or rattling sounds may indicate an issue.
7. Troubleshooting
If you encounter issues with your HUMMER M-360, refer to the following common problems and solutions:
- No Power/Fans Not Spinning/Pump Not Working:
- Check all power connections to the pump and fans.
- Ensure the pump is connected to a dedicated AIO_PUMP or PUMP_FAN header, or a SATA power connector.
- Verify fan cables are securely connected to the PWM splitter and motherboard header.
- Check BIOS/UEFI settings to ensure fan headers are enabled and configured correctly.
- High CPU Temperatures:
- Confirm the CPU block is making proper contact with the CPU. Re-seat if necessary, ensuring even mounting pressure.
- Verify thermal paste application. Reapply if it appears insufficient or uneven.
- Check fan orientation on the radiator for correct airflow (intake or exhaust).
- Ensure the pump is running at full speed. Check BIOS/UEFI settings.
- Clean any dust accumulation from the radiator fins.
- ARGB Lighting Not Working/Incorrect Colors:
- Ensure ARGB cables are securely connected to the 5V ARGB header on your motherboard. Do not connect to a 12V RGB header.
- Verify that your motherboard's ARGB software is installed and configured correctly.
- Check for any loose connections in the ARGB daisy chain.
- Mounting Issues (e.g., AM4 bracket):
- Ensure you are using the correct mounting hardware for your specific CPU socket.
- Apply even pressure when tightening screws in a diagonal pattern to prevent damage to the motherboard or CPU socket.
- If experiencing difficulty, consult your motherboard manual or seek professional assistance.
8. Warranty & Support
NOX XTREME PRODUCTS provides a manufacturer's warranty for the HUMMER M-360 liquid cooling system against defects in materials and workmanship. The specific terms and duration of the warranty may vary by region and retailer. Please retain your proof of purchase for warranty claims.
For technical support, troubleshooting assistance, or warranty inquiries, please contact your point of purchase or visit the official NOX XTREME PRODUCTS website for contact information and support resources. When contacting support, please have your product model number (NXHUMMERM360ARGBW) and proof of purchase readily available.
© 2024 NOX XTREME PRODUCTS. All rights reserved.