1. Product Overview
The MokerLink 5 Port 2.5G Managed Ethernet Switch is designed to provide high-speed network connectivity for various environments, from home entertainment to small offices. It features five 2.5 Gigabit Ethernet ports and one 10 Gigabit SFP+ port, offering robust performance and flexible management capabilities. This switch supports advanced Layer 2 features such as VLAN, QoS, LACP, and IGMP, all configurable via a user-friendly web interface. Its fanless metal design ensures quiet and reliable operation.

2. Setup Guide
2.1 Package Contents
- MokerLink 2.5Gigabit Managed Switch
- Power Adapter
- User Manual (this document)
2.2 Hardware Installation
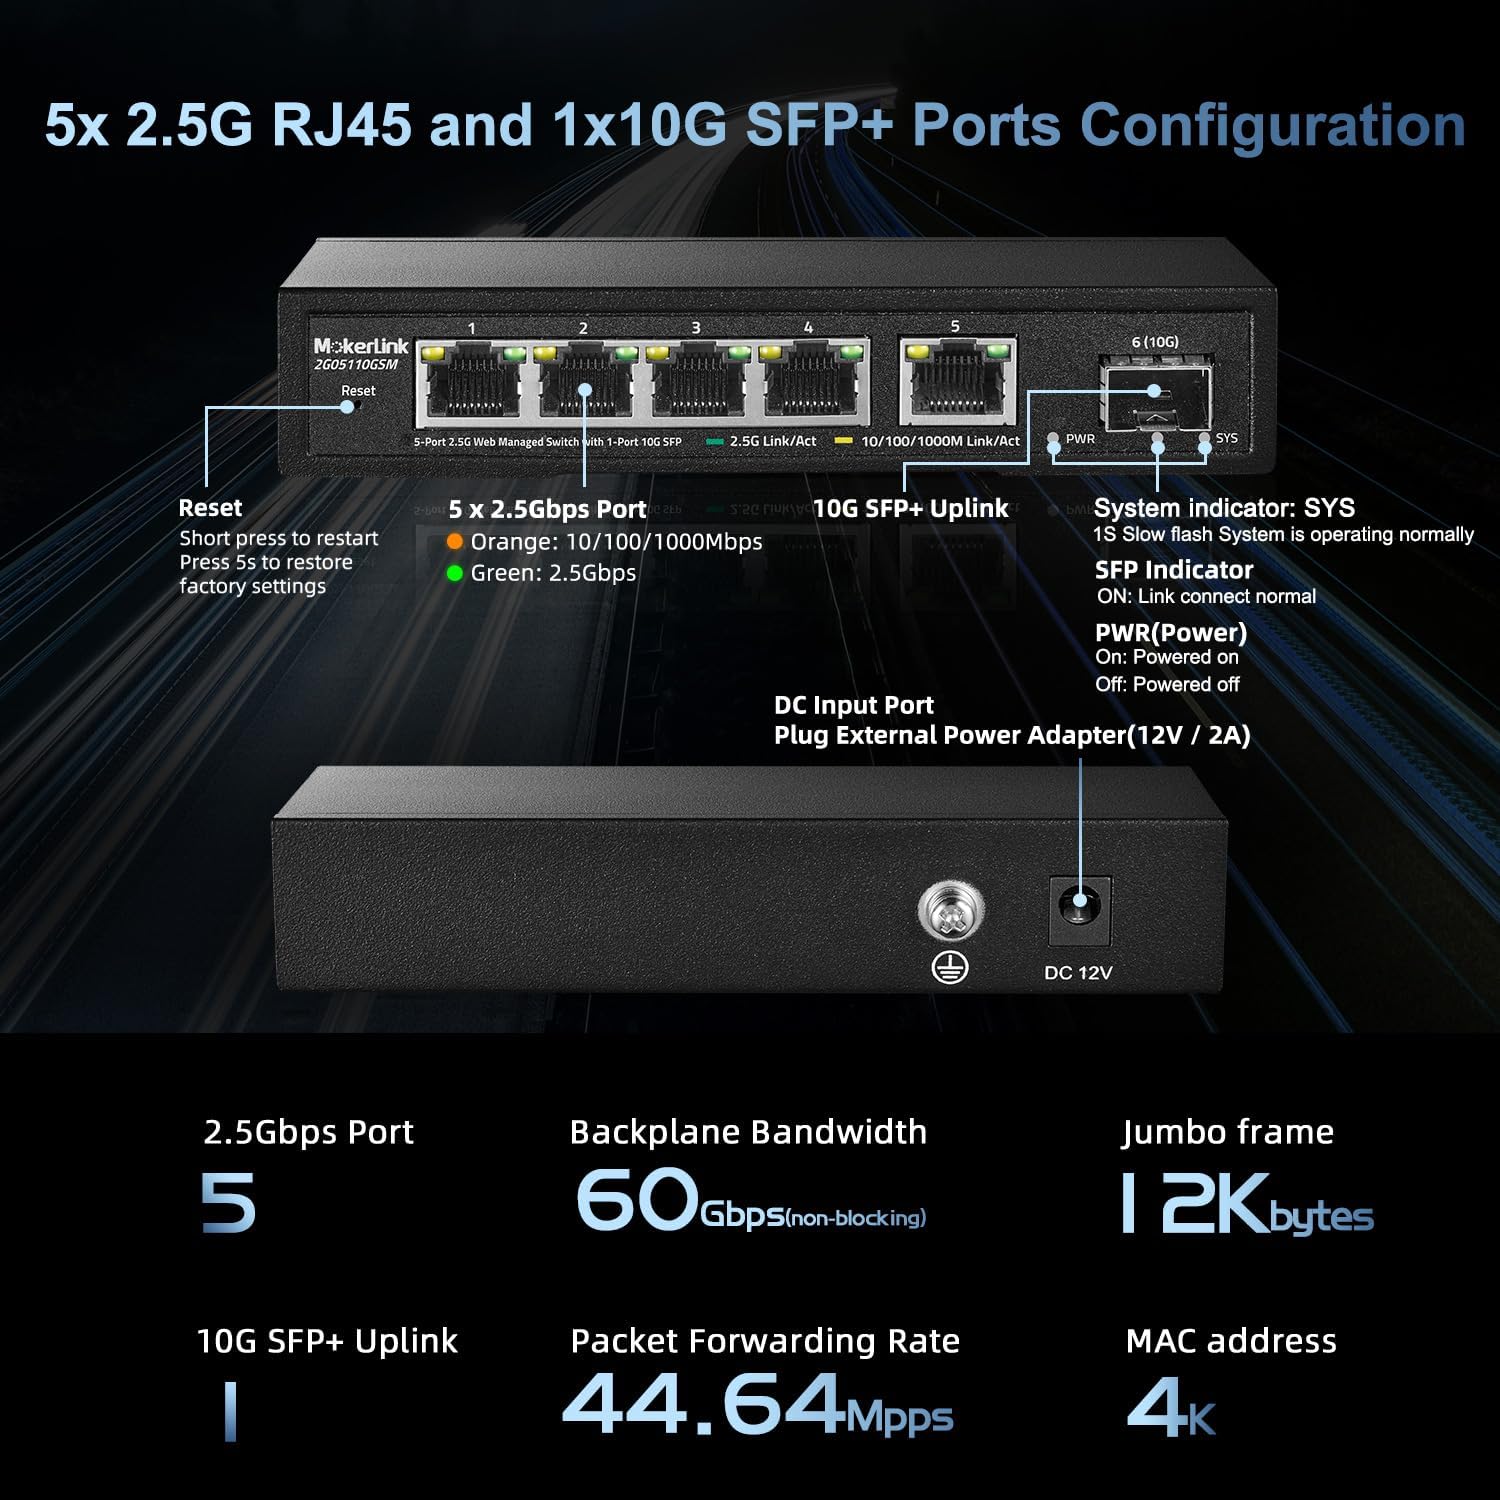
- Power Connection: Connect the provided power adapter to the DC 12V input port on the switch and plug it into a power outlet. The PWR LED indicator will illuminate when the switch is powered on.
- Ethernet Connections: Connect your network devices (e.g., computers, NAS, WiFi 6 APs) to the 2.5G Ethernet ports (1-5) using standard Ethernet cables (Cat5e, Cat6, or Cat6a recommended for optimal performance). The Link/Act LEDs for each port will indicate connection status and activity.
- SFP+ Uplink (Optional): For higher-speed network uplinks, insert a compatible 1G/2.5G/10G SFP+ module (not included) into the 10G SFP+ port (Port 6). Connect a fiber optic cable from the SFP+ module to your desired network device or router.
2.3 Initial Web Management Access
The switch features a web-based Graphical User Interface (GUI) for configuration and monitoring. To access it:
- Connect Directly: Connect a computer directly to any of the switch's Ethernet ports.
- Configure Computer IP: Set your computer's Ethernet adapter to a static IP address within the same subnet as the switch's default IP. For example, set your computer's IP to
192.168.2.2with a Subnet Mask of255.255.255.0and a Gateway of192.168.2.1. - Access Web UI: Open a web browser and enter the default IP address of the switch:
http://192.168.2.1. - Login: Enter the default username and password. The default credentials are Username:
admin, Password:admin. - Configure DHCP (Optional): Once logged in, you can configure the switch to obtain an IP address via DHCP if you prefer to integrate it into an existing network with a DHCP server.

3. Operation and Management
3.1 Basic Operation
- Auto MDI/MDIX: The switch automatically detects the type of Ethernet cable (straight-through or crossover) and adjusts accordingly, simplifying cable connections.
- Auto-Negotiation: Each port automatically negotiates the optimal speed (10/100/1000Mbps or 2.5Gbps) and duplex mode with the connected device.
- LED Indicators: Monitor the PWR, SYS, and Link/Act LEDs to quickly assess the switch's operational status and port activity.
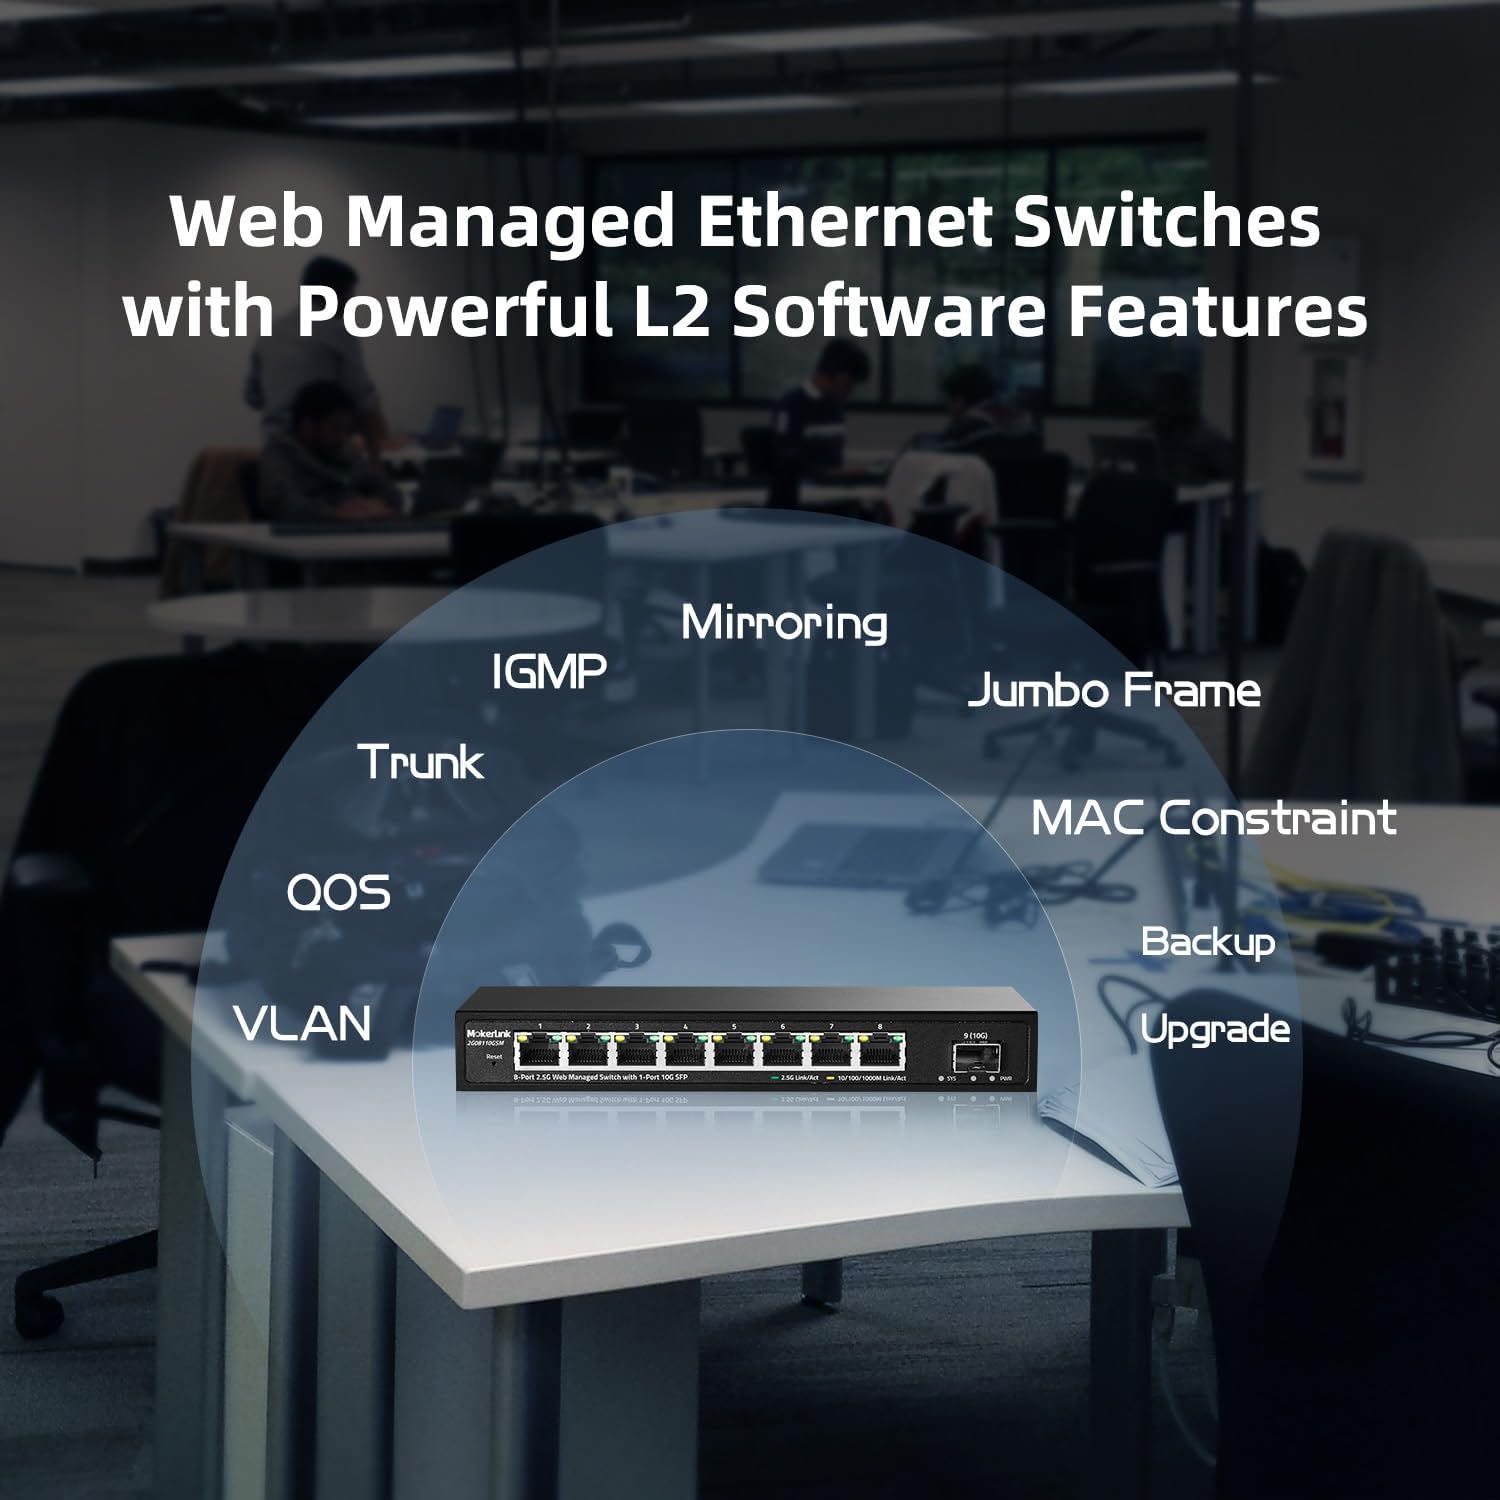
3.2 Advanced Layer 2 Features
The web management interface allows configuration of various Layer 2 features to optimize your network:
- VLAN (Virtual Local Area Network): Segment your network into smaller, isolated broadcast domains to improve security and performance.
- QoS (Quality of Service): Prioritize network traffic for critical applications (e.g., voice, video) to ensure smooth performance.
- LACP (Link Aggregation Control Protocol): Combine multiple physical links into a single logical link for increased bandwidth and redundancy (available in Version 1.9 and above).
- IGMP (Internet Group Management Protocol): Optimize multicast traffic delivery, useful for streaming video and other multicast applications.
- MAC Address Table: View and manage the MAC address table for connected devices.
- Diagnosis: Utilize built-in diagnostic tools for network troubleshooting.
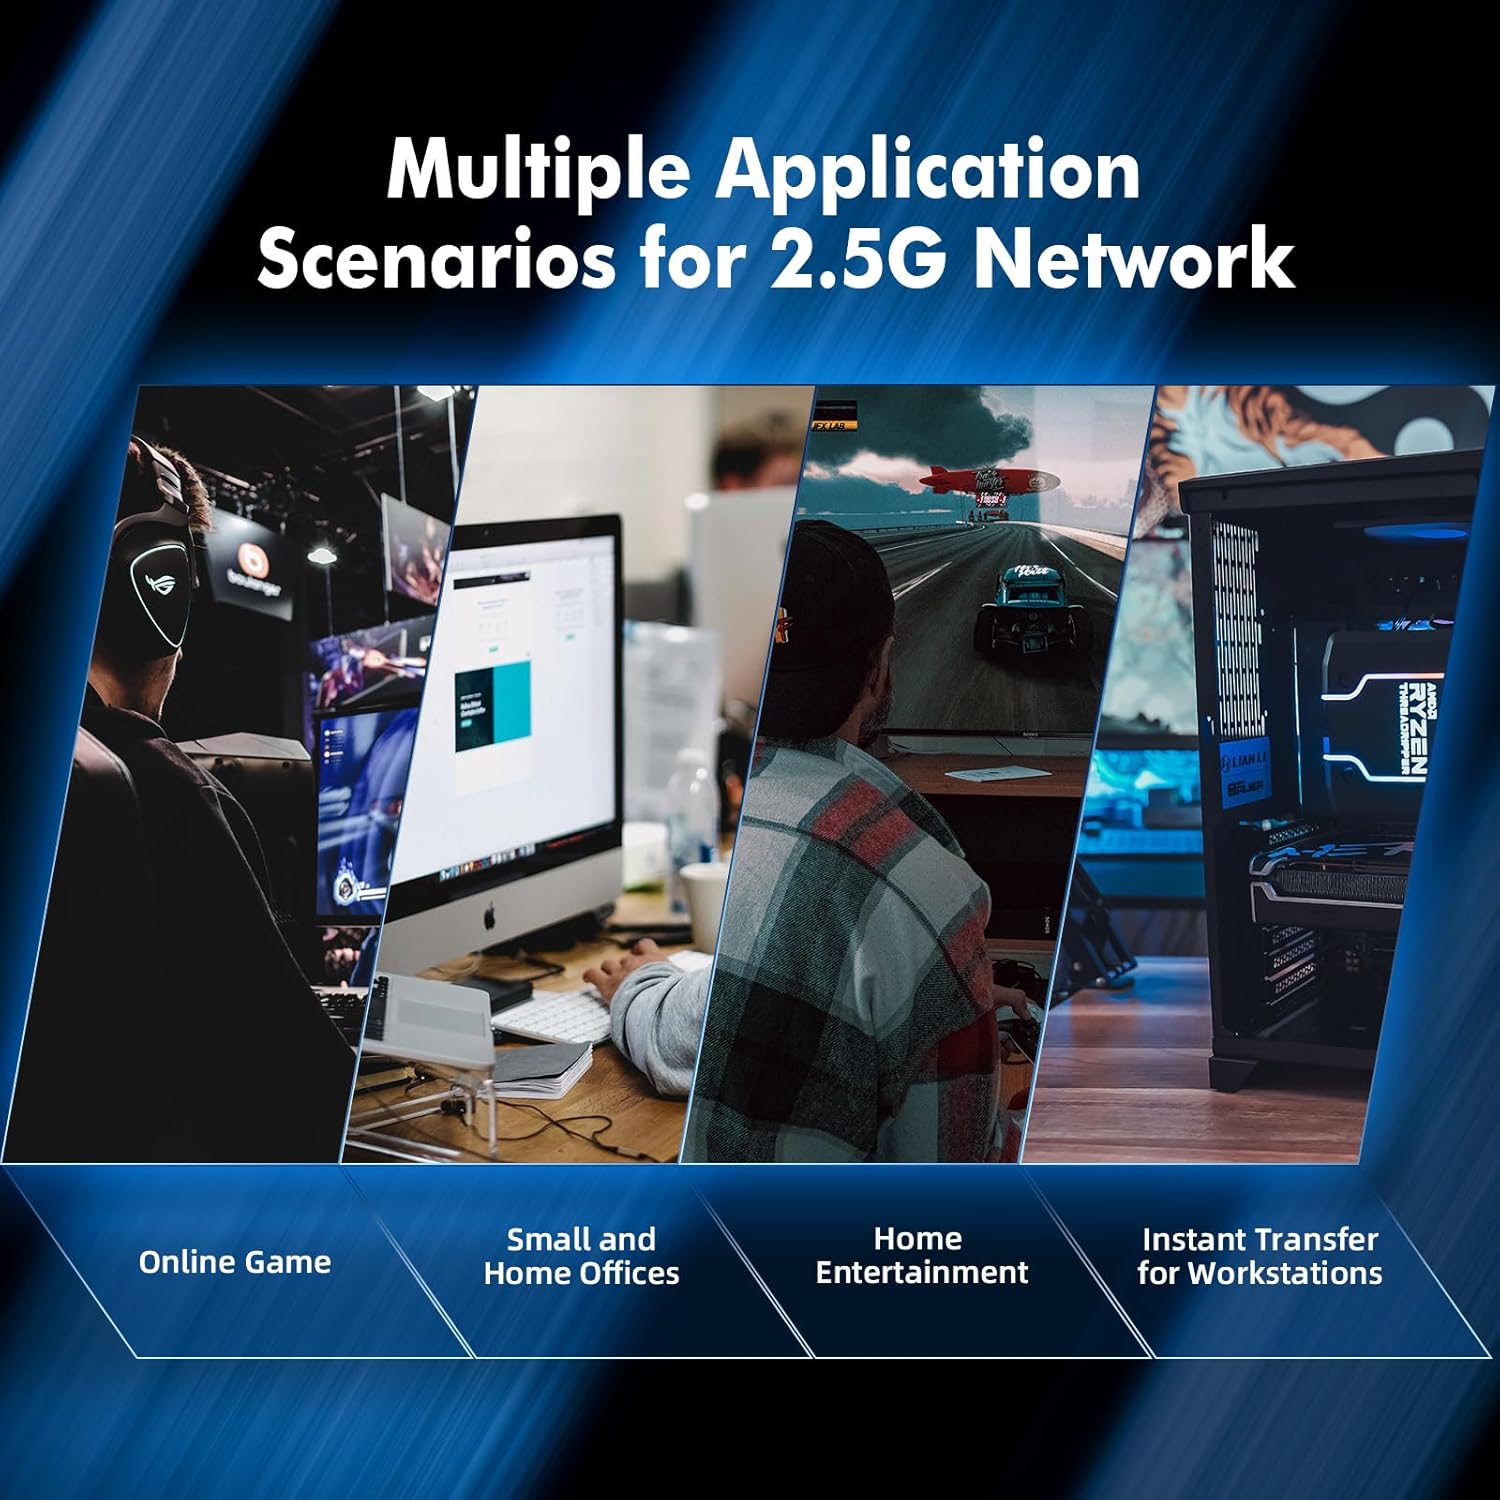
3.3 Application Scenarios
The MokerLink 2.5G Managed Switch is versatile and suitable for various high-bandwidth applications:
- Home Entertainment: Enhance streaming of 4K video and online gaming.
- Small and Home Offices: Provide reliable and fast connectivity for multiple workstations and servers.
- Workstations: Facilitate instant data transfer for demanding tasks.
- Network Attached Storage (NAS): Maximize data transfer speeds to and from NAS devices.
- WiFi 6 Access Points: Provide multi-gigabit backhaul for high-performance wireless networks.
4. Maintenance
- Fanless Design: The switch's fanless design minimizes noise and reduces power consumption, requiring less active cooling maintenance.
- LED Monitoring: Regularly check the PWR, SYS, and Link/Act LEDs to ensure the switch is operating correctly and all connections are active.
- Cleaning: Keep the switch clean and free from dust. Use a soft, dry cloth for cleaning. Do not use liquid or aerosol cleaners.
- Ventilation: Ensure adequate airflow around the switch to prevent overheating, even with its fanless design. Do not block the ventilation holes.
- Firmware Updates: Periodically check the MokerLink official website for firmware updates to ensure optimal performance and access to new features. Firmware updates can typically be performed via the web management interface.
5. Troubleshooting
5.1 No Power
- Ensure the power adapter is securely connected to the switch and a working power outlet.
- Verify that the power outlet is supplying power.
- Check if the PWR LED on the switch is illuminated.
5.2 No Link/Activity on Port
- Verify that the Ethernet cable is securely connected to both the switch port and the connected device.
- Ensure the connected device is powered on and functioning correctly.
- Try a different Ethernet cable.
- Test with a different port on the switch.
- Check the Link/Act LED for the specific port. If it's off, there's no link. If it's orange, it's a 10/100/1000Mbps link. If it's green, it's a 2.5Gbps link.
5.3 Cannot Access Web Management Interface
- Ensure your computer's IP address is configured to be in the same subnet as the switch's default IP (e.g.,
192.168.2.xfor the switch's default192.168.2.1). - Verify that you are using the correct default IP address (
192.168.2.1) and login credentials (username:admin, password:admin). - Try a different web browser or clear your browser's cache.
- Temporarily disable any firewall or antivirus software on your computer that might be blocking access.
- If the switch's IP address has been changed and forgotten, or if the web UI is unresponsive, perform a factory reset.
5.4 Resetting the Switch
The switch has a reset button for recovery:
- Short Press: A short press (less than 5 seconds) of the reset button will restart the device.
- Long Press: A long press (more than 5 seconds) of the reset button will restore the switch to its factory default settings. This will revert the IP address to
192.168.2.1and login credentials toadmin/admin.
6. Technical Specifications
| Feature | Specification |
|---|---|
| Model Number | 5*2.5G Managed |
| Number of Ports | 5 x 2.5Gbe Base-T Ports, 1 x 10G SFP+ Port |
| Data Transfer Rate | 10/100/1000Mbps/2.5Gbps (Ethernet), 1G/2.5G/10G (SFP+) |
| Backplane Bandwidth | 45Gbps |
| Case Material | Metal |
| Dimensions (L x W x H) | 5.51 x 3.66 x 1.1 inches |
| Item Weight | 1.01 pounds |
| Power Supply | DC 12V/2A (External Power Adapter) |
| Management | Web GUI Managed (L2 features: VLAN, QoS, LACP, IGMP, etc.) |
| Cooling | Fanless |
7. Warranty Information
MokerLink products are designed and manufactured to the highest quality standards. For specific warranty terms and conditions, please refer to the warranty card included with your product or visit the official MokerLink website. Please retain your proof of purchase for warranty claims.
8. Customer Support
If you encounter any issues or have questions regarding your MokerLink 5 Port 2.5G Managed Ethernet Switch, please contact MokerLink customer support. Contact information can typically be found on the product packaging, the official MokerLink website, or through your point of purchase.


