
1. Introduction
Thank you for choosing the eLinkSmart Fingerprint Padlock. This keyless biometric lock offers enhanced security and convenience for various indoor applications. This manual provides detailed instructions on how to set up, operate, and maintain your padlock to ensure optimal performance.
The eLinkSmart Fingerprint Padlock is designed for quick and secure access using your unique fingerprint. It eliminates the need for keys or combinations, making it ideal for gym lockers, school lockers, backpacks, suitcases, and other personal belongings.
2. Product Overview
The eLinkSmart Fingerprint Padlock features a robust design with advanced biometric technology. Key features include:
- Fingerprint Unlock: Quick access in approximately 1 second. Supports up to 20 fingerprints, including 2 administrator fingerprints.
- Long Battery Life: Equipped with a 110mAh rechargeable lithium battery, providing up to 6 months of standby time or over 2000 unlocks on a single charge.
- USB Rechargeable: Conveniently recharge the padlock using a standard USB power source or power bank.
- Durable Construction: Made of zinc alloy with a stainless steel shackle for superior cut resistance.
- Compact and Portable: Small size (3.2 x 3.2 x 1.3 cm) and lightweight (0.06 kg) for easy portability.
- Versatile Indoor Use: Suitable for gym lockers, school lockers, toolboxes, cases, chests, cabinets, and more.

Image: The eLinkSmart Fingerprint Padlock securely attached to a locker door, demonstrating its intended use in a gym or school environment.

Image: A visual comparison highlighting the advantages of the eLinkSmart Fingerprint Padlock over traditional combination and key locks, emphasizing no forgotten passwords or lost keys.
3. Specifications
| Feature | Description |
|---|---|
| Brand | eLinkSmart |
| Lock Type | Biometric (Fingerprint) |
| Special Features | Fingerprint, USB Charge, Gym Padlock |
| Material | Zinc Alloy body, Stainless Steel shackle |
| Dimensions (L x W x H) | 1.3 x 0.59 x 2.31 inches (3.2 x 1.5 x 5.87 cm) |
| Shackle Diameter | 0.4 cm (4mm) |
| Shackle Inner Length | 2.2 cm |
| Shackle Inner Width | 1.8 cm |
| Battery | 110mAh Lithium Battery |
| Fingerprint Capacity | Up to 20 (2 administrators) |

Image: A detailed diagram illustrating the dimensions of the eLinkSmart Fingerprint Padlock, including body size and shackle measurements.
4. Setup Instructions
4.1 Initial Charging
Before first use, fully charge the padlock. Connect the padlock to a USB power source (e.g., computer, wall adapter, power bank) using a micro-USB cable. The LED indicator will show charging status.
4.2 LED Indicator Guide
Understanding the LED indicators is crucial for setup and operation:

Image: A guide explaining the different LED light patterns and their meanings, such as flashing blue for admin setting, green for successful verification, and red for low battery or failed verification.
- Blue Flashing: Experience Mode / Admin Setting
- Green Flashing: Fingerprint Registration
- Green Solid: Verification Successful
- Red Flashing: Low Battery Alarm
- Red Solid: Verification Failed
4.3 Registering Administrator Fingerprints (First Two Fingerprints)
The first two fingerprints registered will automatically be designated as administrator fingerprints. Only administrators can add or delete other user fingerprints.
- Ensure the padlock is charged.
- Press and hold the fingerprint sensor for approximately 5-8 seconds until the blue LED flashes. Release your finger.
- Place your finger on the sensor. The green LED will flash. Lift and place your finger repeatedly from different angles (at least 5-10 times) until the green LED turns solid. This indicates successful registration of one fingerprint.
- Repeat step 3 for a second fingerprint. These two are your administrator fingerprints.
4.4 Registering User Fingerprints (3rd to 20th Fingerprint)
After registering administrator fingerprints, you can add up to 18 more user fingerprints.
- Wake up the padlock by touching the sensor briefly.
- Place an administrator's finger on the sensor. The green LED will flash, indicating successful verification.
- Immediately after the green flash, press and hold the sensor for approximately 5-8 seconds until the blue LED flashes. Release your finger.
- Place the new user's finger on the sensor. The green LED will flash. Lift and place the finger repeatedly from different angles (at least 5-10 times) until the green LED turns solid. This indicates successful registration.
- Repeat step 4 for additional user fingerprints.

Image: Illustrates the secure fingerprint recognition technology, showing that the padlock does not accept fingerprint copies or simulated fingers, ensuring high security.
4.5 Deleting All Fingerprints (Factory Reset)
This action will delete all registered fingerprints and reset the padlock to its factory default state. Only an administrator can perform this action.
- Wake up the padlock by touching the sensor briefly.
- Place an administrator's finger on the sensor. The green LED will flash.
- Immediately after the green flash, press and hold the sensor for approximately 10-15 seconds until the red LED flashes. Release your finger.
- Place the administrator's finger on the sensor again. The green LED will flash, confirming all fingerprints have been deleted.
5. Operating Instructions
5.1 Unlocking the Padlock
To unlock the padlock:
- Place any registered finger on the fingerprint sensor.
- If the fingerprint is recognized, the green LED will flash, and the padlock will unlock automatically.
- If the fingerprint is not recognized, the red LED will flash, and the padlock will remain locked. Try again with a registered finger.
5.2 Low Battery Indication
When the battery is low, the red LED will flash during operation. This indicates that the padlock needs to be recharged soon. The padlock can still be unlocked multiple times after the low battery warning, but it is recommended to charge it promptly.
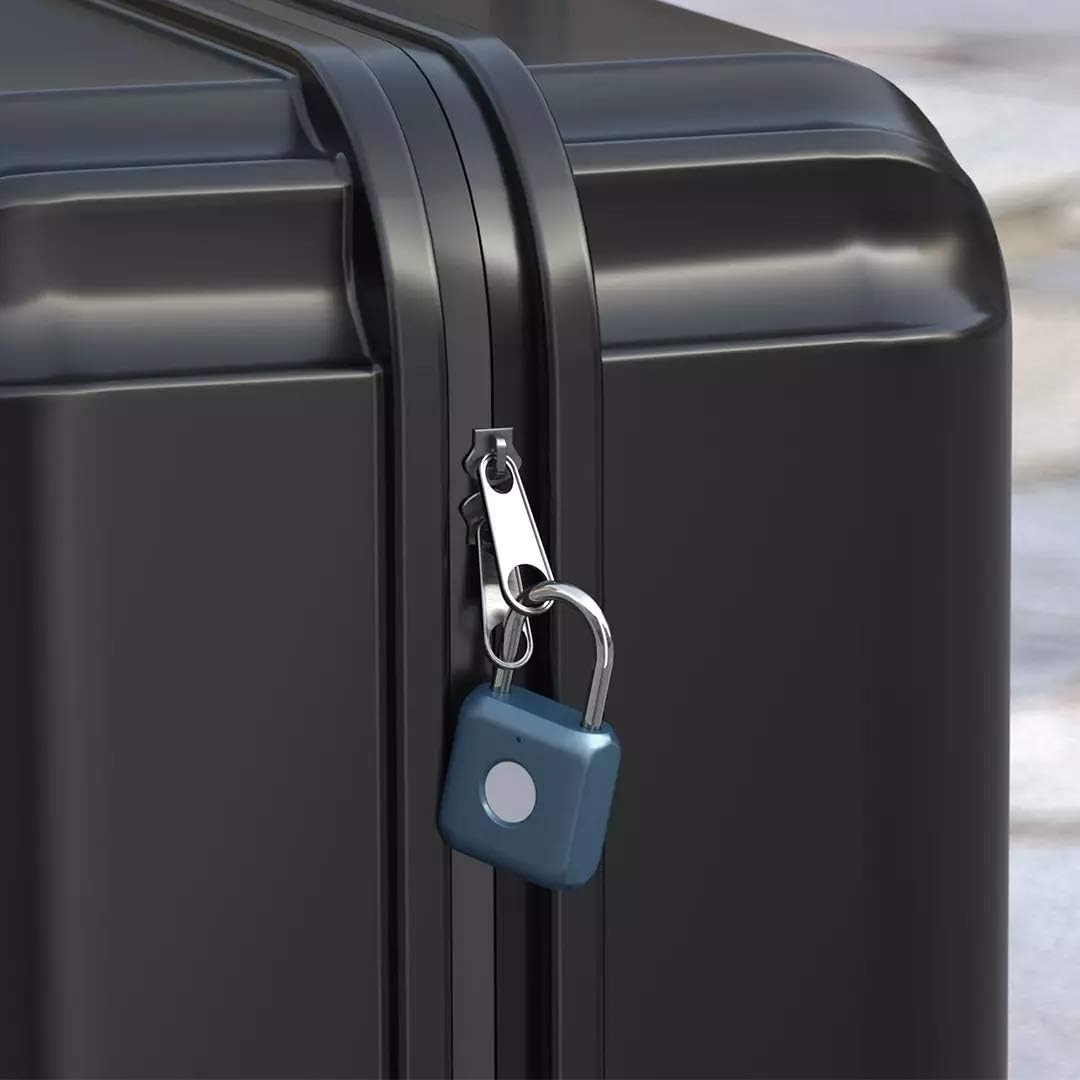
Image: The eLinkSmart Fingerprint Padlock attached to the zipper of a piece of luggage, demonstrating its suitability for travel security.

Image: A collage showing the eLinkSmart Fingerprint Padlock used in various scenarios, including on a backpack, a gate latch, and luggage, highlighting its versatility.
6. Maintenance
- Charging: Recharge the padlock regularly, especially when the low battery indicator appears. Use a standard 5V USB charger.
- Cleaning: Wipe the padlock body and fingerprint sensor with a soft, dry cloth. Avoid using abrasive cleaners or solvents.
- Storage: Store the padlock in a dry environment. Avoid extreme temperatures or direct sunlight.
- Fingerprint Sensor: Ensure the fingerprint sensor is clean and free of dirt or moisture for optimal performance.
7. Troubleshooting
- Padlock not unlocking:
- Ensure your finger is clean and dry.
- Try different angles or positions of your registered finger on the sensor.
- Check the battery level. If the red LED flashes, recharge the padlock.
- Ensure the fingerprint you are using is registered.
- Cannot register new fingerprints:
- Ensure you are using an administrator's finger to initiate the registration process.
- Make sure the padlock has sufficient battery.
- The padlock can store up to 20 fingerprints. If it's full, you may need to delete existing fingerprints.
- Padlock is unresponsive:
- The battery might be completely depleted. Connect it to a USB charger for a few minutes to revive it.
- If the issue persists, perform a factory reset (delete all fingerprints) and re-register.
8. Warranty and Support
eLinkSmart products are designed for reliability and performance. For warranty information or technical support, please refer to the official eLinkSmart website or contact their customer service directly. Please retain your proof of purchase for any warranty claims.
For further assistance, visit: eLinkSmart Store on Amazon

