
1. Introduction
This manual provides essential instructions for the safe and efficient operation of your SINGER C7250 Computerized Sewing & Quilting Machine. Please read it thoroughly before first use and keep it for future reference.
The SINGER C7250 is designed for both beginners and experienced sewists, featuring an intuitive LCD screen and a wide range of stitch options. It includes an extension table for larger projects and a durable metal frame for stability.
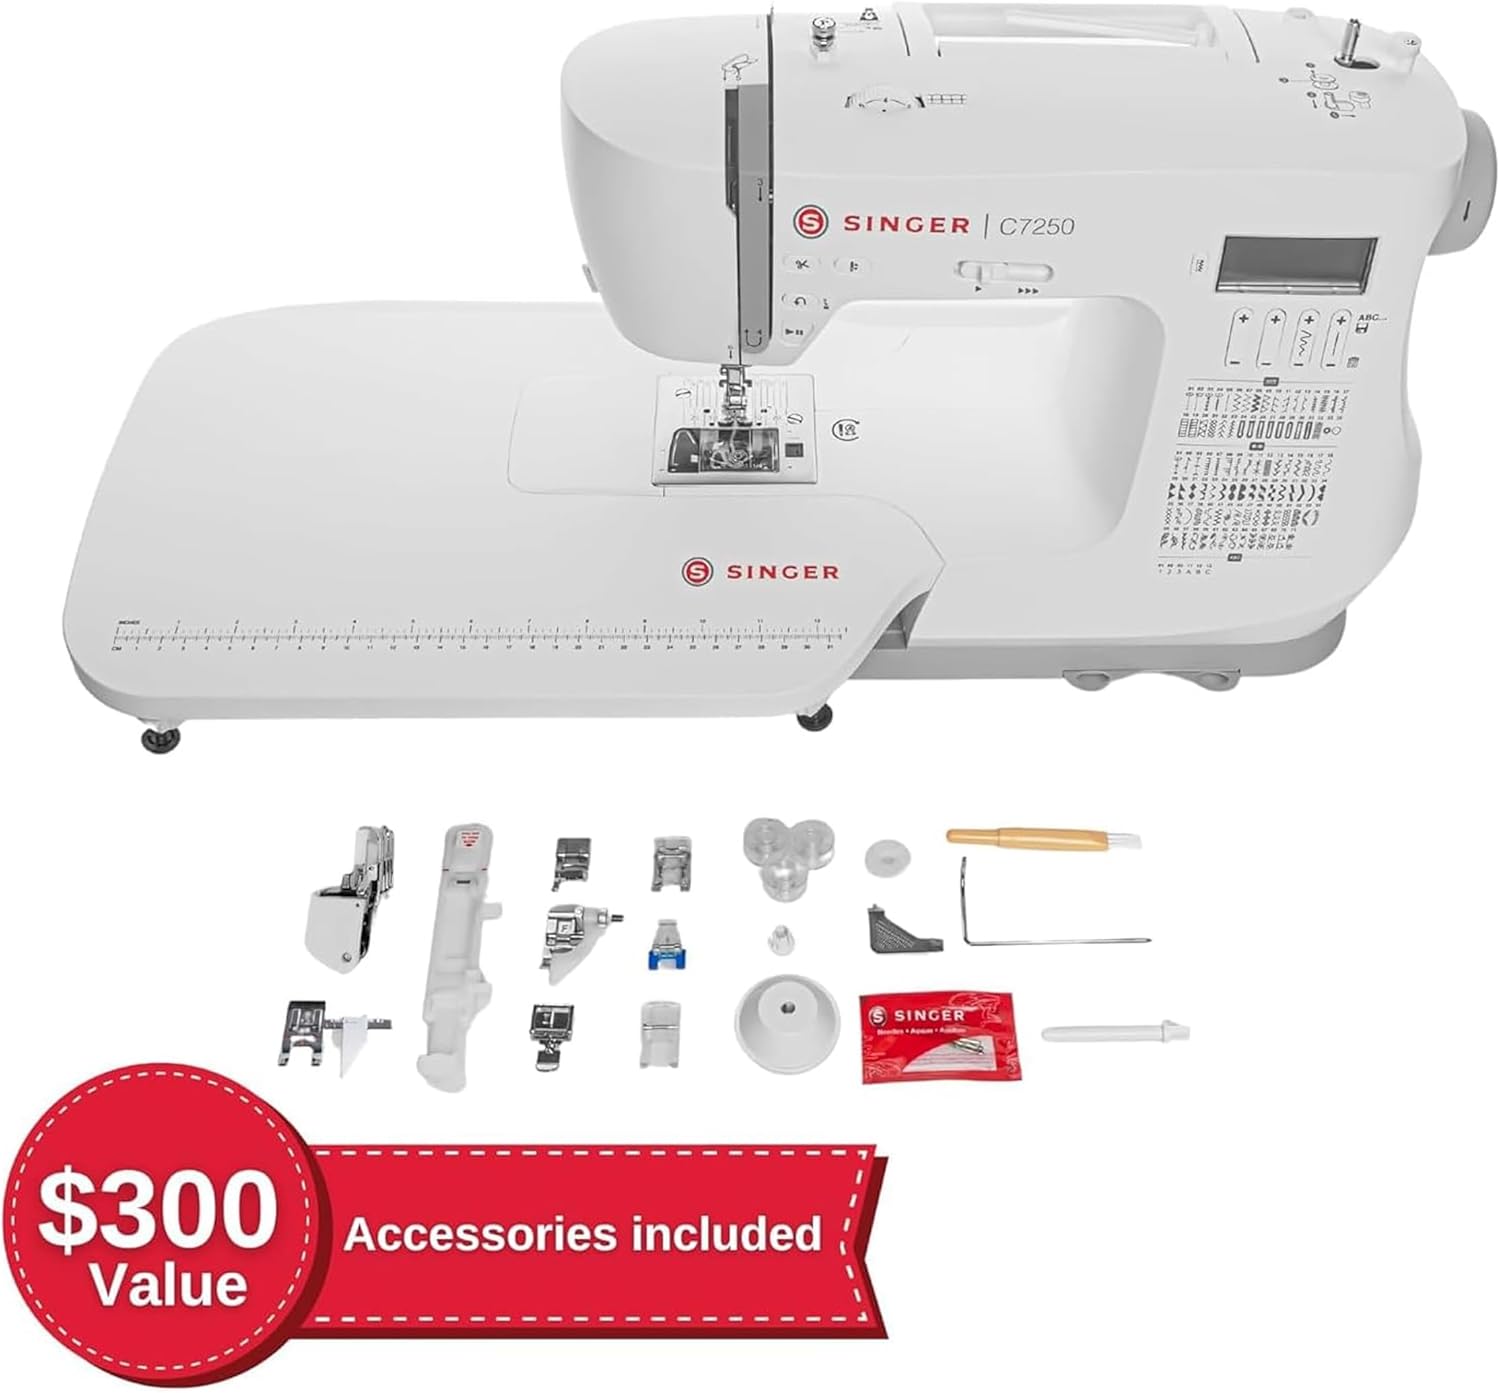
Figure 1.1: Front view of the SINGER C7250 Computerized Sewing Machine.
2. Setup
2.1 Unpacking and Placement
Carefully remove the machine from its packaging. Place the machine on a stable, flat surface. Ensure adequate lighting and space for your projects.
2.2 Attaching the Extension Table
The extension table provides additional workspace, which is particularly useful for quilting and larger projects. To attach, slide the extension table onto the free arm of the machine until it clicks securely into place.

Figure 2.1: SINGER C7250 with the extension table attached and included accessories.
2.3 Power Connection
Connect the power cord to the machine and then to a suitable electrical outlet. Use only the power cord supplied with your machine.
2.4 Bobbin Winding and Insertion
Your machine uses a top drop-in bobbin system for easy monitoring of thread supply. Refer to the markings on the machine for correct bobbin winding and insertion. Ensure the bobbin is inserted correctly for proper stitch formation.
Video 2.1: Overview of SINGER machine features, including the extension table and accessories. This video demonstrates general machine handling and setup aspects.
3. Operation
3.1 Stitch Selection and Adjustment
The C7250 offers 200 built-in stitches and 417 stitch applications. Use the LCD screen and control buttons to select your desired stitch. The machine automatically sets the optimum stitch length and width, which can then be customized as needed.

Figure 3.1: LCD screen displaying stitch selection and available stitch patterns.
3.2 One-Step Buttonholes
Select from 8 different buttonhole styles. The one-step buttonhole feature ensures consistent results. Attach the buttonhole foot and follow the on-screen instructions.
3.3 Built-in Lettering
Personalize your projects using the built-in lettering function. Select characters via the LCD screen to create names, phrases, or monograms.
3.4 Speed Control and Start/Stop Button
Adjust the sewing speed using the speed control lever for precision on intricate details or faster sewing on long seams. The Start/Stop button allows for foot-free operation.
3.5 Programmable Needle Up/Down
This feature is ideal for quilting, appliqué, and topstitching, allowing the needle to stop in either the up or down position as programmed.
3.6 Free Arm Sewing
Remove the accessory storage compartment to access the free arm, which simplifies sewing cuffs, sleeves, trouser hems, and other small, circular projects.
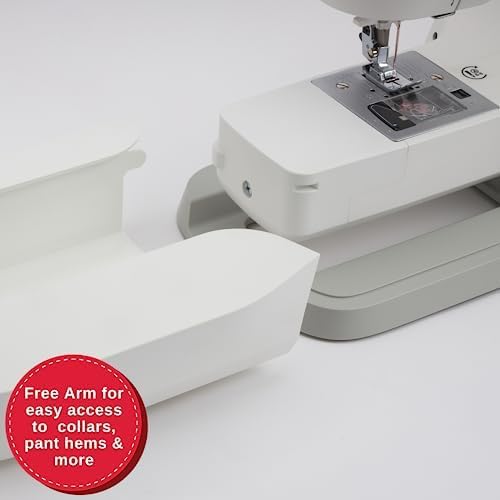
Figure 3.2: The free arm feature, useful for sewing cylindrical items.
4. Included Accessories
Your SINGER C7250 machine comes with a comprehensive accessory kit to support a wide range of sewing techniques:
- Presser Feet: Even Feed/Walking Foot, Sew Easy Foot, All Purpose Foot, Satin Stitch Foot, Blind Hem Foot, Zipper Foot, Buttonhole Foot, Button Sewing Foot, Open Toe Foot, Cording Foot.
- Extension Table
- Seam Ripper/Lint Brush
- Edge/Quilting Guide
- Pack of Needles
- Bobbins (Class 15 transparent)
- Spool Caps
- Auxiliary Spool Pin
- Spool Pin Felt
- Screwdriver

Figure 4.1: The SINGER C7250 machine with a selection of included accessories.
5. Maintenance
Regular maintenance ensures the longevity and optimal performance of your sewing machine.
5.1 Cleaning
Periodically clean the bobbin area and feed dogs to remove lint and thread buildup. Use the provided lint brush or a small, soft brush. Ensure the machine is unplugged before cleaning.
5.2 Needle Replacement
Replace needles regularly, especially when sewing different fabric types or if the needle becomes bent or dull. A dull needle can cause skipped stitches or damage fabric.
5.3 Storage
When not in use, cover the machine to protect it from dust. Store it in a dry, stable environment.
6. Troubleshooting
This section addresses common issues you might encounter. For more complex problems, refer to the full user manual or contact customer support.
| Problem | Possible Cause | Solution |
|---|---|---|
| Skipped Stitches | Incorrect needle, bent needle, improper threading, wrong needle size for fabric. | Replace needle, re-thread machine, use correct needle type and size for fabric. |
| Thread Breaking | Incorrect tension, poor quality thread, bent needle, improper threading, burrs on needle plate. | Adjust tension, use quality thread, replace needle, re-thread machine, check for burrs. |
| Fabric Puckering | Incorrect tension, wrong stitch length, inappropriate presser foot. | Adjust tension, select appropriate stitch length, use correct presser foot. |
| Machine Jams | Thread tangled in bobbin case, lint buildup, incorrect bobbin insertion. | Remove bobbin case and clear tangled thread, clean bobbin area, re-insert bobbin correctly. |
7. Specifications
- Brand: SINGER
- Model Number: C7250 (230344112)
- Color: White
- Material: Metal, Plastic
- Product Dimensions (D x W x H): 14" x 21" x 11"
- Item Weight: 14 pounds
- Power Source: Corded Electric
- Number of Built-in Stitches: 200
- Number of Stitch Applications: 417
- Buttonhole Styles: 8 (One-Step)
- Included Components: Accessories kit, Extension Table
- GTIN/UPC: 840163302418
8. Warranty and Support
For warranty information, technical support, or service inquiries, please refer to the official SINGER website or contact SINGER customer service directly. Keep your purchase receipt as proof of purchase.
You can also find additional resources and frequently asked questions on the SINGER Brand Store.


