Introduction
This manual provides comprehensive instructions for the installation, operation, and maintenance of your Cuifati B75 S Mining Mainboard. This ATX DDR3 LGA1155 Desktop Motherboard is designed to support various Intel Core processors and offers robust performance for desktop computing and mining applications. It features dual-channel DDR3 memory slots, multiple output interfaces including VGA, DVI, and HD Multimedia Interface, and Gigabit Ethernet support.

Figure 1: Overview of the Cuifati B75 S Mining Mainboard.
Setup and Installation
Follow these steps to properly install your B75 S Mining Mainboard into your computer system.
1. Preparing the Motherboard
Ensure you are working in a static-free environment. Place the motherboard on an anti-static mat or in its original anti-static bag before installation.
2. Installing the CPU
- Locate the LGA1155 CPU socket on the motherboard.
- Gently lift the load lever and open the CPU socket cover.
- Align the CPU with the socket, ensuring the golden triangle on the CPU matches the triangle on the socket. Do not force the CPU into place.
- Lower the CPU into the socket, close the cover, and secure it with the load lever.

Figure 2: Diagram illustrating the various components and interfaces on the B75 S Mainboard, including the LGA1155 CPU socket.
3. Installing RAM (DDR3 Memory)
The motherboard features dual-channel DDR3 memory slots for enhanced performance.
- Open the clips at both ends of the DDR3 memory slots.
- Align the notch on the DDR3 memory module with the key in the memory slot.
- Press down firmly on both ends of the memory module until the clips snap into place.

Figure 3: The DDR3 dual channel memory slots, designed to significantly improve motherboard performance.
4. Connecting Power Supply
- Connect the 24-pin ATX power connector from your power supply unit (PSU) to the corresponding port on the motherboard.
- Connect the 4-pin CPU power connector (ATX_12V) to its designated port near the CPU socket.
5. Installing Storage Devices (SATA)
Connect your SATA hard drives or SSDs to the SATA ports on the motherboard. This motherboard supports SATA 2.0 and SATA 3.0.

Figure 4: Illustrates the process of connecting a SATA cable for storage devices.
6. Connecting Front Panel Connectors
Connect the power switch, reset switch, HDD LED, and power LED connectors from your PC case to the corresponding pins on the motherboard's front panel header. Refer to the motherboard diagram for exact pin locations.
7. Connecting Peripherals
Connect your monitor to the appropriate video output (VGA, DVI, or HD Multimedia Interface) on the motherboard's rear I/O panel. Connect USB devices, keyboard, and mouse to the available ports.
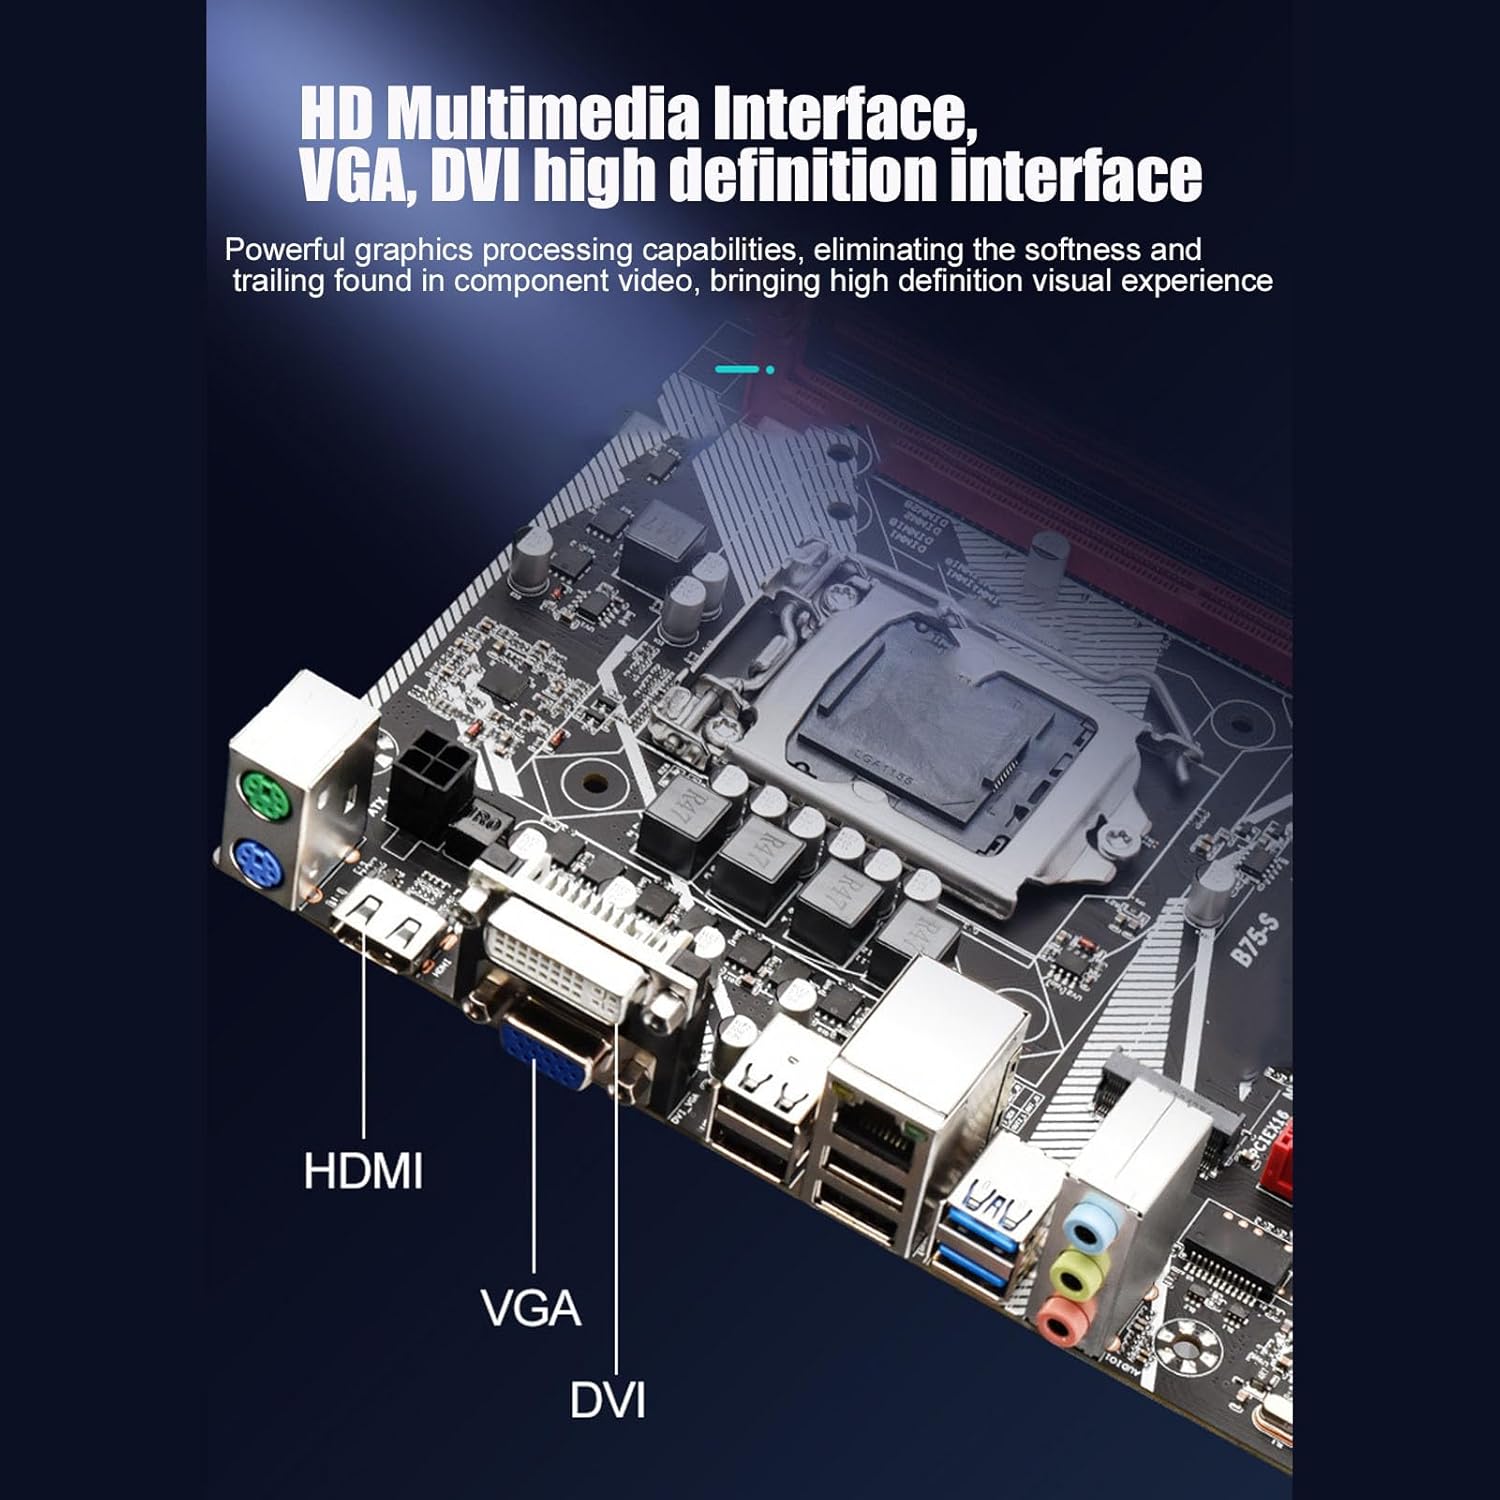
Figure 5: The rear I/O panel featuring HD Multimedia Interface, VGA, and DVI ports for high-definition visual output.

Figure 6: Detailed view of the rear I/O ports, including USB 2.0, USB 3.0, Gigabit Ethernet, and audio jacks.
Operating Instructions
Once all components are installed and connected, you can power on your system.
1. First Boot
- After connecting all necessary cables, turn on the power supply.
- Press the power button on your PC case.
- The system should boot up and display the BIOS/UEFI screen or begin the operating system installation process.
2. BIOS/UEFI Configuration
During the initial boot, press the designated key (usually DEL or F2) to enter the BIOS/UEFI setup. Here you can configure boot order, system time, and other advanced settings. Ensure your storage devices are recognized and set the correct boot priority for your operating system installation media.
3. Operating System Installation
Insert your Windows 10 (or other compatible OS) installation media (USB drive or DVD) and follow the on-screen prompts to install the operating system. After installation, install the necessary drivers for the motherboard components, including chipset, audio, LAN, and graphics drivers.
4. Utilizing Features
- Front USB 3.0 Interface: Connect compatible devices to the front USB 3.0 ports for faster data transfer speeds (up to 10x faster than USB 2.0).
- Gigabit Ethernet: For high-performance network connectivity, connect your Ethernet cable to the Gigabit LAN port. This is ideal for online gaming and high-speed data transfer.
- HD Multimedia Interface: Use the HD Multimedia Interface port for high-definition audio and video output to compatible displays.
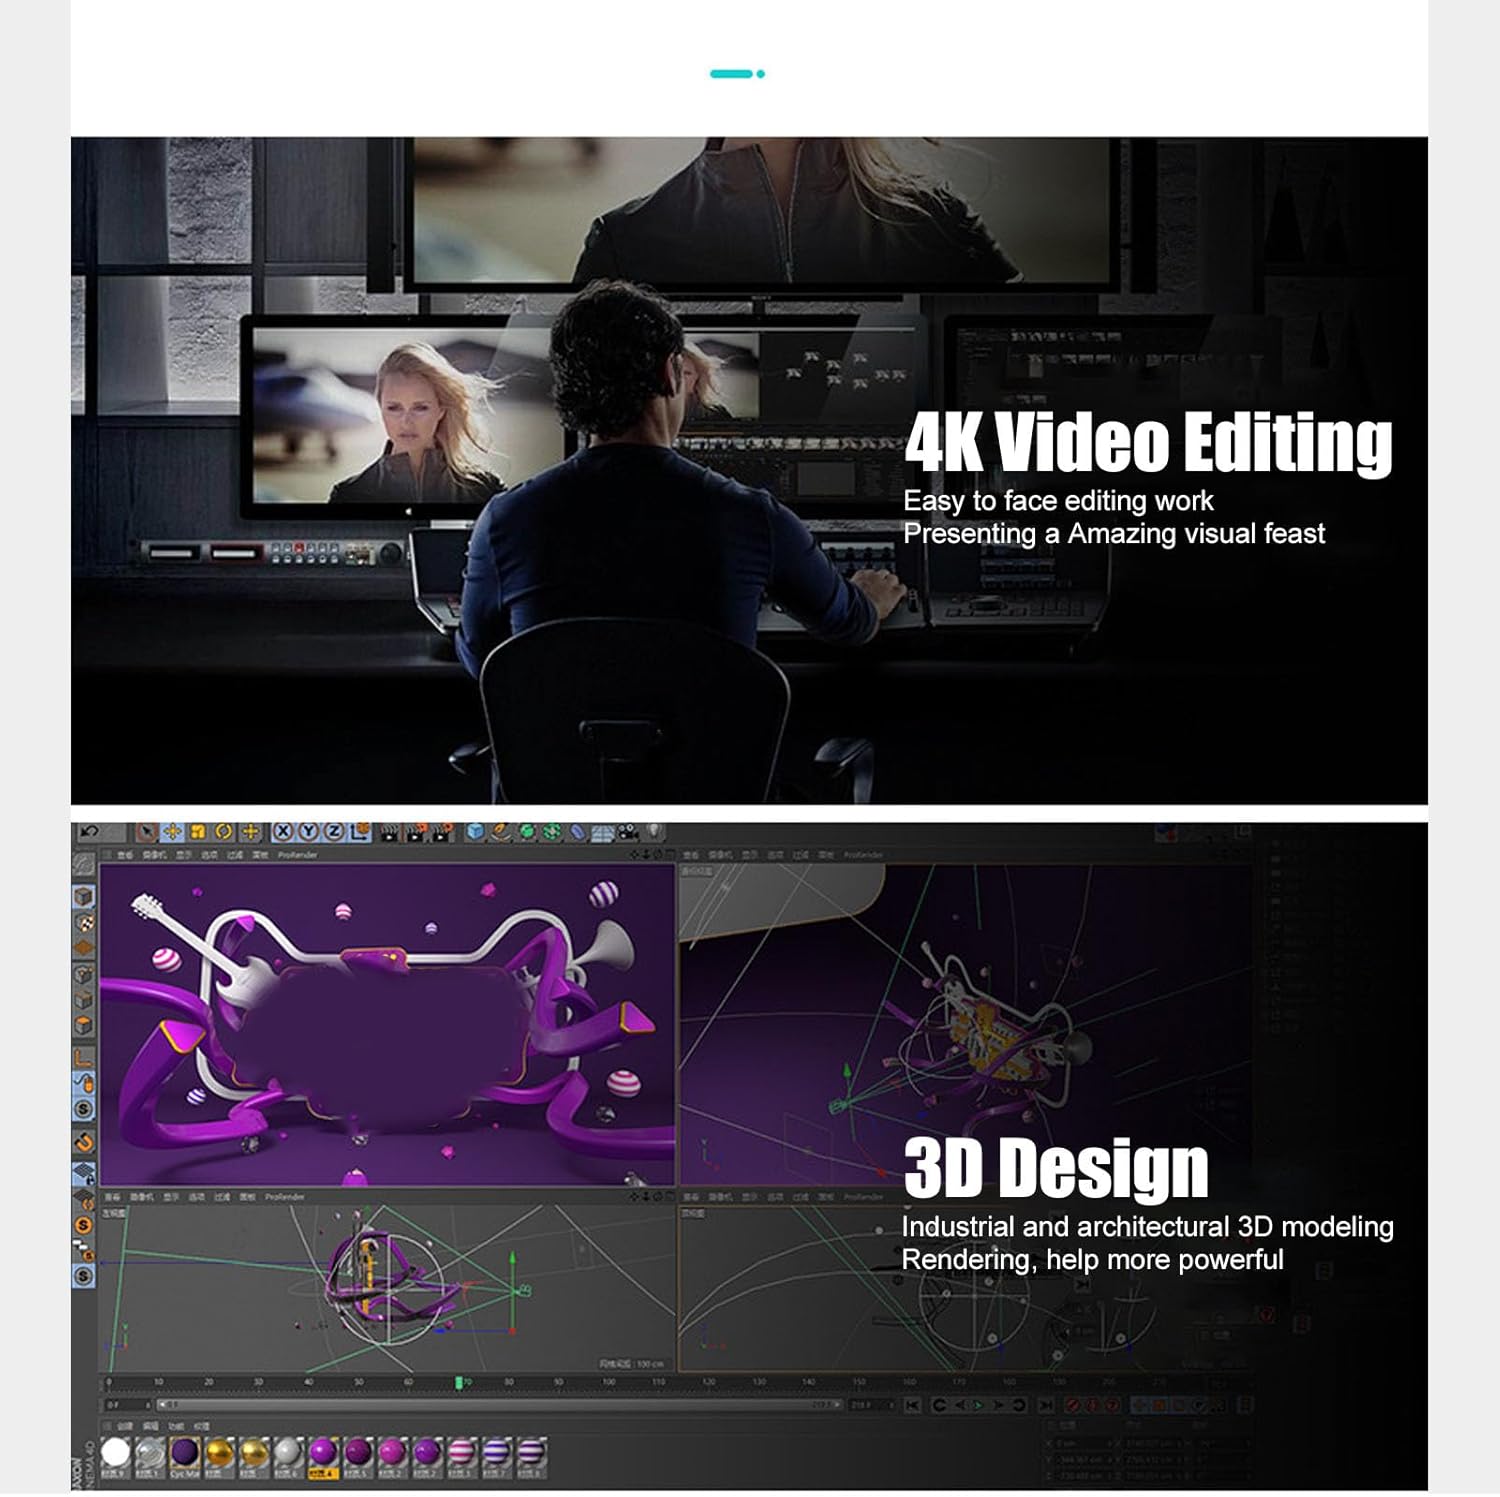
Figure 7: The motherboard's capabilities support demanding tasks such as 4K video editing and 3D design, providing a powerful visual experience.
Maintenance
Proper maintenance ensures the longevity and optimal performance of your motherboard.
- Dust Removal: Regularly clean dust from inside your PC case, especially around the motherboard, CPU cooler, and fan vents. Use compressed air for best results. Ensure the system is powered off and unplugged before cleaning.
- Temperature Monitoring: Monitor CPU and chipset temperatures using system monitoring software to prevent overheating. Ensure adequate airflow within the PC case.
- Driver Updates: Keep your motherboard drivers (chipset, audio, LAN, etc.) updated to the latest versions from the manufacturer's website for improved stability and performance.
- Solid Capacitors: The motherboard utilizes all solid-state capacitors, which contribute to its stability and extended lifespan. While these are highly durable, proper cooling and power supply are still essential.
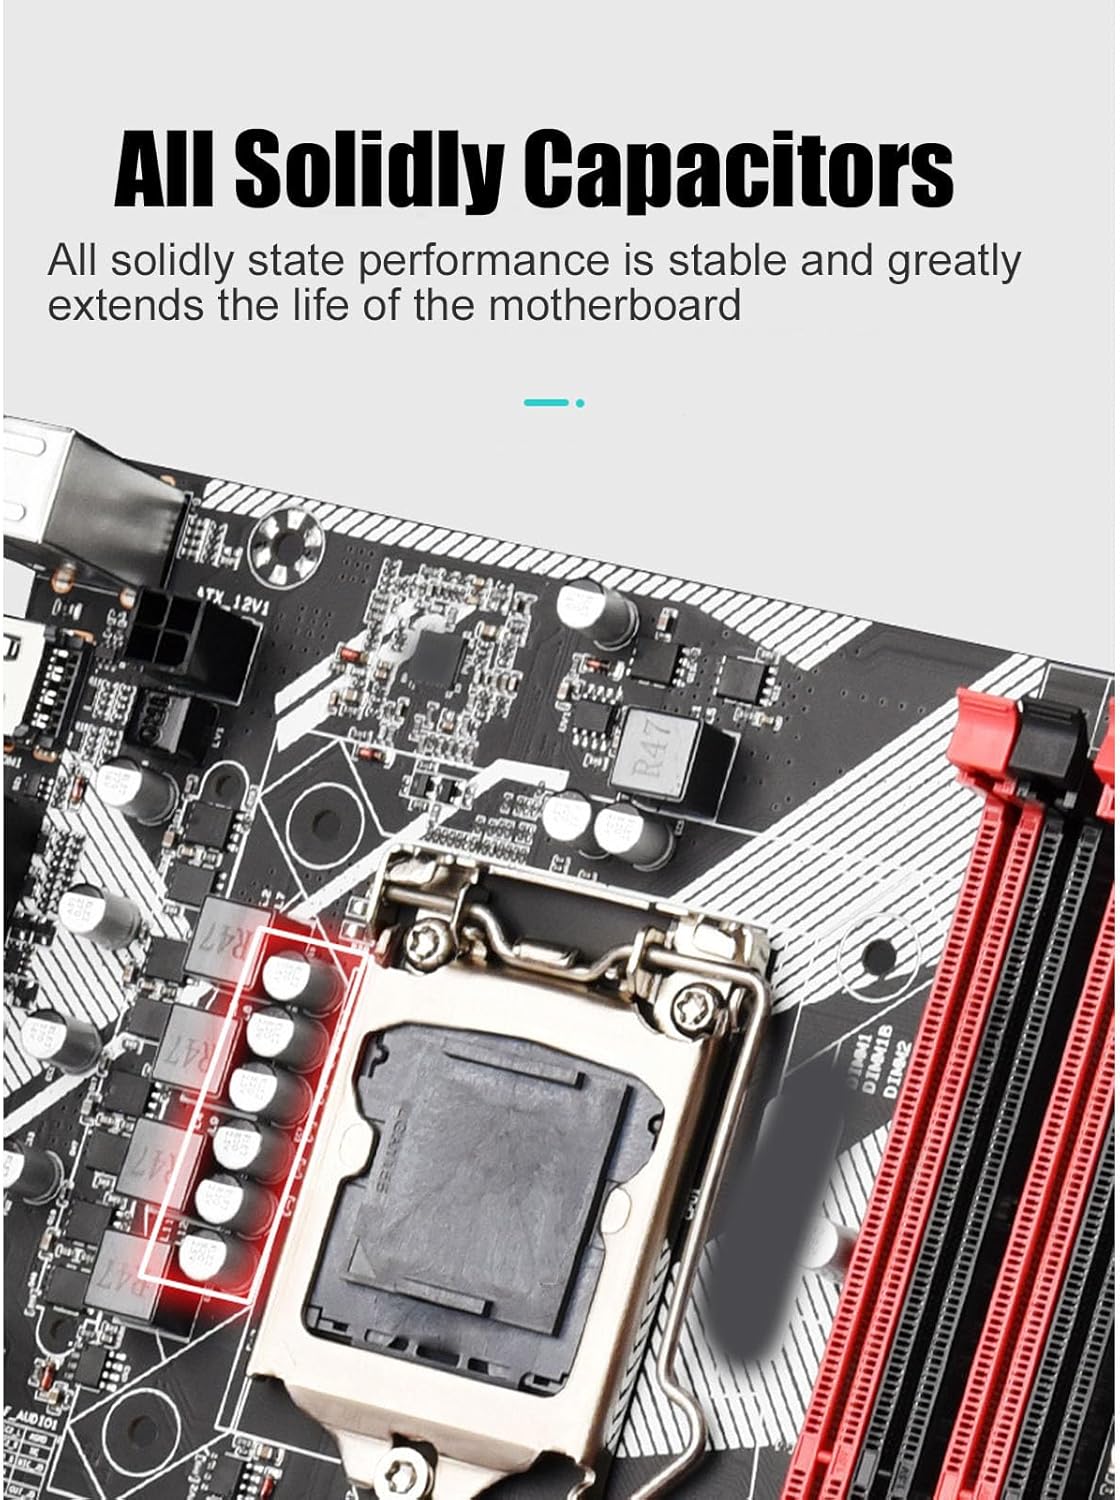
Figure 8: The all solid-state capacitors on the motherboard ensure stable performance and extended durability.
Troubleshooting
This section addresses common issues you might encounter.
- No Power/No Boot:
- Check if the power supply unit (PSU) is properly connected to the motherboard (24-pin ATX and 4-pin CPU power).
- Ensure the front panel power switch connector is correctly attached to the motherboard.
- Verify the PSU is switched on and receiving power from the wall outlet.
- No Display:
- Ensure the monitor is properly connected to the motherboard's video output (VGA, DVI, or HD Multimedia Interface) and is powered on.
- Reseat the RAM modules. Incorrectly seated RAM is a common cause of no display.
- If using a dedicated graphics card, ensure it is properly seated in the PCIe slot and has adequate power.
- System Instability/Crashes:
- Check for overheating. Ensure CPU cooler is properly installed and fans are working.
- Run memory diagnostic tools to check for faulty RAM.
- Update motherboard chipset drivers and BIOS/UEFI firmware.
- USB Devices Not Recognized:
- Ensure USB drivers are installed.
- Try connecting the device to a different USB port.
- Check BIOS/UEFI settings to ensure USB ports are enabled.
Specifications
| Feature | Detail |
|---|---|
| Brand | Cuifati |
| Model Name | Cuifati9ue1rxghng |
| CPU Socket | LGA 1155 |
| Compatible Processors | Intel Core i3-3xxx, Intel Core i5-3xxx, Intel Core i7-3xxx, Intel Core i3-4xxx, Intel Core i5-4xxx, Intel Core i7-4xxx |
| RAM Memory Technology | DDR3 |
| Memory Clock Speed | 2400 MHz |
| Memory Storage Capacity (Max) | 64 GB |
| Chipset Type | Intel B75 Express |
| Compatible Devices | Personal Computer |
| Platform | Windows 10 |
| Output Interfaces | HD Multimedia Interface, VGA, DVI |
| Ethernet | Gigabit Ethernet |
| USB Interfaces | Front USB 3.0, USB 2.0 |
| Capacitors | All Solid State Capacitors |
| Package Dimensions | 11.57 x 9.53 x 2.4 inches |
| Item Weight | 1.67 pounds |
| Manufacturer | Cuifati |
| Date First Available | July 18, 2023 |

Figure 9: Key performance features of the Cuifati B75 S Mainboard.
Warranty and Support
For warranty information and technical support, please refer to the official Cuifati website or contact your retailer. Keep your purchase receipt as proof of purchase for warranty claims.
- Return Policy: The product typically comes with a 30-day return/replacement policy from the date of purchase.
- Protection Plans: Additional protection plans (e.g., 3-Year or 4-Year Protection Plans) may be available for extended coverage. Please check with your retailer for details.