
Balboa Water Group 55049KIT/MVP260/VL260
Contents
Balboa Water Group MVP260/VL260 Topside Control Panel User Manual
Model: 55049KIT/MVP260/VL260
Introduction
This manual provides detailed instructions for the installation, operation, and maintenance of the Balboa Water Group 55049KIT MVP260/VL260 Topside Control Panel. Please read this manual thoroughly before installation and operation to ensure proper function and safety.
Product Overview
The Balboa Water Group 55049KIT MVP260/VL260 Topside Control Panel is designed for use with compatible Balboa spa control systems. It features four buttons for controlling jets, temperature, and lighting, along with a display for status information.

Image 1: Front view of the Balboa Water Group MVP260/VL260 Topside Control Panel, showing the main unit with its attached cable and the separate overlay with button labels.
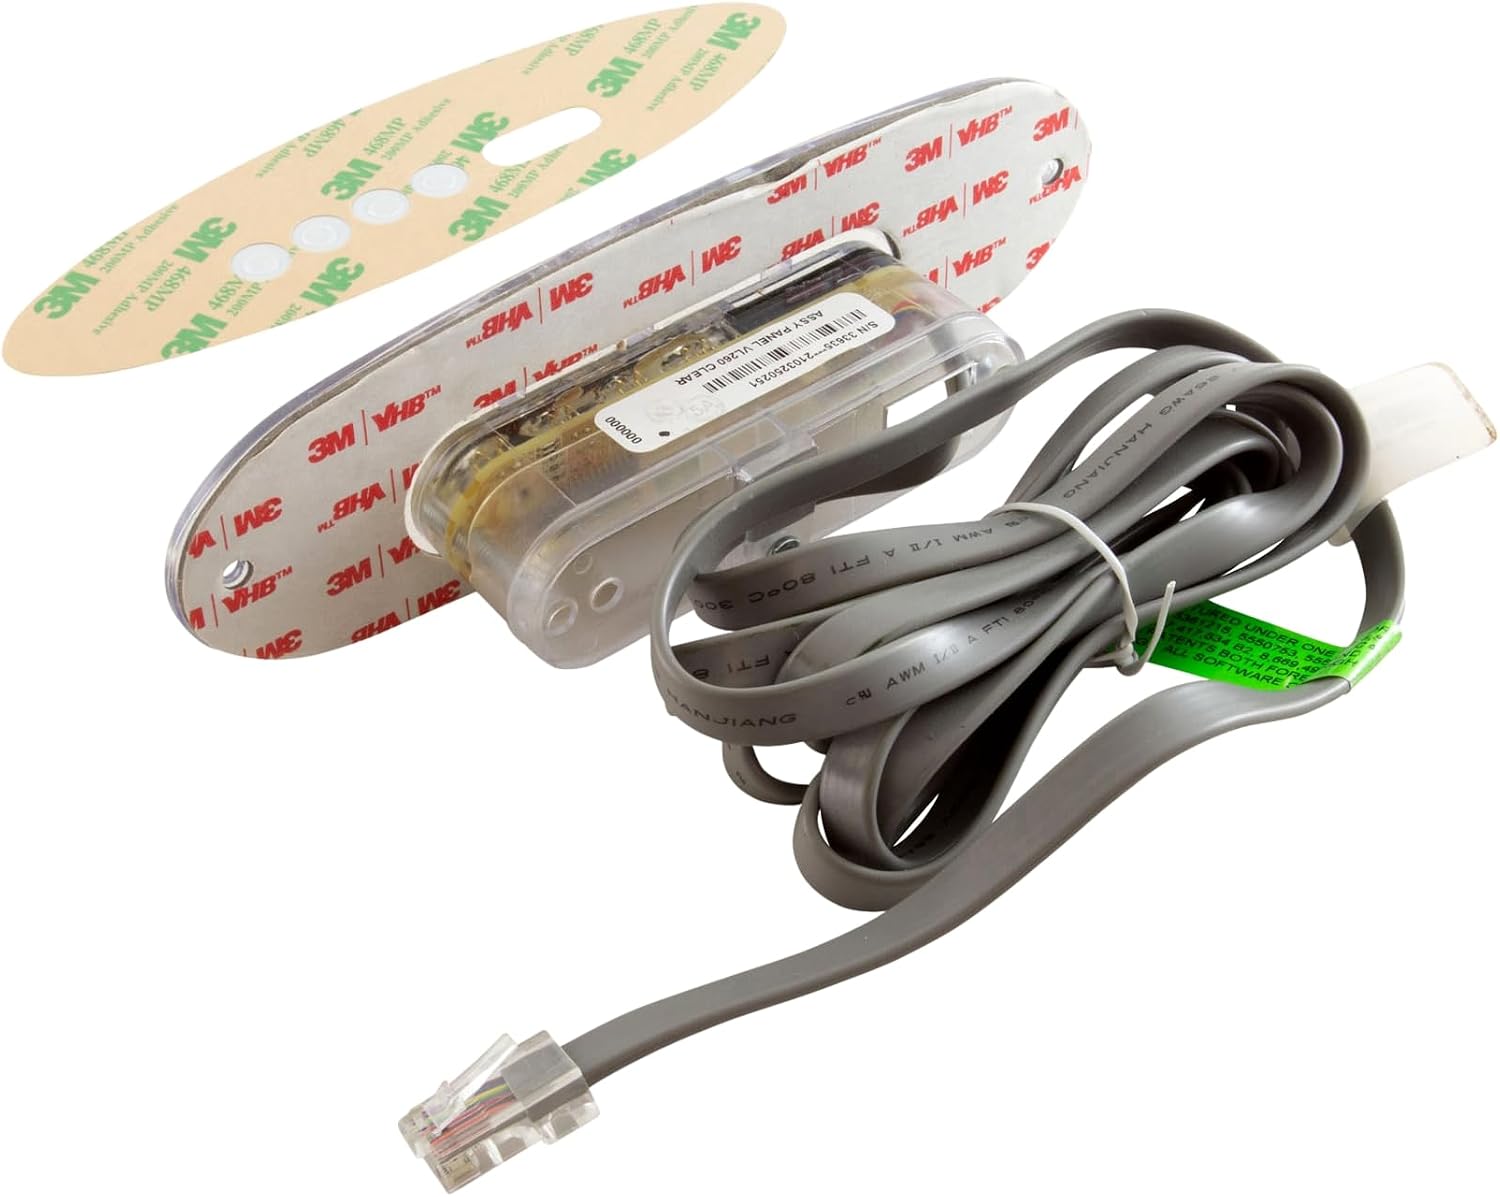
Image 2: Rear view of the control panel, highlighting the adhesive backing for secure mounting and the cable connection point.

Image 3: Close-up view of the control panel with the overlay applied, clearly showing the "BALBOA" branding, display window, and four button labels: "JETS", "JETS", "TEMP", and "LIGHT".
Setup and Installation
Proper installation is crucial for the longevity and correct operation of your topside control panel. If you are unsure about any steps, consult a qualified technician.
Safety Precautions
- Ensure all power to the spa system is disconnected before beginning installation.
- Wear appropriate personal protective equipment (PPE).
- Do not attempt to modify the control panel or its wiring.
Installation Steps
- Prepare the Mounting Surface: Ensure the surface where the topside panel will be mounted is clean, dry, and free of debris. If replacing an existing panel, remove any old adhesive residue.
- Connect the Cable: Carefully route the RJ45 communication cable from the topside panel to the main spa control pack. Plug the cable securely into the designated port on the control pack. Refer to your spa control pack's manual for the exact port location.
- Apply the Overlay: Peel the backing from the adhesive side of the button overlay. Carefully align the overlay with the buttons and display window on the topside panel. Press firmly to ensure a secure bond.
- Mount the Panel: Peel the backing from the adhesive on the rear of the topside panel. Carefully position the panel on the prepared mounting surface and press firmly for several seconds to ensure proper adhesion.
- Test Connection: Once installed, restore power to the spa system. The topside panel display should illuminate, and buttons should respond to input.
Operating Instructions
The MVP260/VL260 topside control panel provides intuitive control over your spa's primary functions.
Button Functions
- JETS (Left): Activates/deactivates the primary jet pump. Press once for low speed (if applicable), press again for high speed, press a third time to turn off.
- JETS (Right): Activates/deactivates the secondary jet pump or blower (functionality may vary based on spa model). Press once to turn on, press again to turn off.
- TEMP: Used to adjust the desired water temperature. Press the button to display the current set temperature. While displayed, press the button repeatedly to increase or decrease the temperature setting. The display will flash while adjusting and then return to showing the current water temperature.
- LIGHT: Turns the spa light on or off. Some systems may offer multiple light modes (e.g., color cycling) with repeated presses.
Display Information
The digital display shows the current water temperature and various status messages or error codes. Refer to your main spa control system manual for a complete list of error codes and their meanings.
Maintenance
Regular maintenance ensures the longevity and optimal performance of your topside control panel.
- Cleaning: Wipe the surface of the control panel with a soft, damp cloth. Do not use abrasive cleaners, solvents, or harsh chemicals, as these can damage the overlay and display.
- Inspection: Periodically inspect the panel for any signs of wear, cracks, or damage to the overlay. Ensure the cable connection remains secure.
- Water Exposure: While designed for spa environments, avoid direct, prolonged exposure to high-pressure water jets.
Troubleshooting
This section addresses common issues you might encounter with your topside control panel.
| Problem | Possible Cause | Solution |
|---|---|---|
| Panel display is blank. | No power to spa; loose cable connection; faulty panel. | Check spa power supply; ensure cable is securely plugged into control pack; if problem persists, contact support. |
| Buttons are unresponsive. | Loose cable connection; damaged overlay; internal panel issue. | Check cable connection; inspect overlay for damage; if problem persists, contact support. |
| Incorrect temperature reading. | Sensor issue; communication error. | Refer to your main spa control system manual for sensor troubleshooting; ensure cable is secure. |
If the issue is not resolved by the above steps, please contact Balboa Water Group customer support or a qualified spa technician.
Specifications
- Model: 55049KIT / MVP260 / VL260
- Buttons: 4 (Jets, Jets, Temp, Light)
- Display: Digital Segment Display
- Connection Type: RJ45 (Phone-style connector)
- Manufacturer: Balboa Water Group
- Package Dimensions: 8 x 4 x 4 inches (approximate)
Warranty Information
Specific warranty details for the Balboa Water Group 55049KIT MVP260/VL260 Topside Control Panel are typically provided with the product packaging or can be obtained directly from Balboa Water Group or your authorized dealer. Generally, Balboa Water Group products come with a limited warranty covering defects in materials and workmanship for a specified period from the date of purchase.
To claim warranty service:
- Retain your proof of purchase (receipt or invoice).
- Contact the dealer from whom you purchased the product or Balboa Water Group customer service.
- Provide the model number and a detailed description of the issue.
Please note that the warranty may not cover damage resulting from improper installation, misuse, neglect, unauthorized repairs, or acts of nature.
Customer Support
For further assistance, technical support, or to inquire about replacement parts, please contact Balboa Water Group directly or your authorized dealer.
Balboa Water Group Contact Information:
- Website: www.balboawatergroup.com (Check their website for current contact details, manuals, and FAQs)
- Phone: Refer to the website for regional contact numbers.
When contacting support, please have your product model number (55049KIT/MVP260/VL260) and a description of your issue ready.
Documents and downloads
Ask a question about this manual
Ask about setup, troubleshooting, compatibility, parts, safety, or missing instructions. Manuals+ will review the question and use this page’s manual context to help answer it.