1. Introduction
This manual provides detailed instructions for the safe and efficient installation, operation, and maintenance of your CO-Z Motorized TV Lift, Model TFQF-508. Please read this manual thoroughly before assembly and use to ensure proper function and to prevent potential hazards. Keep this manual for future reference.

Figure 1: CO-Z Motorized TV Lift (Model TFQF-508)
2. Safety Instructions
Always prioritize safety during installation and operation. Failure to follow these instructions may result in property damage, injury, or death.
- Read all instructions before assembly and use.
- Do not exceed the maximum weight capacity of 165 pounds (75 kg).
- Ensure the TV size is between 32 and 70 inches and VESA patterns are within 100x100 to 600x400 mm.
- Keep children and pets away from the motorized lift during operation.
- Ensure all cables are properly routed and secured to prevent pinching or damage.
- Do not place hands or objects in the path of the moving lift mechanism.
- Disconnect power before performing any maintenance or cleaning.
- If installing inside a cabinet, ensure the combined weight of the lid and TV does not exceed the mount's load capacity.
3. Package Contents
Verify that all components are present before beginning assembly. If any parts are missing or damaged, contact customer service.

Figure 2: Package List
- 1 x Lifting Column
- 2 x Vertical Brackets
- 2 x Transverse Brackets
- 2 x Connecting Rods
- 1 x Wired Controller
- 1 x Remote Control
- 1 x Power Adapter
- 1 x Anticollision Bracket
- Hardware Kit (various screws, washers, and tools)
4. Specifications
| Specification | Value |
|---|---|
| Brand | CO-Z |
| Model Number | TFQF-508 |
| Item Weight | 42.2 pounds (19.1 kg) |
| Package Dimensions | 35.9 x 10.5 x 9.8 inches (91.2 x 26.7 x 24.9 cm) |
| Color | Black |
| Material | Iron |
| Mounting Type | Wall Mount (also suitable for cabinet installation) |
| Movement Type | Telescopic |
| Compatible TV Sizes | 32" to 70" |
| Maximum Weight Capacity | 165 pounds (75 kg) |
| VESA Compatibility | 100x100, 100x200, 100x300, 100x400, 200x100, 200x200, 200x300, 200x400, 300x100, 300x200, 300x300, 300x400, 400x100, 400x200, 400x300, 400x400, 500x100, 500x200, 500x300, 500x400, 600x100, 600x200, 600x300, 600x400 mm |
| Height Range | 32" to 72" (81.3 cm to 182.9 cm) |
| Lift Speed | 1 inch per second |
5. Features
- Superior Height Range: The TV bracket rises from 32" to 72" at 1 inch per second, allowing for optimal viewing angles.
- Durable & Versatile Design: Constructed from heavy-duty materials with a fail-safe reinforced design, supporting 32"-70" plasma, LCD, LED, or OLED TVs up to 165 pounds with VESA from 100x100 to 600x400.
- Easy Operation: Features a quiet and powerful 24V motor, responsive to both the attached wired controller and a long-range remote control.
- Memory Settings: Three programmable height memory settings for quick adjustments.
- Adaptable Setup: Can be installed directly onto walls, used freestanding, or integrated within a cabinet or bench.
- User-Friendly Design: Pre-installed components and intuitive design facilitate quick and safe setup.
6. Setup & Installation
Follow these steps carefully for proper assembly and installation. It is recommended to have assistance when handling the TV and mounting components.
6.1. Assembling the TV Mount
Refer to the following video for a visual guide on assembling the TV lift components and attaching them to your television.
Video 1: CO-Z Motorized TV Lift Assembly Overview
- Connect Transverse Brackets: Attach the transverse brackets to the connecting rods using the provided bolts.
- Attach Frame to Column: Secure the assembled frame to the lifting column using bolts and tighten with the 5 mm hex wrench.
- Install Anticollision Bracket: Attach the anti-collision bracket to the top of the column using bolts and tighten with the 4 mm hex wrench.
- Secure Vertical Brackets to TV: Lay your TV face down on a soft, clean surface. Secure the vertical brackets to the back of your TV using the appropriate bolts from the hardware kit. Ensure they are firmly tightened.
- Hang TV on Lift: Carefully lift the TV and hang the vertical brackets onto the hooks of the lift frame. Ensure the TV is securely seated. Tighten the bolts at the bottom of the brackets to further secure the TV in place.
- Test Bracket Adjustment: Test to ensure the bracket can be adjusted to the desired angle.
6.2. Power Connection and Initial Test
Connect the power adapter to the lift and plug it into a power outlet. Perform an initial test to ensure the lift mechanism operates correctly.
Video 2: Power Connection and Initial Test
6.3. Installation Options (Wall or Cabinet)
The CO-Z Motorized TV Lift offers flexible installation options:
- Wall Mount: The lift can be directly mounted to a wall. Ensure proper wall studs are located for secure attachment.
- Freestanding: The lift can be used as a freestanding unit.
- Cabinet Integration: The lift can be installed inside a cabinet or bench. When installing inside a cabinet, ensure the combined weight of the cabinet lid and the TV does not exceed the mount's load capacity.
For cabinet installation, ensure adequate clearance for the TV to fully extend and retract. The lift has a height range of 32" to 72".
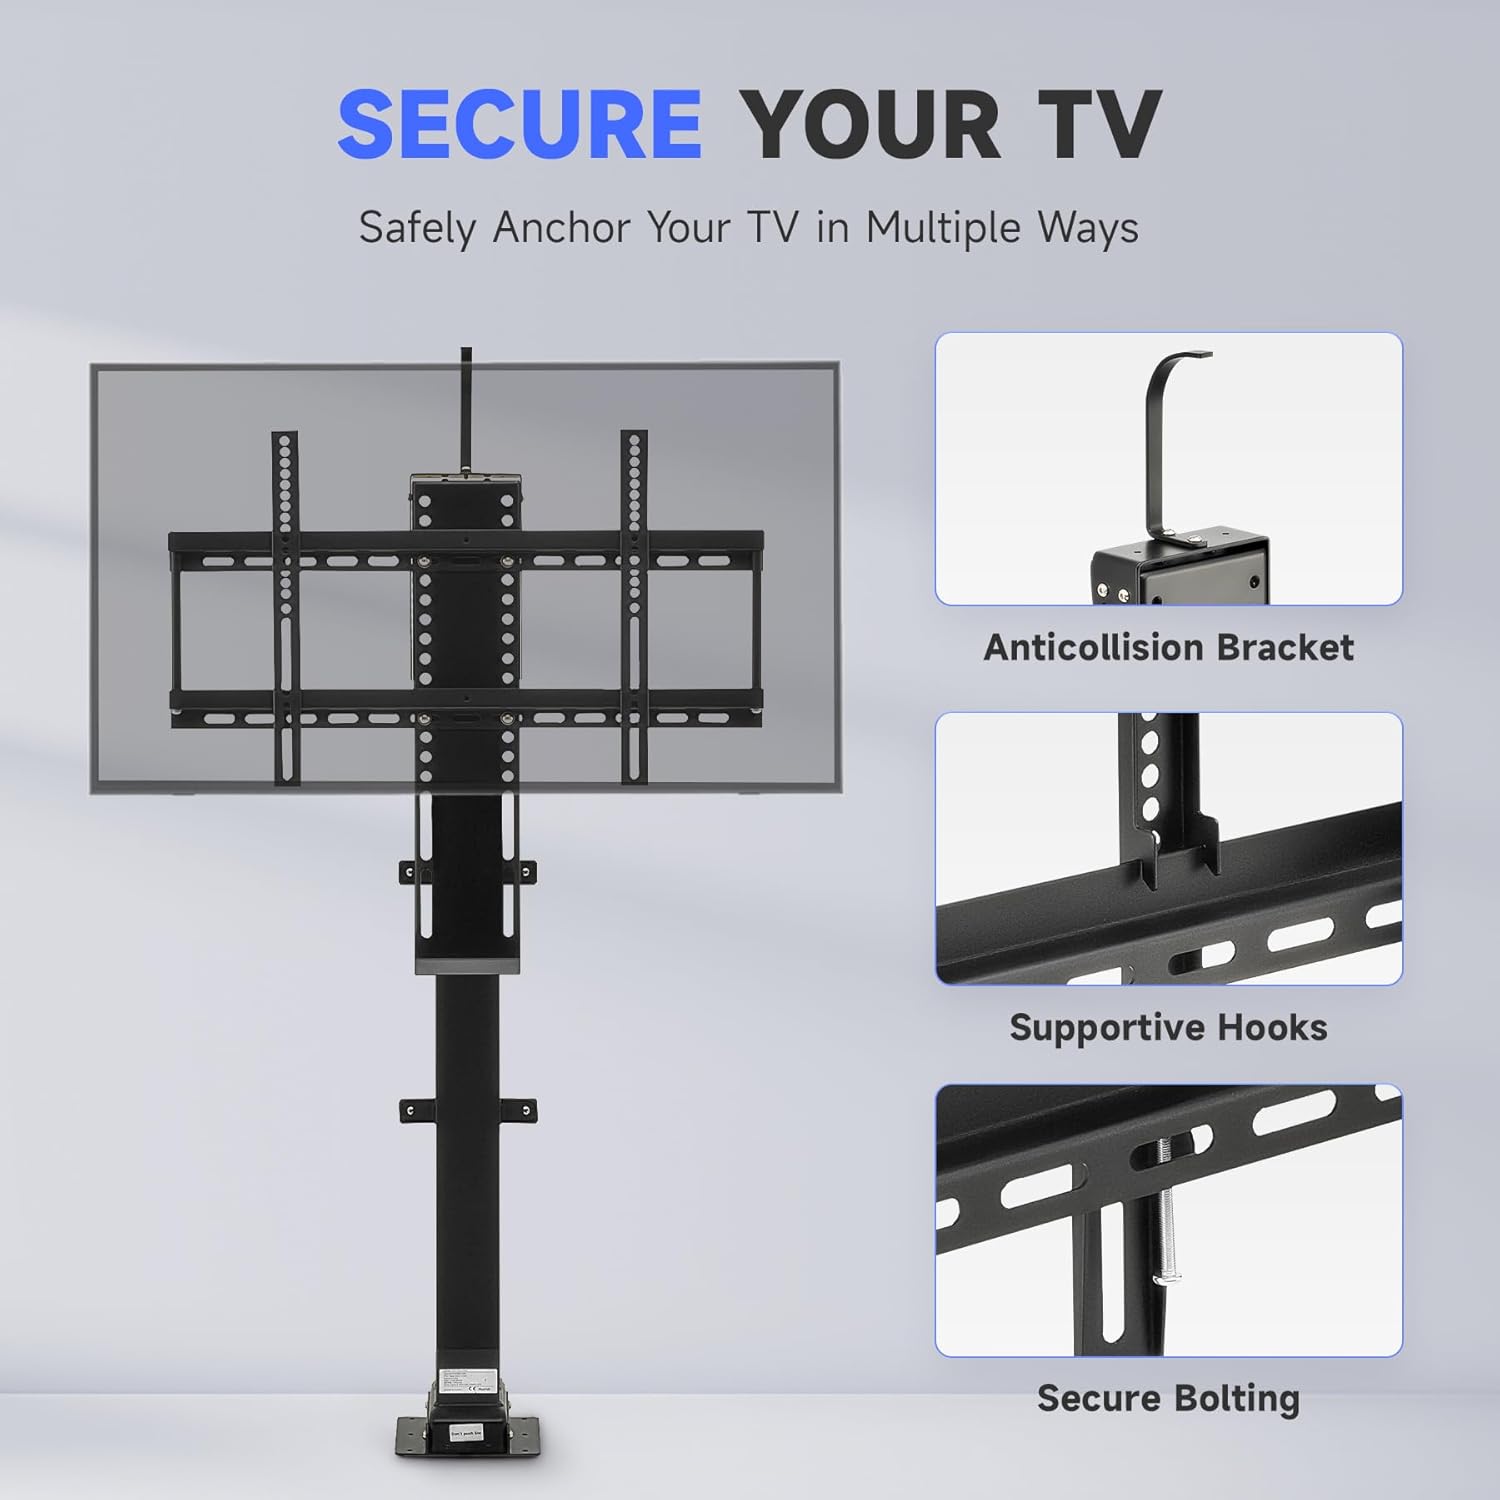
Figure 3: Secure Your TV (Anticollision Bracket, Supportive Hooks, Secure Bolting)
Video 3: CO-Z Motorized TV Lift Cabinet Installation (32" to 57" model shown, similar process for 32" to 70")
7. Operating Instructions
Your CO-Z Motorized TV Lift can be operated using the included remote control, wired controller, or via smart home integration.

Figure 4: Wired Controller with 3 Preset Heights
7.1. Basic Operation (Remote & Wired Controller)
- Use the Up (▲) button on either controller to raise the TV.
- Use the Down (▼) button on either controller to lower the TV.
- Use the Stop (■) button on the remote or the S button on the wired controller to stop the TV at any desired height.
7.2. Memory Settings
The wired controller allows you to save and recall three preferred height levels.
- Move your TV to the desired height using the Up (▲) or Down (▼) buttons.
- Press the S button on the wired controller. The display will flash.
- Press one of the three memory buttons (1, 2, or 3) to save the current height.
- To recall a saved height, simply press the corresponding memory button (1, 2, or 3). The TV will automatically move to that preset height.
Video 4: Setting Memory Positions (Wired Controller)
7.3. Smart Home Integration (Tuya App, Amazon Alexa, Google Home)
For advanced control, including voice commands and app-based operation, you can integrate your TV lift with smart home platforms. Refer to the following video for guidance on setting up Tuya App, Amazon Alexa, and Google Home control.
Video 5: Tuya App, Amazon Alexa, and Google Home Operation
8. Maintenance
- Cleaning: Wipe the lift and TV with a soft, dry cloth. Do not use abrasive cleaners or solvents.
- Regular Checks: Periodically inspect all bolts and connections to ensure they are secure. Tighten if necessary.
- Cable Management: Ensure cables remain free from obstruction and are not pinched by moving parts.
9. Troubleshooting
If you encounter issues with your CO-Z Motorized TV Lift, refer to the following common problems and solutions:
- Lift Not Responding:
- Check if the power adapter is securely connected and plugged into a working outlet.
- Ensure the remote control batteries are not depleted.
- Verify that the wired controller cable is properly connected.
- Lift Stops Mid-Operation:
- The anti-collision feature may have been triggered. Remove any obstructions and try again.
- The motor may have overheated from continuous use. Allow it to cool down for a few minutes before operating again.
- Unusual Noises:
- Check for any loose components or obstructions.
- Ensure the TV is properly mounted and balanced.
If the problem persists, contact customer service for further assistance.
10. Warranty & Support
CO-Z is committed to providing quality products and excellent customer service. Your CO-Z Motorized TV Lift is backed by our standard warranty. For any questions, technical support, or warranty claims, please contact our friendly 24/7 customer service team. Refer to your purchase documentation for specific warranty details and contact information.


