
1. Introduction
Thank you for purchasing the Dpofirs LMD-750 Portable DVD Player. This device is designed to provide versatile entertainment on the go, at home, or in the office. Featuring a 270° rotating HD LCD screen, multi-format disc support, USB/SD card playback, analog TV function, FM radio, and game capabilities, it offers a comprehensive multimedia experience. Please read this manual carefully to ensure proper use and to maximize the performance and longevity of your device.
2. Safety Information
- Do not expose the device to rain, moisture, or extreme temperatures.
- Avoid placing the device near heat sources or in direct sunlight.
- Use only the provided power adapter and car adapter.
- Do not attempt to disassemble or repair the device yourself. Contact qualified service personnel.
- Keep the device away from strong magnetic fields.
- Ensure proper ventilation when operating the device.
- Remove discs when transporting the player to prevent damage.
3. Package Contents
Please check the package for the following items:
- 1 x Dpofirs LMD-750 Portable DVD Player
- 1 x Remote Control
- 1 x Power Adapter (EU Plug)
- 1 x Car Adapter
- 1 x AV Cable
- 1 x Antenna
- 1 x Gamepad
- 1 x Game Disc
- 1 x User Manual
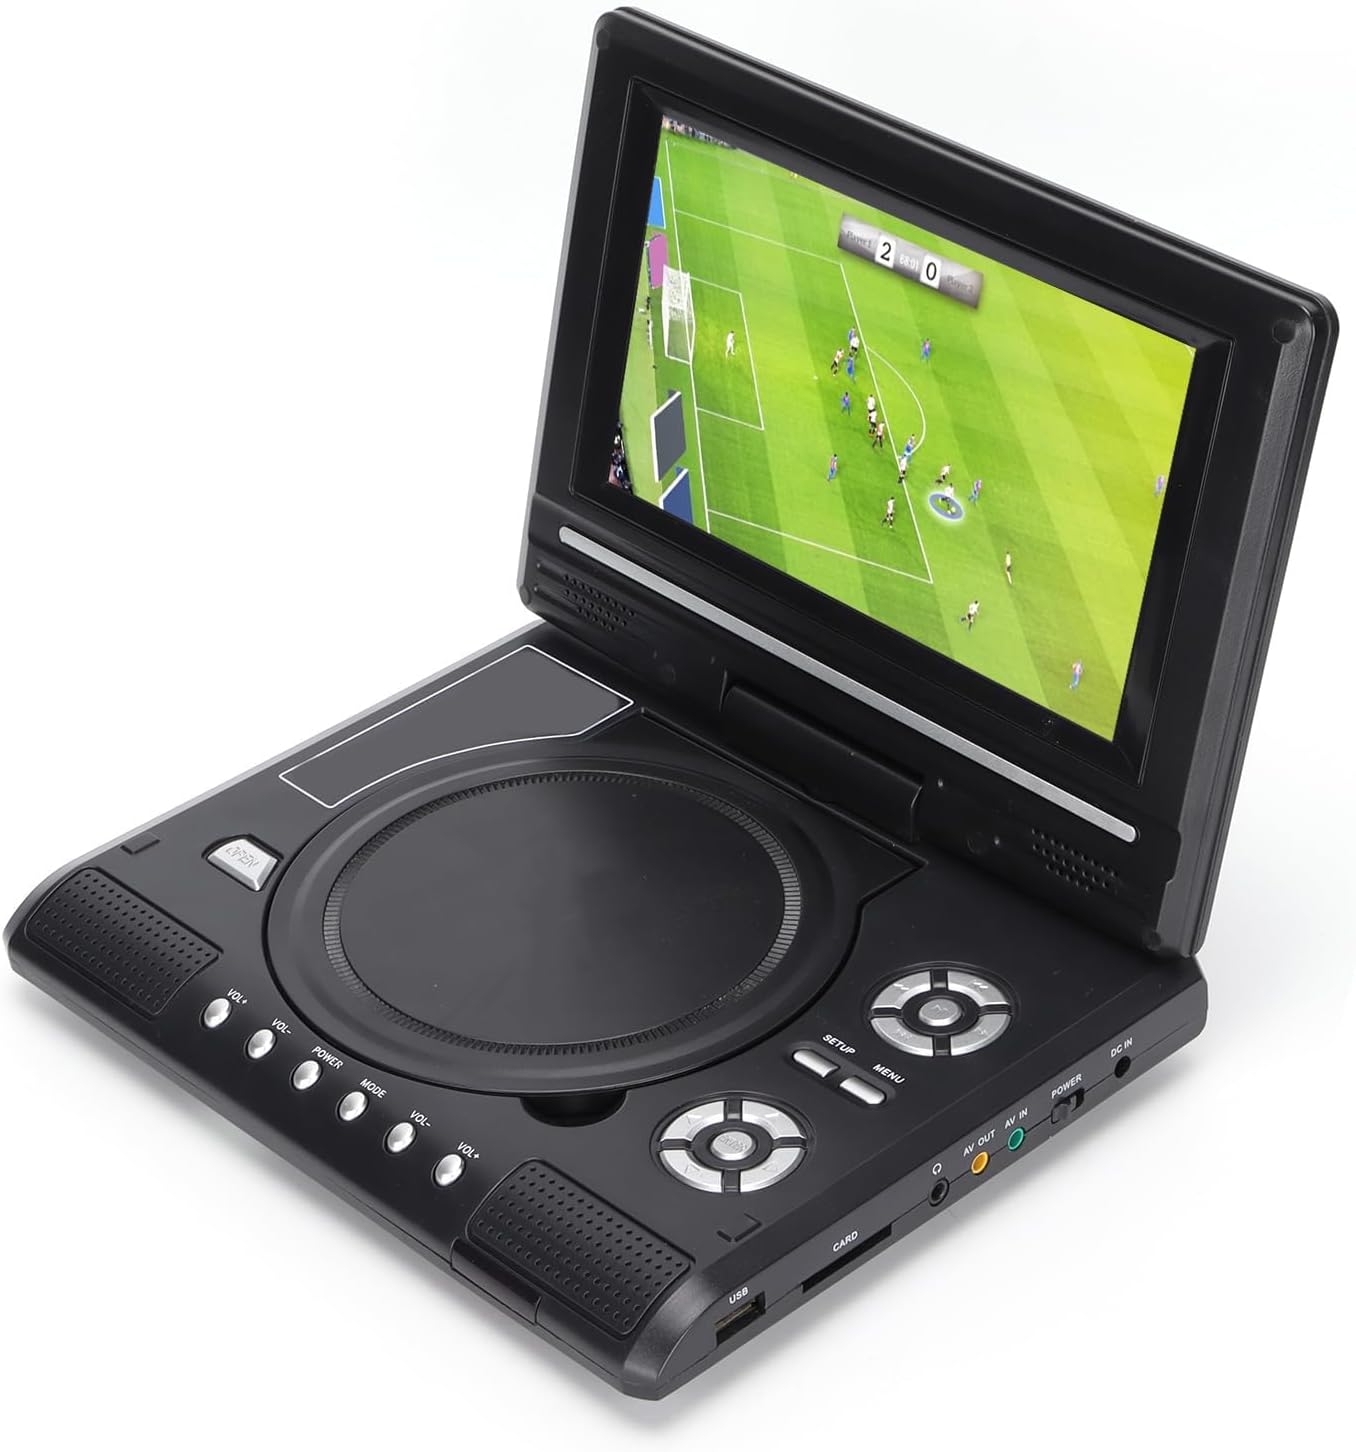
Image: All accessories included with the Dpofirs LMD-750 Portable DVD Player.
4. Product Overview
The Dpofirs LMD-750 features a compact design with intuitive controls and multiple connectivity options.

Image: Front view of the Dpofirs LMD-750 Portable DVD Player with the screen open.

Image: Side view detailing the input/output ports.

Image: Top view of the player when closed.
Controls and Ports:
- Screen: 6.8"/8.5" HD LCD, 270° rotatable.
- Disc Tray: For DVD/CD media.
- Control Buttons: Play/Pause, Stop, Fast Forward/Rewind, Next/Previous, Setup, Menu, Volume +/-.
- USB Port: For connecting USB flash drives.
- CARD Slot: For inserting memory cards (e.g., SD card).
- Headphone Jack: For private listening.
- AV OUT: Audio/Video output to external display.
- AV IN: Audio/Video input from external source.
- POWER Switch: To turn the device On/Off.
- DC IN: Power input for adapter.
5. Setup
5.1 Charging the Battery
Before first use, fully charge the built-in 1500mAh lithium battery. Connect the power adapter to the DC IN port on the player and plug it into a wall outlet (110-240V 50/60Hz). The charging indicator will illuminate. Once fully charged, the indicator may change color or turn off. A full charge provides approximately 30-60 minutes of continuous playback, depending on usage.
5.2 Connecting Power
- Home Use: Connect the AC power adapter to the DC IN port and a wall socket.
- Car Use: Connect the car adapter to the DC IN port and your vehicle's cigarette lighter socket.
5.3 Connecting to an External Display (AV OUT)
To view content on a larger screen:
- Connect one end of the AV cable to the AV OUT port on the DVD player.
- Connect the other end of the AV cable to the corresponding AV IN ports (Yellow for Video, White/Red for Audio) on your TV or monitor.
- Select the correct AV input source on your external display.
5.4 Connecting External Devices (AV IN)
To display content from an external source on the DVD player's screen:
- Connect one end of the AV cable to the AV IN port on the DVD player.
- Connect the other end of the AV cable to the AV OUT ports of your external device (e.g., another DVD player, game console).
- Switch the DVD player to AV IN mode (refer to Operating Instructions).
6. Operating Instructions
6.1 Power On/Off
Slide the POWER switch to the "ON" position to turn on the player. Slide it to "OFF" to power down.
6.2 Screen Rotation
The LCD screen can rotate up to 270 degrees. Gently adjust the screen to your desired viewing angle. This allows for flexible viewing in various environments.
6.3 Volume Control
Use the VOL+ and VOL- buttons on the player or remote control to adjust the audio volume.
6.4 Menu Navigation
Press the MENU button to access the main menu. Use the directional buttons (up, down, left, right) to navigate and the OK button to confirm selections. Press SETUP to access system settings.
7. Media Playback
7.1 Disc Playback (DVD/CD)
- Open the disc cover.
- Carefully place a compatible disc (DVD, DVD±R, DVD±RW, VCD, CD, CD±R, CD±RW) onto the spindle with the label side facing up.
- Close the disc cover securely.
- The player will automatically detect and begin playback. If not, press the PLAY button.

Image: Player displaying video content.

Image: Player displaying a sports event.
7.2 USB/SD Card Playback
- Insert a USB flash drive into the USB port or a memory card into the CARD slot.
- The player will automatically switch to USB/Card mode or prompt you to select the source.
- Navigate through your files using the directional buttons and press OK to play.
Supported Formats: DIVX, AV/VOB, MPG, MP3, MP4, WMA, JPEG, TXT, RMVB.
The player features an intelligent power-off memory function, resuming playback from where it stopped after a power interruption.
8. TV Function
The Dpofirs LMD-750 includes an analog TV tuner.
- Connect the included antenna to the antenna port on the player.
- Switch the player to TV mode (usually via the MODE button or menu selection).
- Perform an automatic channel scan in the TV settings menu to find available analog channels.
- Channel reception quality depends on local signal strength.
Supported TV Standards: PAL, NTSC, SECAM (optional).
9. Game Function
Enjoy gaming with the included gamepad and game disc.
- Connect the gamepad to the designated game port on the player.
- Insert the game disc into the disc tray.
- Select the game function from the main menu.
- Choose from the available games on the disc (up to 300 games).
10. Maintenance
10.1 Cleaning the Device
- Wipe the exterior of the player with a soft, dry cloth.
- Do not use liquid cleaners or abrasive materials.
- For the screen, use a soft, lint-free cloth specifically designed for LCD screens.
10.2 Disc Care
- Handle discs by their edges to avoid fingerprints.
- Clean discs with a soft, lint-free cloth, wiping from the center outwards.
- Store discs in their cases to prevent scratches.

Image: Internal disc mechanism.
11. Troubleshooting
| Problem | Possible Cause | Solution |
|---|---|---|
| No power | Battery drained; Power adapter not connected; Power switch OFF. | Charge the battery; Connect power adapter; Slide POWER switch to ON. |
| No disc playback | Disc inserted incorrectly; Disc dirty or scratched; Incompatible disc format. | Insert disc correctly (label up); Clean or replace disc; Use supported disc format. |
| No sound | Volume too low; Mute function active; Headphone connected. | Increase volume; Deactivate mute; Disconnect headphones if using speakers. |
| Poor TV reception | Weak signal; Antenna not positioned correctly. | Adjust antenna position; Rescan channels; Check local signal strength. |
| Remote control not working | Batteries drained or inserted incorrectly; Obstruction between remote and player. | Replace batteries (2x AAA); Ensure correct polarity; Remove obstructions. |
12. Specifications
| Model Number | LMD-750 (Dpofirsrgi5bmonx0-13) |
| Material | ABS |
| Color | Black |
| Screen Size | 6.8" / 8.5" (diagonal, depending on variant) |
| Display Type | LCD |
| Display Resolution | 234 x 480 x RGB (native), supports up to 1280 x 720, 1366 x 768 |
| Input Voltage | 110-240V 50/60Hz |
| Output Voltage | 12V |
| Battery Capacity | 1500mAh Lithium Battery (built-in) |
| Remote Control Battery | 2 x AAA batteries (not included) |
| Supported Disc Formats | DVD, DVD±R, DVD±RW, VCD, MP3, MP4, CD±R, CD±RW |
| Supported Media Formats (USB/Card) | DIVX, AV/VOB, MPG, MP3, MP4, WMA, JPEG, TXT, RMVB |
| TV System | PAL, NTSC, SECAM (full system) |
| Receiving Channels | LHF1-5, VHF6-12, UHF13-69, ATV |
| Audio Encoding Technology | 96kHz/24bit |
| Dynamic Range | ≥ 80dB |
| Signal-to-Noise Ratio | ≥ 70dB |
| Channel Isolation | ≥ 70dB |
| Connectivity Technology | USB, Composite Video |
| Manufacturer | Dpofirs |
| Country of Origin | China |
13. Warranty and Support
For warranty information and customer support, please refer to the documentation provided with your purchase or contact your retailer. Keep your proof of purchase for any warranty claims.