1. Product Overview
The Amig Model 4300 Super Angled Cup Hinge is a robust and functional component designed for cabinet doors. Constructed from alloy steel with a nickel-plated finish, this hinge provides reliable and long-lasting performance. Its super-angled bowl design facilitates easy mounting to the inside of furniture, ensuring a secure fit. Key features include a 35 mm cup diameter, a 52 mm distance between mounting holes, and a wide 110° opening angle for convenient door access. A quick-release latch mechanism allows for easy door removal and reattachment, simplifying installation, maintenance, and replacement.
2. Safety Information
- Always wear appropriate personal protective equipment, such as safety glasses, when drilling or using tools.
- Ensure the work area is well-lit and clear of obstructions.
- Keep small parts and tools out of reach of children.
- Use the correct tools for each step of the installation process to prevent damage to the hinge or injury.
- Do not overtighten screws, as this can strip threads or damage the material.
3. Package Contents
Each package contains:
- 20 x Amig Model 4300 Super Angled Cup Hinges
- Pre-assembled studs and lag screws (within the hinge cup)
Note: Mounting screws for attaching the hinge plate to the cabinet frame are not included and must be purchased separately.
4. Setup and Installation
Follow these steps for proper installation of the Amig Model 4300 hinges:
- Prepare the Door: Using a 35 mm Forstner bit, drill a cup hole into the cabinet door at the desired hinge location. Refer to the dimensional drawing for precise measurements and placement. The depth of the hole should accommodate the hinge cup without protruding.
- Mark Screw Holes: Place the hinge cup into the drilled hole. Mark the positions for the two smaller mounting holes (Ø10 mm) on the door, which are 52 mm apart from the center of the cup hole.
- Drill Pilot Holes: Drill pilot holes for the mounting screws at the marked positions. Ensure pilot holes are appropriate for the screw size to prevent wood splitting.
- Attach Hinge to Door: Secure the hinge to the cabinet door using the appropriate screws (not included). Ensure the hinge is flush and firmly attached.
- Attach Mounting Plate to Cabinet: Position the cabinet door with the attached hinges against the cabinet frame. Mark the screw positions for the hinge mounting plate on the cabinet frame. Ensure proper alignment for the door to close correctly.
- Secure Mounting Plate: Drill pilot holes into the cabinet frame and attach the hinge mounting plate using appropriate screws (not included).
- Connect Hinge to Plate: Align the hinge arm with the mounting plate. The quick-release latch mechanism allows the hinge to snap onto the plate. Press firmly until you hear a click, indicating it is securely engaged.

Figure 1: Dimensional drawing for hinge installation, showing a 35 mm cup diameter and 52 mm hole distance.
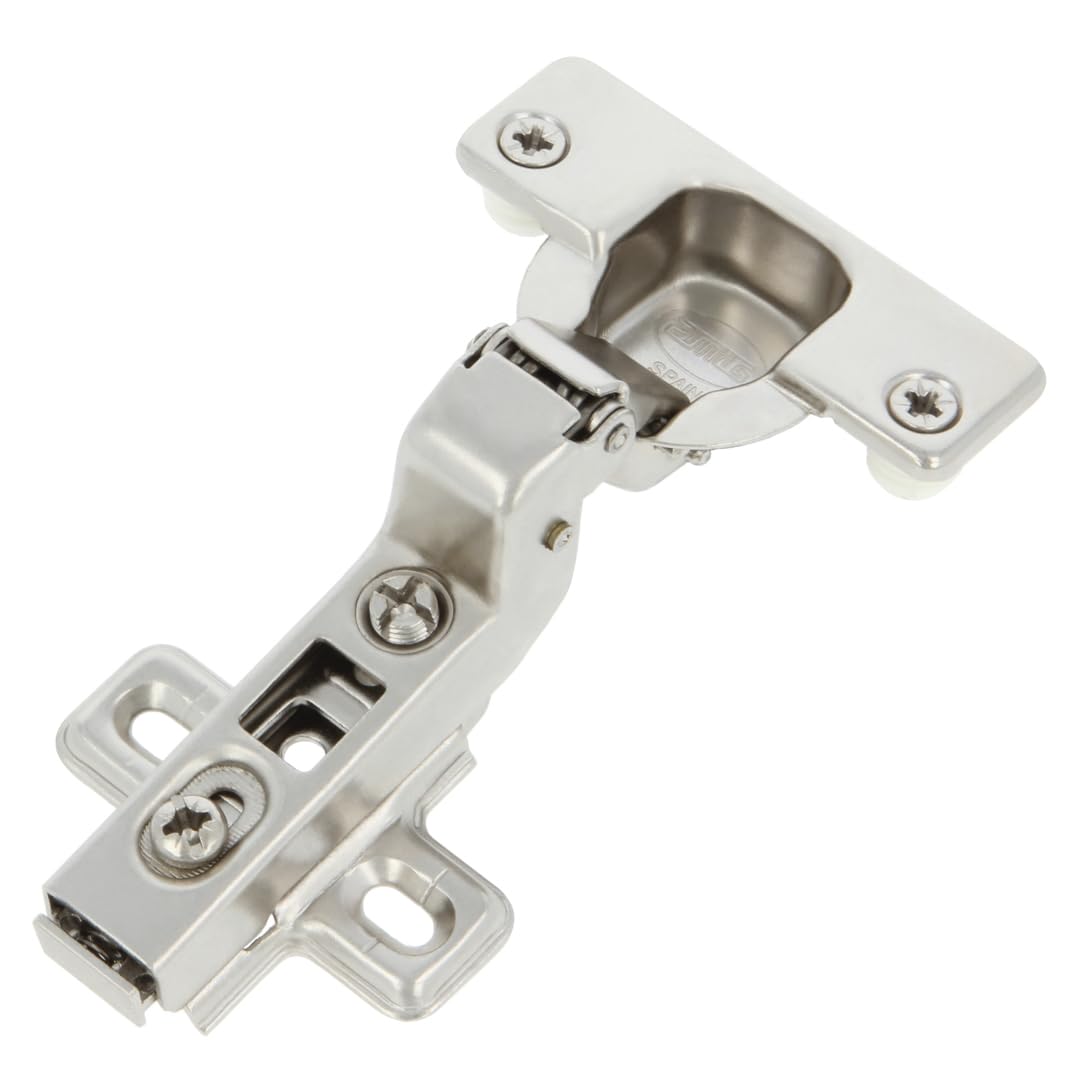
Figure 2: The quick-release latch on the hinge, allowing for easy detachment and reattachment of the door.
5. Operating Instructions
The Amig Model 4300 hinge is designed for straightforward operation:
- Opening and Closing: The hinge allows the cabinet door to open up to 110 degrees, providing ample access to the cabinet interior. Close the door gently to ensure proper engagement.
- Quick Release: To remove the cabinet door, locate the quick-release latch on the hinge arm (refer to Figure 2). Press the latch mechanism, and the hinge arm will disengage from the mounting plate. To reattach, align the hinge arm with the mounting plate and press until it clicks into place.
- Adjustments: Most cabinet hinges include adjustment screws for fine-tuning door alignment (side-to-side, depth, and height). While specific adjustment screw locations are not detailed for this model, typically these are small screws located on the hinge arm or mounting plate. Use a screwdriver to make small adjustments until the door is perfectly aligned.
6. Maintenance
Regular maintenance ensures the longevity and smooth operation of your hinges:
- Cleaning: Wipe the hinges periodically with a soft, damp cloth to remove dust and grime. Avoid abrasive cleaners or harsh chemicals, which can damage the nickel-plated finish.
- Lubrication: If the hinges begin to squeak or feel stiff, apply a small amount of silicone-based lubricant to the pivot points. Avoid oil-based lubricants, which can attract dust.
- Check Fasteners: Periodically check all mounting screws to ensure they are tight. Loose screws can lead to door misalignment or hinge failure. Do not overtighten.
7. Troubleshooting
| Problem | Possible Cause | Solution |
|---|---|---|
| Door is misaligned or sagging | Loose mounting screws; improper hinge adjustment | Tighten all mounting screws. Adjust the hinge screws (if present) to realign the door. |
| Door does not close completely | Obstruction; improper hinge adjustment; worn hinge | Check for any obstructions. Adjust hinge depth screws. If hinges are old or damaged, consider replacement. |
| Hinge squeaks during operation | Lack of lubrication; dust/debris | Clean the hinge and apply a small amount of silicone-based lubricant to the pivot points. |
| Quick-release latch not engaging/disengaging | Misalignment; debris in mechanism; damaged latch | Ensure hinge arm is correctly aligned with the mounting plate. Clear any debris. If damaged, replace the hinge. |
8. Specifications
| Feature | Specification |
|---|---|
| Model Number | 4300 |
| Material | Alloy Steel |
| Finish Type | Nickel plated |
| Cup Diameter | Ø35 mm |
| Hole Distance (Mounting) | 52 mm |
| Opening Angle | 110° |
| Product Dimensions (Hinge) | 3.15"L x 2.76"W (approximate) |
| Item Weight (per hinge) | Approximately 2.99 ounces |
| Number of Pieces (per pack) | 20 |
| Mounting Type | Door Mount (Recessed) |
9. Warranty and Support
Amig is committed to providing high-quality and reliable products. While specific warranty details are not provided in this manual, for any questions regarding product defects, installation issues, or general support, please contact the retailer where the product was purchased or visit the official Amig website for customer service information.
For more information about Amig products, please visit: Amig Brand Store


