1. Introduction
Thank you for choosing the Vactidy V9 Cordless Vacuum Cleaner. This manual provides essential information for the safe and efficient operation, maintenance, and troubleshooting of your new vacuum cleaner. Please read this manual thoroughly before first use and retain it for future reference.
2. Important Safety Instructions
To reduce the risk of fire, electric shock, or injury, always follow basic safety precautions when using an electrical appliance, including the following:
- Read all instructions before using this appliance.
- Do not use outdoors or on wet surfaces.
- Do not allow to be used as a toy. Close attention is necessary when used by or near children.
- Use only as described in this manual. Use only manufacturer's recommended attachments.
- Do not use with a damaged cord or plug. If appliance is not working as it should, has been dropped, damaged, left outdoors, or dropped into water, return it to a service center.
- Do not pull or carry by cord, use cord as a handle, close a door on cord, or pull cord around sharp edges or corners. Do not run appliance over cord. Keep cord away from heated surfaces.
- Do not unplug by pulling on cord. To unplug, grasp the plug, not the cord.
- Do not handle plug or appliance with wet hands.
- Do not put any object into openings. Do not use with any opening blocked; keep free of dust, lint, hair, and anything that may reduce airflow.
- Keep hair, loose clothing, fingers, and all parts of body away from openings and moving parts.
- Do not pick up anything that is burning or smoking, such as cigarettes, matches, or hot ashes.
- Do not use to pick up flammable or combustible liquids, such as gasoline, or use in areas where they may be present.
- Do not pick up toxic material, such as chlorine bleach, ammonia, or drain cleaner.
- Do not use without dust cup and/or filters in place.
- Turn off all controls before unplugging.
- Use extra care when cleaning on stairs.
- Do not use to pick up hard or sharp objects such as glass, nails, screws, coins, etc.
- Prevent unintentional starting. Ensure the switch is in the off-position before connecting to battery pack, picking up or carrying the appliance.
- Recharge only with the charger specified by the manufacturer.
- Under abusive conditions, liquid may be ejected from the battery; avoid contact. If contact accidentally occurs, flush with water. If liquid contacts eyes, additionally seek medical help.
- Do not modify or attempt to repair the appliance or the battery pack.
3. Product Overview and Components
The Vactidy V9 Cordless Vacuum Cleaner is designed for versatile cleaning. Familiarize yourself with its components:

Image 3.1: Overview of the Vactidy V9 Cordless Vacuum Cleaner and its included accessories, including the main unit, extension tube, floor brush, crevice tool, and 2-in-1 dusting brush.
Included Components:
- Main Motor Unit (Handheld Vacuum)
- Extension Tube
- Motorized Floor Brush
- Crevice Tool
- 2-in-1 Dusting Brush
- Wall Mount Dock
- Power Adapter
- Detachable Battery Pack

Image 3.2: The Vactidy V9 handheld unit shown with different attachments, demonstrating its versatility for cleaning crevices, mattresses, curtains, and desktops.
4. Assembly and Setup
4.1 Initial Charging
Before first use, fully charge the battery pack. Connect the power adapter to the charging port on the battery or the wall mount dock, then plug it into a power outlet. The charging indicator lights will show the charging status. A full charge typically takes 4-5 hours.

Image 4.1: Illustration of the detachable battery being inserted into the main motor unit, highlighting the ease of battery removal and installation for charging or replacement.
4.2 Assembling the Vacuum
- Attach the Battery: Slide the fully charged battery pack into the main motor unit until it clicks securely into place.
- Connect Extension Tube: Insert the extension tube into the main motor unit until it locks.
- Attach Floor Brush: Connect the motorized floor brush to the other end of the extension tube until it clicks.
- Alternative Configurations: For handheld use, attach the crevice tool or 2-in-1 dusting brush directly to the main motor unit.
5. Operation
5.1 Powering On and Suction Modes
Press the power button to turn on the vacuum. The Vactidy V9 offers two suction modes:
- Standard Mode (15KPa): Ideal for daily cleaning of hard floors and light debris, offering longer runtime.
- Max Mode (25KPa): Provides powerful suction for deep cleaning carpets, pet hair, and stubborn dirt. Press the mode button to switch between modes.

Image 5.1: The Vactidy V9 vacuum cleaner effectively transitioning from a wooden floor to a low-pile carpet, demonstrating its capability to clean various floor types.
5.2 Using Attachments
- Motorized Floor Brush: Use for general floor cleaning on hard floors and carpets. Its swivel steering allows for easy maneuverability under furniture.
- Crevice Tool: Perfect for narrow gaps, corners, and edges, such as between sofa cushions or along baseboards.
- 2-in-1 Dusting Brush: Use the brush bristles for delicate surfaces like curtains, upholstery, or keyboards. Retract the bristles for a wider nozzle to clean larger flat surfaces.

Image 5.2: The Vactidy V9 vacuum cleaner being used to clean underneath a bed, showcasing its flexible design for reaching low-clearance areas.

Image 5.3: A user demonstrating the lightweight nature of the Vactidy V9, easily carrying it while cleaning, emphasizing its portability and ease of use.
6. Maintenance
Regular maintenance ensures optimal performance and extends the lifespan of your Vactidy V9 vacuum cleaner.
6.1 Emptying the Dust Cup
Empty the 1-liter dust cup after each use or when the MAX fill line is reached. Press the dust cup release button to detach it from the main unit, then press the bottom release latch to empty contents into a trash bin. Reattach the dust cup securely.
6.2 Cleaning the Filtration System
The Vactidy V9 features a 5-layer high-efficiency filtration system. Regular cleaning of the filters is crucial for maintaining suction power and air quality.
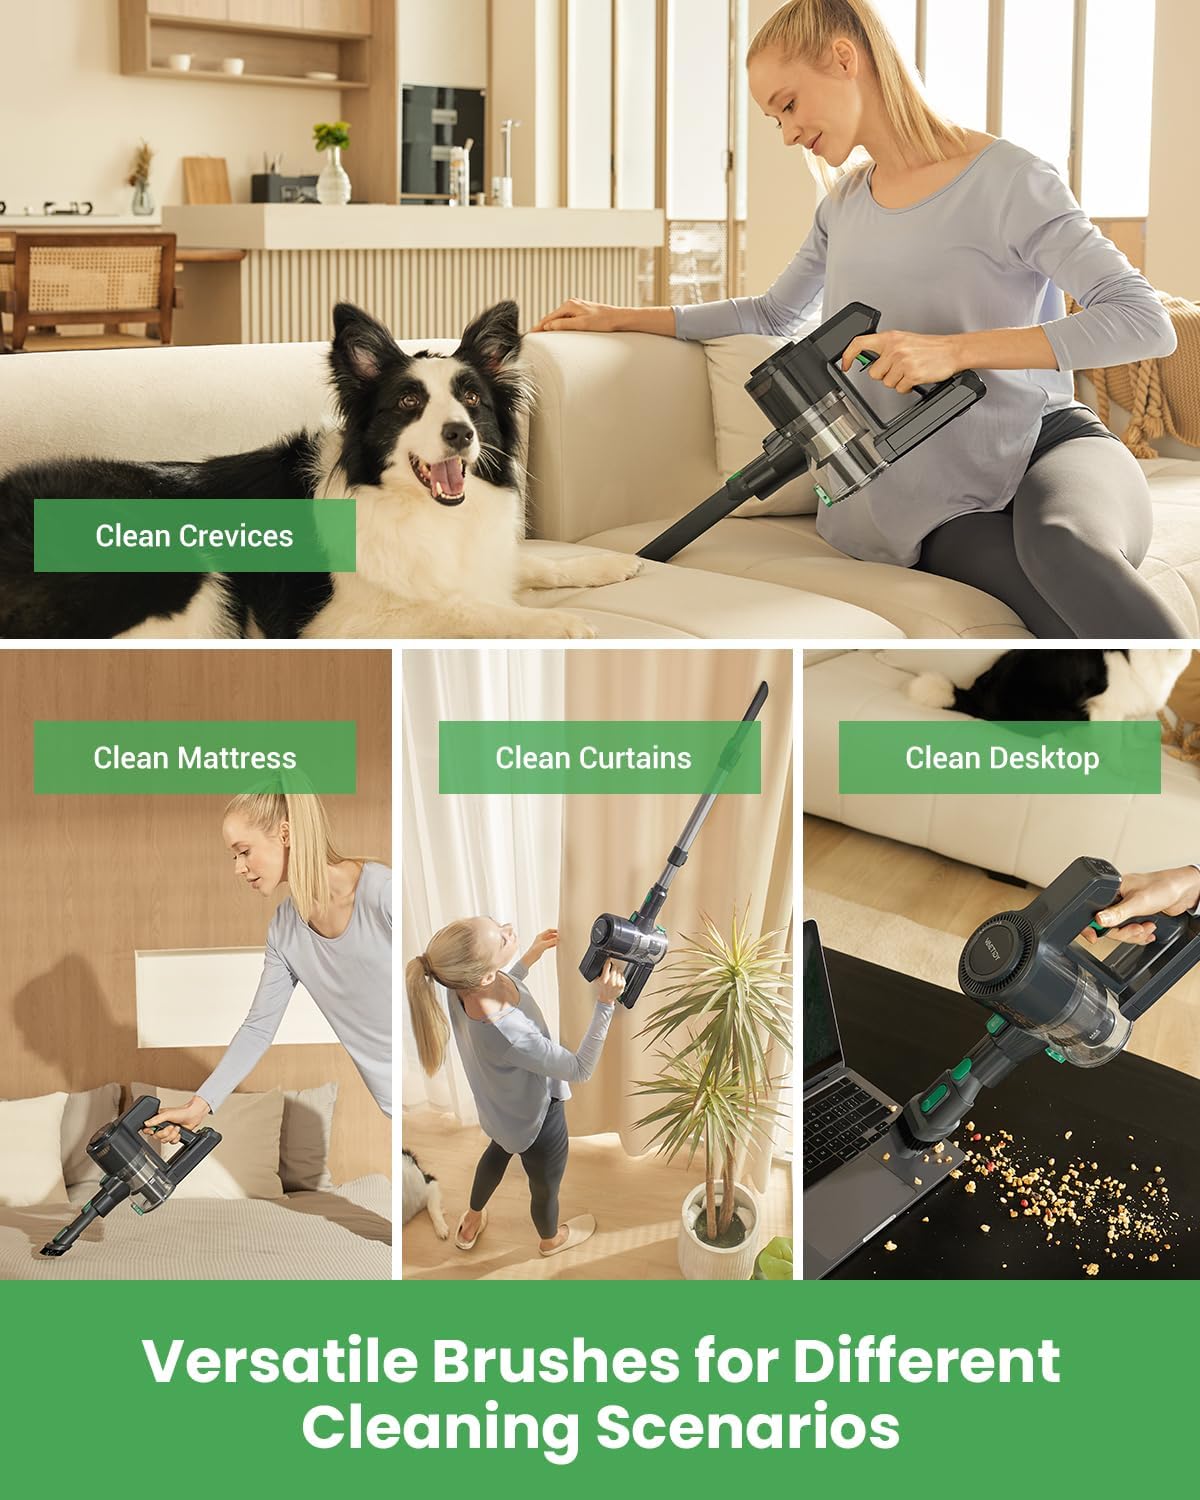
Image 6.1: An exploded view diagram illustrating the Vactidy V9's 5-layer filtration system, including the cyclone filter, stainless steel filters, inlet HEPA, filter sponge, and outlet HEPA.
- Disassemble Filters: Remove the dust cup. Twist and pull out the internal filter components, including the stainless steel filter, cyclone filter, and HEPA filter.
- Wash Filters: Rinse the stainless steel filter, cyclone filter, and HEPA filter under running water. Do not wash the main motor unit.
- Dry Thoroughly: Allow all washed components to air dry completely for at least 24 hours before reassembling. Ensure they are bone dry to prevent mold and maintain suction.
- Reassemble: Once dry, reassemble the filters in reverse order and secure the dust cup.
Recommendation: Clean the HEPA filter regularly (e.g., monthly) and replace it every two to three months, depending on usage.
6.3 Cleaning the Brush Roll
Periodically check the motorized floor brush for tangled hair or debris. Use scissors to cut away any tangled hair and remove it. Ensure the brush roll spins freely.
7. Troubleshooting
If you encounter issues with your Vactidy V9, refer to the following common problems and solutions:
| Problem | Possible Cause | Solution |
|---|---|---|
| Vacuum does not turn on. | Battery is not charged or not properly installed. | Ensure battery is fully charged and securely clicked into place. |
| Low suction power. | Dust cup is full; filters are clogged; blockage in nozzle/tube. | Empty dust cup. Clean all filters thoroughly and ensure they are dry. Check for and remove any blockages. |
| Brush roll not spinning. | Hair or debris tangled in brush roll; brush roll is jammed. | Turn off the vacuum and remove any obstructions from the brush roll. |
| Short runtime. | Battery not fully charged; operating in Max mode continuously. | Ensure battery is fully charged. Use Standard mode for longer cleaning sessions. Battery performance may decrease over time. |
8. Specifications
| Feature | Specification |
|---|---|
| Model | V9 |
| Rated Power | 250W |
| Max Suction | 25KPa |
| Standard Suction | 15KPa |
| Battery Capacity | 2200mAh Lithium-ion |
| Working Time | 15-45 minutes (depending on mode) |
| Charging Time | 4-5 hours |
| Dust Tank Capacity | 1 Liter |
| Noise Level | Less than 65dB |
| Net Weight | 1.45 kg (3.2 lbs for main machine) |
| Filtration System | 5-layer High-efficiency Cyclone Metal Filtration System with HEPA |
| Recommended Use | Hard Floor, Thin Carpet, Upholstery |
9. Warranty and Support
The Vactidy V9 Cordless Vacuum Cleaner comes with a 12-month warranty from the date of purchase. This warranty covers manufacturing defects and issues arising from normal use.
For warranty claims, technical support, or any questions regarding your product, please contact Vactidy customer service. Please have your purchase receipt and product model number (V9) ready when contacting support.
For more information, you may visit the official Vactidy store on Amazon: Vactidy Store


