1. Introduction
This manual provides detailed instructions for the installation, operation, and maintenance of your LINISHOP 100W Automatic Roller Door Opener Motor. Designed for garage roll-up doors, this motor offers convenient and reliable automatic door control. Please read this manual thoroughly before installation and use to ensure proper function and safety.

Image 1.1: The LINISHOP 100W Automatic Roller Door Opener Motor, accompanied by two remote controls and the user manual.
2. Safety Information
Always prioritize safety during installation and operation. Failure to follow these instructions may result in injury or damage to property.
- Ensure the power supply is disconnected before any installation, maintenance, or repair work.
- Keep children and pets away from the door area during operation.
- Do not allow children to play with the remote controls or the door opener.
- Regularly inspect the door and opener for signs of wear or damage. Do not operate if damaged.
- This product is designed for garage roll-up doors. Do not use for other purposes.
- The motor features automatic obstacle detection. However, always ensure the path of the door is clear before operation.
3. Package Contents
Verify that all components are present in your package:
- 1 x LINISHOP Rolling Door Opener Motor
- 2 x Remote Controls
- 1 x English User Manual (this document)
4. Product Overview
The LINISHOP 100W Automatic Roller Door Opener is a robust unit designed for efficient and secure operation of roll-up garage doors. It features a powerful copper motor, an intuitive control panel, and multiple control options.

Image 4.1: Detailed view of the control panel with buttons for setting, open/close/stop, up, down, and code learning, alongside the two remote controls.
The control panel includes an LED display for status indication and buttons for function setting, remote control learning, and manual operation. The unit also features integrated LED lights for illumination. Two remote controls are provided for convenient wireless operation.

Image 4.2: An angled perspective of the door opener, highlighting its compact design and the integrated control panel.
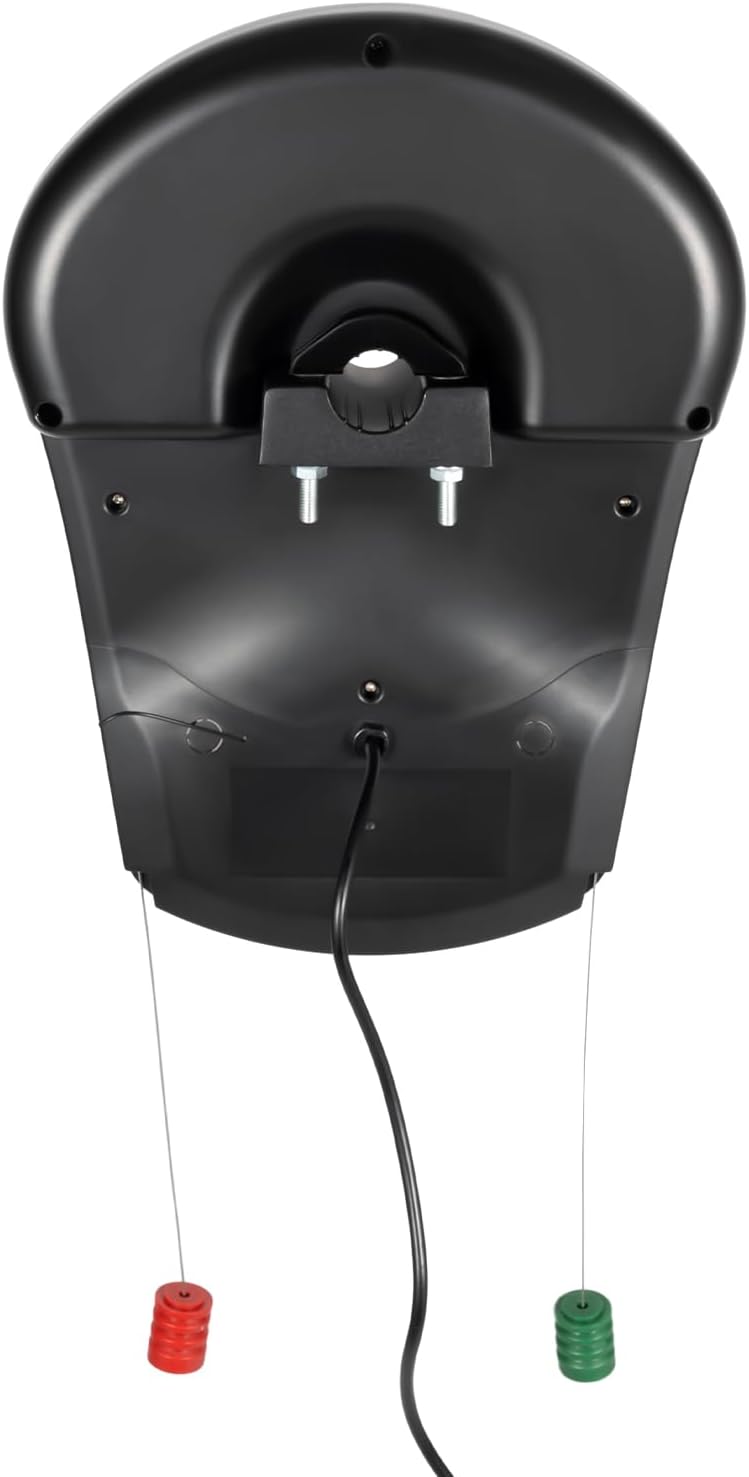
Image 4.3: The rear view of the motor, showing the mounting points and power cable connection.

Image 4.4: A side profile of the door opener, illustrating its slim form factor suitable for narrow spaces above garages.

Image 4.5: Top-down view showing the shaft connection and mounting brackets for installation.
5. Setup and Installation
Installation of the LINISHOP Automatic Roller Door Opener is designed to be straightforward. For detailed visual instructions, please refer to the official Installation Manual PDF provided with your product or available online.
Important: Ensure the garage door is balanced and operates smoothly manually before installing the opener. Disconnect power before beginning installation.
5.1 Mounting the Motor
- Position the motor above the center of the garage door shaft.
- Secure the motor to the wall or ceiling using appropriate screw-in mounting hardware. Ensure it is firmly attached and level.
- Connect the motor's drive shaft to the garage door's rolling shaft.
5.2 Wiring
- Connect the power cable to a suitable power outlet.
- Ensure all connections are secure and insulated.
5.3 Limit Setting
After physical installation, you will need to set the open and close limits for the door. Refer to the detailed instructions in the separate PDF manual for precise steps on programming the travel limits using the control panel.
For a comprehensive installation guide, please download the Installation Manual (PDF).
6. Operating Instructions
Your LINISHOP Automatic Roller Door Opener offers multiple methods of control for your convenience.
6.1 Remote Control Operation
The primary method of operation is via the included remote controls. Each remote has buttons for opening, closing, and stopping the door.
- Pressing the button once will initiate the door's movement (open or close).
- If the door is closing, pressing the button will stop its movement and reverse its direction to open.
- If the door is opening, pressing the button will stop its movement.
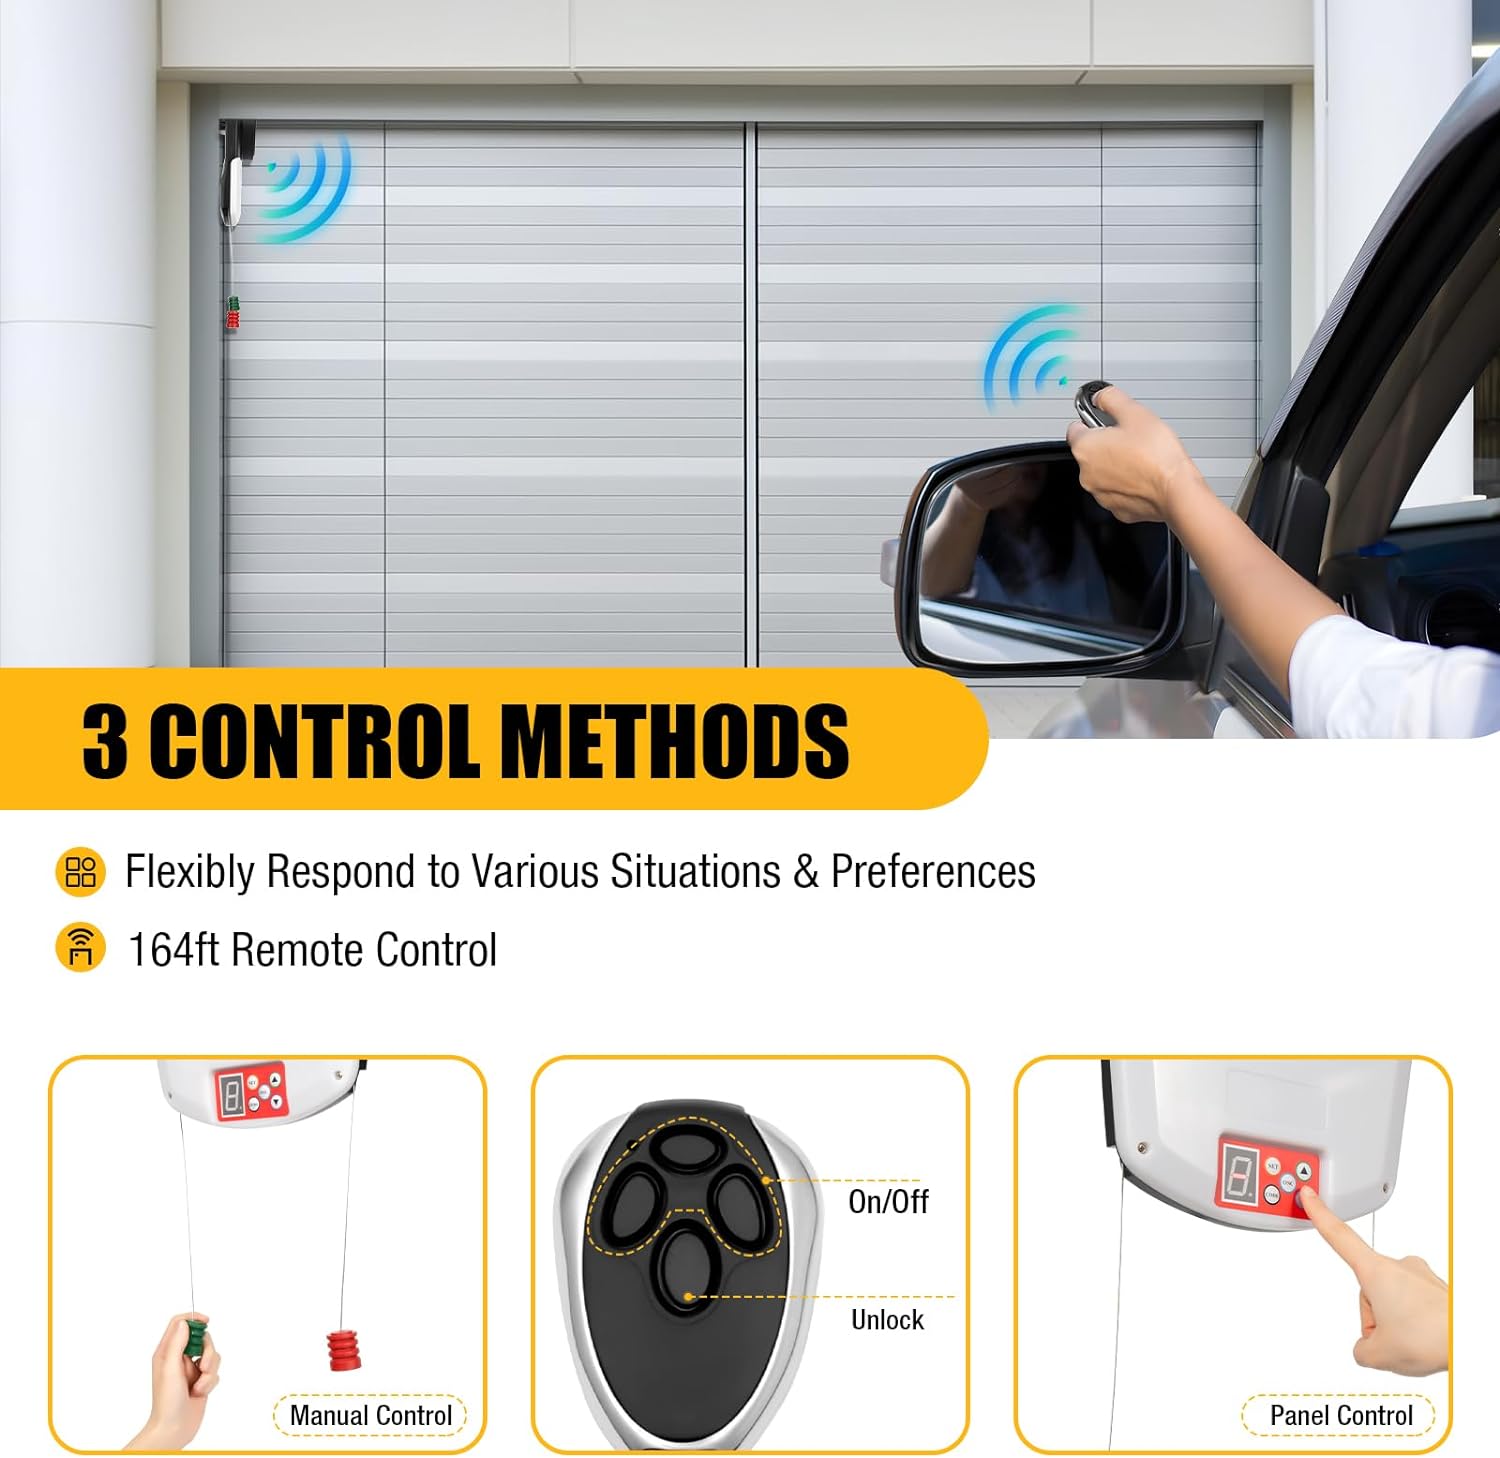
Image 6.1: Illustration of the three flexible control methods: manual pull cord, remote control, and the integrated control panel.
6.2 Manual Control
In case of power outage or emergency, the door can be operated manually using the hanging handles. Pulling the appropriate handle will disengage the motor, allowing you to open or close the door by hand.
6.3 Control Panel Operation
The integrated control panel on the motor unit allows for direct operation and programming. Use the 'Up' and 'Down' buttons to move the door, and the 'OSC' button to stop it.
6.4 Automatic Shutdown Mode
The opener supports an automatic shutdown mode, which can be programmed to close the door after a set delay. This feature enhances convenience and security. Consult the detailed manual for programming steps.
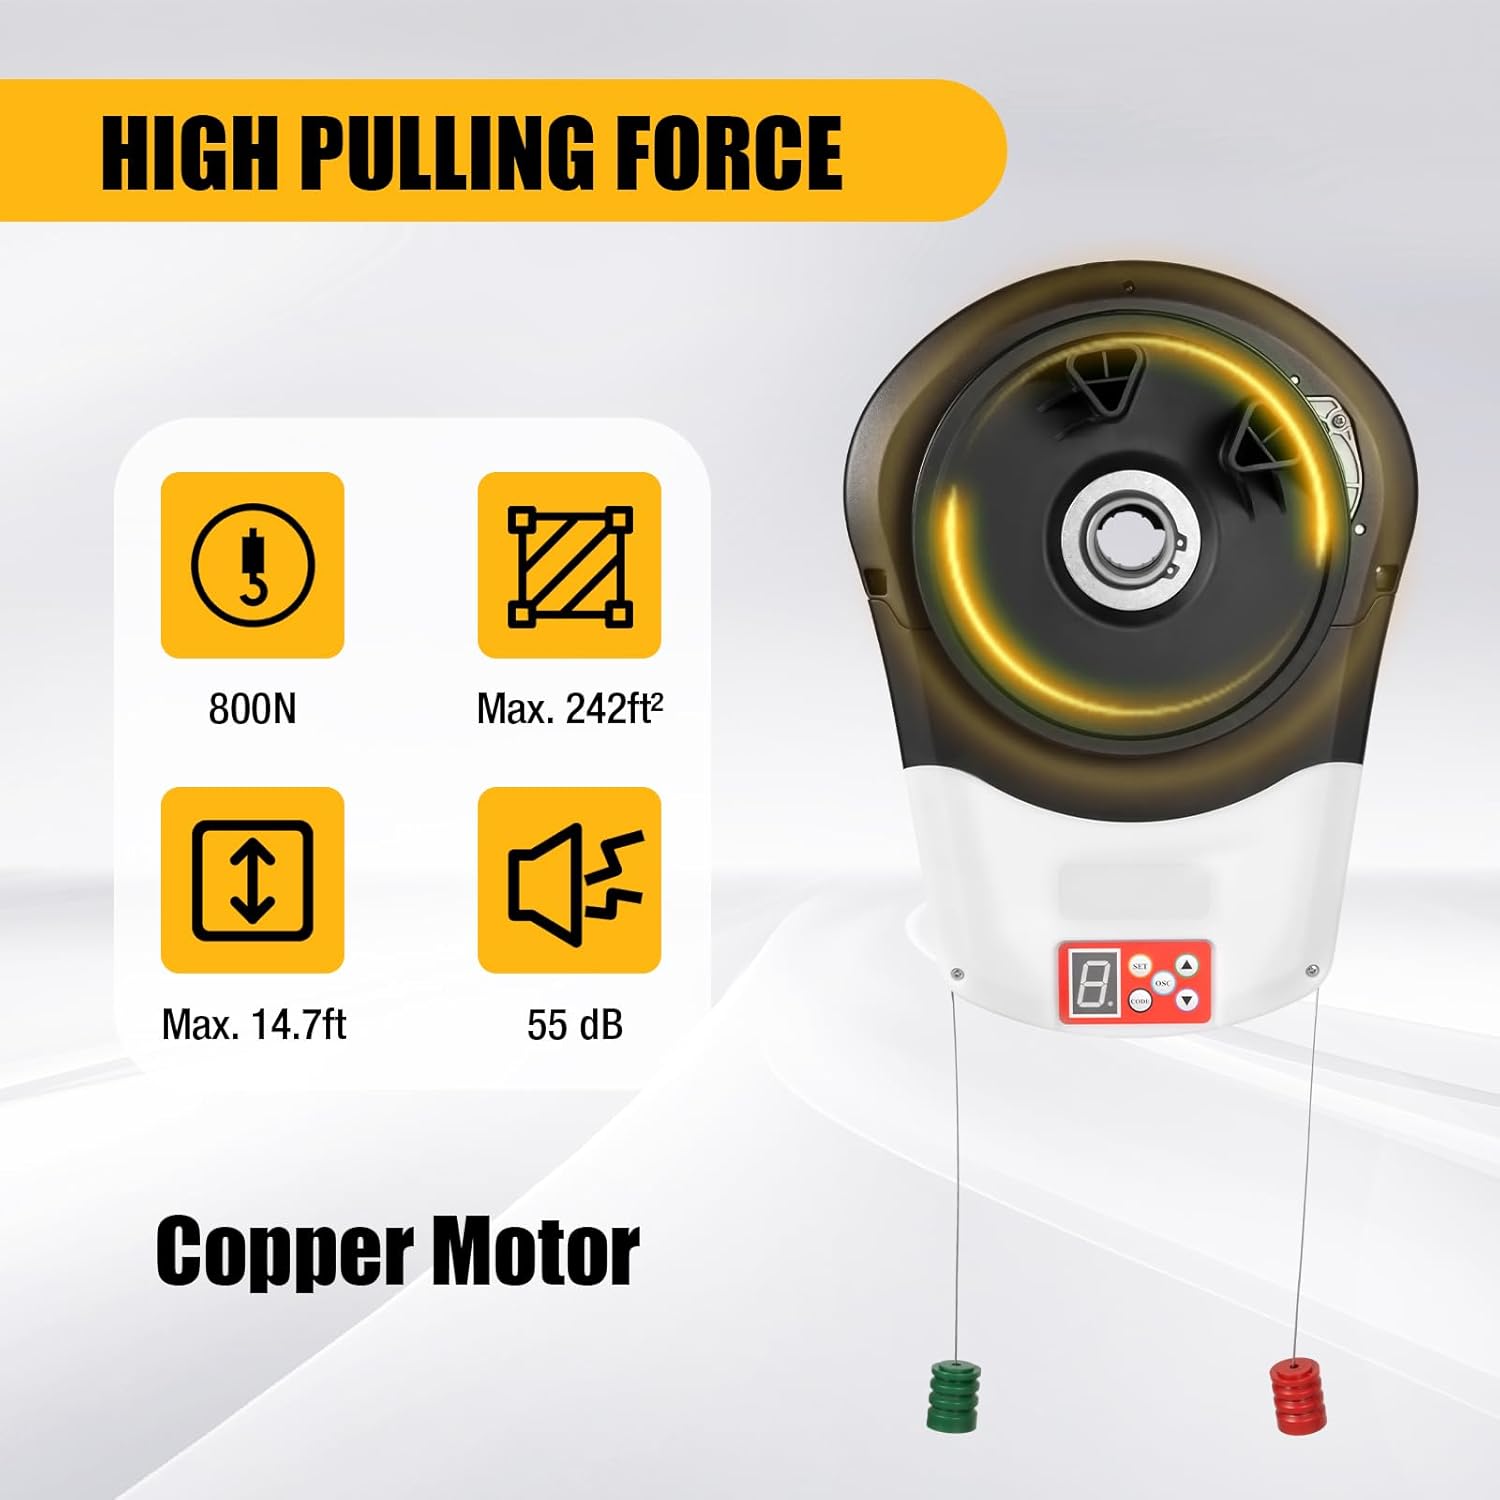
Image 6.2: The powerful 800N pulling force of the copper motor, capable of lifting doors up to 242 square feet and 14.7 feet high, operating at a quiet 55 dB.
The motor provides a strong 800N pulling force, suitable for doors up to 242 square feet and a maximum height of 14.7 feet. It operates quietly at approximately 55 dB.
6.5 Product Details Display Video
Watch this video for a visual demonstration of the product's features and operation.
Video 6.1: A detailed display of the LINISHOP Automatic Roller Door Opener, showcasing its various components and operational aspects.
7. Maintenance
Regular maintenance ensures the longevity and safe operation of your door opener.
- Monthly: Inspect the door and opener for any signs of wear, loose parts, or damage. Ensure the door moves freely and smoothly.
- Annually: Have a qualified technician inspect the entire system, including the motor, springs, cables, and safety features.
- Keep the motor unit clean and free from dust and debris.
- Do not lubricate the motor's internal components.
8. Troubleshooting
If you encounter issues with your door opener, refer to the following common problems and solutions:
| Problem | Possible Cause | Solution |
|---|---|---|
| Motor does not respond to remote. | Dead remote battery, remote not programmed, power outage. | Replace remote battery, reprogram remote (refer to manual), check power supply. |
| Door reverses or stops unexpectedly. | Obstruction in door path, limit settings incorrect, safety sensor issue. | Clear obstruction, re-adjust limit settings, check safety sensors for alignment or damage. |
| Door does not close completely. | Limit settings incorrect. | Adjust the closing limit setting. |
| Motor makes noise but door doesn't move. | Motor disengaged, mechanical issue with door. | Check if motor is engaged, inspect door springs/cables, consult a professional. |
If the problem persists after attempting these solutions, please contact customer support.
9. Specifications
| Feature | Detail |
|---|---|
| Model Number | BI-HJWJL-2493 |
| Power | 100W |
| Pulling Force | 800N |
| Max. Door Area | 242 sq ft |
| Max. Door Height | 14.7 ft |
| Noise Level | Approx. 55 dB |
| Product Dimensions | 15.75 x 11.81 x 7.09 inches |
| Item Weight | 11.57 pounds |
| Material | ABS, Copper |
| Color | White, Black, Red |
| Installation Type | Screw-In |
| Country of Origin | China |
10. Warranty and Support
For warranty information and customer support, please refer to the contact details provided at the point of purchase or on the official LINISHOP website. Keep your purchase receipt as proof of purchase for warranty claims.
If you require technical assistance or have questions not covered in this manual, please do not hesitate to reach out to our support team.


