Product Overview
The POWLSOJX MPPT Solar Charge Controller is an advanced device designed to efficiently manage power flow from your solar panels to your battery bank and connected loads. It features Maximum Power Point Tracking (MPPT) technology to optimize charging efficiency, an intuitive LCD display for comprehensive system monitoring, and versatile operating modes to suit various applications. This controller supports multiple battery voltages (12V, 24V, 36V, 48V) and is compatible with both lead-acid and lithium batteries.
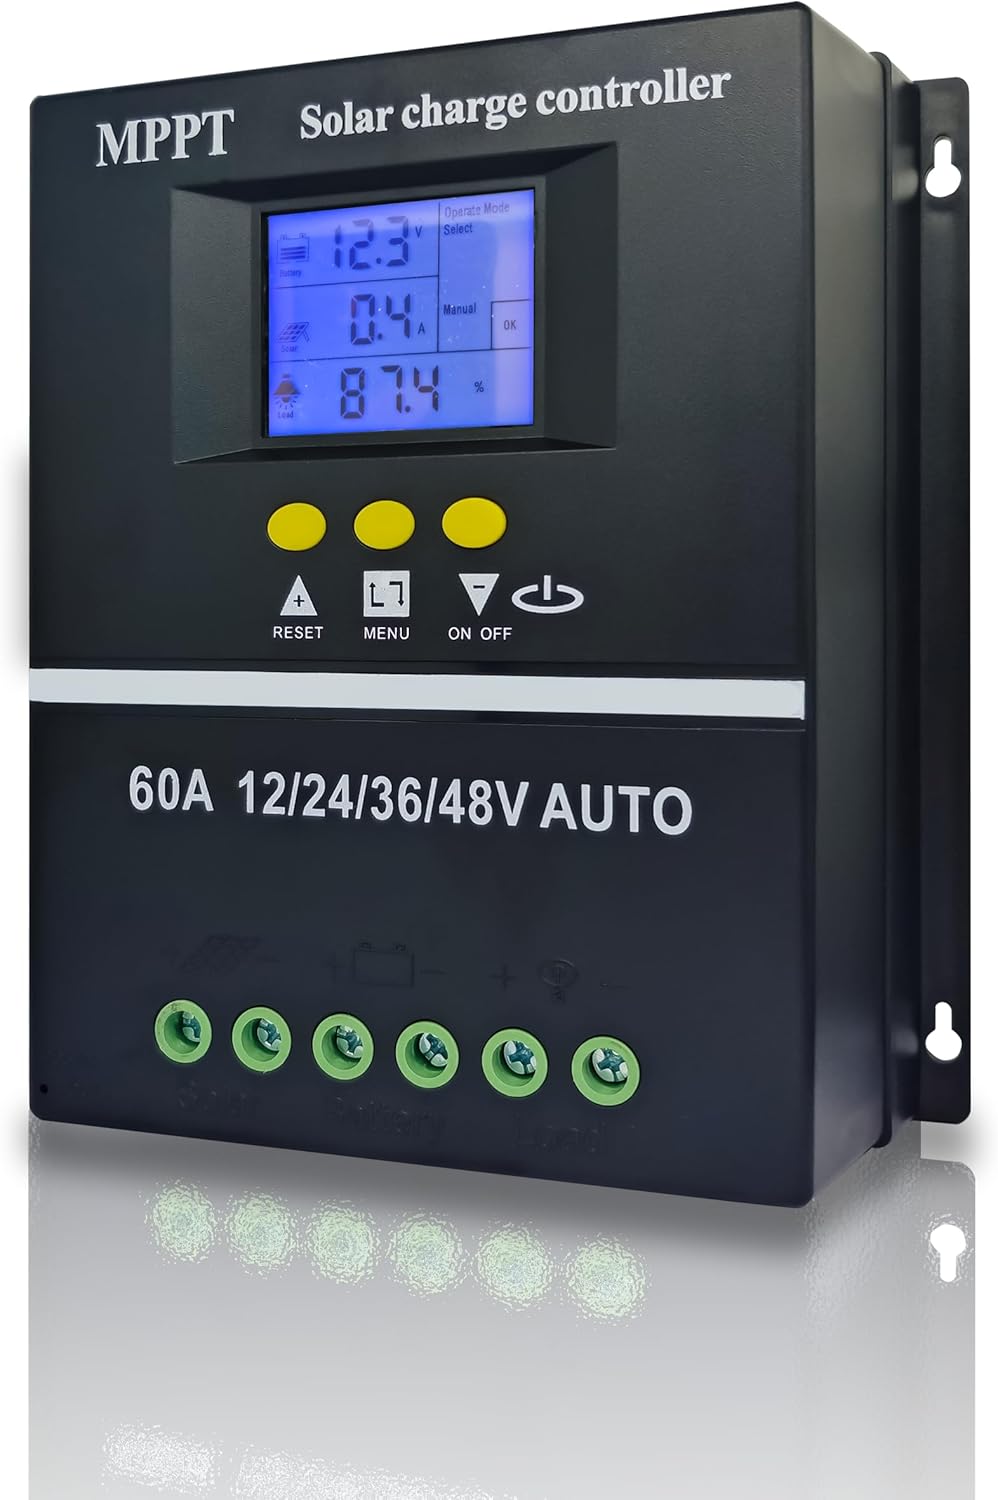
Figure 1: Front view of the POWLSOJX MPPT Solar Charge Controller, showing the LCD display, control buttons, and connection terminals.
Key Features
- Versatile Operation Modes: Offers seven distinct modes including charging, light control, time-delay control, general control, manual control, timing control, and factory test mode.
- Intuitive LCD Display: Provides real-time data on battery and solar panel status, mode control, load output, and various parameters for easy monitoring.
- Efficient MPPT Charging: Maximizes power conversion from solar panels to batteries, ensuring optimal charging efficiency.
- Flexible Discharge Control: Multiple discharge modes allow tailored management of power output based on specific needs.
- Wide Compatibility and Protection: Supports 12V, 24V, 36V, and 48V systems with comprehensive protective features including low-voltage protection.
Figure 2: Close-up of the controller's LCD display, showing battery voltage, current, and other operational data.
Setup and Installation
Proper installation is crucial for the safe and efficient operation of your solar charge controller. Always ensure all connections are secure and follow the recommended sequence.
Connection Sequence:
- Connect the Battery: Connect the battery to the controller first. Ensure the battery voltage meets the minimum requirements for detection:
- 12V battery: Voltage higher than 10V
- 24V battery: Voltage higher than 20V
- 36V battery: Voltage higher than 30V
- 48V battery: Voltage higher than 42V
Note: The controller needs to be connected to the battery first to correctly identify the battery voltage.
- Connect the Solar Panels (PV Array): Connect the solar panels to the controller. Ensure the solar panel voltage is compatible with your battery system. Do not charge 12V batteries with 24V/36V/48V solar panels, as a large pressure difference may damage the controller due to overheating.
- Connect the Loads: Finally, connect your DC loads to the controller.

Figure 3: Diagram illustrating the correct connection order for the solar charge controller, battery, PV panel, and DC load.

Figure 4: Comprehensive system connection diagram showing the solar panel, controller, battery, inverter, and various AC/DC loads.
Temperature Sensor:
The controller includes a temperature sensor (3.3ft length). For accurate battery charge voltage compensation and extended battery lifespan, place this sensor near the battery.

Figure 5: Image highlighting the die-cast aluminum heat sink for efficient heat dissipation and the importance of the temperature sensor for battery health.
Operating Modes
The controller offers various operating modes to manage your solar power system effectively. Use the LCD display and control buttons to navigate and select modes.
- Charging Mode: In this mode, the controller focuses solely on charging the battery and does not discharge power to loads.
- Light Control Mode: The controller detects ambient light. When it senses night, it will delay ten minutes then begin discharging. When it senses daytime, it will delay ten minutes then stop discharging.
- Light and Time Delay Control Mode: Similar to light control, but includes a countdown timer. Discharge begins after a ten-minute delay at night and stops when the timer reaches zero. The maximum delay is 23:59.
- Universal Control Mode: Under normal operating conditions, the controller continuously discharges power to the loads.
- Manual Control Mode: Allows manual control of discharge using the "DOWN" button. Pressing "DOWN" for 5 seconds will force continuous discharge. Caution: Manually forcing discharge under low voltage protection may damage the battery. Discharge must be stopped manually in this mode.
- Timing Control Mode: Enables scheduled opening or closing of discharge based on set times.
- Test Mode: Functions similarly to Light and Time Delay Control Mode but with a reduced ten-minute time delay.
Video 1: An overview of the POWLSOJX MPPT Solar Charge Controller, demonstrating its features and appearance.
Maintenance
Regular maintenance ensures the longevity and optimal performance of your solar charge controller.
- Inspect Connections: Periodically check all wiring connections to ensure they are tight and free from corrosion. Loose connections can lead to power loss or overheating.
- Clean the Controller: Keep the controller's exterior clean and free of dust and debris. The die-cast aluminum heat sink relies on airflow for efficient cooling.
- Monitor Performance: Regularly check the LCD display for normal operation and parameter readings. Any unusual readings may indicate a problem.
- Battery Health: Ensure your battery is well-maintained. The controller compensates charge voltages to extend battery lifespan, but overall battery health is critical.

Figure 6: Image showing the aluminum alloy heat sink, emphasizing the importance of proper ventilation for heat dissipation.
Troubleshooting
If you encounter issues with your solar charge controller, refer to the following common problems and solutions.
| Problem | Possible Cause | Solution |
|---|---|---|
| Controller not powering on / Blinking screen | Incorrect wiring sequence; Battery voltage too low; Loose battery connection. | Ensure battery is connected first and its voltage is above the minimum threshold (e.g., >10V for 12V battery). Check battery terminals for secure connection. |
| No charging from solar panels | Solar panels not connected or connected incorrectly; Insufficient sunlight; PV voltage too low or too high; Faulty solar panel. | Verify PV panel connections. Ensure adequate sunlight. Check PV voltage compatibility with the system. Test solar panels. |
| Loads not receiving power | Loads not connected or connected incorrectly; Battery low voltage protection activated; Load output disabled in settings. | Check load connections. Recharge battery. Verify load output settings on the LCD. If low voltage protection is active, recharge the battery or use manual override with caution. |
| Controller overheating | Poor ventilation; Overload; Incorrect PV voltage for battery. | Ensure adequate airflow around the controller. Reduce load. Verify PV voltage matches battery system requirements. |
For persistent issues, contact the seller or manufacturer for further assistance.
Specifications
| Feature | Detail |
|---|---|
| Model | 100A (Also available in 60A, 80A) |
| Brand | POWLSOJX |
| System Voltage | 12V / 24V / 36V / 48V Auto-sensing |
| Display Type | LCD |
| Battery Compatibility | Lead Acid, Lithium Batteries |
| Recommended PV Input Voltage (for 100A model) | 12V Battery: 15V-25V 24V Battery: 30V-50V 36V Battery: 45V-66V 48V Battery: 60V-90V |
| Maximum PV Input Power (for 100A model) | 12V Battery: 1200W 24V Battery: 2400W 36V Battery: 3600W 48V Battery: 4800W |
| Item Weight | 1.94 pounds |
| Package Dimensions | 8.19 x 8.07 x 2.91 inches |
| Manufacturer | POWLSOJX |
| UPC | 766157532404 |
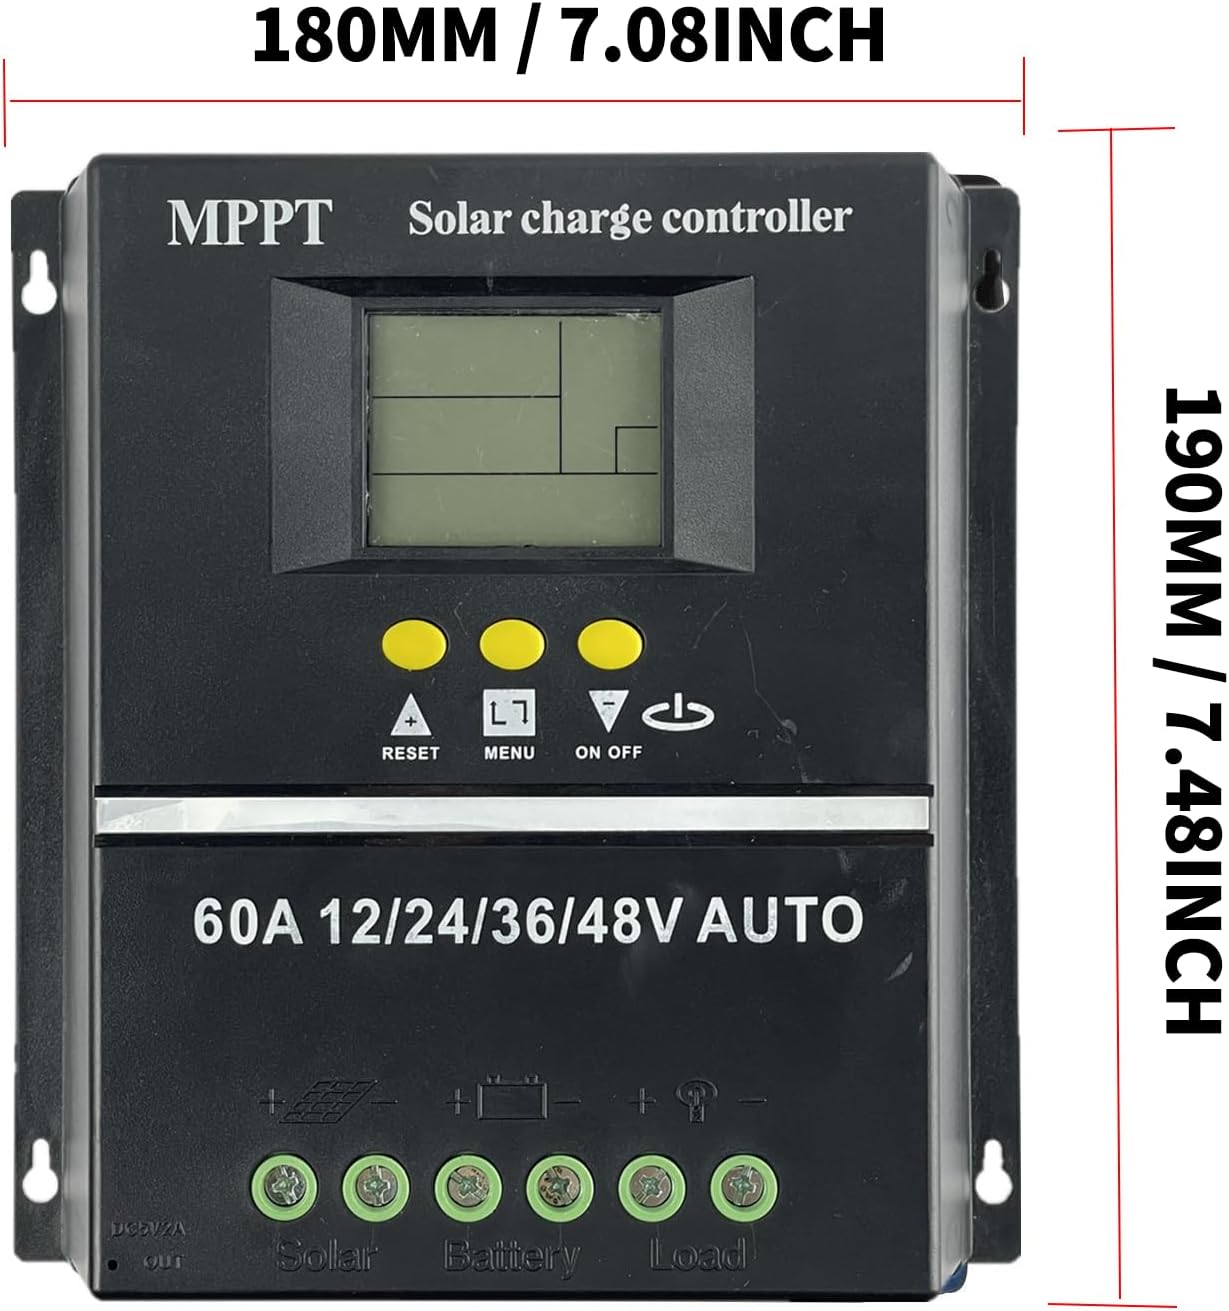
Figure 7: Dimensions of the solar charge controller (180mm / 7.08 inches width, 190mm / 7.48 inches height).
Warranty and Support
For specific warranty details and technical support, please refer to the documentation provided with your purchase or contact the seller, Polestar Solar Technology, directly. Keep your purchase receipt as proof of purchase for any warranty claims.


