Introduction
This manual provides essential information for the safe and effective operation, setup, and maintenance of your Topcon RL-SV1S-PS.RBP.X Single Slope Grade Laser Kit. Please read this manual thoroughly before using the product to ensure optimal performance and safety. The Topcon RL-SV1S-PS.RBP.X is a versatile laser designed for horizontal, single slope, and vertical applications, offering high accuracy and durability for various construction and surveying tasks.
Safety Information
WARNING: This product emits a Class IIIa laser beam. Avoid direct eye exposure. Never stare into the laser beam or direct it at others. Use caution when operating near reflective surfaces. Always wear appropriate eye protection if required by local regulations. Keep out of reach of children.
- Do not attempt to disassemble or modify the laser unit.
- Ensure the laser is securely mounted before operation.
- Operate the laser within its specified temperature range (-4°F to 122°F).
- Use only Topcon approved batteries and chargers.
Package Contents
Verify that all items listed below are included in your kit:
- RL-SV1S Laser Level Unit
- LS-80X Laser Receiver
- RC-50 Remote Control
- Rechargeable Battery Pack (for laser unit)
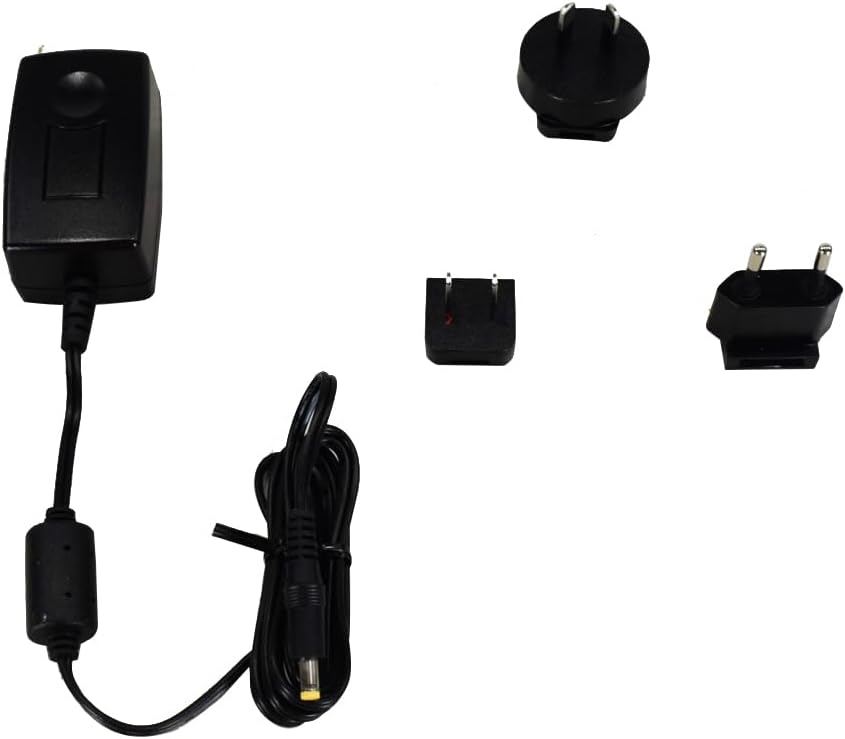
- Battery Charger with Adapters
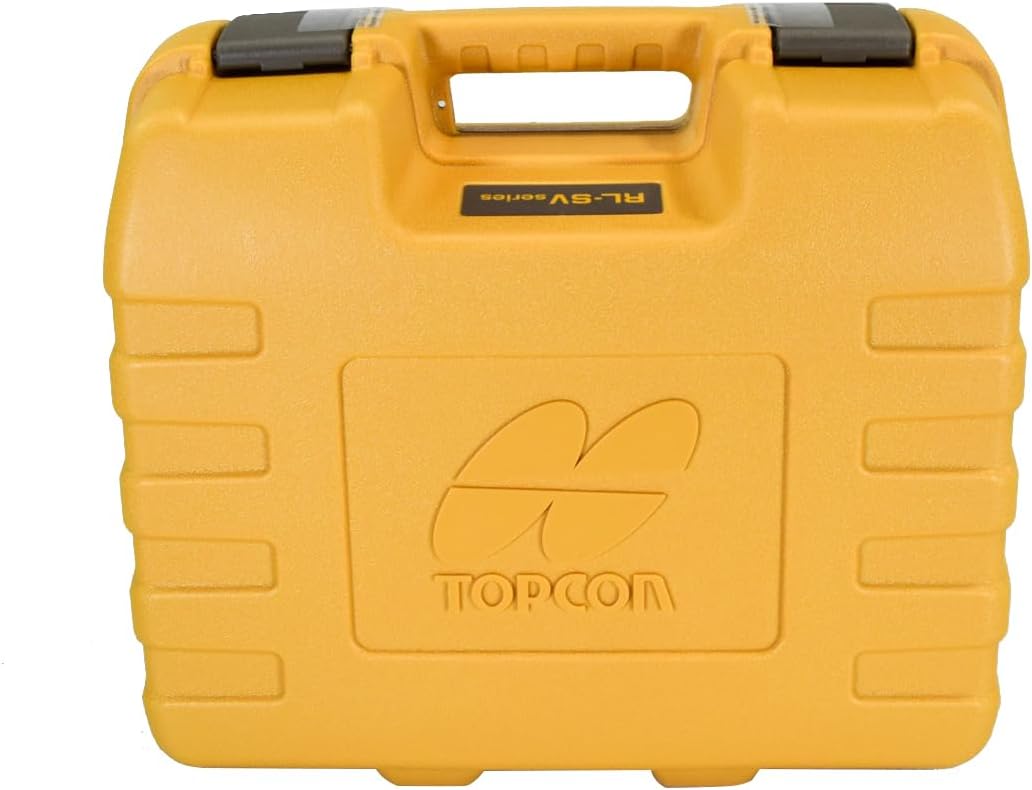
- Hard Carrying Case
- Receiver Clamp/Holder

Product Overview
RL-SV1S Laser Unit
The main laser unit projects a highly accurate laser beam for various applications. It features a robust housing and an intuitive control panel.


LS-80X Laser Receiver
The LS-80X receiver detects the laser beam, providing visual and audible indications for precise grade matching. It has a 2.5-inch reception height.

RC-50 Remote Control
The RC-50 remote control allows for convenient adjustment of laser functions from a distance.

Setup
1. Battery Installation and Charging
The RL-SV1S laser unit operates on a rechargeable battery pack. The LS-80X receiver and RC-50 remote control use standard alkaline batteries (not included for receiver/remote).
- Laser Unit: Open the battery compartment on the laser unit. Insert the rechargeable battery pack, ensuring correct polarity. Close the compartment securely.
- Charging: Connect the charger to the laser unit and a power outlet. The charging indicator will illuminate. A full charge can take several hours.
- LS-80X Receiver: Open the battery cover and insert two AA alkaline batteries, observing polarity.
- RC-50 Remote Control: Open the battery cover and insert two AA alkaline batteries, observing polarity.
2. Mounting the Laser Unit
The RL-SV1S can be mounted on a tripod or other stable surface. Ensure the mounting surface is level and secure.
- For horizontal applications, mount the laser unit upright.
- For vertical applications, mount the laser unit on its side using the integrated mounting points.
3. Powering On/Off
Press the green power button on the laser unit or the RC-50 remote control to turn the unit on. Press and hold the power button to turn it off.
4. Self-Leveling
Upon power-on, the RL-SV1S will automatically self-level. The laser beam will begin rotating once leveling is complete. If the unit is significantly out of level, it may indicate an error or require manual adjustment before self-leveling can occur.
Operating Instructions
1. Horizontal Operation
For general leveling tasks, place the laser unit upright on a stable surface or tripod. Power on the unit. It will self-level and project a horizontal rotating beam.
2. Single Slope Operation
The RL-SV1S allows for single slope applications. Use the X and Y axis buttons on the control panel or RC-50 remote to set the desired slope. The display will show the current slope percentage.
- Press the MENU button to access slope settings.
- Use the arrow buttons to adjust the slope value for the X or Y axis.
- Press ENT to confirm the setting.
3. Vertical Operation
For vertical alignment, mount the laser unit on its side. The unit will project a vertical plane. Use the X and Y axis buttons to adjust the vertical alignment or plumb. The RC-50 remote can also be used for fine adjustments.
4. Using the LS-80X Receiver
The LS-80X receiver is used to detect the laser beam over long distances or in bright conditions.
- Attach the LS-80X to a grade rod using the provided clamp.
- Power on the receiver.
- Move the receiver up or down until the center indicator is displayed, indicating the on-grade position.
- The receiver provides both visual (LCD display) and audible (beeping) feedback.
5. Using the RC-50 Remote Control
The RC-50 remote control allows you to adjust various settings of the RL-SV1S laser unit from a distance, including rotation speed and slope adjustments.
- Ensure the remote control has fresh batteries.
- Point the remote control towards the laser unit.
- Use the corresponding buttons to change settings as needed.
6. Adjusting Rotation Speed
The RL-SV1S offers selectable rotation speeds of 300 RPM or 600 RPM. Adjust the rotation speed using the control panel or the RC-50 remote control to suit your application. Higher speeds are generally better for longer distances, while lower speeds can improve visibility for closer work.
Maintenance
1. Cleaning
Regular cleaning helps maintain the accuracy and longevity of your laser kit.
- Wipe the laser unit, receiver, and remote with a soft, damp cloth.
- Do not use abrasive cleaners or solvents.
- Keep the laser aperture clean and free of dust or debris.
2. Storage
When not in use, store the laser kit in its hard carrying case in a dry, temperature-controlled environment.
3. Battery Care
To maximize battery life:
- Fully charge the rechargeable battery pack before first use and after extended storage.
- Remove alkaline batteries from the receiver and remote if storing for long periods to prevent leakage.
Troubleshooting
| Problem | Possible Cause | Solution |
|---|---|---|
| Laser does not power on | Dead battery; Loose battery connection | Charge battery pack; Check battery compartment for secure connection. |
| Laser not self-leveling | Unit is too far out of level; Unit is on an unstable surface | Manually adjust unit closer to level; Place on a stable, vibration-free surface. |
| Receiver not detecting beam | Receiver batteries low/dead; Receiver not aligned with beam; Beam too faint (long distance/bright light) | Replace receiver batteries; Ensure receiver is facing the laser; Reduce distance or use in lower light conditions. |
| Remote control not working | Remote batteries low/dead; Obstruction between remote and laser | Replace remote batteries; Ensure clear line of sight to laser unit. |
Specifications
| Feature | Specification |
|---|---|
| Model Number | RL-SV1S-PS.RBP.X |
| Laser Range | 2,625 feet (800 meters) |
| Laser Accuracy | ±1/16 inch at 100 feet (±1.5 mm at 30 meters) |
| Rotation Speed | 300 RPM, 600 RPM |
| Laser Class | Class IIIa, 2.4 mW |
| Self-Leveling Range | ±5 degrees |
| Dust/Water Resistance | IP66 |
| Operating Temperature | -4°F to 122°F (-20°C to 50°C) |
| Battery Life (Rechargeable) | Up to 65 hours |
| Power Source | Rechargeable Battery Pack (Laser), AA Alkaline (Receiver, Remote) |
| Item Weight | 14.9 pounds (6.76 kg) |
| Package Dimensions | 17.5 x 15.5 x 10.5 inches (44.45 x 39.37 x 26.67 cm) |
| Included Components | Laser Level, Receiver, Remote, Charger with adapters, Hard Case |
Warranty and Support
Topcon products are manufactured to high standards and are backed by a manufacturer's warranty. For specific warranty details, registration, or technical support, please refer to the warranty card included with your product or visit the official Topcon website. Keep your purchase receipt as proof of purchase.
For further assistance, you may contact Topcon customer service or an authorized service center.


