
1. Product Overview
This replacement parts set is designed to address common issues such as leaks and continuous water flow in specific Geberit flush-mounted cisterns. It provides essential components for repair and restoration of proper function.
1.1 Compatibility
This set is suitable for Geberit flush-mounted cisterns including UP120 (Artline), UP200 (Kappa), UP120Y, and UP200Y. It is also compatible with cisterns corresponding to the following Geberit numbers:
- 109.200.00.1, 109.202.00.1, 109.210.00.1, 110.204.00.1, 110.205.00.1, 110.220.00.1, 110.227.00.1, 110.229.00.1, 110.230.00.1, 110.250.00.1, 110.255.00.1, 111.189.00.1, 111.220.00.1, 111.222.00.1, 111.223.00.1, 111.230.00.1, 111.240.00.1, 111.242.00.1, 111.244.00.1, 111.253.00.1, 111.256.00.1, 111.270.00.1, 111.272.00.1, 111.277.00.1, 111.280.00.1, 111.290.00.1, 111.291.00.1, 111.293.00.1, 111.294.00.1, 111.295.00.1, 115.228.11.1, 115.228.21.1, 115.228.46.1, 115.240.KH.1, 115.240.KJ.1, 115.240.KN.1, 115.260.11.1, 115.260.21.1, 115.260.46.1
- 260.193.00.1, 260.196.00.1, 260.197.00.1, 260.198.00.1, 260.199.00.1, 260.240.00.1, 260.241.00.1, 260.248.00.1, 260.249.00.1, 260.251.00.1, 260.252.00.1, 260.253.00.1, 260.255.00.1, 260.261.00.1, 260.262.00.1, 260.263.00.1
- 440.220.00.1, 440.222.00.1, 440.225.00.1, 440.226.00.1, 461.220.00.1, 461.230.00.1, 461.231.00.1, 461.240.00.1, 461.242.00.1, 461.245.00.1, 461.247.00.1, 461.320.00.1, 461.330.00.1, 461.331.00.1
- 880.621.00.0, 880.913.00.0, 880.915.00.0, 882.027.00.0, 882.029.00.0, 882.051.00.0, 882.052.00.0, 883.028.00.0, 883.211.00.0, 883.225.00.0
- 964.832.00.0 (00), 964.895.00.0 (01), 964.895.00.0 (03), 964.896.00.0 (00), 994.425.00.0, 994.709.00.0, 994.7709.00.0 (01)

Image 1.1: Lifting Bell Eyelet Compatibility. The replacement part is compatible only if the eyelets of your existing lifting bell match the examples shown in the top section of the image. If your eyelets resemble those in the bottom section, the replacement part is not compatible.

Image 1.2: Old vs. New Model Comparison. This set serves as a replacement for older models. The image illustrates an older, no longer available part (left) and the new, successor model (right) included in this set.
2. Package Contents
The Generisch Replacement Parts Set includes the following components:
- Filling valve with adapter
- Lifting bell with pre-assembled lifting bell seal
- Basket (basin) with pre-assembled basket seal
- Hold-down device (pre-assembled)
- Assembly instructions from GS replacement parts service (with real pictures)
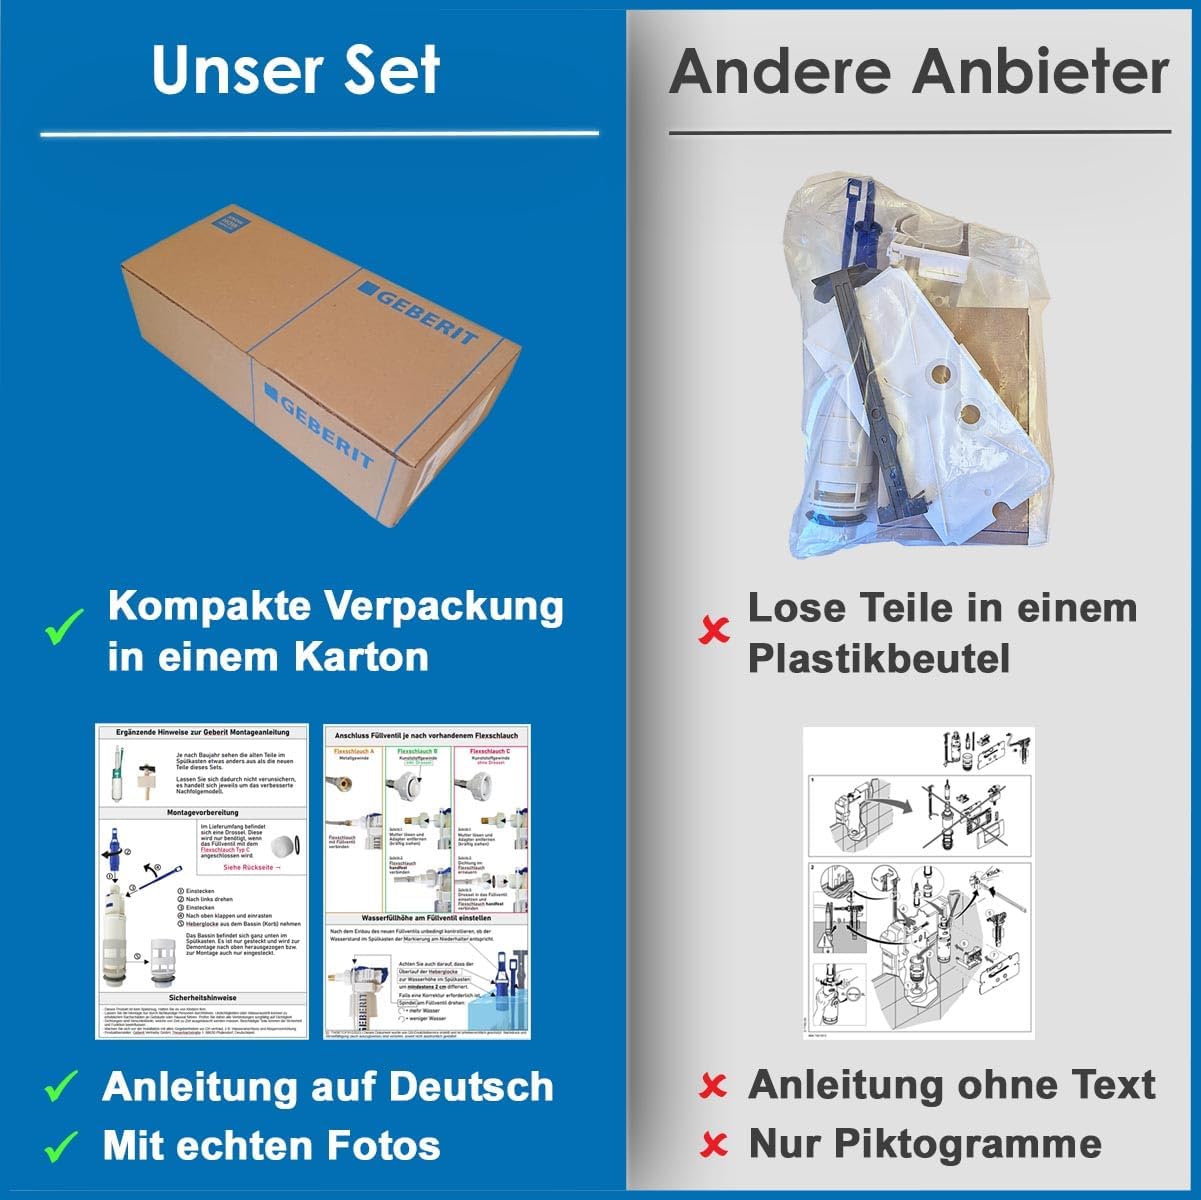
Image 2.1: Packaging and Included Instructions. The set comes in compact packaging within a carton. Comprehensive assembly instructions with real photographs are included to guide the installation process.
3. Setup and Installation
Installation of this replacement parts set is designed to be straightforward and can be performed via the inspection opening of the cistern, eliminating the need to remove tiles.
3.1 Component Identification and Adjustment Points

Image 3.1: Key Components and Adjustment Points. This image highlights the main components and their functions:
- Adapter with 3/8" Brass Connection: Ensures universal fitment.
- Adjustment for Small Flush Volume: Allows setting the water volume for the small flush button.
- Adjustment for Large Flush Volume: Allows setting the water volume for the large flush button.
- Pre-assembled Seal: Ensures a watertight connection.
- Adjustment for Water Fill Height: Controls the water level inside the cistern.
- Compact Size: Designed for efficient space utilization.
- Quiet Filling: Engineered for reduced noise during water refilling.
Refer to the included assembly instructions for detailed, step-by-step guidance with photographs specific to your cistern model.
4. Operating Instructions
Once installed, the replacement parts allow for adjustment of the cistern's flushing mechanism to optimize water usage.
4.1 Flush Volume Adjustment
As indicated in Image 3.1, the set includes mechanisms to adjust the flush volume for both the small and large flush buttons. These adjustments typically involve rotating or sliding components on the lifting bell or filling valve. Consult the detailed assembly instructions for precise steps on how to set your desired flush volumes.
4.2 Water Fill Height Adjustment
The water fill height can also be adjusted using the designated control on the filling valve (refer to Image 3.1). This allows you to set the maximum water level in the cistern, which can impact overall water consumption. Follow the instructions provided in the manual for correct adjustment.
5. Maintenance
Regular maintenance helps ensure the longevity and efficient operation of your cistern parts. Periodically inspect the seals and moving components for wear or debris accumulation. Clean components with mild, non-abrasive cleaners if necessary. Avoid using harsh chemicals that could damage plastic or rubber parts.
6. Troubleshooting
This replacement parts set is designed to fix common issues. If you experience problems after installation, consider the following:
- Leaks or Trailing Water: Ensure all seals (lifting bell seal, basket seal) are correctly seated and not damaged. Verify that the filling valve is properly installed and not obstructed. Check the water fill height adjustment to ensure it's not set too high, causing overflow.
- Incomplete Flush: Check the flush volume adjustments for both small and large buttons. Ensure the lifting bell moves freely without obstruction.
- Slow Filling: Inspect the filling valve for any blockages or debris. Ensure water supply to the cistern is fully open.
If issues persist, re-read the assembly instructions carefully or consult a qualified plumber.
7. Specifications
| Feature | Detail |
|---|---|
| Brand | Generisch |
| Manufacturer | Geberit (for compatible cisterns) |
| Product Dimensions | 10L x 14.2W x 30.5H centimetres |
| Item Weight | 467 Grams |
| Colour | White |
| Handle Material | Plastic |
| Head Material | Plastic |
| Number of Items | 1 |
| Batteries Required | No |
| Surface Recommendation | Ceiling, Wall, Floor (Note: This likely refers to the cistern's installation environment, not the part itself.) |
8. Warranty and Support
No explicit warranty information is provided with this product. For any questions regarding installation, operation, or troubleshooting that are not covered in this manual, please contact the seller or the manufacturer for support.