
ROCKLER 56248
Router Table Dust Bucket with Dual Port Instruction Manual
Model: 56248
Brand: ROCKLER
Introduction
The ROCKLER Router Table Dust Bucket with Dual Port is designed to enhance your woodworking experience by providing efficient dust and debris collection for your router table. This system captures dust from both above and below the router table, significantly improving workshop cleanliness and air quality. Its robust construction and thoughtful design ensure ease of use and compatibility with most full-size router tables.

Image: The Router Table Dust Bucket in its closed state, showcasing its compact design and the "Dust RIGHT" branding.
Safety Information
Always prioritize safety when working with power tools and dust collection systems. Read and understand all instructions before assembly and operation.
- Ensure all power tools are disconnected from their power source before performing any assembly, maintenance, or adjustments to the dust bucket.
- Wear appropriate personal protective equipment (PPE), including eye protection, hearing protection, and a dust mask, when operating woodworking machinery.
- Ensure your dust collection system is properly sized and connected to handle the volume of dust generated by your router.
- Keep the work area clean and well-lit. Cluttered or dark areas invite accidents.
- Do not operate the dust bucket if any parts are damaged or missing.
- This product is designed for dust collection from router tables. Do not use it for purposes other than its intended use.
Package Contents
Verify that all components are present before beginning assembly:
- (1) Router Table Dust Bucket
- (1) Vent Assembly
- (1) Dual Dust Port
- (44) #8-3/8'' Screws
Setup
Follow these steps for quick and straightforward assembly and installation of your Router Table Dust Bucket.
1. Assembling the Dust Bucket
The dust bucket components are designed for easy assembly. Use the provided #8-3/8'' screws to secure the panels together. Ensure all connections are tight for optimal dust collection performance.
2. Attaching Mounting Tabs
The mounting tabs can be attached to any side of the dust bucket to best suit your router table's configuration. This allows for a customized and convenient fit.

Image: A close-up view of the black mounting tabs attached to the top edge of the blue dust bucket, showing the keyhole slots for hanging.
3. Installing the Dual Dust Port
Attach the dual dust port to the designated opening on the side of the dust bucket. This port allows for connection to your main dust collection system and also provides an additional port for connecting a hose to your router table's fence port.

Image: The rear view of the blue dust bucket, clearly showing the black dual dust port assembly attached to its side, ready for hose connection.
4. Mounting to Router Table
Once assembled, mount the dust bucket to your router table using the attached mounting tabs. Ensure it is securely fastened to prevent movement during operation. The bucket is designed to accommodate most routers, including large plunge routers.
Note: This product is not compatible with Bench Dog cast iron router table tops.
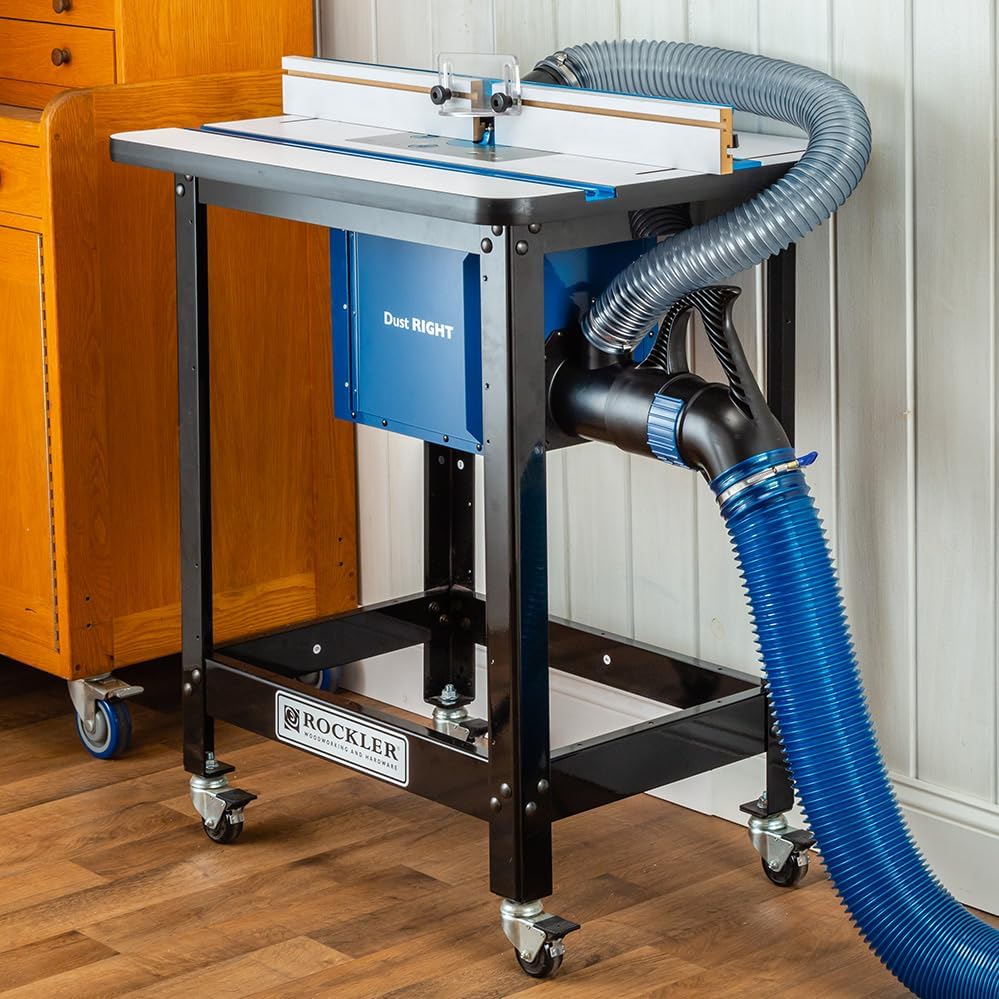
Image: A complete router table setup with the blue dust bucket mounted underneath, showing the main dust collection hose connected to the bucket and another hose extending to the router fence.
Operating Instructions
1. Connecting Dust Hoses
Connect your primary dust collection hose to the larger port on the dual dust port assembly. For enhanced dust capture, connect a smaller hose from the secondary port on the dual dust port to your router table's fence port.

Image: A user's hands guiding a piece of wood across a router table, with the blue dust bucket and connected hoses visible underneath, indicating active dust collection during routing.
2. Accessing the Router
The dust bucket features an easy-access door with a magnetic catch. This allows for convenient access to your router for bit changes, adjustments, or maintenance without dismounting the entire bucket.

Image: The blue dust bucket with its front access door swung open, revealing the interior space where a router would be housed.

Image: A router mounted inside the blue dust bucket, with the access door open, providing a clear view of the router's motor and base.
3. Adjusting the Vent
An adjustable vent is integrated into the design to help prevent boards from sticking to the router table due to excessive suction. Adjust the vent as needed to control the suction power and optimize dust collection efficiency while maintaining smooth workpiece movement.
Maintenance
Regular maintenance ensures the longevity and optimal performance of your Router Table Dust Bucket.
- Cleaning: Periodically open the access door and remove any accumulated dust and debris from inside the bucket. Ensure the router and surrounding area are clean.
- Inspection: Regularly inspect the dust bucket, hoses, and connections for any signs of wear, damage, or blockages. Ensure the magnetic catch on the door is functioning correctly.
- Hardware Check: Verify that all screws and mounting hardware remain tight. Re-tighten if necessary.
Troubleshooting
| Problem | Possible Cause | Solution |
|---|---|---|
| Poor Dust Collection |
|
|
| Boards Sticking to Table |
|
|
| Bucket Does Not Fit Table |
|
|
Specifications
| Manufacturer | Rockler |
| Item Model Number | 56248 |
| Material | Alloy Steel |
| Shape | Rectangular |
| Power Source | Corded Electric (referring to router, not bucket) |
| Included Components | (1) Dual Dust Port, (1) Router Table Dust Bucket, (1) Vent Assembly, (44) #8-3/8'' Screws |
| ASIN | B0CBCLQW33 |
| Date First Available | July 7, 2023 |
Warranty and Support
For information regarding product warranty, returns, or technical support, please refer to the official Rockler Woodworking and Hardware website or contact their customer service directly. Keep your purchase receipt for any warranty claims.
Visit the ROCKLER Store on Amazon for more products and information.
Related documents56248


Ask a question about this manual
Ask about setup, troubleshooting, compatibility, parts, safety, or missing instructions. Manuals+ will review the question and use this page’s manual context to help answer it.