
1. Introduction and Overview
The Uten 2200 Computerized Embroidery Sewing Machine is designed for both beginners and experienced sewers, offering a wide range of features for various sewing projects. This manual provides detailed instructions for setup, operation, maintenance, and troubleshooting to ensure optimal performance and longevity of your machine.

Figure 1.1: Uten 2200 Computerized Embroidery Sewing Machine.

Figure 1.2: Key components of the Uten 2200 Sewing Machine, including the thread tension control dial, start/stop button, sewing speed control, LCD display, automatic needle threader, reverse sewing lever, power/light switch, presser foot lifter, and feed dog controller.
2. Safety Information
Please read all instructions before using this sewing machine to prevent electric shock, fire, or injury. Keep this manual for future reference.
- Always unplug the machine from the electrical outlet immediately after using and before cleaning, making any adjustments, or removing any parts.
- Do not allow children to operate the machine unsupervised.
- Keep fingers away from all moving parts. Special care is required around the sewing machine needle.
- Use only accessories recommended by the manufacturer.
- Never operate the machine if it has a damaged cord or plug, if it is not working properly, or if it has been dropped or damaged.
- Do not use the machine in the presence of explosive and/or flammable fumes.
3. Package Contents
Upon unboxing your Uten 2200 Sewing Machine, ensure all the following components are present. Accessories are typically stored inside the removable accessory table on the front of the machine.
- Uten 2200 Sewing Machine Unit
- Foot Pedal
- Power Cord
- Standard Accessories:
- Zigzag Foot
- Zipper Foot
- Button Foot
- Blind Stitch Foot
- Buttonhole Foot
- Bobbins
- Needles
- Twin Needle
- Screwdriver
- Hem Guide Foot
- Ripper/Brush

Figure 3.1: Location of accessories and a visual guide to the included presser feet and tools.
4. Setup
4.1 Power Connection
Connect the power cord to the machine and then to a suitable electrical outlet. If using the foot pedal, connect it to the designated port on the machine.
4.2 Bobbin Winding
Proper bobbin winding ensures smooth stitching. Place the thread spool on the spool pin, guide the thread through the tension disc, and wind it onto an empty bobbin. Place the bobbin onto the bobbin winder spindle and push it to the right. Start the machine to wind the bobbin evenly. Once full, cut the thread and remove the bobbin.
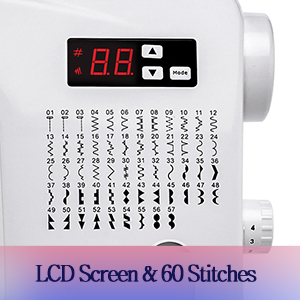
Figure 4.1: Bobbin winding system in operation.
4.3 Threading the Machine
Upper Threading: Follow the numbered guides on the machine to thread the upper thread from the spool, through the tension discs, take-up lever, and down to the needle. The automatic needle threader simplifies the final step.

Figure 4.2: Demonstrating the automatic needle threader for easy threading.
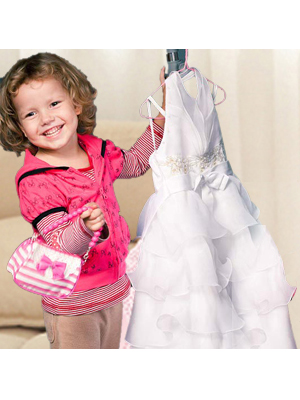
Figure 4.3: Close-up of the automatic needle threader.
Lower Threading (Bobbin Case): Open the bobbin case cover. Insert the wound bobbin into the bobbin case, ensuring the thread unwinds in the correct direction. Pull the thread through the tension spring and into the bobbin case slot. Close the cover. Use the handwheel to bring the bobbin thread up through the needle plate.
4.4 Attaching Presser Feet
To change a presser foot, raise the needle and presser foot lifter. Press the release button on the back of the presser foot holder to detach the current foot. Align the new presser foot with the holder and lower the presser foot lifter until it snaps into place.
4.5 Extension Table
For larger projects and quilting, an optional extension table can be attached to the machine. This provides a larger, flat working surface. (Note: Extension table is not included and must be purchased separately).

Figure 4.4: The sewing machine with an optional extension table, providing a larger work area for projects and quilts.

Figure 4.5: Side view emphasizing the extended table area.
5. Operating Instructions
The Uten 2200 offers a variety of functions to enhance your sewing experience.
5.1 Stitch Selection and LCD Display
The machine features 60 unique built-in stitches, including basic and decorative options. Use the LCD screen and selection buttons to easily choose your desired stitch pattern. The LCD display shows the selected stitch number and other relevant settings.

Figure 5.1: The LCD screen and the comprehensive chart of 60 built-in stitch patterns.
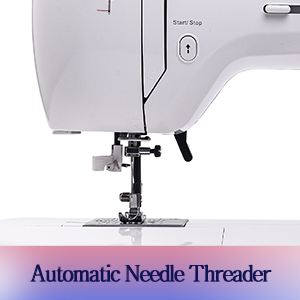
Figure 5.2: Detailed view of the LCD screen and stitch selection buttons.
5.2 Speed Control
Adjust the sewing speed using the variable speed control slider located on the machine. This allows for precise control, especially for intricate work or when learning.

Figure 5.3: The speed control slider for adjusting sewing pace.
5.3 Reverse Stitch Function
To reinforce stitches at the beginning or end of a seam, press and hold the reverse button. The machine will sew in reverse. Release the button to resume forward stitching.
5.4 Stitch Length and Width Adjustment
The machine allows for automatic adjustment of stitch length and width. For specific patterns, consult the stitch chart and adjust as needed using the appropriate controls.
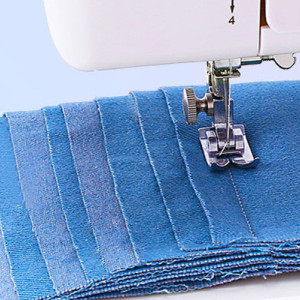
Figure 5.4: Adjusting stitch length using the dial.
5.5 Tension Adjustment
The machine features automatic tension. If manual adjustment is required for specific fabrics or threads, use the tension control dial to achieve balanced stitches.
5.6 Using Different Presser Feet
The Uten 2200 comes with 5 quick-change presser feet, each designed for specific tasks:
- Zigzag Foot: Standard foot for general sewing and zigzag stitches.
- Zipper Foot: Used for sewing zippers, allowing the needle to stitch close to the zipper teeth.
- Button Foot: Designed for attaching buttons securely.
- Blind Stitch Foot: Creates invisible hems on various fabrics.
- Buttonhole Foot: Used in conjunction with the machine's buttonhole function to create precise buttonholes.

Figure 5.5: Examples of projects using various presser feet, including button, zipper, and blind stitch feet.
5.7 Four-step Buttonhole Sewing
Attach the buttonhole foot. Select the buttonhole stitch pattern on the LCD. Follow the machine's instructions for each of the four steps to create a complete buttonhole.
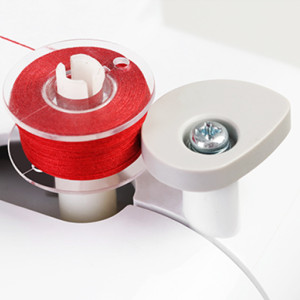
Figure 5.6: Four-step buttonhole sewing in progress.
5.8 Free-Motion Quilting/Embroidery
For free-motion quilting or embroidery, the feed dogs can be dropped. This allows you to move the fabric freely under the needle. Attach the embroidery foot for best results.

Figure 5.7: The drop feed system for easy embroidery and free-motion sewing.
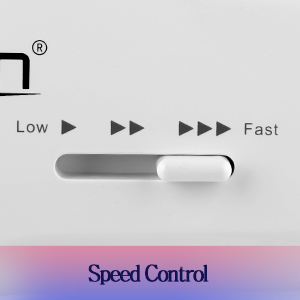
Figure 5.8: Free-hand sewing with the feed dogs lowered.
5.9 Multilayer Sewing
The Uten 2200 is capable of sewing through multiple layers of fabric, such as denim, making it suitable for various projects from delicate fabrics to heavier materials.
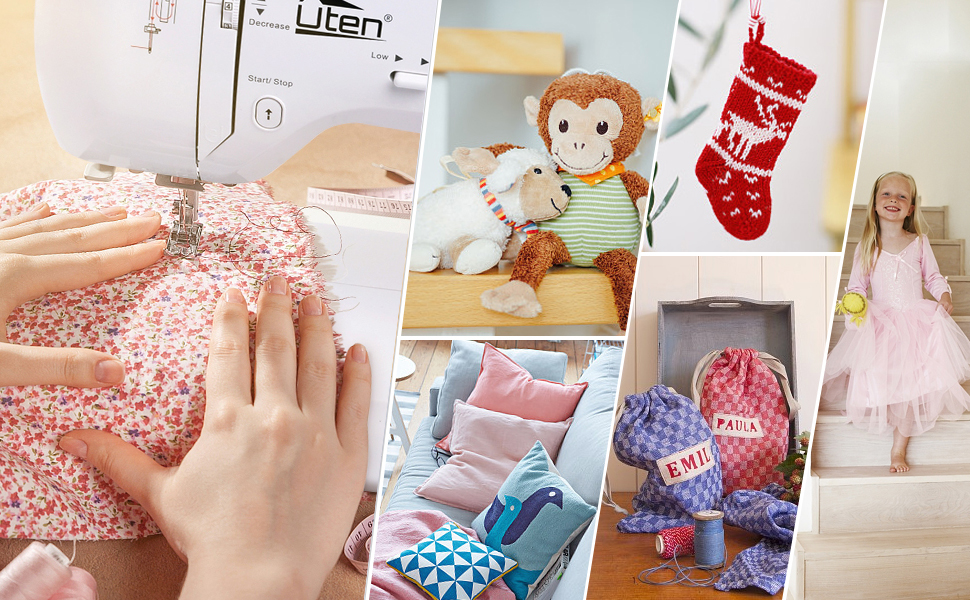
Figure 5.9: The machine's capability to sew through multiple layers of fabric.
5.10 Product Video Overview
For a visual guide to the Uten 2200 Sewing Machine's features and basic operations, please watch the official product video below.
Video 5.1: Official Uten Sewing Machine Model 2200 demonstration, covering bobbin winding, threading, automatic needle threader, stitch selection, tension control, two control modes (automatic and foot pedal), stitch length adjustment, multilayer sewing, reverse stitch, variable speed control, four-step buttonhole sewing, blind stitch foot, zipper foot, button foot, free motion quilting, and extension table usage.
6. Maintenance
Regular maintenance ensures the smooth operation and extends the life of your sewing machine.
6.1 Cleaning
Regularly clean lint and dust from the bobbin area and feed dogs using the brush provided. Unplug the machine before cleaning. Do not use liquid cleaners or immerse the machine in water.
6.2 Needle Replacement
Replace the needle frequently, especially when sewing different fabric types or if the needle becomes bent or dull. A dull needle can cause skipped stitches or damage to fabric. Ensure the flat side of the needle faces the back of the machine when inserting.
7. Troubleshooting
This section addresses common issues you might encounter. For more complex problems, contact customer support.
| Problem | Possible Cause | Solution |
|---|---|---|
| Skipped Stitches | Incorrect needle, bent needle, improper threading, incorrect tension. | Replace needle with correct type/size, re-thread machine, adjust tension. |
| Thread Breaking | Improper threading, tension too tight, poor quality thread, bent needle. | Re-thread machine, loosen tension, use good quality thread, replace needle. |
| Fabric Puckering | Tension too tight, incorrect stitch length, wrong needle for fabric. | Adjust tension, increase stitch length, use appropriate needle. |
| Machine Not Starting | Not plugged in, power switch off, foot pedal not connected. | Check power connection, ensure switch is on, verify foot pedal connection. |
8. Specifications
- Model: Uten 2200
- Stitch Patterns: 60 unique built-in stitches
- Display: LCD Screen
- Control Modes: Electric (Start/Stop button) and Foot Pedal
- Dimensions (Product): 19.09 x 13.77 x 9.05 inches (48.5 x 35 x 23 cm)
- Weight (Item): 12.63 pounds (5.73 kg)
- Manufacturer: Uten
- UPC: 744252858674
- Included Presser Feet: Zigzag, Zipper, Button, Blind Stitch, Buttonhole
- Special Features: Automatic Needle Threader, Automatic Tension, Variable Speed Control, Reverse Stitch Function, Drop Feed System.
9. Warranty and Support
For warranty information, technical support, or replacement parts, please contact Uten customer service through their official website or the retailer where the product was purchased. Keep your purchase receipt as proof of purchase.
Uten Official Website: Visit the Uten Store on Amazon


