1. Introduction
This manual provides detailed instructions for the safe and effective operation of the RuoShui Handheld LCR Meter 4080. This digital bridge multimeter is designed for precise measurement of inductance (L), capacitance (C), and resistance (R) across various test frequencies. It is an essential tool for engineers, technicians, and hobbyists working with electronic components.
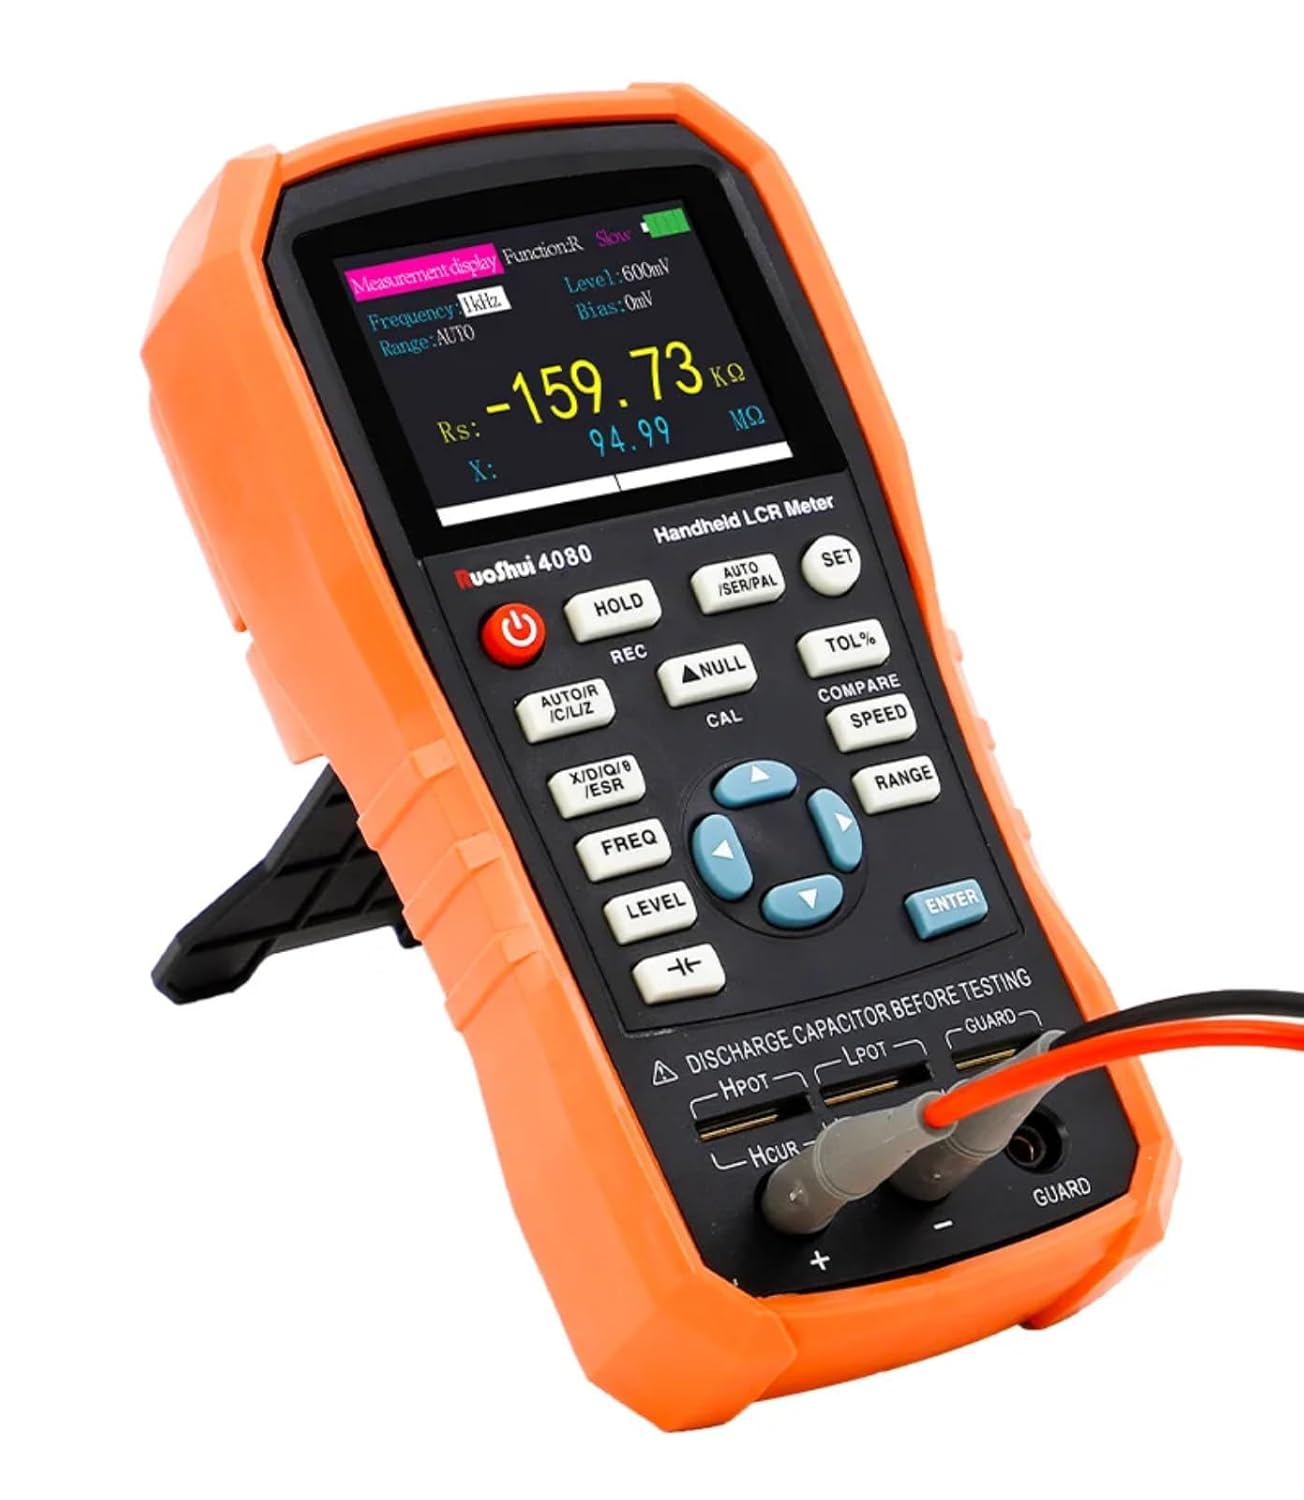
Figure 1: RuoShui Handheld LCR Meter 4080 with test leads connected.
2. Safety Information
Please read and understand all safety warnings and operating instructions before using this instrument. Failure to do so may result in injury or damage to the meter.
- Do not apply voltage to the input terminals. This device is designed for passive component testing only.
- Always discharge capacitors before testing to prevent damage to the meter and ensure accurate readings.
- Ensure the test leads are in good condition and properly connected.
- Do not operate the meter in wet environments or near flammable gases.
- If the meter is damaged or malfunctioning, discontinue use immediately and contact support.
- Only use the specified battery type and charging method.
3. Product Overview
3.1 Key Features
- Measurement Capability: Inductance, Capacitance, Resistance, ESR, D, Q, Theta.
- Test Frequencies: 100Hz, 120Hz, 1KHz, 10KHz, 40KHz, 100KHz.
- Accuracy: 0.2%.
- Display: 2.8-inch TFT color display with backlight.
- Connectivity: Mini-USB for PC communication and data acquisition.
- Power: Internal Lithium Polymer battery, USB-C charging.
- Measurement Speeds: Fast (4 times/s), Medium (2 times/s), Slow (1 time/s).
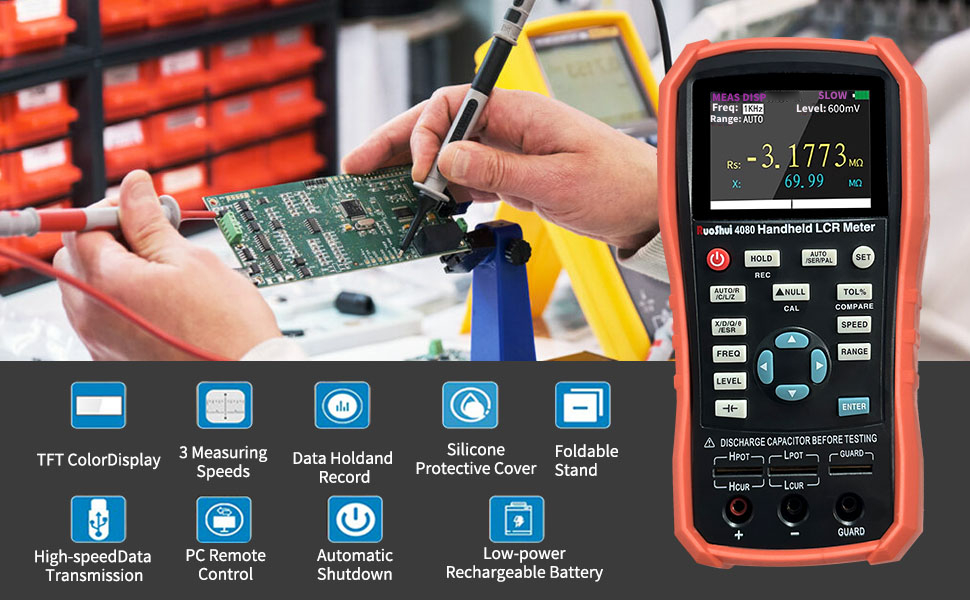
Figure 2: Overview of the RuoShui 4080 LCR Meter's key features including TFT color display, multiple measuring speeds, data hold, silicone protective cover, foldable stand, USB data transmission, PC remote control, automatic shutdown, and low-power rechargeable battery.
3.2 Meter Layout and Controls
Familiarize yourself with the meter's physical components and controls as shown in Figure 3.

Figure 3: Labeled diagram of the RuoShui 4080 LCR Meter's display, buttons, and test terminals.
- Display Screen: 2.8-inch TFT color display for measurement readings and settings.
- Power Button: Turns the device on/off.
- HOLD Button: Freezes the current measurement on the screen. A long press shows min/max/average values.
- AUTO/R/C/L/Z Button: Selects the main measurement parameter (Auto, Resistance, Capacitance, Inductance, or Impedance).
- REC Button: Activates data recording mode.
- NULL/CAL Button: Offsets displayed values (short press). Initiates calibration procedure (long press).
- X/D/Q/ESR Button: Selects secondary measurement parameters (Reactance, Dissipation Factor, Quality Factor, ESR).
- FREQ Button: Cycles through test frequencies (100Hz, 120Hz, 1KHz, 10KHz, 40KHz, 100KHz).
- LEVEL Button: Adjusts the test signal level (300mV, 600mV, 1000mV).
- Bias Voltage Button: (Indicated by a specific symbol, often a capacitor with a DC line) Applies a DC bias voltage (0V, 100mV, 300mV, 600mV).
- Direction Keys (Up/Down/Left/Right): Navigate menus and adjust settings.
- ENTER Button: Confirms selections in menus.
- SET Button: Accesses system settings (Language, Auto-off, Brightness, Beep, Colors, PowerOn).
- AUTO/SER/PAL Button: Toggles between Auto, Series, and Parallel equivalent circuit modes.
- TOL% Button: Activates tolerance comparison mode.
- COMPARE Button: Used in conjunction with TOL% for component sorting.
- SPEED Button: Selects measurement speed (Fast, Medium, Slow).
- RANGE Button: Selects measurement range (Auto or manual).
- Five-terminal Test Slot: For direct insertion of components.
- Three-terminal Test Jacks: For connecting test leads (Hpot, Lpot, Hcur, Lcur, Guard).
- Mini-USB Port: For charging and PC communication.
4. Setup
4.1 Charging the Battery
The LCR Meter 4080 is powered by an internal Lithium Polymer battery. Before first use, or when the battery indicator is low, charge the device using the provided Mini-USB cable and a compatible USB power adapter (not included). The screen will display "In Charging" and the battery level icon during charging. The meter can be used while charging.

Figure 4: Side view of the RuoShui 4080 LCR Meter showing the Mini-USB charging port.
4.2 Connecting Test Leads
For most measurements, use the provided alligator clip test leads. Connect the leads to the three-terminal test jacks at the bottom of the meter. Ensure a secure connection for accurate readings.
- Connect the red lead to the Hpot and Hcur terminals (often combined).
- Connect the black lead to the Lpot and Lcur terminals (often combined).
- The GUARD terminal can be used for shielded measurements to reduce external interference.
Alternatively, small components can be inserted directly into the five-terminal test slot for quick measurements. This slot is designed for 4-wire measurement, with the drive on the bottom metal lip and sense on the top metal lip.
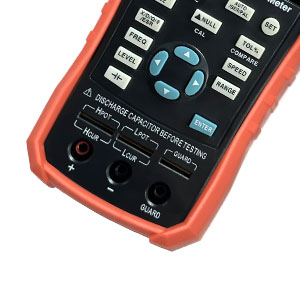
Figure 5: Close-up view of the five-terminal test slot and three-terminal test jacks.
5. Operating Instructions
5.1 Power On/Off
Press and hold the Power Button (red circle with line) to turn the meter on or off.
5.2 Basic Measurements (L/C/R)
- Connect Component: Connect the component to be tested using the test leads or insert it into the direct test slot. Remember to discharge capacitors first.
- Select Main Parameter: Press the AUTO/R/C/L/Z button to cycle through automatic detection (AUTO), Resistance (R), Capacitance (C), Inductance (L), or Impedance (Z). In AUTO mode, the meter attempts to identify the component type.
- Select Test Frequency: Press the FREQ button to choose the desired test frequency (100Hz, 120Hz, 1KHz, 10KHz, 40KHz, 100KHz). The chosen frequency will be displayed on the screen.
- Select Measurement Speed: Press the SPEED button to select Fast, Medium, or Slow measurement speed. Slower speeds generally provide more stable readings.
- Read Measurement: The primary measurement (L, C, or R) will be displayed prominently on the screen.
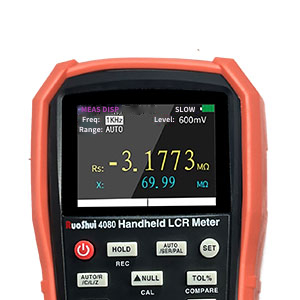
Figure 6: Close-up of the LCR Meter's display showing measurement readings.
5.3 Equivalent Circuit Modes (Series/Parallel)
Press the AUTO/SER/PAL button to switch between Auto, Series, and Parallel equivalent circuit modes. The appropriate mode depends on the component and test frequency:
- Series Mode: Often preferred for low impedance components (e.g., small inductors, large capacitors).
- Parallel Mode: Often preferred for high impedance components (e.g., large inductors, small capacitors, resistors).
- Auto Mode: The meter attempts to select the most suitable mode.
5.4 Calibration (Open/Short Correction)
Calibration helps to remove residual impedance from test leads and fixtures, improving measurement accuracy. It is recommended to perform calibration when changing test leads or frequently for critical measurements.
- Short Calibration:
- Connect the provided shorting bar to the test terminals or short the test leads together.
- Long press the NULL/CAL button. The screen will indicate "Short" calibration in progress and show a countdown. This process takes approximately 45 seconds.
- Open Calibration:
- Remove the shorting bar or ensure the test leads are open (not touching anything).
- Long press the NULL/CAL button again. The screen will indicate "Open" calibration in progress and show a countdown. This process also takes approximately 45 seconds.
The meter automatically senses the presence or absence of the shorting bar, allowing calibration in either order. Calibration settings can be preserved through power cycles if "PowerOn: Last" is selected in the system settings.
5.5 Secondary Measurement Parameters (ESR, D, Q, X)
Press the X/D/Q/ESR button to cycle through secondary measurement parameters displayed below the main reading:
- ESR (Equivalent Series Resistance): Important for evaluating capacitor quality.
- D (Dissipation Factor): Indicates the energy loss in a component.
- Q (Quality Factor): The inverse of the dissipation factor, indicating the efficiency of a reactive component.
- X (Reactance): The imaginary part of impedance.
5.6 Test Signal Level and Bias Voltage
- Test Level: Press the LEVEL button to adjust the RMS test voltage (300mV, 600mV, 1000mV). A higher level can improve signal-to-noise ratio (SNR) for better accuracy, especially for low-value components.
- Bias Voltage: Use the dedicated Bias Voltage Button (or navigate via arrow keys) to apply a DC bias (0V, 100mV, 300mV, 600mV). This is useful for testing electrolytic capacitors or semiconductors.
5.7 Special Function for Electrolytic Capacitors
The meter includes a dedicated function for electrolytic capacitors. Activating this function typically sets the test level to a fixed 600mV RMS and applies a 1V offset, ensuring the lowest part of the test sine wave remains above ground. Refer to the meter's on-screen prompts or specific button for this function.
5.8 System Settings
Press the SET button to access system settings. Use the Direction Keys to navigate and adjust options:
- Language: Select Chinese or English.
- AutoOff: Set automatic power-off time (OFF, 5, 15, 30, 60 minutes).
- Bright: Adjust backlight brightness in 20% increments.
- PowerOn: Choose whether the meter starts with the last settings ("Last") or default settings ("Default").
- Beep: Configure audible alerts (Off, Key+Notice, Only Notice).
- Colors: Select display color scheme (White, Yellow, Cyan, Coral).
6. Remote Communication
The RuoShui 4080 LCR Meter supports remote communication and data acquisition via its Mini-USB port. Connect the meter to a PC using a Mini-USB cable. You may need to install specific driver software provided by RuoShui for your operating system to enable communication. This feature allows for remote control of the meter and logging of measurement data.

Figure 7: The LCR Meter connected to a PC for remote communication and data display.
7. Maintenance
7.1 Cleaning
Wipe the meter's exterior with a soft, damp cloth. Do not use abrasive cleaners or solvents. Ensure no moisture enters the device.
7.2 Storage
Store the meter in a cool, dry place away from direct sunlight and extreme temperatures. If storing for extended periods, ensure the battery is partially charged (around 50%) to prolong its lifespan.
7.3 Screen Protection
The screen may come with a protective film. Carefully remove this film for optimal display clarity. Use a soft cloth to clean the screen.
8. Troubleshooting
| Problem | Possible Cause | Solution |
|---|---|---|
| Meter does not power on. | Low or depleted battery. | Charge the battery using the Mini-USB cable. |
| Inaccurate or unstable readings. |
|
|
| Meter freezes or becomes unresponsive. | Software glitch or unexpected input. | Press and hold the power button to force a restart. If persistent, disconnect the battery (if accessible) or contact support. |
| PC communication not working. | Missing or incorrect drivers. | Ensure the correct drivers for the RuoShui 4080 LCR Meter are installed on your PC. Check cable connection. |
9. Specifications
| Parameter | Value |
|---|---|
| Model | HT-LCR Meter-4080 |
| Measurement Frequencies | 100Hz, 120Hz, 1KHz, 10KHz, 40KHz, 100KHz |
| Measurement Range | L: 0-1000H, C: 0-20mF, R: 0-20MΩ |
| Main Parameters | L, C, R, Z |
| Sub Parameters | X, D, Q, ESR |
| Equivalent Method | Series and parallel connection |
| Range Method | Manual, automatic |
| Test Speed | Fast (4 times/s), Medium (2 times/s), Slow (1 time/s) |
| Test End Configuration | Three end and five end |
| Standard Features | Short circuit, open circuit correction |
| Communication Interface | Mini USB (Virtual Serial Port) |
| Test Signal Level | 0.3Vrms/0.6Vrms optional (Note: Product description mentions 300mV, 600mV, 1000mV) |
| Output Impedance | 100Ω |
| Maximum Accuracy | 0.20% |
| Electrolytic Capacitor Mode | Yes |
| DCR Mode | Yes |
| Internal Bias | Yes |
| Data Retention | Yes |
| Data Record | Yes |
| Power Source | 5V, 2600mAh Lithium Polymer battery (included) or Mini USB power supply |
| Display Screen | 2.8 inch TFT LCD display screen |
| Body Size | 190 * 90 * 50mm (7.48 x 3.54 x 1.97 inches) |
| Body Weight | 423g (0.93 lbs) |
Note: Specifications are subject to change without notice.
10. Warranty and Support
For warranty information and technical support, please refer to the documentation included with your purchase or contact RuoShui customer service directly. Contact details can typically be found on the manufacturer's official website or through your point of purchase.
Manufacturer: RuoShui
Model Number: HT-LCR Meter-4080


