1. Introduction
This manual provides comprehensive instructions for the installation, operation, and maintenance of your EVTSCAN 12V 250A Waterproof Universal Winch Solenoid Relay Kit, Model LR4250. This kit is designed to provide reliable power control for winches on ATVs, UTVs, off-road vehicles, and other applications requiring high-power relay control for vehicle recovery and pulling heavy loads.
Please read this manual thoroughly before installation and operation to ensure safe and efficient use of the product.
2. Safety Information
- Always disconnect the vehicle's battery before performing any electrical installation or maintenance to prevent electrical shock or short circuits.
- Ensure all connections are secure and properly insulated to prevent corrosion and electrical hazards.
- Do not exceed the rated voltage (12V) or current (250A) of the relay kit.
- Keep remote controls away from children and unauthorized users.
- Always turn off the power switch on the remote control when not in use to prevent accidental activation.
- Wear appropriate personal protective equipment (PPE) during installation and operation.
- If you are unsure about any part of the installation or operation, consult a qualified professional.
3. Package Contents
Verify that all items listed below are present in your package:
- 1 x Winch Solenoid Relay (DC12V, 250A)
- 2 x Wireless Remote Controllers (each with 1 x 23A 12V 600mAh battery built-in)
- 1 x Accessory (Wiring harness for receiver)
4. Product Overview
The EVTSCAN Winch Solenoid Relay Kit provides a robust and waterproof solution for controlling your winch remotely. It consists of a heavy-duty solenoid relay and two wireless remote controls.

Figure 4.1: Overview of the EVTSCAN Winch Solenoid Relay Kit components. This image displays the two wireless remote controls, the 12V 250A solenoid relay, and the wired receiver unit.
4.1. Winch Solenoid Relay
The solenoid relay is the central power switching unit. It features a durable ABS and brass construction, designed for 12V systems and capable of handling up to 250A. Its waterproof design ensures reliable operation in various environmental conditions.
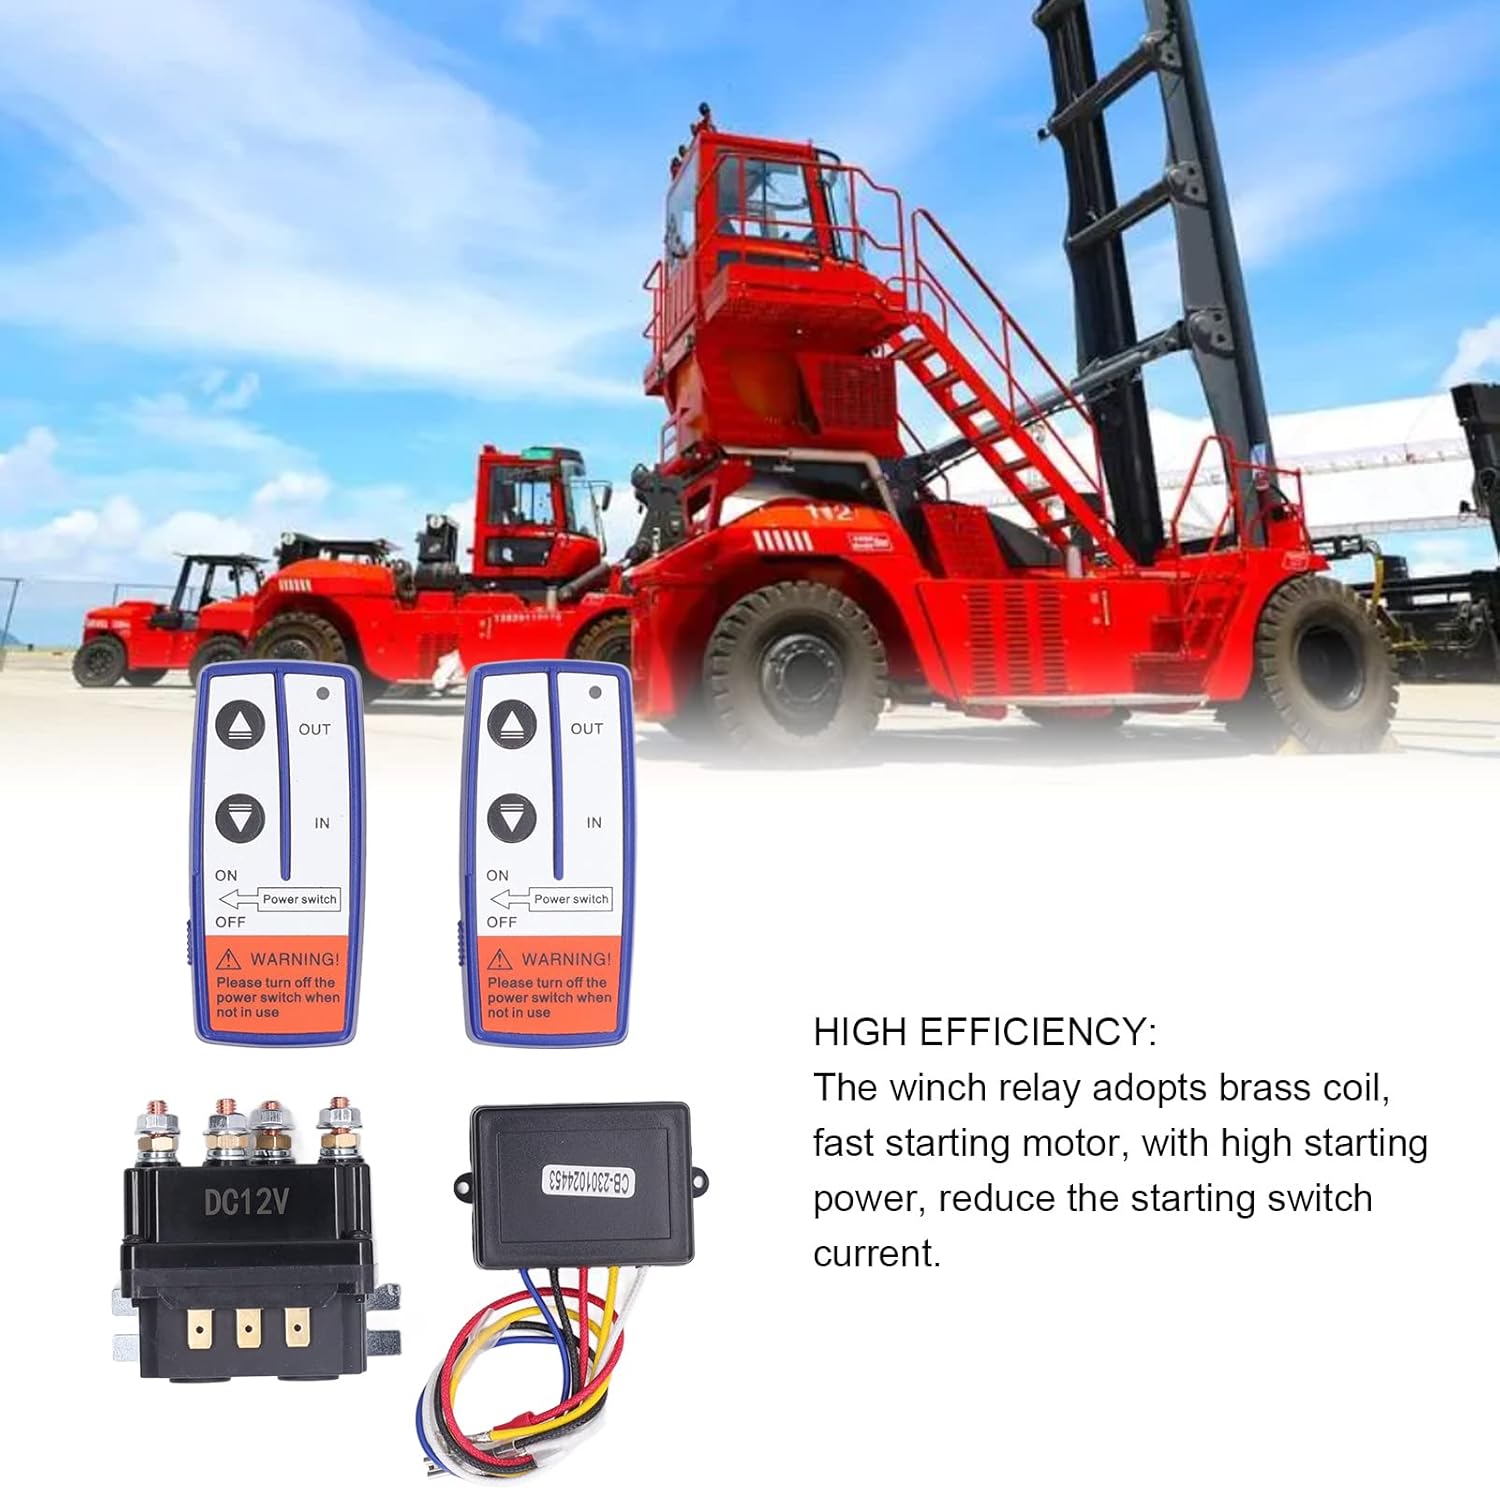
Figure 4.2: Detailed view of the 12V 250A Winch Solenoid Relay. Note the robust terminals for secure electrical connections.
4.2. Wireless Remote Controllers
Two wireless remote controllers are included, allowing for convenient operation of your winch from a distance. Each remote features "IN" and "OUT" buttons for winch control and a power switch for safety. A warning label reminds users to turn off the power switch when not in use.

Figure 4.3: The two wireless remote controllers. Each remote has clear buttons for winch operation and a safety power switch.
5. Specifications
| Feature | Specification |
|---|---|
| Item Type | Winch Relay Kit |
| Model | LR4250 |
| Material | ABS, Brass |
| Rated Voltage | 12V DC |
| Rated Current | 250A |
| Coil Power | 30W |
| Mechanical Life | 10,000 times |
| Electrical Life | 1,000 times |
| Remote Control Battery | 1 x 23A 12V 600mAh (built-in) |
| Application | ATV, UTV, Off-Road Vehicles, Multifunction Vehicles, Snowmobiles, Field Mowers, Garden Tractors |
6. Setup and Installation
Proper installation is critical for the safe and effective operation of your winch solenoid relay kit. If you are not familiar with automotive electrical systems, it is recommended to seek professional assistance.
6.1. Mounting the Solenoid Relay
- Choose a dry, secure location for mounting the solenoid relay, away from excessive heat, moisture, and moving parts.
- Ensure the mounting surface is stable and can support the relay securely.
- Use appropriate fasteners (not included) to mount the relay.
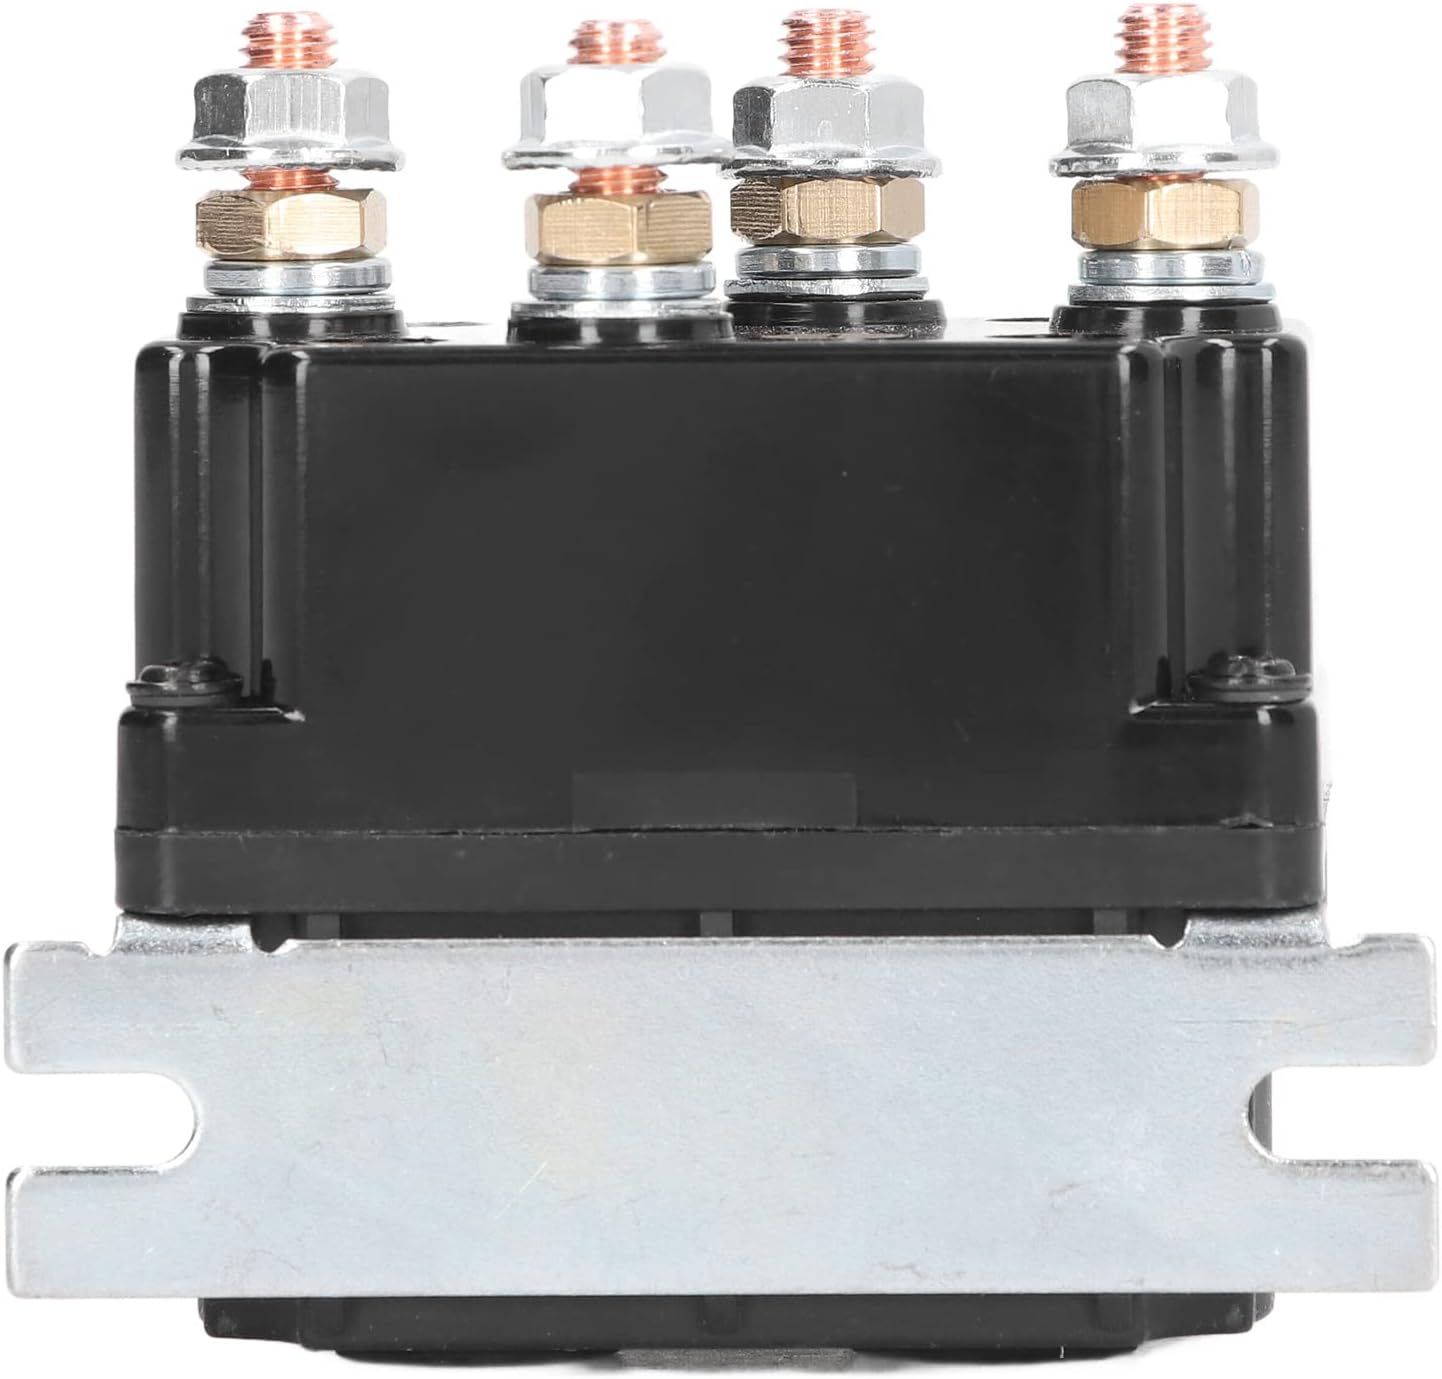
Figure 6.1: Side view of the solenoid relay, illustrating the mounting bracket for secure installation.
6.2. Wiring Connections
Refer to your winch's specific wiring diagram for precise connections. The following is a general guide for a typical 4-post winch solenoid relay setup:
- Disconnect Battery: Before starting, disconnect the negative terminal of your vehicle's battery.
- Identify Terminals: The solenoid relay typically has four large terminals and two small terminals.
- Two large terminals are for connection to the vehicle battery (positive and negative).
- Two large terminals are for connection to the winch motor (positive and negative).
- The two small terminals are for the control circuit from the wireless receiver.
- Connect to Battery: Connect appropriate gauge cables from your vehicle's 12V battery to the designated large terminals on the solenoid relay. Ensure correct polarity (positive to positive, negative to negative).
- Connect to Winch Motor: Connect appropriate gauge cables from the winch motor to the remaining two large terminals on the solenoid relay. Consult your winch manual for specific motor wiring.
- Connect Wireless Receiver:
- Connect the Red wire from the receiver to a 12V positive power source (e.g., ignition switched 12V or directly to battery positive with an inline fuse).
- Connect the Black wire from the receiver to a ground point (vehicle chassis or battery negative).
- Connect the remaining control wires (e.g., Yellow, White, Blue) from the receiver to the two small terminals on the solenoid relay, and potentially to other control inputs on your winch system as per your winch's wiring diagram. These wires typically control the "IN" and "OUT" functions of the winch.
- Secure Connections: Ensure all electrical connections are tight, clean, and protected from environmental elements. Use heat shrink tubing or electrical tape for insulation where necessary.
- Reconnect Battery: Once all connections are secure and verified, reconnect the negative terminal of your vehicle's battery.
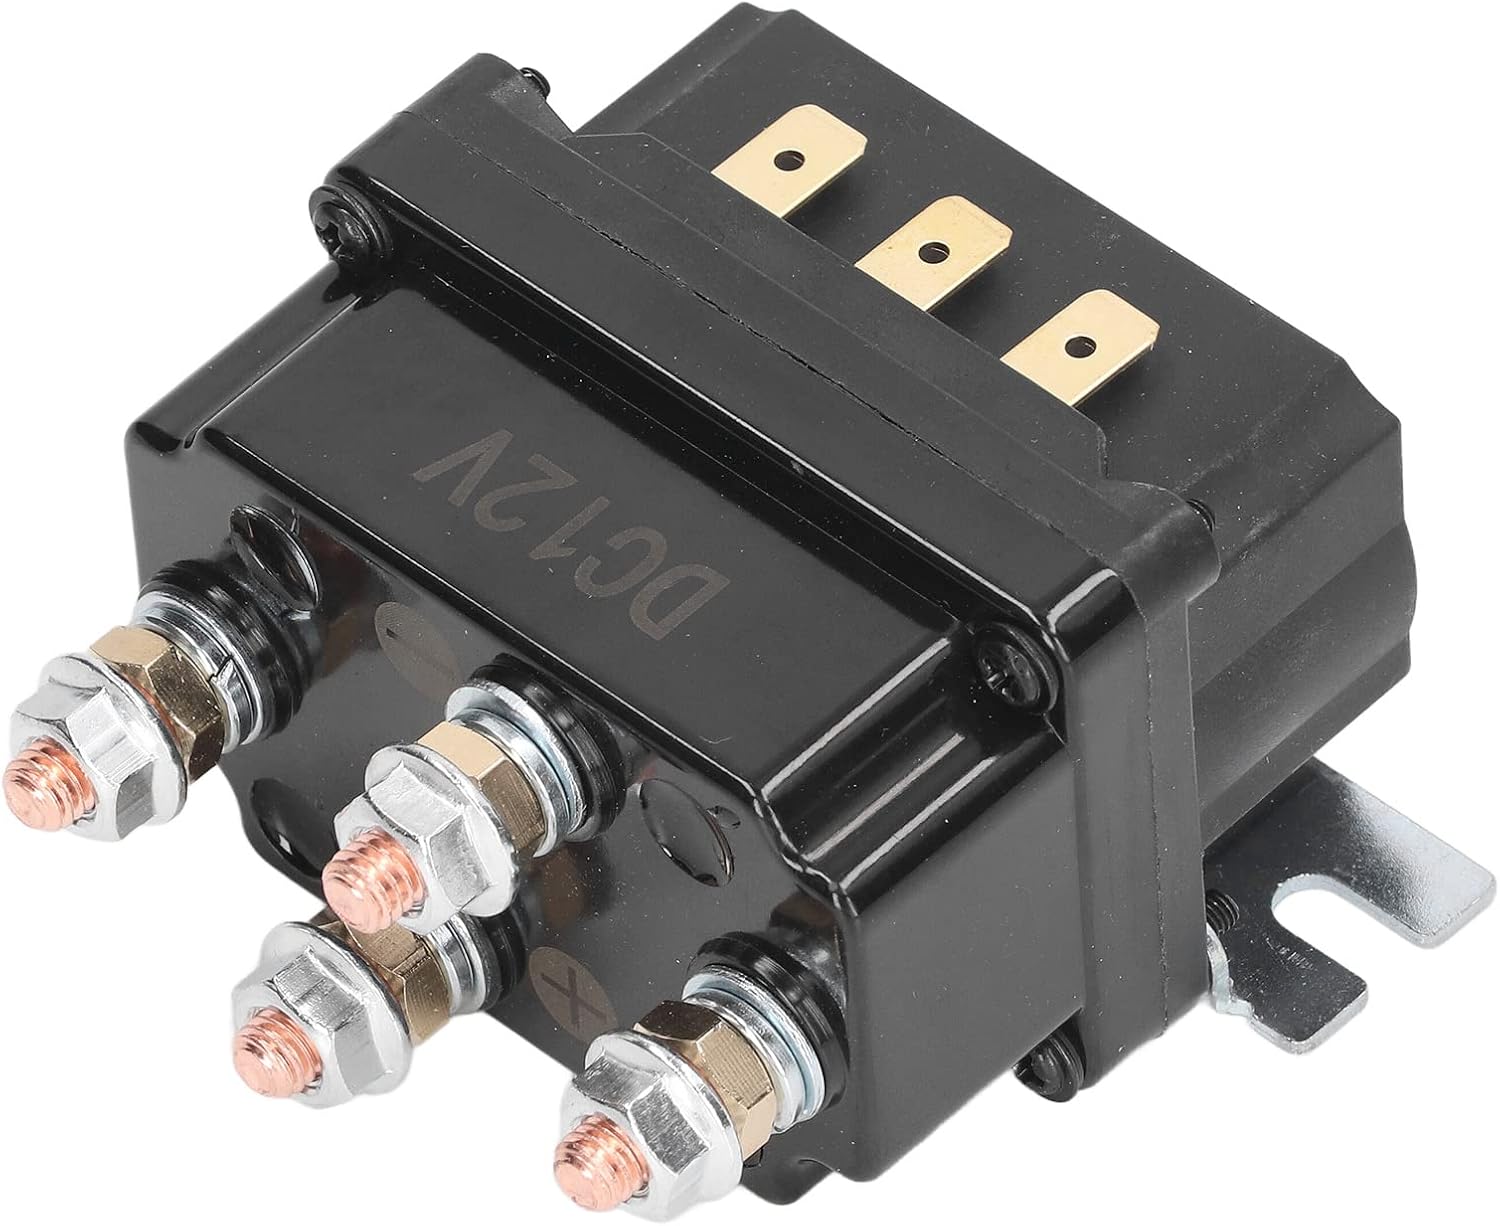
Figure 6.2: The solenoid relay and wireless receiver with its wiring harness. This image helps visualize the components to be connected.
7. Operation
The wireless remote controls provide convenient operation of your winch. Always ensure the area around the winch and load is clear before operating.
7.1. Using the Remote Control
- Power On: Slide the "Power switch" on the side of the remote control to the "ON" position. The remote may have an indicator light to confirm it is powered on.
- Winch In: Press and hold the "IN" button to retract the winch cable.
- Winch Out: Press and hold the "OUT" button to extend the winch cable.
- Power Off: When winching operations are complete, always slide the "Power switch" to the "OFF" position. This prevents accidental activation and conserves battery life.
Figure 7.1: Wireless remote controls with "IN" and "OUT" buttons and the safety power switch.
7.2. Operational Considerations
- Maintain a safe distance from the winch and cable during operation.
- Avoid continuous winching for extended periods to prevent overheating of the winch motor and solenoid. Allow for cooling periods.
- Ensure the winch cable is properly spooled and free of kinks or damage.
- Do not use the winch to lift people or objects over people.
8. Maintenance
Regular maintenance ensures the longevity and reliable performance of your EVTSCAN Winch Solenoid Relay Kit.
- Inspection: Periodically inspect all wiring connections for corrosion, fraying, or damage. Ensure terminals are tight.
- Cleaning: Keep the solenoid relay and receiver free from dirt, mud, and debris. Wipe down with a damp cloth if necessary. Avoid using harsh chemicals.
- Remote Control Battery: The remote controls use a 23A 12V battery. If the remote's range decreases or it becomes unresponsive, replace the battery. To replace, open the battery compartment (usually a small screw or clip on the back) and insert a new 23A 12V battery, observing polarity.
- Waterproof Integrity: While the relay is waterproof, avoid submerging it unnecessarily. Ensure all seals and covers are intact.
9. Troubleshooting
If you encounter issues with your winch solenoid relay kit, refer to the following common problems and solutions:
| Problem | Possible Cause | Solution |
|---|---|---|
| Winch does not operate with remote control. |
|
|
| Winch operates intermittently. |
|
|
| Remote control range is reduced. |
|
|
10. Warranty and Support
For warranty information or technical support, please contact EVTSCAN customer service through your original point of purchase or visit the official EVTSCAN website. Please have your product model (LR4250) and purchase details available when contacting support.