1. Introduction
This manual provides detailed instructions for the proper use and maintenance of your Artbull 650m Laser Rangefinder. Designed for golf and various outdoor activities, this device offers precise distance measurement capabilities. Please read this manual thoroughly before operating the device to ensure optimal performance and safety.
2. Product Overview
The Artbull 650m Laser Rangefinder is a highly accurate device equipped with a 6x magnification monocular, capable of measuring distances up to 650 meters. It features flag lock and slope adjustment functions, making it suitable for varied terrains and partially obstructed targets. The device is designed to be water and shock-resistant, ensuring durability in challenging outdoor conditions.
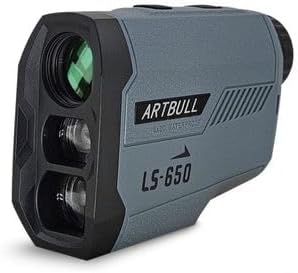
Figure 1: The Artbull 650m Laser Rangefinder. This image displays the compact, ergonomic design of the device, highlighting its primary lenses and control buttons. The 'Artbull' brand and 'LS-650' model are visible on the casing.
Key Features:
- High Precision: Accurately measures distances to targets.
- Flag Lock Function: Identifies and locks onto the flagstick, ignoring background objects.
- Slope Adjustment: Provides compensated distance readings for uphill and downhill shots.
- 6x Magnification: Offers a clear and magnified view of distant targets.
- 650m Range: Capable of measuring distances up to 650 meters.
- Durable Design: Water and shock-resistant for reliable outdoor use.
3. Setup
3.1 Battery Installation
- Locate the battery compartment on the device.
- Open the battery cover by twisting or sliding it according to the indicator.
- Insert the required battery type (e.g., CR2 lithium battery, not specified in product data, assume standard for rangefinders) ensuring correct polarity (+/-).
- Close the battery cover securely.
3.2 Powering On/Off
- To power on, press the power button (usually located on the top or side). The display will illuminate.
- The device typically powers off automatically after a period of inactivity to conserve battery. To manually power off, press and hold the power button for a few seconds.
4. Operating Instructions
4.1 Basic Distance Measurement
- Look through the eyepiece and aim the reticle at your desired target.
- Press the measurement button (often the same as the power button) once.
- The measured distance will be displayed in the eyepiece.
4.2 Flag Lock Function
The flag lock function helps to accurately measure the distance to a flagstick, even when trees or other objects are in the background. To use:
- Aim the reticle at the flagstick.
- Press and hold the measurement button while slowly scanning across the flagstick.
- The device will vibrate or display an icon when it has locked onto the flag, showing the distance to the flagstick.
4.3 Slope Adjustment
The slope adjustment feature calculates the uphill or downhill compensation, providing an 'effective' distance for more accurate shot planning. To activate/deactivate:
- Refer to the device's mode button (usually labeled 'M' or 'MODE').
- Press the mode button to cycle through available modes until the slope adjustment indicator (e.g., 'SLOPE' or an angle icon) appears or disappears.
- When active, the display will show both the actual distance and the slope-adjusted distance.
4.4 Unit Switching
To switch between measurement units (e.g., meters and yards):
- With the device powered on, press and hold the mode button for a few seconds until the unit changes.
- Release the button when your desired unit is displayed.
5. Maintenance
5.1 Cleaning
- Lenses: Use a soft, clean microfiber cloth specifically designed for optics. Gently wipe the lenses to remove dust or smudges. Do not use abrasive materials or harsh chemicals.
- Body: Wipe the device body with a soft, damp cloth. Avoid excessive moisture.
5.2 Storage
- Store the rangefinder in its protective case when not in use.
- Keep it in a cool, dry place, away from direct sunlight and extreme temperatures.
- Remove the battery if the device will not be used for an extended period to prevent leakage.
6. Troubleshooting
| Problem | Possible Cause | Solution |
|---|---|---|
| Device does not power on. | Low or dead battery; incorrect battery installation. | Replace battery; ensure correct polarity. |
| Inaccurate measurements. | Dirty lenses; unstable aiming; target too far or too small. | Clean lenses; ensure stable grip; try a closer or larger target. |
| Display is dim or flickering. | Low battery. | Replace battery. |
| Flag lock not working. | Not scanning correctly; flag too small or obscured. | Ensure smooth scan across flag; try again from a different angle. |
7. Specifications
| Specification | Detail |
|---|---|
| Model Name | 650m |
| Brand | Artbull |
| Magnification | 6x |
| Maximum Range | 650 meters |
| Functions | Flag Lock, Slope Adjustment |
| Resistance | Water and Shock Resistant |
| Material | Plastic |
| Power Source | Not specified (typically CR2 battery) |
| Included Components | 1 Laser Rangefinder (as per product description) |
8. Safety Information
- Laser Safety: This device uses an invisible laser. Do not look directly into the laser aperture or aim it at others. Avoid direct eye exposure to the laser beam.
- Battery Safety: Use only the specified battery type. Do not mix old and new batteries. Dispose of batteries properly.
- Environmental Conditions: While water and shock-resistant, avoid submerging the device in water or subjecting it to severe impacts.
- Children: Keep the device out of reach of children.
9. Warranty and Support
Specific warranty information is not provided with the product data. For warranty details, technical support, or service inquiries, please refer to the documentation included with your purchase or contact Artbull customer service through their official website or your retailer.
10. Official Product Videos
No official product videos from the seller were found to be relevant for inclusion in this instruction manual.