1. Introduction
Thank you for choosing the NUSVAN Vanity Mirror with Lights. This manual provides essential information for the safe and efficient operation, maintenance, and troubleshooting of your new mirror. Please read this manual thoroughly before use and retain it for future reference.
Product Overview
The NUSVAN Vanity Mirror is designed to provide optimal lighting for makeup application and grooming. It features dimmable LED bulbs, three color lighting modes, a touch control interface, and a convenient USB charging port. Its sturdy metal frame ensures durability and stability.

Image: Front view of the NUSVAN Vanity Mirror with Lights, showcasing its illuminated LED bulbs and sleek design.
2. Safety Information
To ensure safe operation and prevent damage, please observe the following safety precautions:
- Do not expose the mirror to water or excessive humidity.
- Use only the provided power adapter or a compatible power source.
- Keep the mirror away from heat sources and direct sunlight.
- Do not attempt to disassemble or repair the mirror yourself. Contact customer support for assistance.
- Ensure the mirror is placed on a stable, flat surface or securely mounted to a wall.
- Unplug the mirror from the power outlet before cleaning or when not in use for extended periods.
- Avoid direct current connection to the USB charging port. It is designed for charging other devices, not for powering the mirror itself.

Image: Close-up of the USB charging port on the side of the mirror, with a warning indicating not to connect direct current to the charging port for powering the mirror.
3. Setup and Installation
Your NUSVAN Vanity Mirror offers flexible installation options: freestanding or wall-mounted.
Freestanding Setup
- Carefully remove the mirror and its base from the packaging.
- Attach the mirror to the sturdy metal base, ensuring it is securely fastened.
- Place the assembled mirror on a flat, stable surface, such as a vanity table or dresser.
- Connect the power adapter to the mirror's power input port and then plug it into a standard electrical outlet.

Image: Illustration showing the mirror in a freestanding configuration on a vanity desk.
Wall-Mounted Installation
For wall-mounting, ensure you have appropriate wall anchors and screws (not included) suitable for your wall type. It is recommended to seek professional assistance for wall installation.
- Identify a suitable location on the wall, ensuring it is sturdy enough to support the mirror's weight.
- Mark the drilling points on the wall according to the mirror's mounting holes.
- Drill holes and insert appropriate wall anchors.
- Securely attach the mirror to the wall using screws.
- Connect the power adapter to the mirror's power input port and then plug it into a standard electrical outlet.
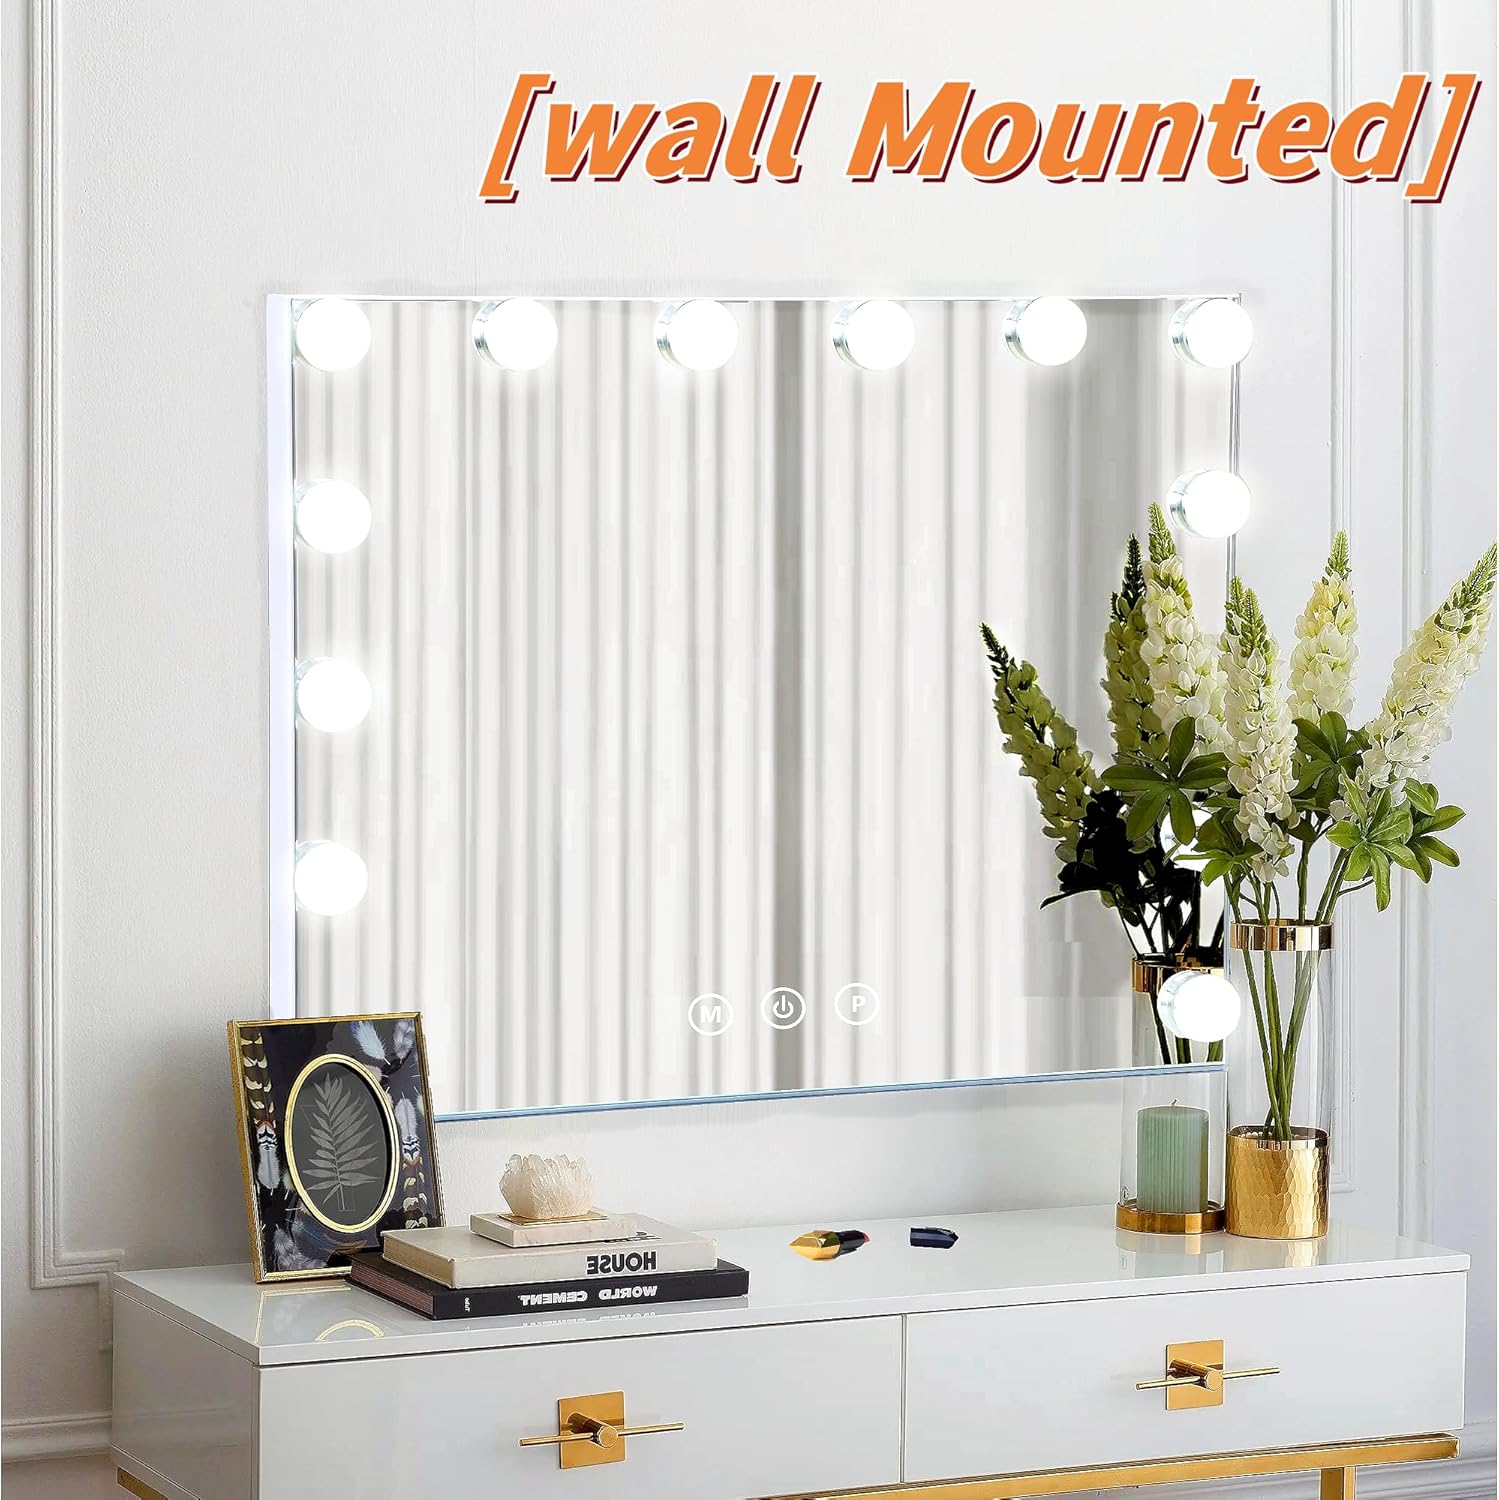
Image: The vanity mirror shown mounted on a wall, demonstrating its wall-mounted capability.
4. Operating Instructions
The NUSVAN Vanity Mirror features intuitive touch controls located on the mirror surface.
Control Buttons
- Power Button (On/Off): Short press to turn the mirror lights on or off.
- "M" Button (Mode): Short press to cycle through the three color lighting modes.
- "P" Button (Brightness): Long press to adjust the brightness level of the LED lights.

Image: Diagram illustrating the touch control buttons (M, Power, P) on the mirror surface, along with product dimensions.
Adjusting Light Color Modes
The mirror offers three distinct lighting modes to suit various makeup needs:
- Cool Lights: Ideal for precise makeup application, providing a bright, clear illumination.
- Neutral Lights: Mimics natural sunlight, perfect for everyday makeup.
- Warm Lights: Creates an inviting glow, suitable for evening or party makeup.
To switch between modes, short press the "M" button.

Image: Visual representation of the three light color modes: Cool, Neutral, and Warm, demonstrating their appearance on a user's face.
Adjusting Brightness
The LED brightness can be adjusted to your preference. Long press the "P" button to increase or decrease the brightness. The mirror has a smart memory function that will recall the last brightness setting used.

Image: Visual guide showing different brightness levels (High, Medium, Low) and their recommended uses for detailed care, full-face skincare, and daily skincare.
Using the 10X Magnifying Mirror
The included detachable 10X magnifying mirror is designed for detailed tasks such as applying mascara, eyeliner, or precise eyebrow shaping. Simply attach it to the main mirror surface as needed.
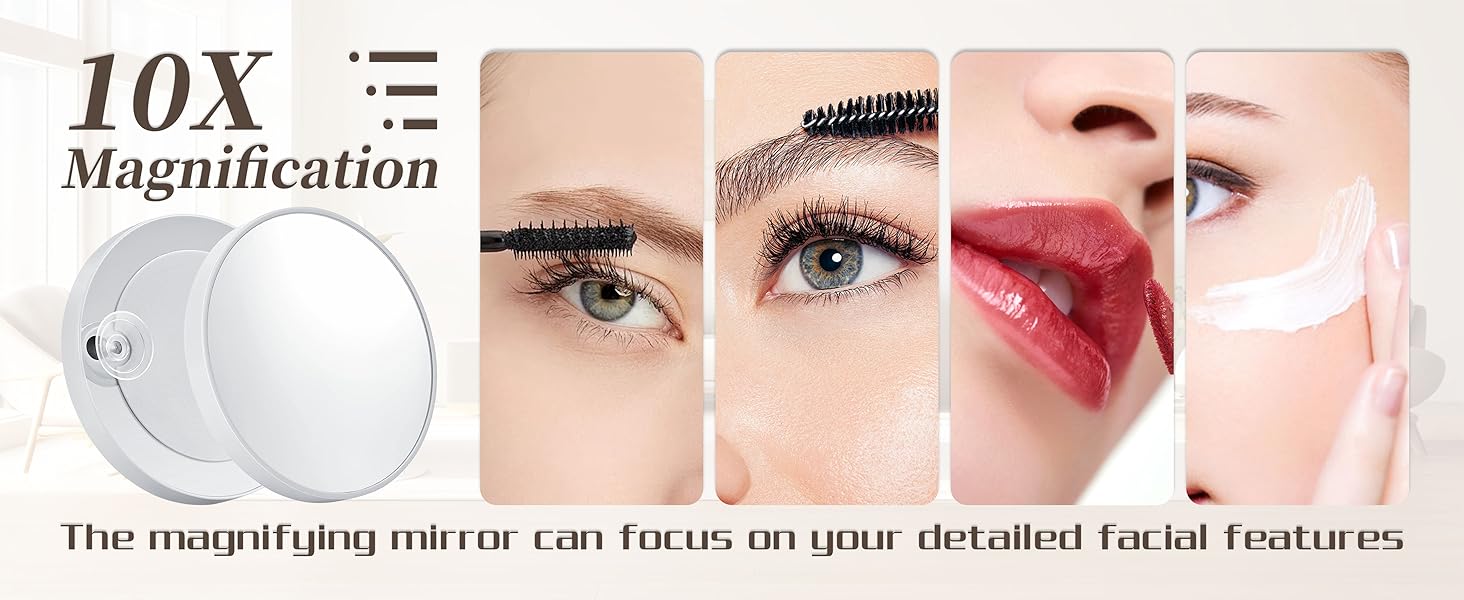
Image: A close-up of the detachable 10X magnifying mirror and examples of its use for detailed facial features like eyes and lips.
USB Charging Port
The integrated USB charging port allows you to conveniently charge your phone, tablet, or other USB-powered devices while using the mirror. Locate the USB port on the side of the mirror and connect your device's charging cable.
Image: A smartphone connected to the USB charging port on the side of the vanity mirror, showing the phone charging.
5. Maintenance and Care
Proper care will extend the life and maintain the performance of your NUSVAN Vanity Mirror.
- Cleaning the Mirror Surface: Use a soft, lint-free cloth and a non-abrasive glass cleaner. Spray the cleaner onto the cloth, not directly onto the mirror, then wipe gently.
- Cleaning the Frame: Wipe the metal frame with a soft, damp cloth. Avoid harsh chemicals or abrasive cleaners.
- LED Bulbs: The integrated LED bulbs have a lifespan of approximately 50,000 hours and do not require replacement.
- Storage: When not in use for extended periods, unplug the mirror and store it in a dry, cool place, protected from dust.
6. Troubleshooting
If you encounter any issues with your mirror, please refer to the following common problems and solutions:
| Problem | Possible Cause | Solution |
|---|---|---|
| Mirror lights do not turn on. | Not plugged in; power outlet issue; power adapter fault. | Ensure the power adapter is securely plugged into both the mirror and a working electrical outlet. Try a different outlet. |
| Lights flicker or are dim. | Low power; faulty connection. | Check power connections. Ensure the power adapter is fully inserted. |
| Touch controls are unresponsive. | Dirty surface; temporary software glitch. | Clean the touch control area with a soft, dry cloth. Unplug the mirror for 30 seconds and then plug it back in to reset. |
| USB charging port not working. | Cable issue; device compatibility. | Try a different USB cable and another device. Ensure the mirror is powered on. |
If the problem persists after trying these solutions, please contact NUSVAN customer support.
7. Specifications
| Feature | Detail |
|---|---|
| Brand | NUSVAN |
| Model Number | 5040W |
| Frame Material | Metal |
| Color | White |
| Lighting Modes | 3 (Cool, Neutral, Warm) |
| Brightness Adjustment | Dimmable via touch control |
| Special Features | USB Charging Port, Touch Control, Smart Memory Function, Detachable 10X Magnifying Mirror |
| Mounting Type | Wall Mount, Freestanding |
| LED Bulb Lifespan | Approx. 50,000 hours |
| Item Weight | 9.53 pounds |

Image: Diagram showing various available sizes of the vanity mirror, including the 19.7"L x 16.6"W model.
8. Warranty and Support
NUSVAN provides a satisfaction guarantee for this product. For specific warranty details, please refer to the product packaging or contact NUSVAN customer service directly.
Customer Support
If you have any questions, require technical assistance, or need to report a damaged product, please contact NUSVAN customer support through the retailer where you purchased the product or visit the official NUSVAN website for contact information.
When contacting support, please have your product model number (5040W) and purchase date available.