Introduction
Thank you for choosing the Ingco 20V Cordless Rotary Hammer. This powerful and versatile tool is designed for drilling and hammering applications in various materials, including concrete, wood, and metal. Its cordless design provides convenience and portability for both indoor and outdoor tasks. Please read this manual carefully before operating the tool to ensure safe and efficient use. Keep these instructions for future reference.
General Safety Instructions
Always follow basic safety precautions when using power tools to reduce the risk of fire, electric shock, and personal injury.
- Work Area Safety: Keep your work area clean and well-lit. Cluttered or dark areas invite accidents. Do not operate power tools in explosive atmospheres, such as in the presence of flammable liquids, gases, or dust.
- Electrical Safety: Avoid body contact with earthed or grounded surfaces such as pipes, radiators, ranges, and refrigerators. There is an increased risk of electric shock if your body is earthed or grounded.
- Personal Safety: Always wear eye protection. Use safety glasses, goggles, or a face shield. Wear hearing protection when operating the tool for extended periods. Dress properly; do not wear loose clothing or jewelry. Keep hair, clothing, and gloves away from moving parts.
- Tool Use and Care: Do not force the power tool. Use the correct power tool for your application. Disconnect the battery pack from the power tool before making any adjustments, changing accessories, or storing power tools.
- Battery Pack Use and Care: Recharge only with the charger specified by the manufacturer. Do not use a battery pack or tool that is damaged or modified.
Package Contents
Verify that all items listed below are included in your package:
- Ingco 20V Lithium-Ion Rotary Hammer
- 1 x 20V Lithium-Ion Battery
- 1 x Fast Charger
- 3 x SDS-plus Drill Bits (6x150mm, 8x150mm, 10x150mm)
Product Overview
Familiarize yourself with the main components of your Ingco Cordless Rotary Hammer.
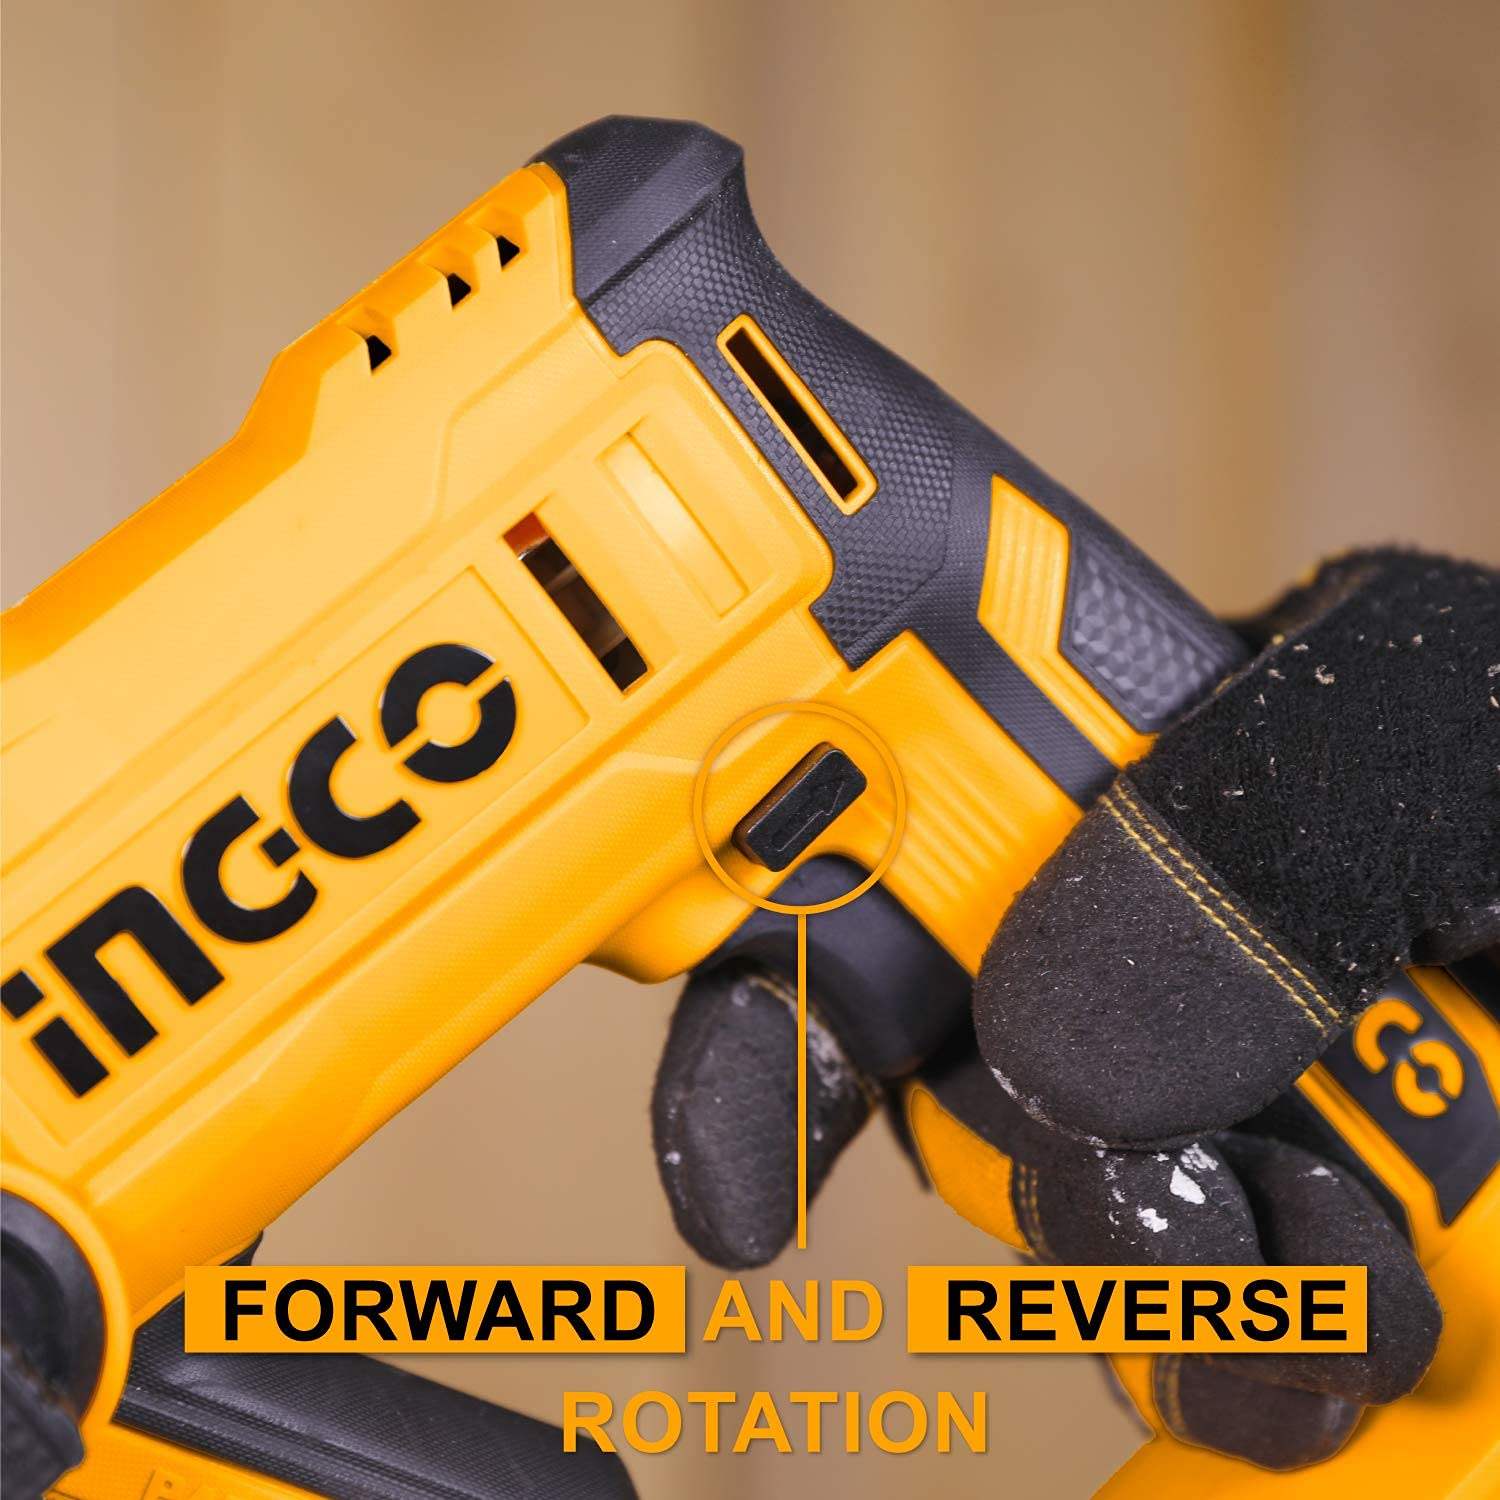
Image: The forward and reverse rotation switch, located near the trigger, allows for easy change of drilling direction.

Image: The main trigger switch, designed for comfortable and controlled operation.
- SDS-Plus Chuck: For quick and secure insertion of SDS-plus drill bits.
- Mode Selector Switch: Allows selection between 'Rotation only' and 'Rotation plus hammering' modes.
- Forward/Reverse Switch: Changes the direction of rotation for drilling and bit removal.
- Trigger Switch: Activates the tool and controls speed (variable speed).
- Battery Port: For attaching and detaching the 20V Lithium-Ion battery pack.
- Integrated Work Light: Illuminates the work area for improved visibility in low-light conditions.
Setup
1. Charging the Battery
- Ensure the battery is fully charged before first use.
- Connect the charger to a standard power outlet.
- Slide the battery pack onto the charger until it clicks into place.
- The charger indicator light will show the charging status. Refer to the charger manual for specific light indications.
- Once fully charged, disconnect the battery from the charger.
2. Installing and Removing the Battery
- To Install: Align the battery pack with the tool's battery port and slide it in until it locks securely.
- To Remove: Press the battery release button (if present) and slide the battery pack out of the tool.
3. Installing SDS-Plus Drill Bits
- Ensure the tool is switched off and the battery is removed.
- Pull back the chuck collar on the front of the tool.
- Insert the SDS-plus drill bit into the chuck, rotating it slightly until it slides fully into place.
- Release the chuck collar. The bit should be held securely but have a small amount of axial play, which is normal for SDS-plus systems.
- To remove, pull back the chuck collar and pull the drill bit out.
Operating Instructions
1. Mode Selection
The rotary hammer features two operating modes:
- Rotation Only: For drilling in wood, metal, or for driving screws (with appropriate accessories). Set the mode selector switch to the drill icon.
- Rotation Plus Hammering: For drilling in concrete and masonry. Set the mode selector switch to the hammer drill icon.
Always ensure the tool is switched off before changing modes.
2. Forward and Reverse Operation
The forward/reverse switch, located above the trigger, controls the direction of rotation:
- Push the switch to the left for forward (clockwise) rotation, typically used for drilling.
- Push the switch to the right for reverse (counter-clockwise) rotation, used for removing bits or freeing jammed bits.
Ensure the tool has come to a complete stop before changing the direction of rotation.
3. Starting and Stopping
- To Start: Press the trigger switch. The integrated work light will illuminate automatically.
- To Stop: Release the trigger switch.
The tool features variable speed, meaning the drilling speed can be controlled by the amount of pressure applied to the trigger switch.
4. Drilling Techniques
- General: Always secure your workpiece. Apply steady, even pressure. Do not force the tool.
- Concrete/Masonry: Use the 'Rotation Plus Hammering' mode with SDS-plus masonry bits. Start with light pressure and increase as needed.
- Wood/Metal: Use the 'Rotation Only' mode with appropriate drill bits. For metal, use a center punch to mark the drilling spot and use cutting fluid.
Maintenance
Regular maintenance ensures optimal performance and extends the life of your tool.
- Cleaning: Keep the tool's ventilation openings clean to prevent overheating. Use a soft, damp cloth to clean the exterior. Do not use harsh chemicals or abrasive cleaners.
- Battery Care: Store batteries in a cool, dry place away from direct sunlight. Do not store fully discharged batteries for extended periods. Charge them periodically if not in use.
- Inspection: Regularly check for damaged parts, loose screws, or any other condition that may affect the tool's operation. If damage is found, have the tool repaired by a qualified service technician.
- Lubrication: The SDS-plus chuck mechanism may benefit from occasional light lubrication to ensure smooth bit insertion and removal.
Troubleshooting
If you encounter issues with your rotary hammer, refer to the following common problems and solutions:
- Tool does not start:
- Check if the battery is fully charged and properly inserted.
- Ensure the forward/reverse switch is not in the center (locked) position.
- Reduced power or performance:
- The battery may be low; recharge it.
- The drill bit may be dull or incorrect for the material; replace or use the correct bit.
- Overheating: Allow the tool to cool down. Ensure ventilation slots are clear.
- Drill bit not holding in chuck:
- Ensure the SDS-plus bit is fully inserted and the chuck collar has snapped back into place.
- Inspect the chuck for damage or excessive wear.
If problems persist, contact Ingco customer support or a qualified service center.
Specifications
Technical data for the Ingco 20V Cordless Rotary Hammer:
| Feature | Specification |
|---|---|
| Voltage | 20V |
| No-load Speed | 0-900/min |
| Impact Rate | 0-5100bpm |
| Single Impact Force | 1.5J |
| Max Drilling Capacity (Concrete) | Φ16 mm |
| Max Drilling Capacity (Wood) | 14 mm |
| Max Drilling Capacity (Metal) | 8 mm |
| Power Source | Battery Powered |
| Amperage | 2 Amps |
| Item Weight | 209 g |
| Product Dimensions | 20L x 20W x 10H Centimeters |
| Special Feature | Variable Speed |
Warranty and Support
This Ingco Cordless Rotary Hammer typically comes with a 6-month warranty from the date of purchase, covering manufacturing defects. Please retain your proof of purchase for warranty claims.
For technical assistance, spare parts, or warranty service, please contact your local Ingco dealer or authorized service center. Refer to the contact information provided with your purchase or visit the official Ingco website for support details.


