1. Introduction
Thank you for choosing the Itari M08F Tattoo Thermal Copier. This lightweight and portable device is designed to simplify the tattoo stencil creation process, offering high-quality transfers without the need for ink. It supports various connection methods, including Bluetooth for mobile devices and USB for computers, making it a versatile tool for tattoo artists.
This manual provides detailed instructions on how to set up, operate, and maintain your Itari M08F printer to ensure optimal performance and longevity.
2. Safety Information
- Always use the printer in a dry environment. Avoid exposure to water or excessive humidity.
- Ensure the power adapter used is compatible with the device's voltage requirements (5V).
- Do not attempt to disassemble or repair the printer yourself. Refer to qualified service personnel.
- Keep the printer away from direct sunlight and heat sources.
- Use only recommended thermal transfer paper to prevent damage to the print head.
- Keep out of reach of children.
3. Product Overview
3.1 Key Features
- Lightweight and Wireless Design: Weighing only 715g, the M08F is highly portable, offering convenience for on-the-go use.
- All-in-One Printer: Supports Bluetooth connection for iOS and Android phones, and USB connection for Windows, MacOS, and ChromeOS. It can also print normal thermal paper.
- Powerful Application: The dedicated app allows for easy image and document printing, editing, adjusting, and exporting of stencil images.
- High-Quality Transfers: Utilizes advanced thermal technology for clear and precise stencil designs, eliminating ink and cleaning issues.
- Wide File Format Support: Compatible with Word, Excel, PPT, TXT, and JPG formats.
3.2 Components
The Itari M08F printer comes with the main unit and essential accessories. Familiarize yourself with the device's appearance and ports.

Figure 3.2.1: Itari M08F Tattoo Thermal Copier and accessories. The image shows the compact printer, a printed stencil, and mobile devices demonstrating connectivity.

Figure 3.2.2: The M08F printer in a tattoo studio setting, emphasizing its benefits: saving time, no ink needed, and clearer prints. A hand is shown drawing on a tablet, and the printer is on a table.
4. Setup
4.1 Initial Charging
Before first use, ensure the printer is fully charged. Connect the printer to a 5V power source using the provided USB cable. The indicator light will show charging status.
4.2 Loading Transfer Paper
Follow these steps to properly load the thermal transfer paper into the printer:
- Remove the protective sheet: Separate the protective sheet from the thermal transfer paper.
- Peel off the yellow backing sheet: Carefully peel off the yellow backing sheet from the transfer paper.
- Insert the transfer paper: Insert the transfer paper into the printer with the white side facing up. Ensure it is aligned correctly.

Figure 4.2.1: Step-by-step guide on how to prepare and insert the thermal transfer paper into the M08F printer for stencil printing.
5. Operating Instructions
5.1 Connecting via Bluetooth (Smartphone/Tablet)
The Itari M08F printer supports Bluetooth connectivity for iOS and Android devices. Ensure Bluetooth is enabled on your device.
- Download the Phomemo APP: Search for "Phomemo" in your device's app store (App Store for iOS, Google Play for Android) and download the official application.
- Connect Bluetooth in the APP: Open the Phomemo app, turn on the M08F printer, and connect to "Phomemo" via Bluetooth within the app.
- Upload Designs/Images and Print: Use the app to select and upload your desired designs or images for printing.

Figure 5.1.1: The M08F printer wirelessly connected to a smartphone and tablet via Bluetooth, ready for printing.

Figure 5.1.2: Visual steps for connecting the Itari M08F printer to a phone via Bluetooth and initiating a print job using the Phomemo app.
5.2 Connecting via USB (PC/Laptop)
For Windows, MacOS, and ChromeOS computers, you can connect the printer via USB.
- Download Driver: Visit the official website (tattoo.phomemo.com) to download and install the necessary printer drivers for your operating system.
- Connect to PC with USB Cable: Use a USB cable to connect the printer to your computer.
- Open Designs/Images and Print: Once the driver is installed and the printer is connected, you can open your designs or images and print them directly from your computer.
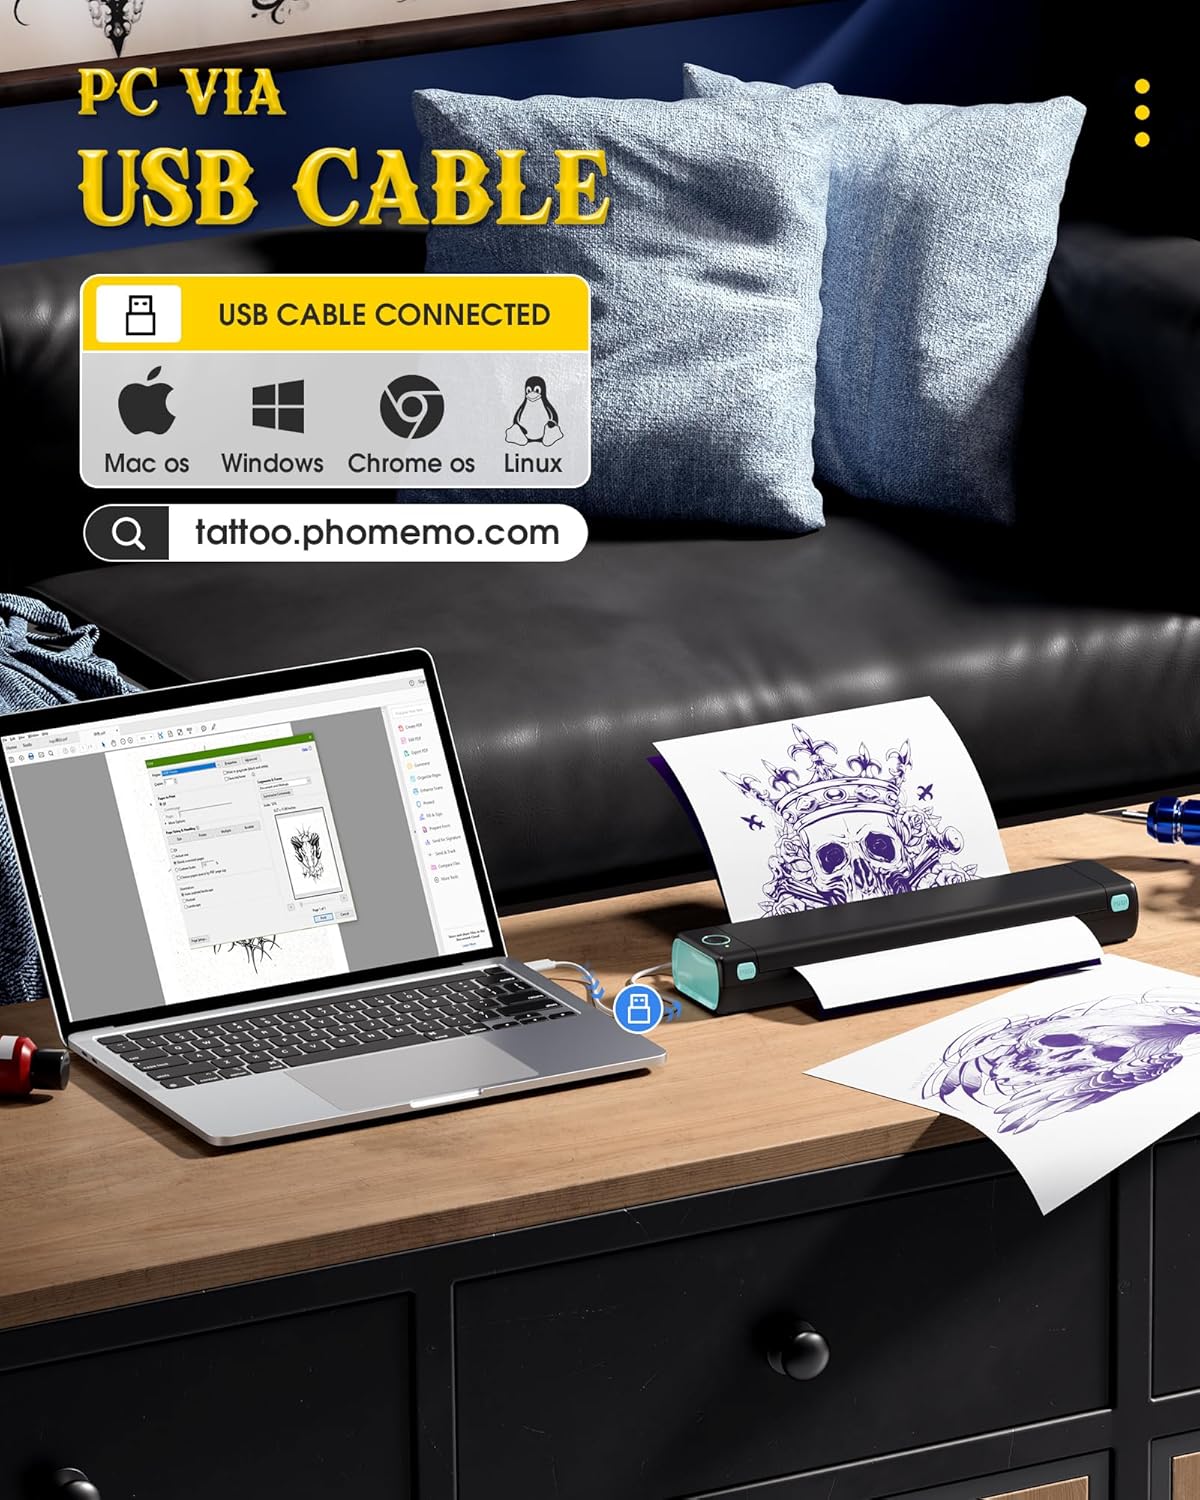
Figure 5.2.1: The M08F printer connected to a laptop via USB, demonstrating PC compatibility.

Figure 5.2.2: Visual steps for connecting the Itari M08F printer to a PC via USB and initiating a print job.
5.3 Printing Process and Quality
The M08F uses advanced thermal technology to produce clear and precise tattoo stencils. It is optimized for line art and simple designs. Complex shadows, dark backgrounds, or color drafts may not transfer optimally.

Figure 5.3.1: Examples of suitable and unsuitable designs for printing with the Itari M08F, showing optimal results for simple lines and totem patterns, and less optimal for complex shadows or dark backgrounds.
After printing, you can proceed with applying the stencil to the skin. The process typically involves cutting the printed stencil, applying it to the skin, and then adding color once the stencil is set.

Figure 5.3.2: Illustrates the complete workflow from printing the stencil to applying it and adding color to the tattoo.
6. Maintenance
The Itari M08F printer is designed for low maintenance due to its inkless thermal printing technology. Regular cleaning of the print head and paper path is recommended to ensure consistent print quality.
- Cleaning the Print Head: Gently wipe the print head with a lint-free cloth dampened with isopropyl alcohol. Ensure the printer is turned off and cool before cleaning.
- Cleaning the Paper Path: Use a soft brush or compressed air to remove any paper dust or debris from the paper entry and exit slots.
- Storage: When not in use, store the printer in a cool, dry place, away from direct sunlight and extreme temperatures.
7. Troubleshooting
| Problem | Possible Cause | Solution |
|---|---|---|
| Printer not turning on | Low battery or power issue. | Charge the printer. Ensure the power adapter is working and connected correctly. |
| Poor print quality / Faded prints | Print head is dirty or paper is inserted incorrectly. | Clean the print head. Ensure the white side of the transfer paper is facing up. Use high-quality thermal transfer paper. |
| Printer not connecting via Bluetooth | Bluetooth is off on device, app issue, or printer not discoverable. | Ensure Bluetooth is enabled on your phone/tablet. Restart the Phomemo app and the printer. Try re-pairing the device. |
| Printer not recognized by PC via USB | Driver not installed or USB cable issue. | Install the correct driver from tattoo.phomemo.com. Try a different USB port or cable. Restart your computer. |
| Paper jam | Paper inserted incorrectly or foreign object in paper path. | Turn off the printer. Carefully remove any jammed paper. Ensure paper is inserted straight. |
8. Specifications
| Feature | Detail |
|---|---|
| Model Name | M08F |
| Product Dimensions (L x W x H) | 6.8 x 31 x 4.4 cm (2.68 x 12.2 x 1.73 inches) |
| Item Weight | 907 g (2 lbs) |
| Connectivity Technology | Bluetooth, USB |
| Printing Technology | Thermal |
| Maximum Print Speed (Monochrome) | 3 Pages per minute |
| Maximum Print Resolution (Monochrome) | 203 dots per inch |
| Maximum Printer Media Size | A4 (210 x 297 mm) |
| Compatible Devices | PC, Laptop, Tablet, Smartphone |
| Power Consumption | 13.2 Watt |
| Battery Capacity | 1200 mAh |
| Included Components | 10 sheets of thermal transfer paper |
9. Warranty and Support
Itari stands behind the quality of its products. The Itari M08F Tattoo Thermal Copier comes with:
- 18-Month Product Replacement Warranty: For any manufacturing defects or malfunctions.
- 90-Day Money-Back Guarantee: If you are not satisfied with the product.
If you encounter any issues or are not satisfied with your product, please contact our professional after-sales service team. We are available 24/7 to provide a satisfactory solution.
For support, please refer to the contact information provided with your purchase or visit the official Itari website.


