1. Product Overview
The Anysea Automatic Pet Feeder (Model DU4L-KS) is designed to provide scheduled and portion-controlled meals for your cats and dogs. Featuring a 4-liter capacity, an LCD display for easy programming, a 10-second voice recorder, and dual power supply options, this feeder ensures your pet receives consistent nutrition even when you are away.
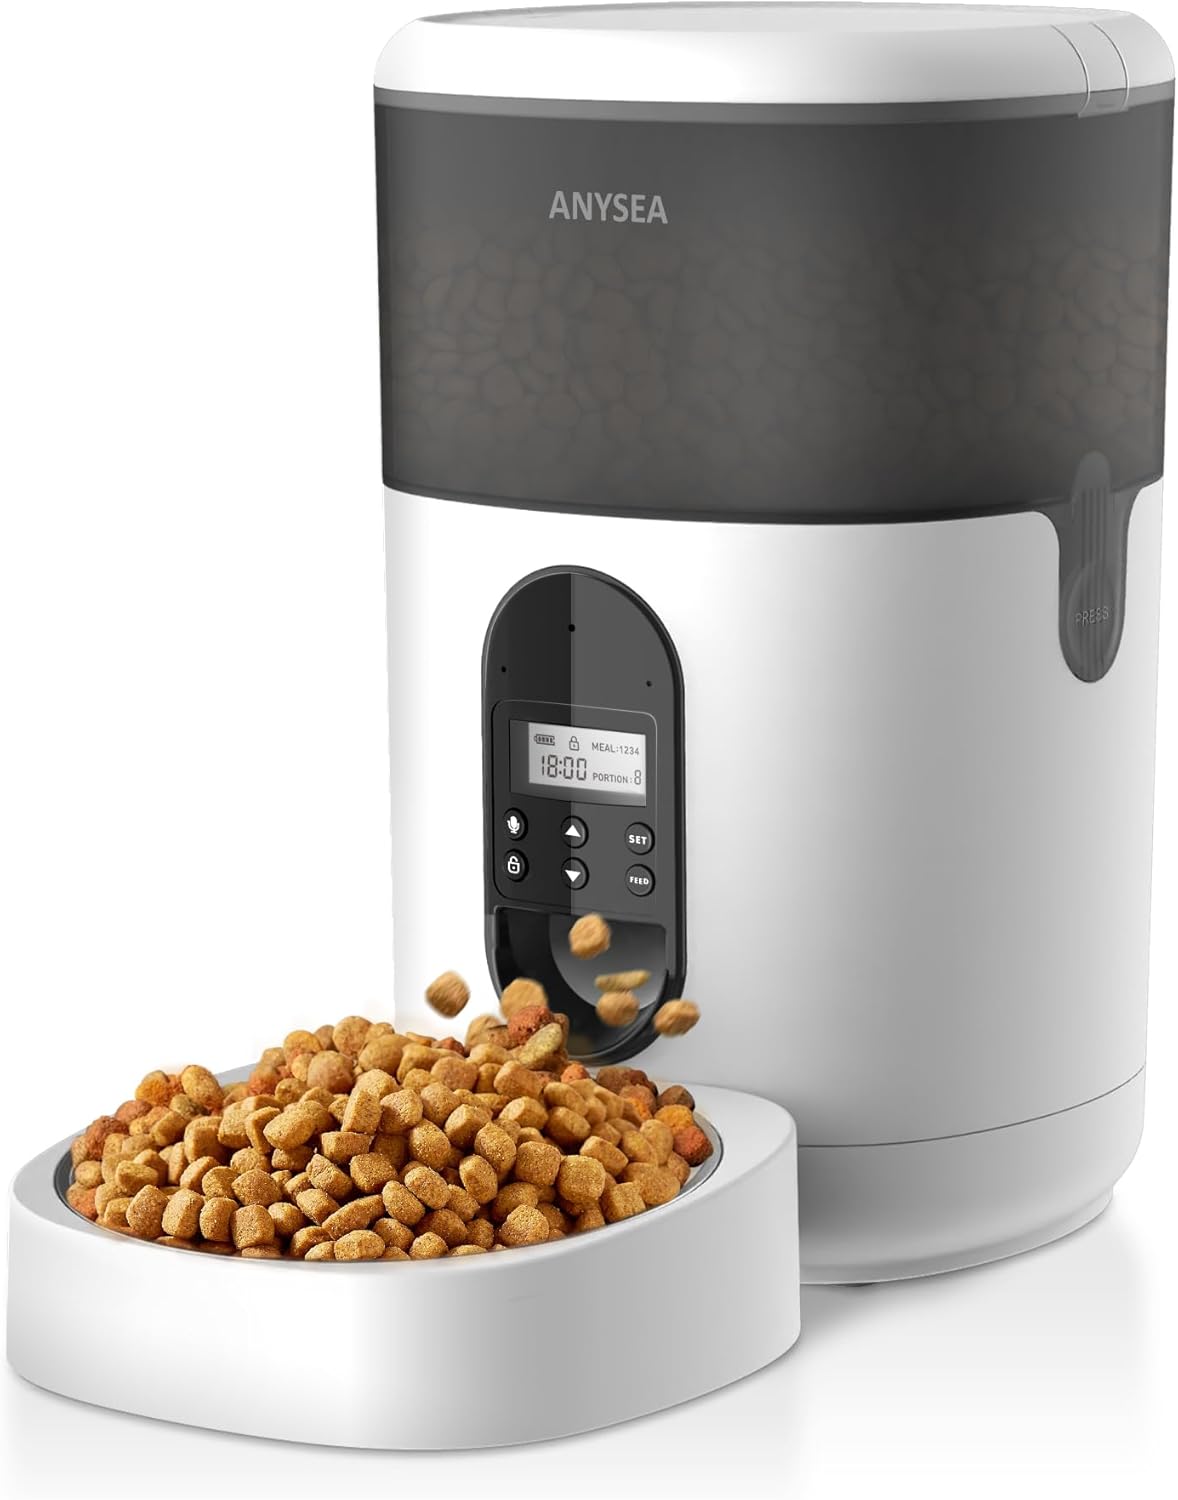
Image 1.1: Anysea Automatic Pet Feeder with food being dispensed.

Image 1.2: Overview of the Anysea Automatic Pet Feeder's key features and design.
2. Safety Information
- Read all instructions carefully before using the appliance.
- Keep the feeder away from children and pets during setup to prevent accidental injury or damage.
- Use only dry pet food with a kibble size between 2-10mm. Do not use wet, canned, or moist food.
- Do not immerse the main unit (base with motor) in water or any other liquid.
- Ensure the power adapter is properly connected and the batteries (if used) are inserted correctly.
- Place the feeder on a stable, level surface to prevent tipping.
- Unplug the feeder from the power outlet before cleaning.
3. Package Contents
Please check the package to ensure all items are present:
- Automatic Pet Feeder Main Unit
- Food Storage Container (4L)
- Stainless Steel Food Bowl
- Bowl Holder
- 5V DC Power Adapter with Nylon Braided Wire
- Desiccant Bag
- Instruction Manual
4. Product Components

Image 4.1: Dual Power Supply options (D batteries and 5V adapter).

Image 4.2: Freshness Preservation features: Secure Twist-lock Lid, Desiccant Bag, and Closed Pet Food Outlet.

Image 4.3: Pet-friendly details: Non-slip Silicone Bottom, Stainless Steel Bowl, and Nylon Braided Wire.
5. Setup Guide
5.1 Unpacking and Assembly
- Carefully remove all components from the packaging.
- Place the main unit on a flat, stable surface.
- Insert the stainless steel bowl into the bowl holder, then attach the bowl holder to the main unit.
5.2 Power Supply
The feeder can be powered by a 5V DC adapter or three D batteries (not included).
- AC Adapter: Connect the 5V DC adapter to the power port on the back of the feeder and plug it into a wall outlet.
- Battery Power: Open the battery compartment on the bottom of the feeder. Insert three D-size alkaline batteries, ensuring correct polarity (+/-). Close the compartment securely. Batteries provide backup power in case of an outage.
5.3 Filling the Food Container
- Open the top lid by twisting it counter-clockwise.
- Place the desiccant bag into the designated slot under the lid to help keep food fresh. Replace the desiccant bag every 15-30 days.
- Pour dry pet food into the container. Ensure the kibble size is between 2-10mm. Do not overfill.
- Close the lid by twisting it clockwise until it locks securely.
6. Operating Instructions
6.1 LCD Display and Control Panel Overview
Image 6.1: LCD Display and Control Panel.
The control panel features an LCD screen and several buttons:
- SET: Enters/confirms settings.
- UP/DOWN Arrows: Adjust values.
- LOCK: Press and hold to lock/unlock the control panel.
- MIC: Press to record voice message.
- FEED: Manual feeding.
6.2 Setting Current Time
- Press and hold the LOCK button for 3 seconds to unlock the panel.
- Press the SET button once. The hour digit will flash.
- Use the UP/DOWN arrows to set the current hour (24-hour format).
- Press SET again. The minute digit will flash.
- Use the UP/DOWN arrows to set the current minute.
- Press SET to confirm and exit time setting.
6.3 Setting Feeding Schedule
The feeder supports up to 4 meals per day, with 1-20 portions per meal (each portion is approximately 7g ± 2g).

Image 6.2: Time Feeding Schedule parameters.
- Unlock the panel by pressing and holding LOCK for 3 seconds.
- Press SET repeatedly until "MEAL 1" flashes.
- Use UP/DOWN to set the desired feeding time for Meal 1 (hour then minute, confirming with SET after each).
- After setting the time, the "PORTION" number will flash. Use UP/DOWN to set the number of portions (1-20) for Meal 1.
- Press SET to confirm Meal 1 settings.
- Repeat steps 3-5 for MEAL 2, MEAL 3, and MEAL 4 if desired. If a meal is not needed, set its portion to 0.
- After setting all desired meals, press SET to exit programming mode.
6.4 Voice Recording
Record a 10-second message to call your pet at meal times.

Image 6.3: Customized 10-second voice recording feature.
- Unlock the panel by pressing and holding LOCK for 3 seconds.
- Press and hold the MIC button. The screen will show a recording icon.
- Speak your message clearly into the microphone for up to 10 seconds.
- Release the MIC button to save the recording. The feeder will play back the recorded message to confirm.
- The recorded message will play automatically during each scheduled meal.
6.5 Manual Feeding
To dispense food immediately outside of the scheduled times:
- Unlock the panel by pressing and holding LOCK for 3 seconds.
- Press the FEED button once. One portion of food will be dispensed.
- You can press FEED multiple times for additional portions.
7. Maintenance and Cleaning
Regular cleaning ensures hygiene and proper functioning of your pet feeder.
Image 7.1: Easy Disassembly and Cleaning.
- Disassembly: Unplug the feeder and remove any remaining food. Detach the food container, lid, and food bowl from the main unit.
- Washing: The food container, lid, and stainless steel bowl are washable. Hand wash these components with mild soap and water. Rinse thoroughly and dry completely before reassembly.
- Main Unit: The base unit containing the motor and electronics is NOT washable. Wipe it clean with a soft, damp cloth. Do not use abrasive cleaners.
- Desiccant Bag: Replace the desiccant bag every 15-30 days to maintain food freshness.
- Reassembly: Ensure all parts are dry before reassembling the feeder.
8. Troubleshooting
If you encounter issues with your Anysea Automatic Pet Feeder, please refer to the following common problems and solutions:
| Problem | Possible Cause | Solution |
|---|---|---|
| Feeder does not power on. | No power from adapter; dead batteries; loose connection. | Check adapter connection and wall outlet. Replace D batteries if using battery power. Ensure batteries are inserted with correct polarity. |
| Food is not dispensing. | Food jammed; low food level; incorrect kibble size; dispenser blocked. | Check food level. Ensure kibble size is 2-10mm. Clear any blockages in the dispenser outlet. Clean the food container and dispensing mechanism. |
| Scheduled meals are not dispensing. | Incorrect time setting; meal schedule not set; panel locked. | Verify current time is set correctly. Ensure meal times and portions are programmed. Unlock the control panel. |
| Voice recording not playing or unclear. | No recording saved; microphone blocked; low volume. | Re-record the message, ensuring you speak clearly. Check for any obstructions near the microphone. |
| Feeder is unstable or moves. | Uneven surface; non-slip feet not effective. | Place the feeder on a flat, stable surface. Ensure the non-slip silicone bottom is clean and intact. |
9. Specifications
- Model: DU4L-KS
- Capacity: 4 Liters
- Material: Acrylonitrile Butadiene Styrene (ABS)
- Dimensions (LxWxH): 7.5 x 7.5 x 12.6 inches
- Item Weight: 3.4 Pounds
- Power Supply: 5V DC Adapter or 3 x D Batteries (not included)
- Meals per Day: Up to 4
- Portions per Meal: 1-20 (approx. 7g ± 2g per portion)
- Kibble Size: 2-10mm dry food
- Special Features: Programmable, Voice Recording, Dual Power, Freshness Preservation
10. Warranty and Support
The Anysea Automatic Pet Feeder (Model DU4L-KS) comes with a 1-year limited warranty from the date of purchase. This warranty covers manufacturing defects under normal use.
For warranty claims, technical support, or any questions regarding your product, please contact Anysea customer service through the retailer where you purchased the product or visit the official Anysea website for contact information.
Please retain your proof of purchase for warranty validation.