1. Introduction
This manual provides essential information for the safe and efficient operation of your Mxmoonant 6KW 220V Electric Sauna Heater. Please read all instructions carefully before installation and use to ensure proper function and to prevent injury or damage.
The Mxmoonant 6KW electric sauna heater is designed to provide a comfortable and relaxing dry steam sauna experience for home, hotel, or spa environments. It efficiently heats sauna rooms ranging from 170 to 300 cubic feet.
2. Safety Information
WARNING: Failure to follow these safety instructions may result in fire, electric shock, serious injury, or death.
- Electrical Installation: This electric sauna heater operates on 220V and does not come with a plug. Installation requires direct wiring. It is highly recommended to consult and engage a licensed electrician to ensure that all wiring is performed correctly and in compliance with local electrical codes. Incorrect wiring can lead to severe hazards.
- Sauna Stones: Approximately 30-40 lbs of sauna stones are required for proper operation. Sauna stones are NOT included with this product and must be purchased separately. Ensure stones are specifically designed for sauna heaters.
- Ventilation: Ensure adequate ventilation in the sauna room as per local building codes.
- Clearance: Maintain specified minimum distances from walls, benches, and other combustible materials as detailed in the installation section.
- Water Application: Only pour small amounts of water onto the hot sauna stones to create steam. Avoid pouring excessive water, which can damage the heating elements or cause scalding.
- Supervision: Do not leave the sauna heater unattended while in operation.
- Children and Pets: Keep children and pets away from the sauna heater, especially when it is hot.
- Medical Conditions: Individuals with heart conditions, high blood pressure, or other medical concerns should consult a physician before using a sauna.
- Flammable Materials: Do not place any flammable materials on or near the sauna heater.
3. Product Components
The following components are typically included with your Mxmoonant 6KW Electric Sauna Heater:
- Mxmoonant 6KW Electric Sauna Heater Unit
- Mounting Screws (1.26 inch x 6, 0.51 inch x 2)
- Washers
- Straight Screwdriver x 1
- Sauna Hygrothermograph (Thermometer and Hygrometer) x 1
- Instruction Manual (this document)
Note: Sauna stones are not included and must be purchased separately (approximately 30-40 lbs required).

Image: Mxmoonant 6KW Electric Sauna Heater with its accessories, including various screws, a screwdriver, and a sauna hygrothermograph. The main heater unit is silver-colored with control knobs at the bottom.
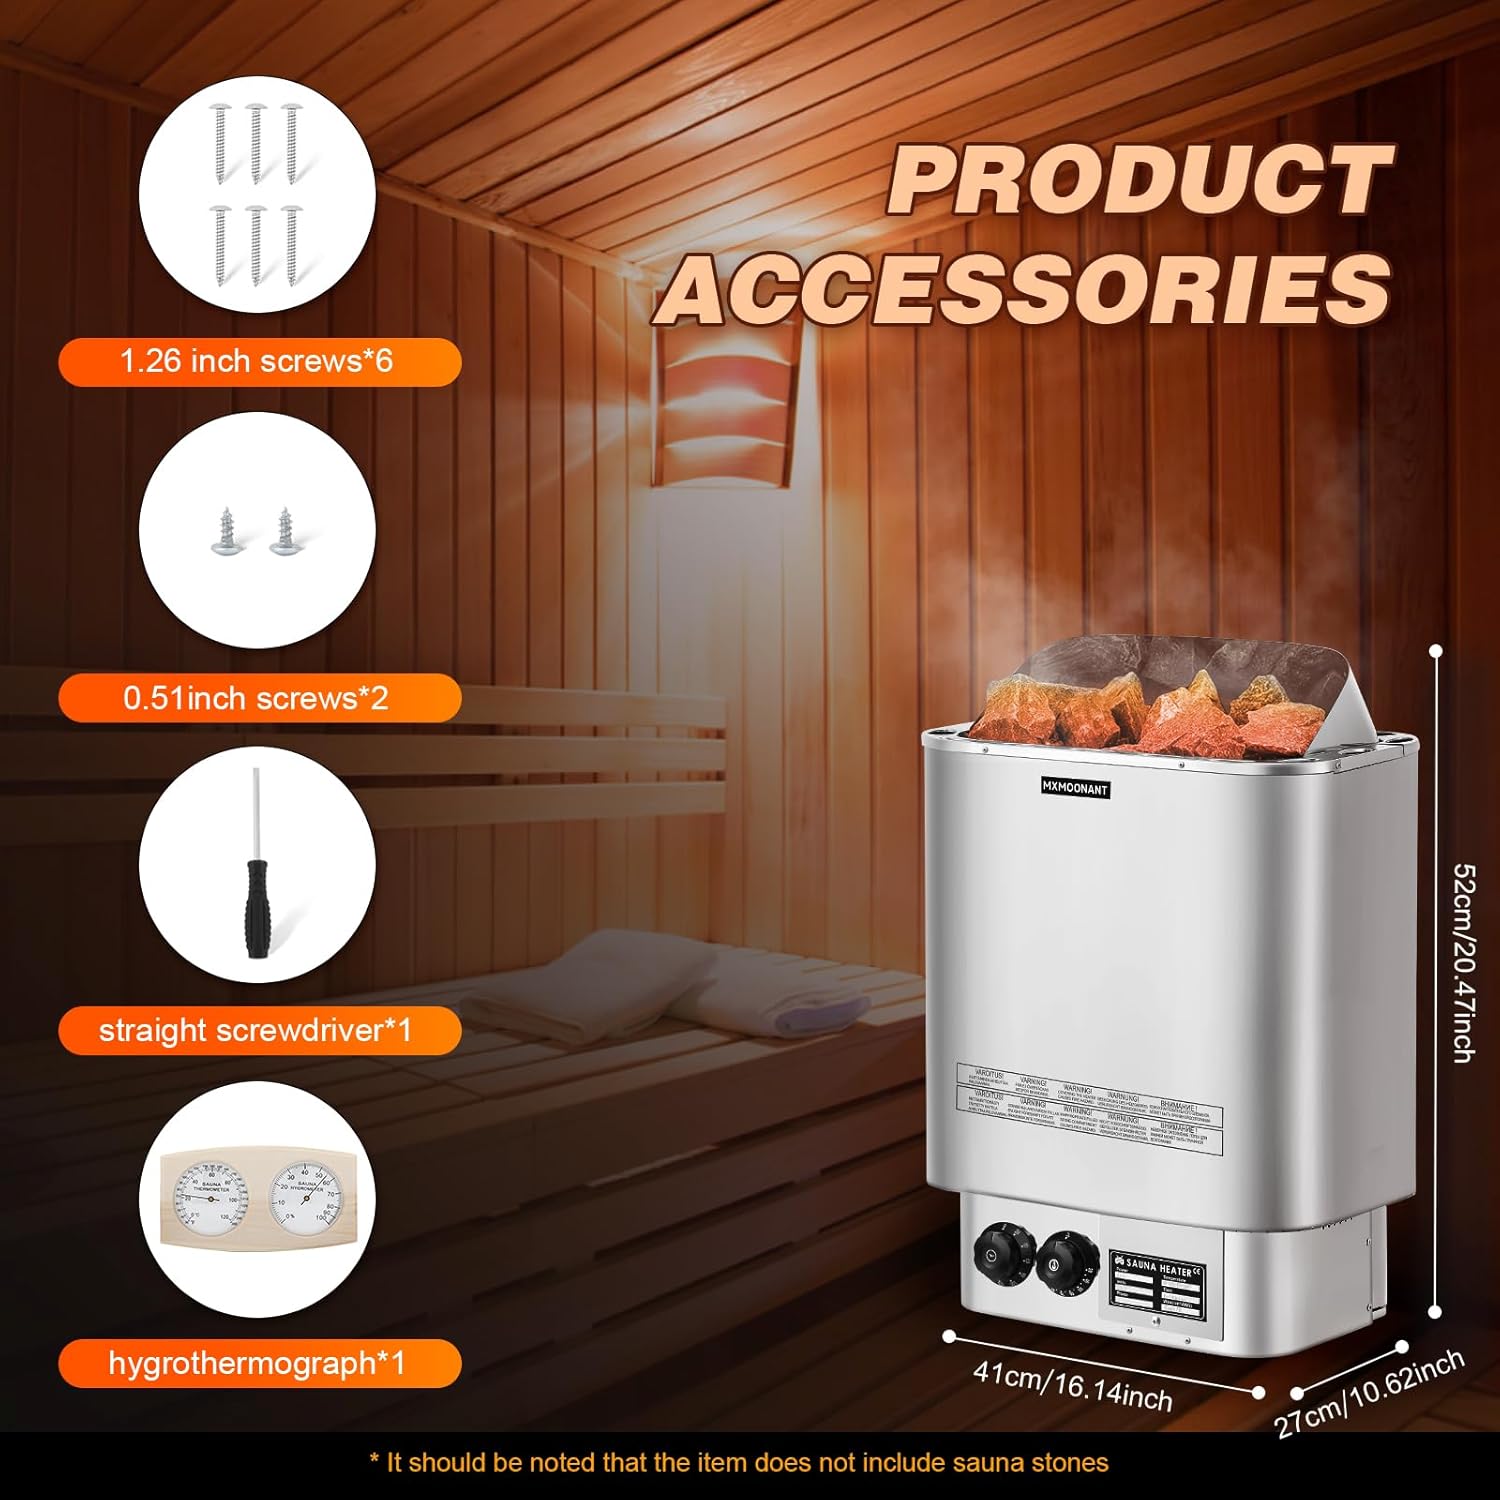
Image: A visual representation of the product accessories, including 1.26-inch screws (x6), 0.51-inch screws (x2), a straight screwdriver (x1), and a hygrothermograph (x1). The image also displays the dimensions of the sauna heater: 52cm/20.47inch height, 41cm/16.14inch width, and 27cm/10.62inch depth.
4. Setup and Installation
The Mxmoonant 6KW sauna heater features a wall-mounted design to optimize space within your sauna room. Proper installation is critical for safety and performance.
4.1 Pre-Installation Checklist
- Ensure the sauna room size is appropriate for a 6KW heater (170 to 300 cubic feet).
- Verify that the electrical supply meets the heater's requirements (220V).
- Have a licensed electrician available for wiring.
- Acquire 30-40 lbs of suitable sauna stones.
- Confirm adequate clearance around the heater location.
4.2 Installation Steps
- Mains Connection:
Before any electrical work, ensure the main power supply to the sauna room is turned OFF at the circuit breaker. Connect the heater to the 220V electrical supply. This step MUST be performed by a licensed electrician to ensure correct wiring (GND, L1, L2, N connections) and adherence to all local electrical codes.
- Install Heat Shielding (if applicable):
If your sauna room requires additional heat shielding behind the heater, install it according to manufacturer guidelines and local regulations. This protects the wall from excessive heat.
- Mount the Heater on the Wall:
Securely mount the sauna heater to a sturdy wall structure using the provided mounting screws and washers. Ensure the heater is level and firmly attached. The wall-mounted design helps save floor space.
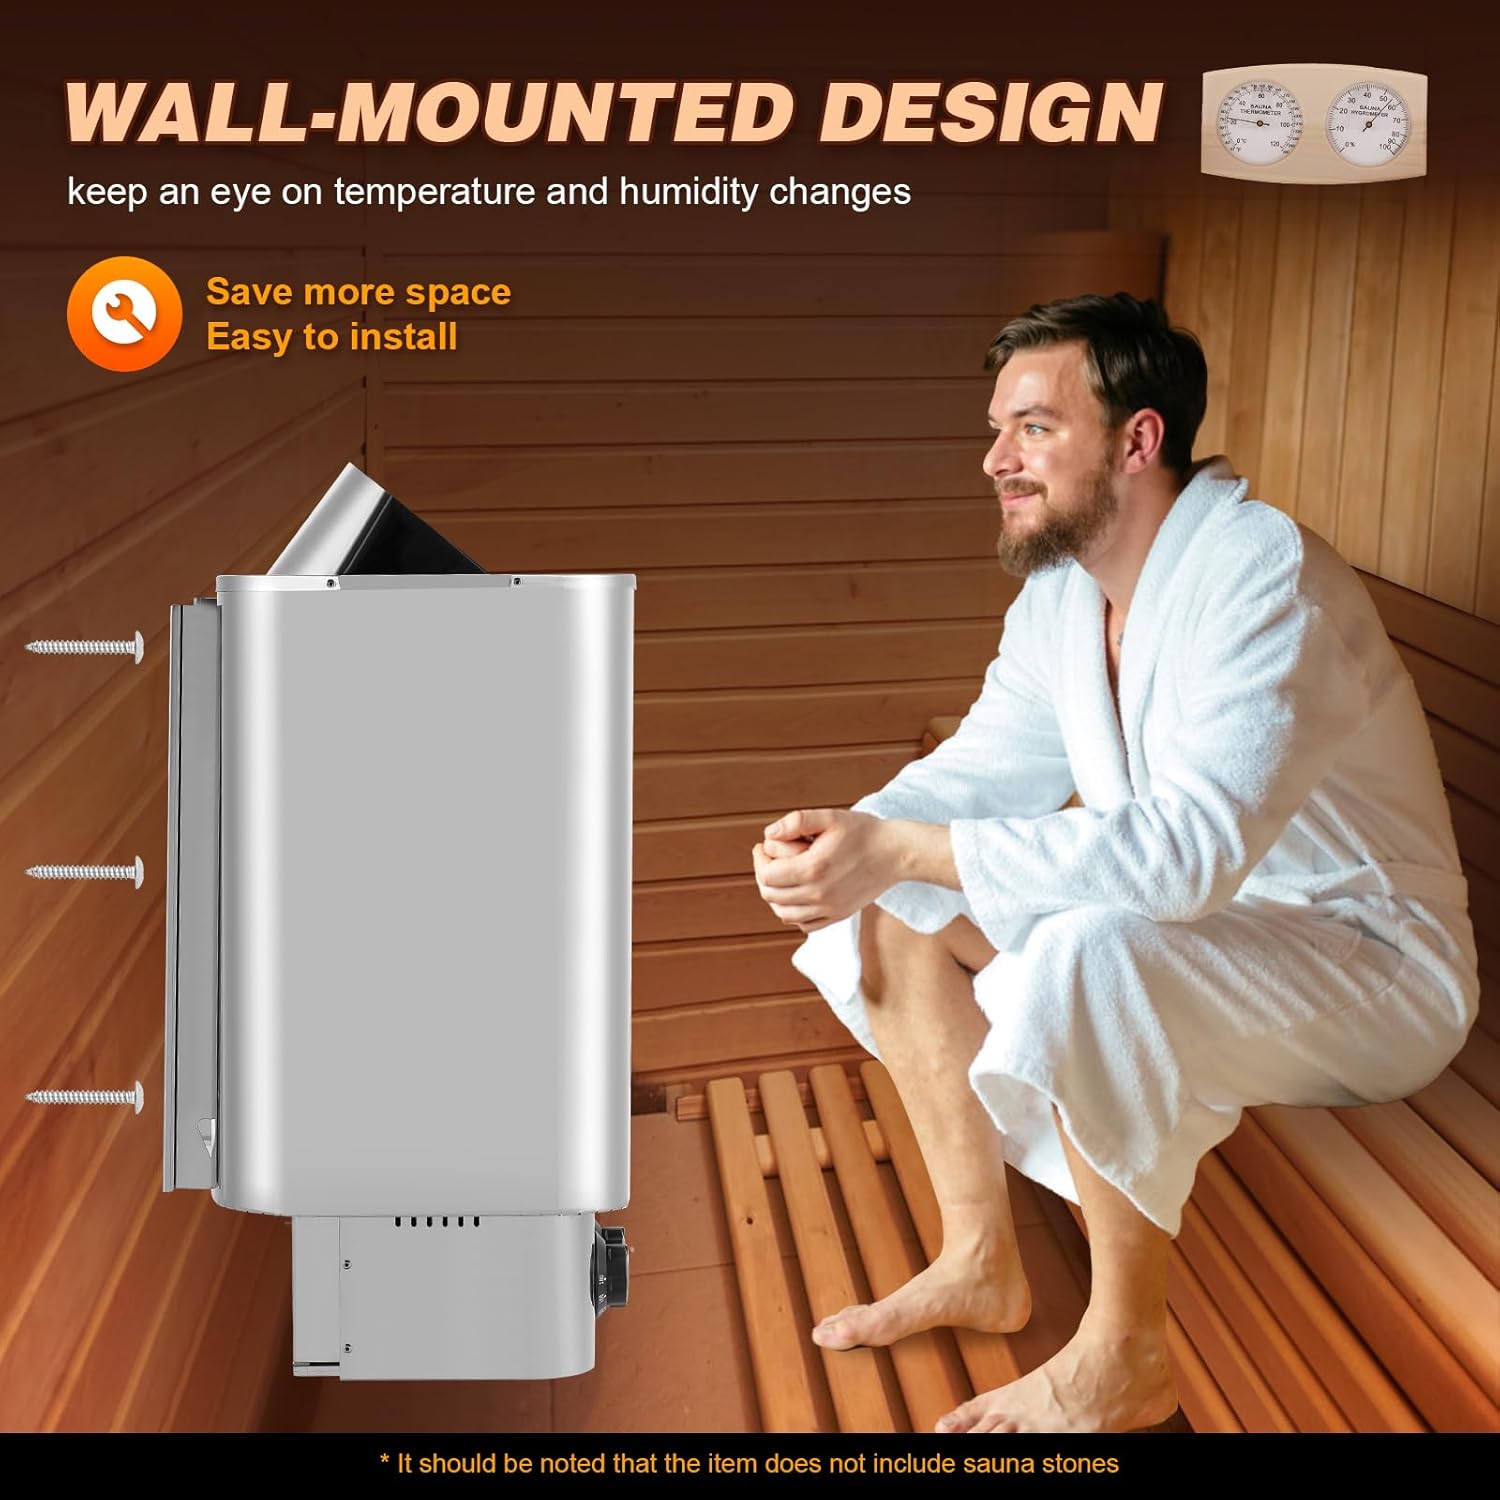
Image: A Mxmoonant sauna heater is shown securely mounted on a wooden wall inside a sauna, illustrating its space-saving wall-mounted design.
- Piling Sauna Stones:
Carefully place the sauna stones into the stone compartment of the heater. Arrange them loosely to allow for proper air circulation. Do not pack them too tightly. Ensure the stones cover the heating elements but do not obstruct the air vents.
- Set Temperature and Time:
Once installation is complete and verified by a licensed electrician, you can proceed to set the desired temperature and time using the control knobs.
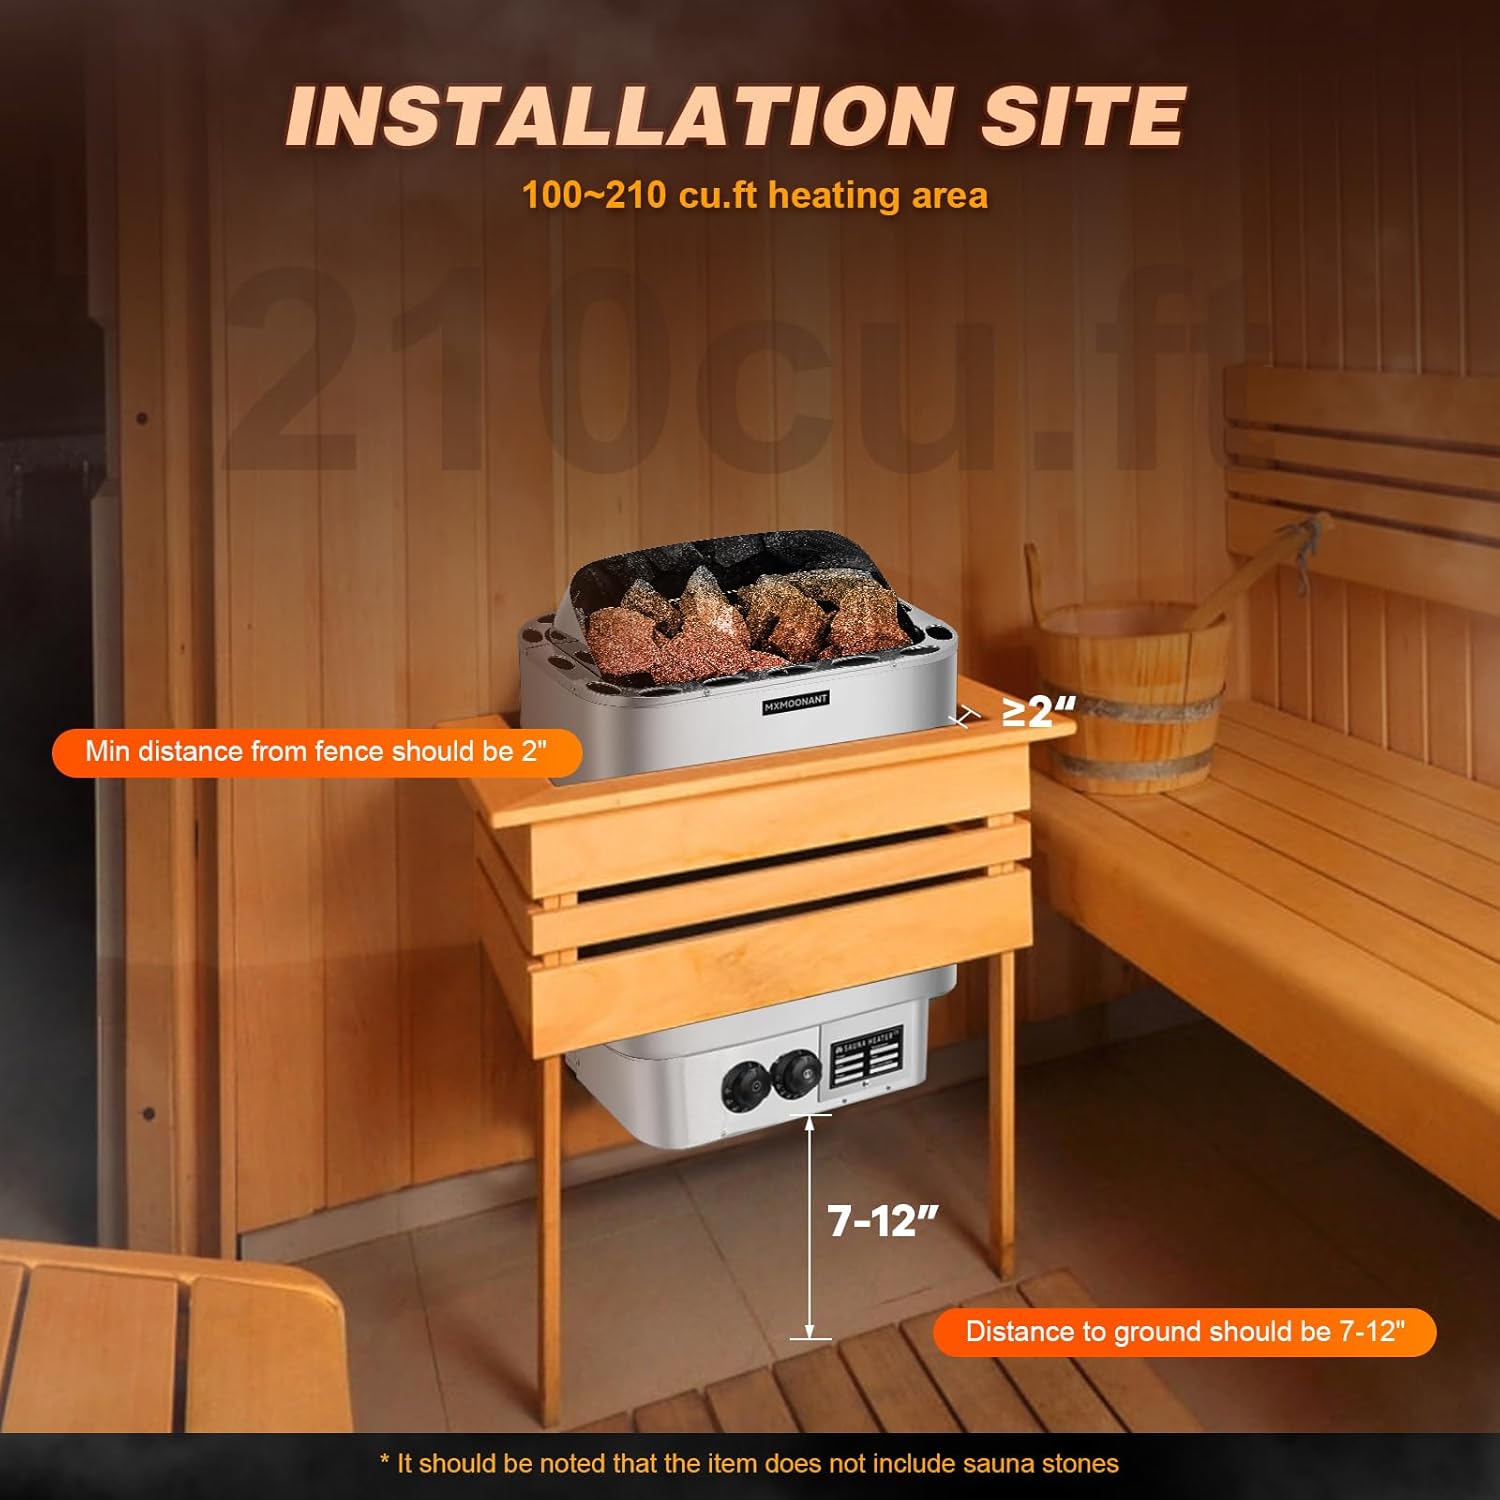
Image: A diagram showing the recommended installation clearances for the sauna heater. It indicates a minimum distance of 2 inches from any fence or protective barrier and a distance of 7-12 inches from the ground to the bottom of the heater. The image also notes a heating area of 100-210 cu.ft, though the 6KW model supports up to 300 cu.ft.

Image: A five-step visual guide for installing the sauna heater. Step 1 shows mains connection wiring, Step 2 shows installing heat shielding, Step 3 shows mounting the heater on the wall, Step 4 shows piling sauna stones, and Step 5 shows setting the temperature and time controls.
5. Operating Instructions
Your Mxmoonant sauna heater is equipped with integrated time and temperature controls for a customized sauna experience.
5.1 Control Knobs
The heater features two rotary knobs on the front panel:
- Time Control Knob: Adjusts the operating duration from 0 to 180 minutes. Turn the knob clockwise to set the desired heating time.
- Temperature Control Knob: Adjusts the desired sauna room temperature, typically ranging from 30°C to 110°C (86°F to 230°F). Turn the knob to select your preferred temperature setting.
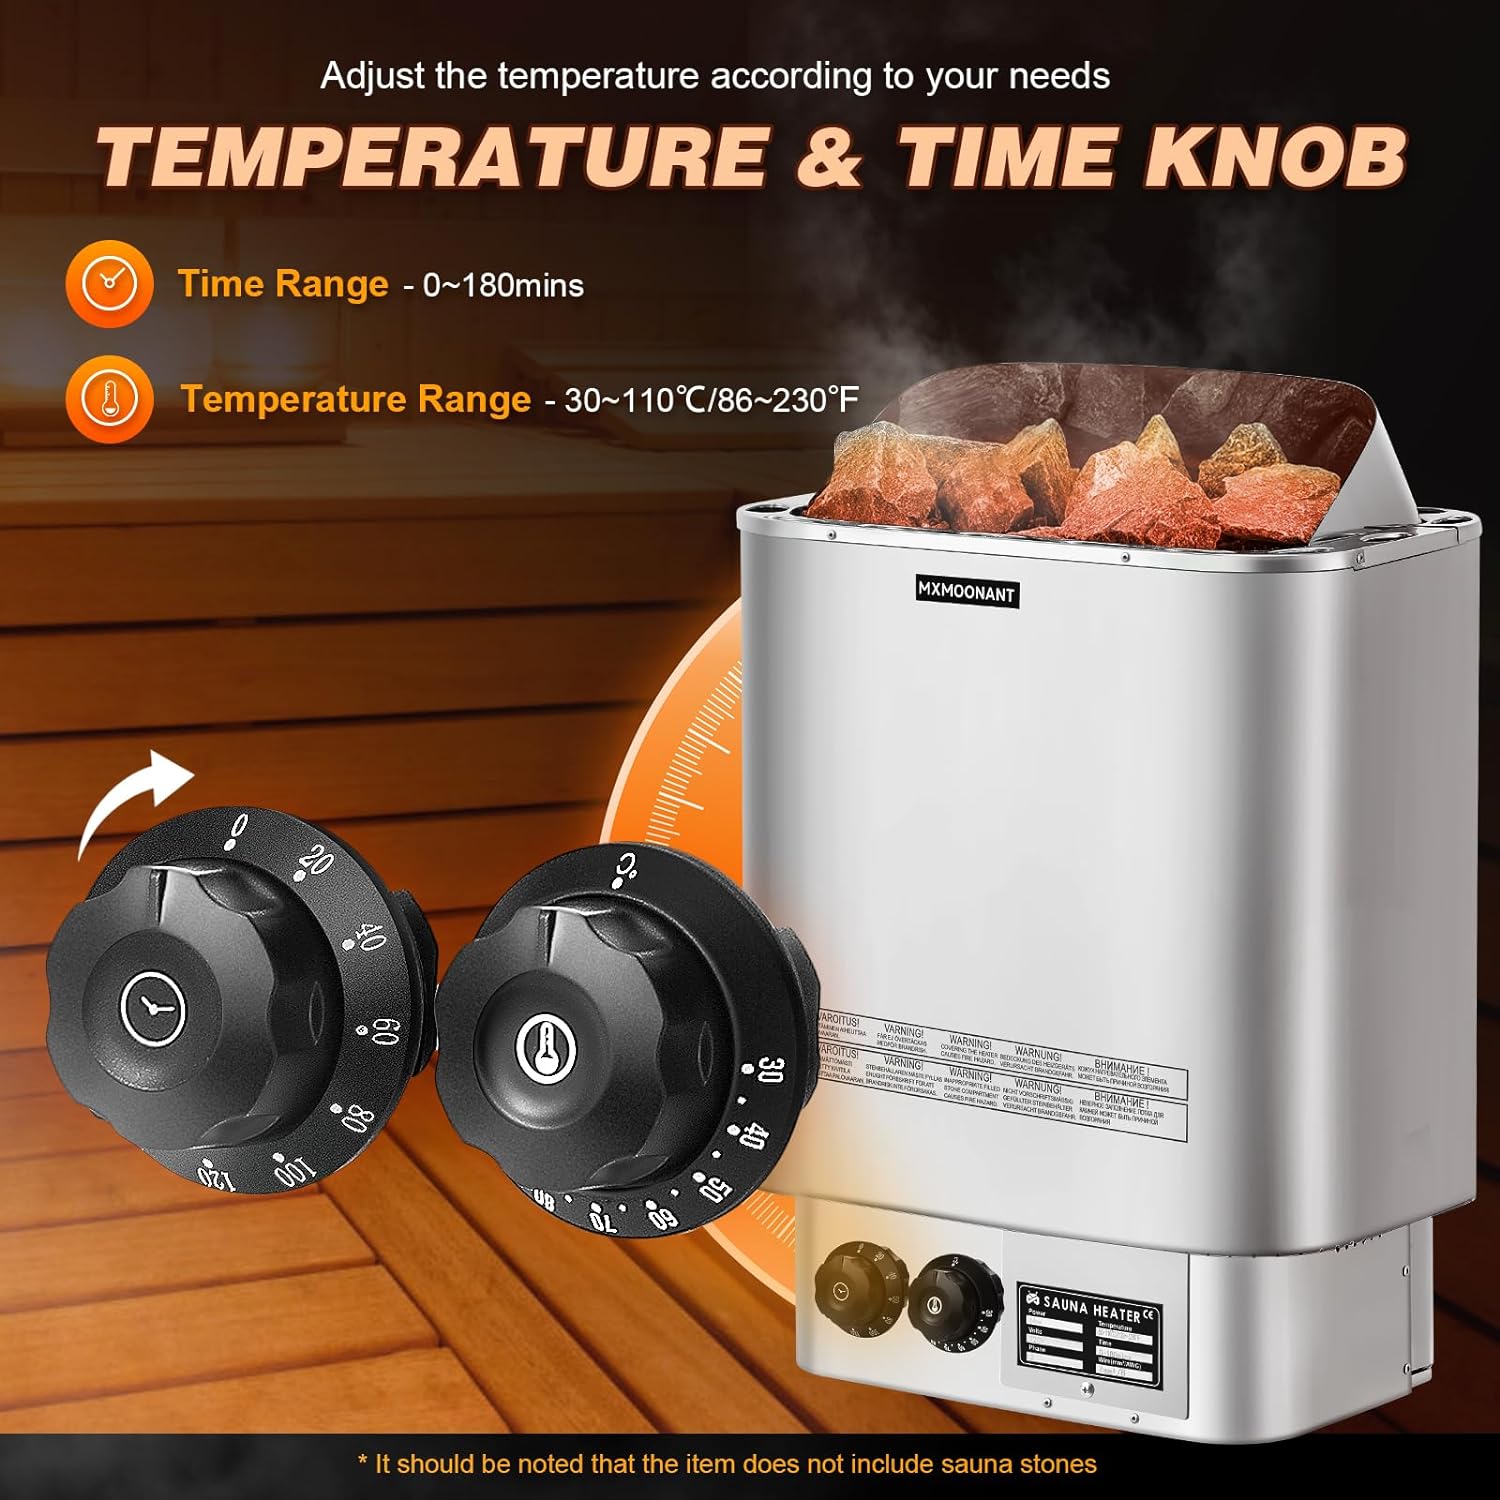
Image: A detailed view of the two control knobs on the sauna heater. One knob controls the time range (0-180 minutes), and the other controls the temperature range (30-110°C / 86-230°F).
5.2 Initial Use
- Ensure sauna stones are properly placed in the heater.
- Turn on the main power supply to the sauna heater.
- Set the desired temperature using the temperature control knob.
- Set the desired heating time using the time control knob. The heater will begin to warm up.
- Allow the sauna room to reach the set temperature. The heater will cycle on and off to maintain this temperature.
5.3 Creating Steam
Once the sauna stones are hot, you can gently pour small amounts of water over them to create steam. Use a ladle for this purpose. Do not pour large quantities of water at once, as this can cool the stones too quickly or cause water to splash onto the heating elements.
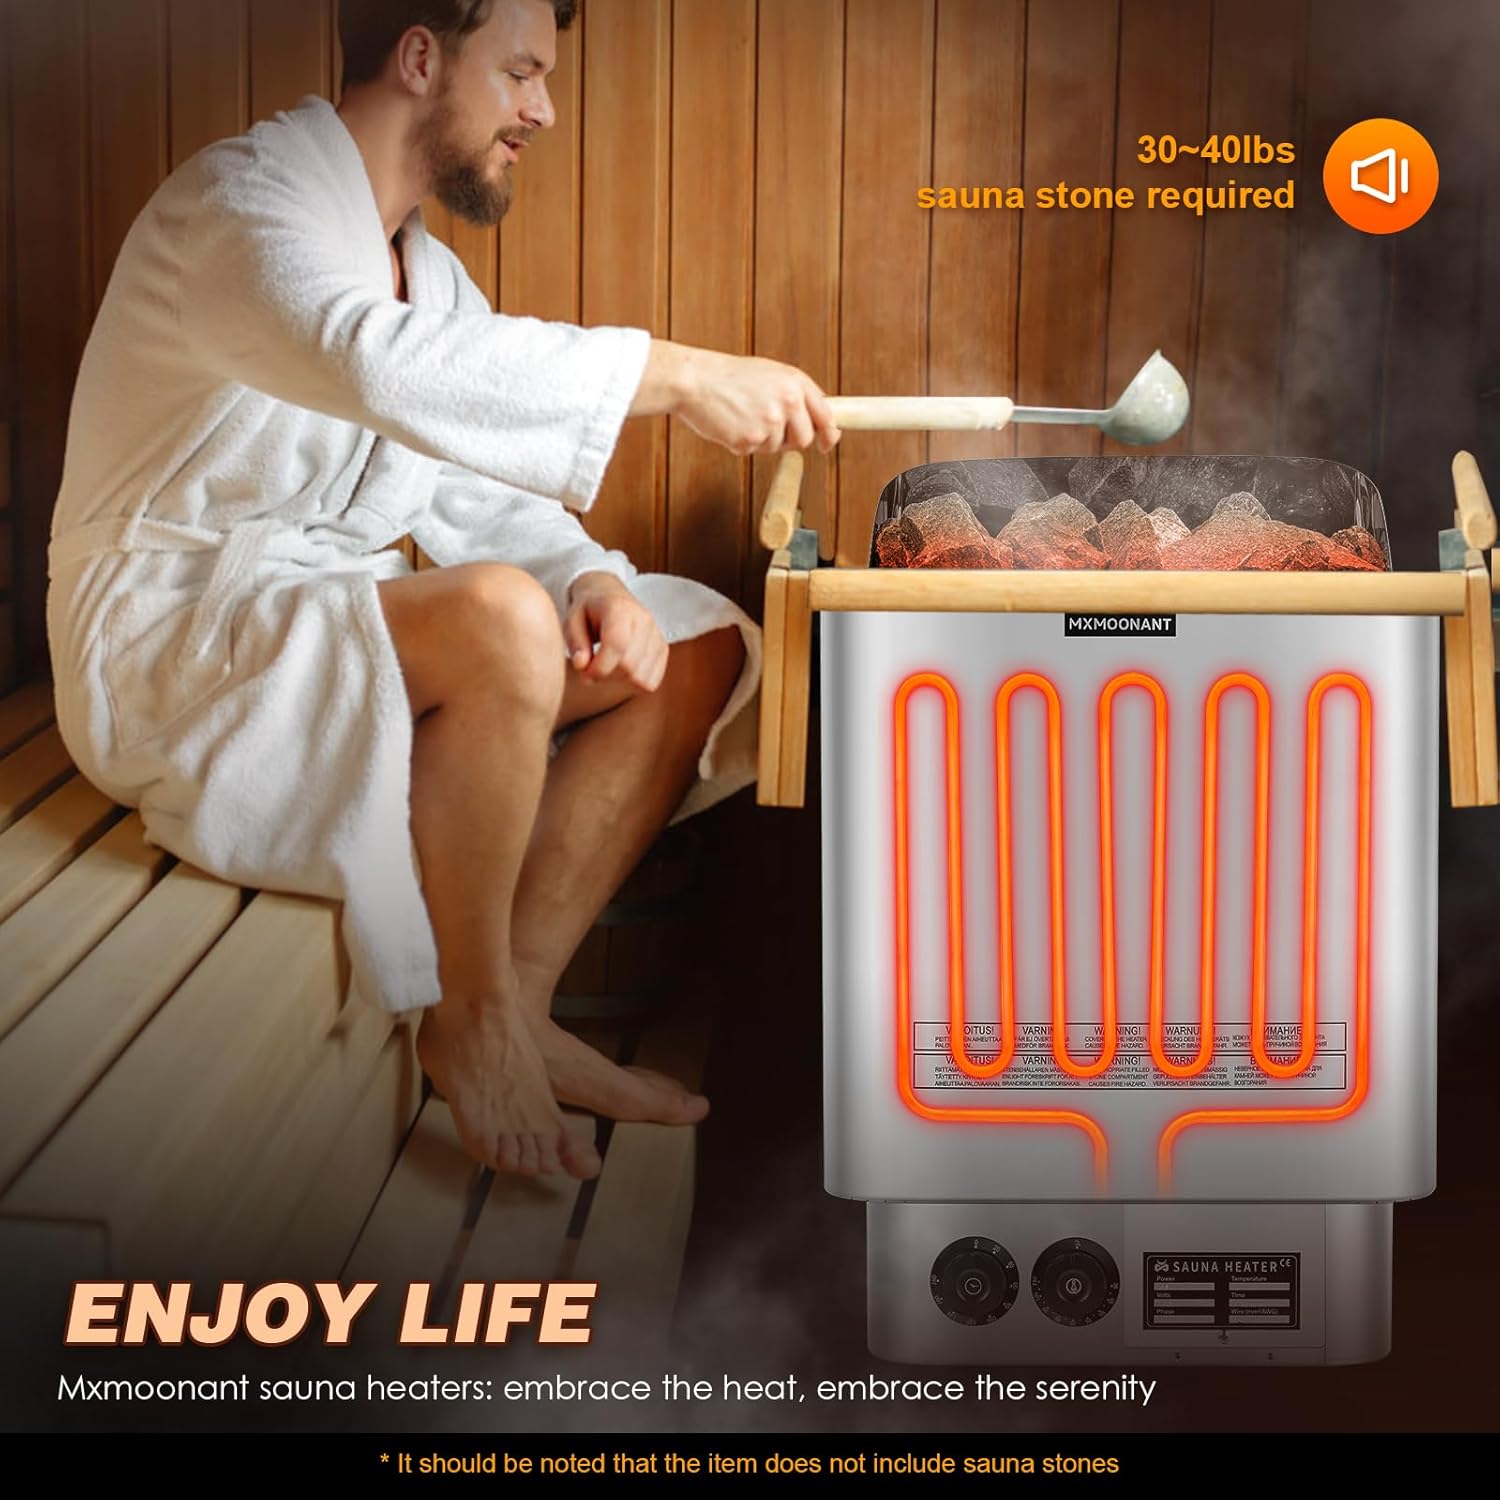
Image: A person is shown carefully pouring water from a wooden ladle onto the hot sauna stones within the Mxmoonant heater, generating steam for a dry steam sauna experience.
6. Maintenance
Regular maintenance ensures the longevity and safe operation of your sauna heater.
- Cleaning:
Ensure the heater is completely cool and disconnected from power before cleaning. Wipe the exterior with a damp cloth. Do not use abrasive cleaners or solvents. Periodically remove sauna stones and clean out any debris or dust from the stone compartment.
- Stone Inspection:
Inspect sauna stones regularly for signs of crumbling or deterioration. Replace any broken or worn-out stones to maintain efficient heating and prevent damage to the heating elements.
- Electrical Connections:
Periodically have a licensed electrician inspect the electrical connections for tightness and signs of wear.
7. Troubleshooting
This section addresses common issues you might encounter with your sauna heater.
| Problem | Possible Cause | Solution |
|---|---|---|
| Heater does not turn on. | No power supply, circuit breaker tripped, faulty wiring, timer not set. | Check main power supply. Reset circuit breaker. Verify timer is set. Consult a licensed electrician to check wiring. |
| Heater turns on but does not heat. | Faulty heating element, temperature knob set too low, thermostat issue. | Ensure temperature knob is set to a high enough setting. Inspect heating elements for visible damage (only when cool and power off). Contact customer support or a qualified technician. |
| Sauna room not reaching desired temperature. | Sauna room too large for heater, poor insulation, door/window leaks, insufficient sauna stones, stones packed too tightly. | Verify room volume is within 170-300 cu.ft. Check for air leaks. Ensure 30-40 lbs of stones are used and loosely arranged. |
| Loud cracking or popping noises during operation. | Expansion/contraction of metal, stones settling, incorrect type or amount of stones. | Some noise is normal due to thermal expansion. Ensure correct type and amount of sauna stones are used and they are not packed too tightly. If excessive, consult customer support. |
8. Specifications
- Model: 6KW
- Power Output: 6 Kilowatts (KW)
- Voltage: 220V
- Recommended Sauna Room Volume: 170 - 300 cubic feet
- Heating Elements: 840 Stainless Steel
- Casing Material: 430 Stainless Steel
- Product Dimensions (L x W x H): 18.8 x 13.77 x 21.45 inches
- Item Weight: 29.9 pounds
- Temperature Range: 30°C - 110°C (86°F - 230°F)
- Time Range: 0 - 180 minutes
- Sauna Stone Requirement: 30-40 lbs (not included)
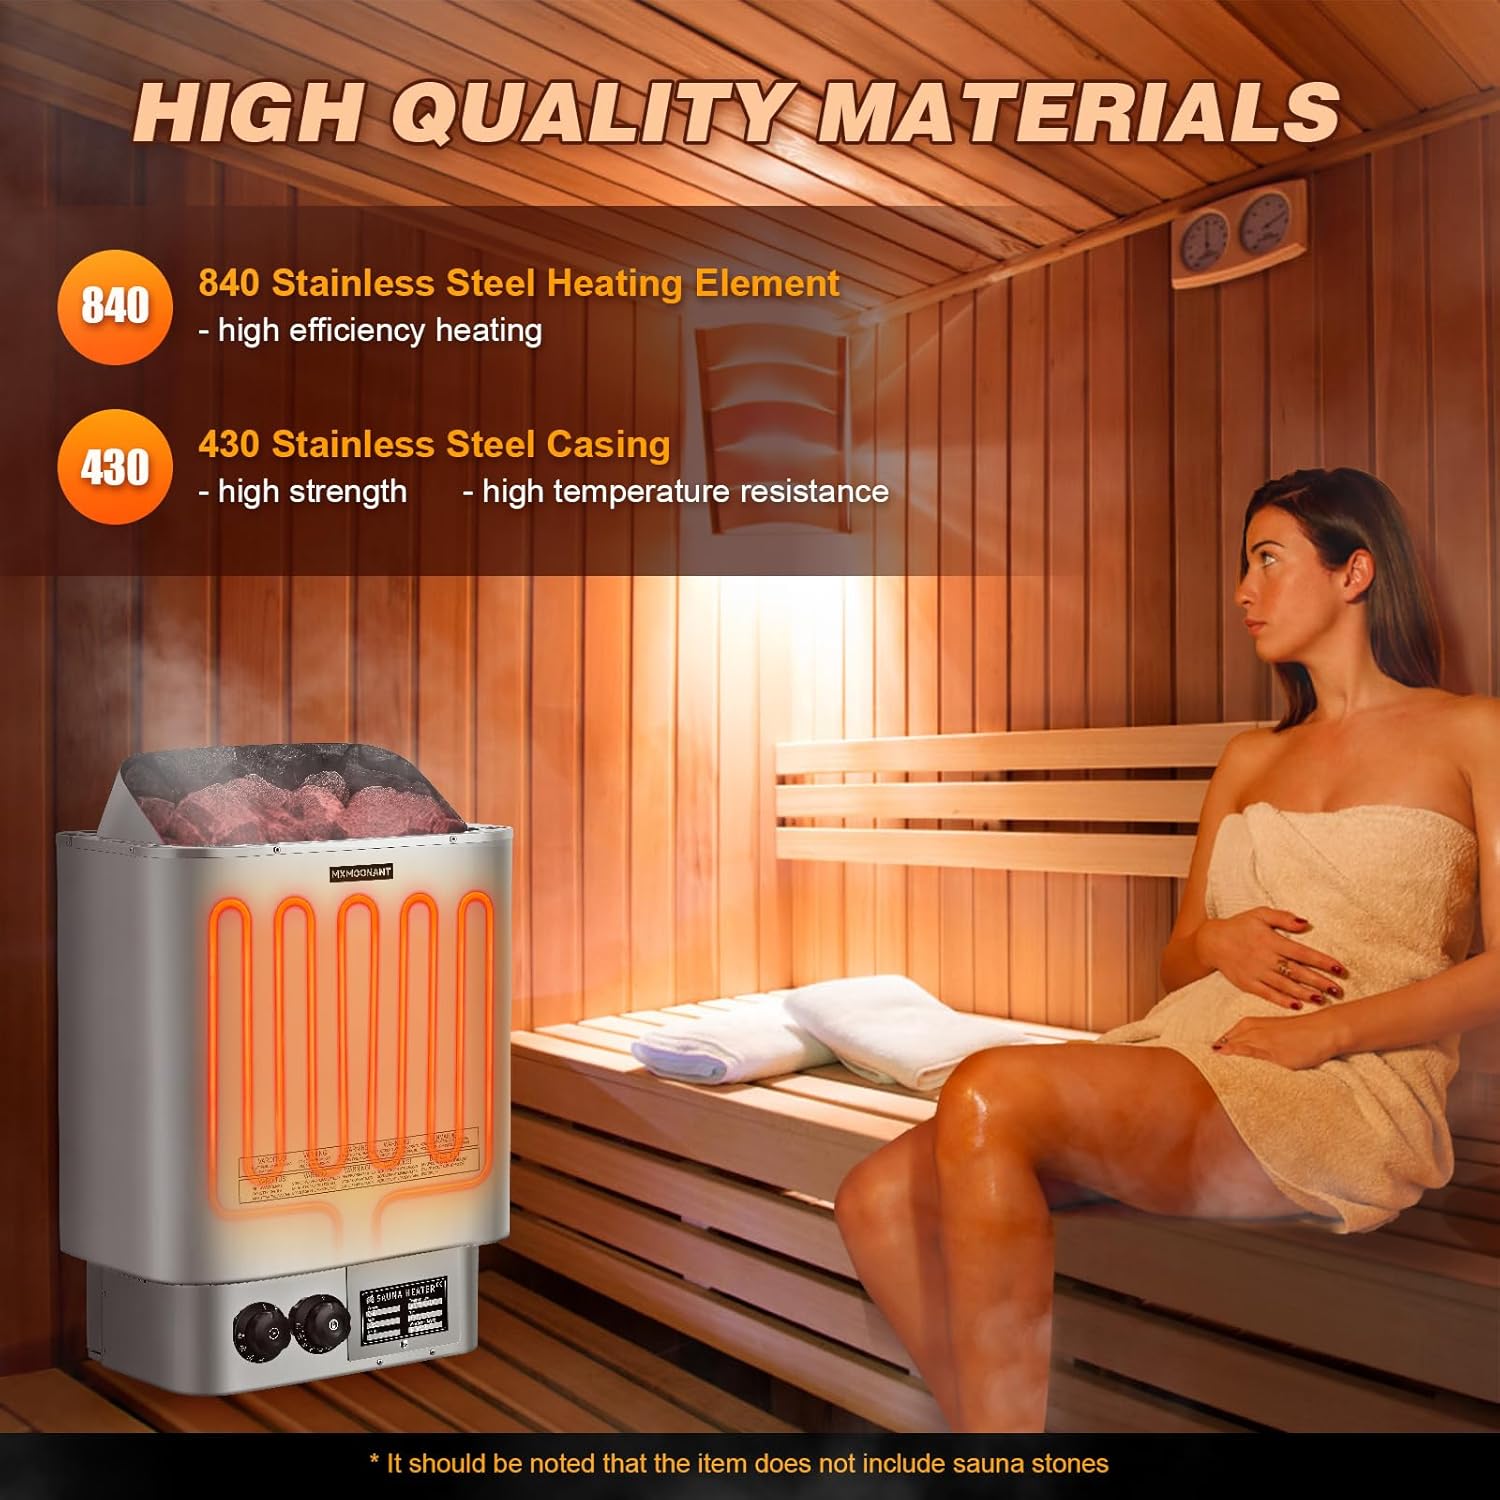
Image: A person is shown relaxing in a sauna, with the Mxmoonant heater visible. The image highlights the heater's construction from 840 stainless steel for high-efficiency heating elements and 430 stainless steel for the casing, providing high strength and temperature resistance.
9. Warranty and Support
For warranty information and customer support, please refer to the documentation provided at the time of purchase or contact Mxmoonant customer service directly. Keep your purchase receipt as proof of purchase.
For technical assistance or inquiries, please visit the official Mxmoonant website or contact their support channels.


