
VIGORWORK D3400
VIGORWORK D3400 Single Din Car Radio User Manual
Bluetooth with Phone Bracket, APP Control, FM Radio, Type-C Charging
1. Product Overview
The VIGORWORK D3400 is a versatile single DIN car radio designed to enhance your in-car audio and connectivity experience. It features Bluetooth for hands-free calls and music streaming, an integrated phone bracket, FM radio, and convenient Type-C charging. Advanced features include mobile APP control for car location and search, audio recording, and a voice assistant.
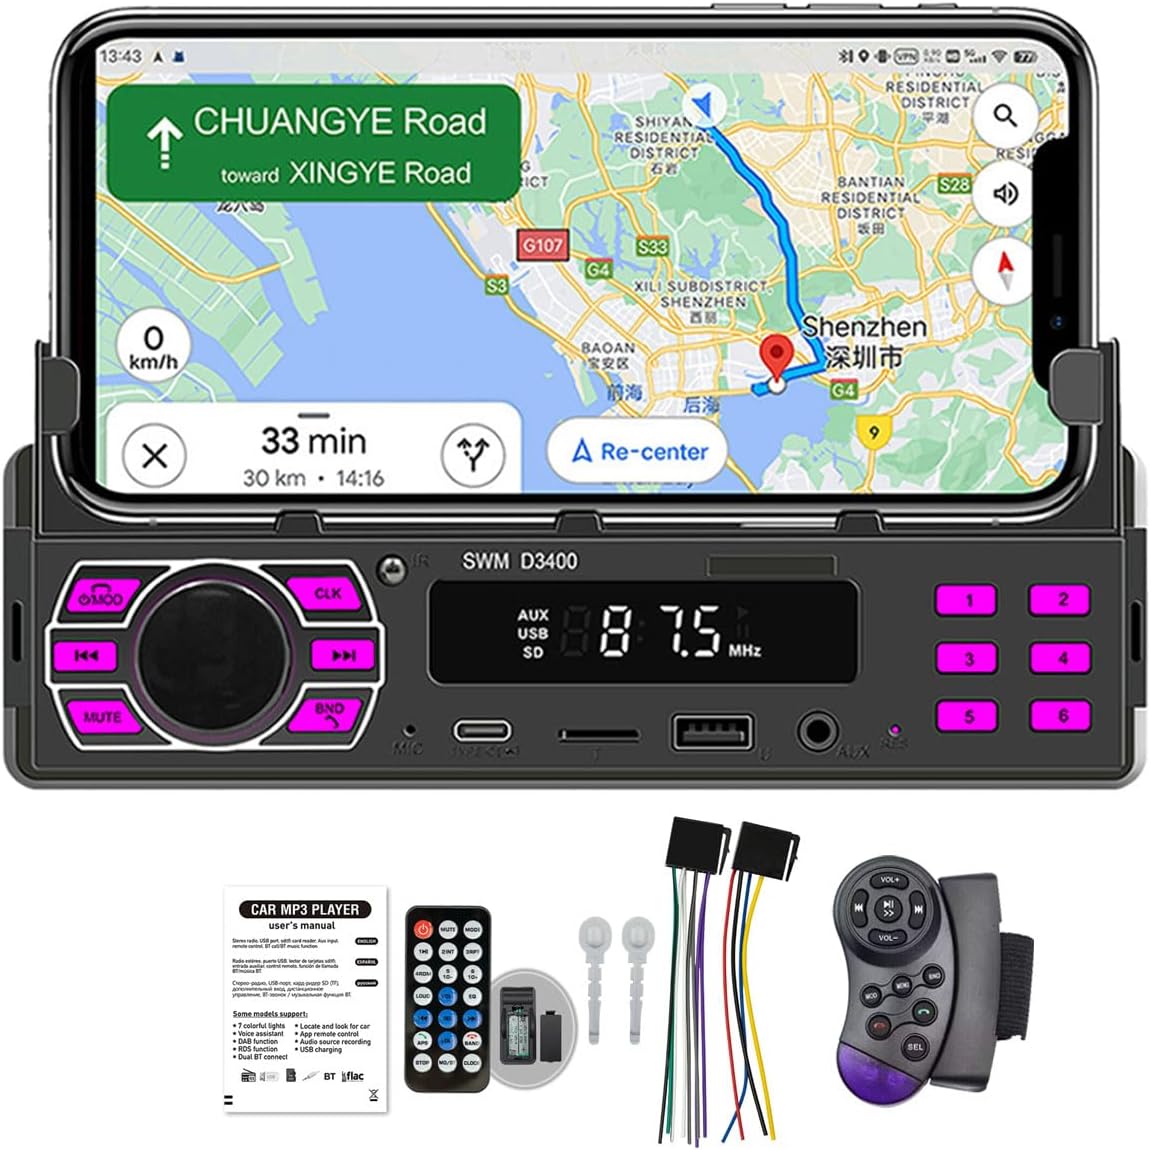
Figure 1.1: VIGORWORK D3400 Car Radio with integrated phone bracket and included accessories.
1.1 Key Features
- Integrated Movable Phone Holder (135-168mm width adjustable)
- Bluetooth 5.0 for Hands-Free Calling and Music Streaming (Dual phone connection supported)
- Mobile APP Control for Car Location and Search, Mode Switching, Sound Effects, and Lighting
- FM Radio (87.5-108MHz)
- Type-C Charging (5V-2.1A)
- Front USB 2.0 and AUX Input
- SD Card Playback
- Audio Recording Function
- Voice Assistant Support
- 7-Color Button Backlight
- Wiring Protection Function (Prevents damage from incorrect wiring)
1.2 Package Contents
Upon opening the package, please verify that all the following items are included:
- D3400 Car Radio Host Unit
- Power Cord
- Remote Control
- Steering Wheel Remote Control
- Instruction Manual
- Disassembly Keys (2)
2. Installation Guide
2.1 Product Dimensions
Before installation, ensure that your vehicle's dashboard opening is compatible with the radio's dimensions.

Figure 2.1: D3400 Car Radio dimensions. Mounting Size: 178x50mm. Face Shell Size: 174x69mm.
2.2 Wiring Diagram
The D3400 features a wiring protection function that automatically cuts off power if the positive and negative poles are reversed, preventing damage to the unit.

Figure 2.2: Wiring diagram illustrating correct and incorrect connections. The unit is protected against reverse polarity.
Important: Always disconnect the vehicle's battery before performing any electrical work.
- Connect the yellow wire to the constant 12V power supply (B+).
- Connect the red wire to the accessory 12V power supply (ACC), which turns on/off with the ignition.
- Connect the black wire to the vehicle's ground.
- Connect speaker wires according to their respective positive and negative terminals. Ensure no speaker wires are shorted to ground or to each other.
- Connect the antenna cable.
2.3 Mounting the Unit
- Insert the metal mounting sleeve into the dashboard opening. Bend the tabs outward to secure it.
- Slide the D3400 unit into the mounting sleeve until it clicks into place.
- Verify the unit is securely installed and flush with the dashboard.
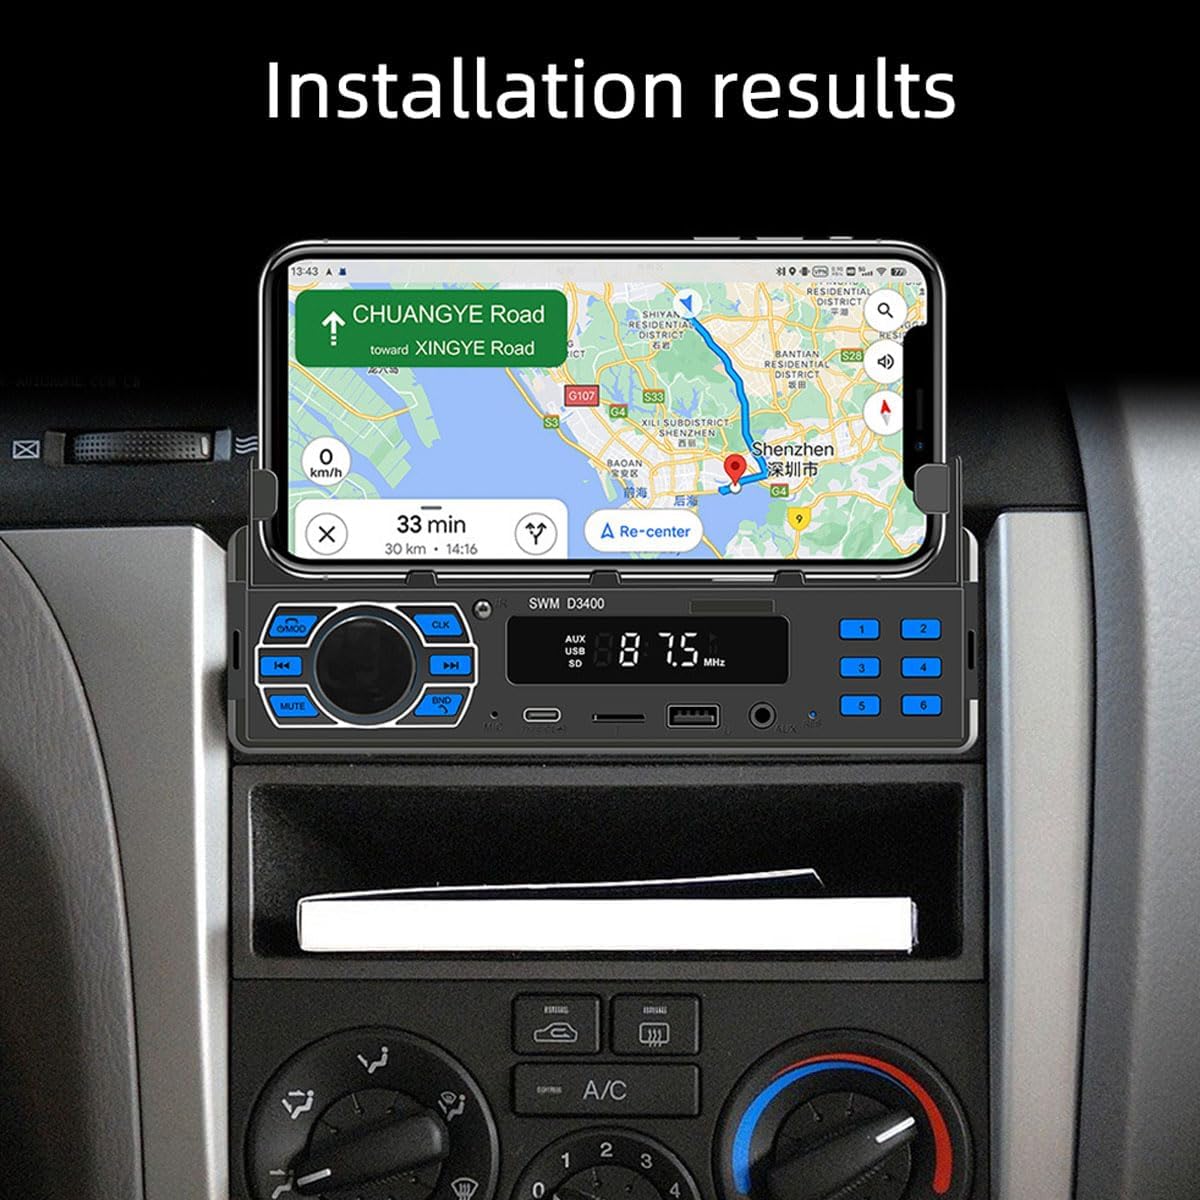
Figure 2.3: Example of the D3400 Car Radio installed in a vehicle dashboard.
3. Operating Instructions
3.1 Basic Operations
Familiarize yourself with the main controls on the unit and the remote control.

Figure 3.1: Overview of key features and functions.
- Power On/Off: Press the power button (usually the volume knob) to turn the unit on or off.
- Volume Control: Rotate the knob to adjust volume.
- Mode Selection: Press the "MOD" button to cycle through available modes (FM, Bluetooth, USB, SD, AUX).
- Mute: Press the "MUTE" button to mute/unmute audio.
- Clock: Press "CLK" to display the time.
3.2 FM Radio Operation

Figure 3.2: FM Radio interface showing frequency display and control buttons.
- Select FM Mode: Press the "MOD" button until "FM" is displayed.
- Auto Scan: Press and hold the "BND" button to automatically scan and store strong stations.
- Manual Tuning: Use the "<<" or ">>" buttons to manually tune to a specific frequency.
- Preset Stations: Use the numbered buttons (1-6) to select stored preset stations. To store a station, tune to the desired frequency, then press and hold a numbered button until you hear a beep.
3.3 Bluetooth Connectivity
The D3400 supports Bluetooth 5.0 and can connect to two mobile phones simultaneously.
- Enable Bluetooth: Ensure Bluetooth is enabled on your mobile phone.
- Select Bluetooth Mode: Press the "MOD" button until "BT" or "Bluetooth" is displayed on the radio.
- Pairing: On your phone, search for Bluetooth devices. The default name for the radio is "CAR BT". Select it to pair.
- Hands-Free Calling: Once paired, you can make and receive calls through the car radio. Use the radio's controls or the remote control to answer/end calls.
- Bluetooth Audio: Play music from your phone, and it will stream through the car speakers.
3.4 Mobile APP Control and Car Location
Download the dedicated mobile application to unlock advanced features, including car location and search, mode switching, sound effect settings, and lighting settings.

Figure 3.3: Scan QR codes to download the mobile application for car positioning and other features.
Download Links:
Car Location Function:
- Download and install the APP on your mobile phone.
- Connect your phone to the car radio via Bluetooth.
- When the car is turned off, the mobile APP will automatically pop up a window.
- Use the built-in navigation software of your phone (via the APP) to accurately locate your car within 5 meters. This function does not require satellite positioning.
3.5 Phone Bracket Usage
The integrated phone bracket supports phones with a width of 135-168mm, providing a stable and secure mount.

Figure 3.4: Mobile phone stand dimensions, supporting handset lengths from 136mm to 168mm.
- Gently pull the top arm of the phone bracket upwards to extend it.
- Place your phone into the bracket, ensuring it is securely held by both the bottom support and the extended arm.
- The bracket is designed to withstand bumps and vibrations during driving.
3.6 Type-C Charging
The front panel includes a dedicated Type-C port for charging your devices with 5V-2.1A high current output.

Figure 3.5: Type-C charging port located on the front panel.
- Connect your device's Type-C charging cable to the Type-C port on the radio's front panel.
- Ensure your device supports 5V-2.1A charging for optimal speed.
3.7 USB/SD/AUX Playback
- USB Playback: Insert a USB flash drive into the front USB 2.0 port. The unit will automatically switch to USB mode and begin playing supported audio files (MP3/WMA/WAV/FLAC).
- SD Card Playback: Insert an SD card into the SD card slot. The unit will automatically switch to SD mode and begin playing supported audio files.
- AUX Input: Connect an external audio device (e.g., MP3 player) to the front AUX input using a 3.5mm audio cable. Press the "MOD" button to select AUX mode.
3.8 Audio Recording and Voice Assistant
- Audio Recording: The unit supports audio source recording. Refer to the specific instructions in the mobile APP or the unit's menu for initiating and managing recordings.
- Voice Assistant: The unit supports voice assistant functionality. Activate it through the mobile APP or a dedicated button on the unit/remote (if available).
3.9 Button Lighting
The D3400 features a 7-color button backlight. You can select your preferred color through the settings menu, typically accessible via the mobile APP or by pressing and holding a specific button (refer to the on-screen menu for exact navigation).
4. Specifications
| Feature | Specification |
|---|---|
| Model | D3400 |
| Brand | VIGORWORK |
| Radio Band | FM1, FM2, FM3 (FM 87.5-108MHz) |
| Output Power | 45W x 4 (RMS), 180W (Peak) |
| Working Voltage | 12-14.4V |
| Bluetooth Version | 5.0 (Default Name: CAR BT) |
| Screen Type | LED Display (White Light) |
| Installation Size | 178mm x 50mm |
| Face Shell Size | 174mm x 69mm |
| Phone Bracket Compatibility | 135-168mm width adjustable |
| Front USB Port | USB 2.0 (Read) |
| Type-C Interface | 2.1A Current Output |
| Audio Output | 2 Channels (Left + Right) |
| Audio Input | Front AUX Input (Left + Right) |
| Audio Format Support | MP3/WMA/WAV/FLAC |
| Playback Modes | USB drive, AUX, Bluetooth, SD card |
| Item Weight | 0.457 KG (Unit only), 600g (Parcel) |
5. Troubleshooting
This section provides solutions to common issues you might encounter with your D3400 car radio.
| Problem | Possible Cause | Solution |
|---|---|---|
| No Power | Incorrect wiring; Blown fuse; Loose connection. | Check power and ground connections. Ensure the yellow (constant 12V) and red (ACC) wires are correctly connected. Check vehicle's fuse box and the radio's fuse. The unit has wiring protection, but a fuse might still blow in the car's circuit. |
| No Sound | Volume too low; Mute activated; Incorrect speaker wiring; Incorrect source selected. | Increase volume. Press MUTE button. Check all speaker wire connections. Ensure the correct audio source (FM, BT, USB, AUX) is selected. |
| Bluetooth Not Connecting | Bluetooth not enabled on phone; Radio not in pairing mode; Interference; Already connected to another device. | Ensure phone's Bluetooth is on and discoverable. Select Bluetooth mode on the radio. Try restarting both the phone and the radio. Disconnect from other Bluetooth devices. |
| Poor FM Reception | Antenna not connected; Weak signal area; Damaged antenna. | Ensure antenna is securely connected. Try auto-scanning for stations again. Consider a stronger antenna if in a weak signal area. |
| USB/SD Playback Issues | Unsupported file format; Corrupted files; USB/SD card not inserted correctly; Max capacity exceeded. | Ensure audio files are MP3/WMA/WAV/FLAC. Reinsert the USB drive/SD card. Try a different USB drive/SD card. Ensure the storage device is formatted correctly (FAT32 recommended). |
6. Maintenance and Care
- Cleaning: Use a soft, dry cloth to clean the unit's surface. Do not use abrasive cleaners or solvents.
- Temperature: Avoid exposing the unit to extreme temperatures or direct sunlight for prolonged periods.
- Moisture: Keep the unit dry. Do not expose it to water or excessive humidity.
- Fuse Replacement: If a fuse blows, replace it with a fuse of the same type and rating. Consult a professional if unsure.
7. Warranty and Support
For warranty information and technical support, please refer to the documentation provided with your purchase or contact VIGORWORK customer service directly. Specific warranty terms may vary by region and retailer.
For further assistance, please visit the official VIGORWORK website or contact their support channels.
Ask a question about this manual
Ask about setup, troubleshooting, compatibility, parts, safety, or missing instructions. Manuals+ will review the question and use this page’s manual context to help answer it.