Introduction
This manual provides detailed instructions for the safe and efficient operation of your PNI Dynascan AD-09+ PMR portable radio. Please read this manual thoroughly before using the device to ensure proper functionality and to prevent damage.
Safety Information
Observe the following safety precautions to reduce the risk of fire, electric shock, or personal injury:
- Do not operate the radio in explosive atmospheres (e.g., flammable gases, dust particles, metallic powders).
- Do not modify the radio. Unauthorized modifications can void your warranty and violate regulatory compliance.
- Use only original or approved accessories.
- Keep the radio away from water and moisture.
- Do not expose the radio to extreme temperatures.
- Dispose of batteries and electronic components responsibly according to local regulations.
Package Contents
Verify that all items are present in your package:
- 2 x PNI Dynascan AD-09+ Portable Radio Units
- 2 x Belt Clips
- 2 x Wall Power Adapters (230V compatible)
- 2 x Li-Ion Batteries (1200mAh)
- 2 x Headsets with Microphone and PTT/VOX Button
- 2 x Antennas
- 2 x USB Cables
- 1 x Carrying Case
- 1 x User Manual (this document)

Image: All components included in the PNI Dynascan AD-09+ package, including two radio units, batteries, chargers, headsets, antennas, USB cables, and belt clips.
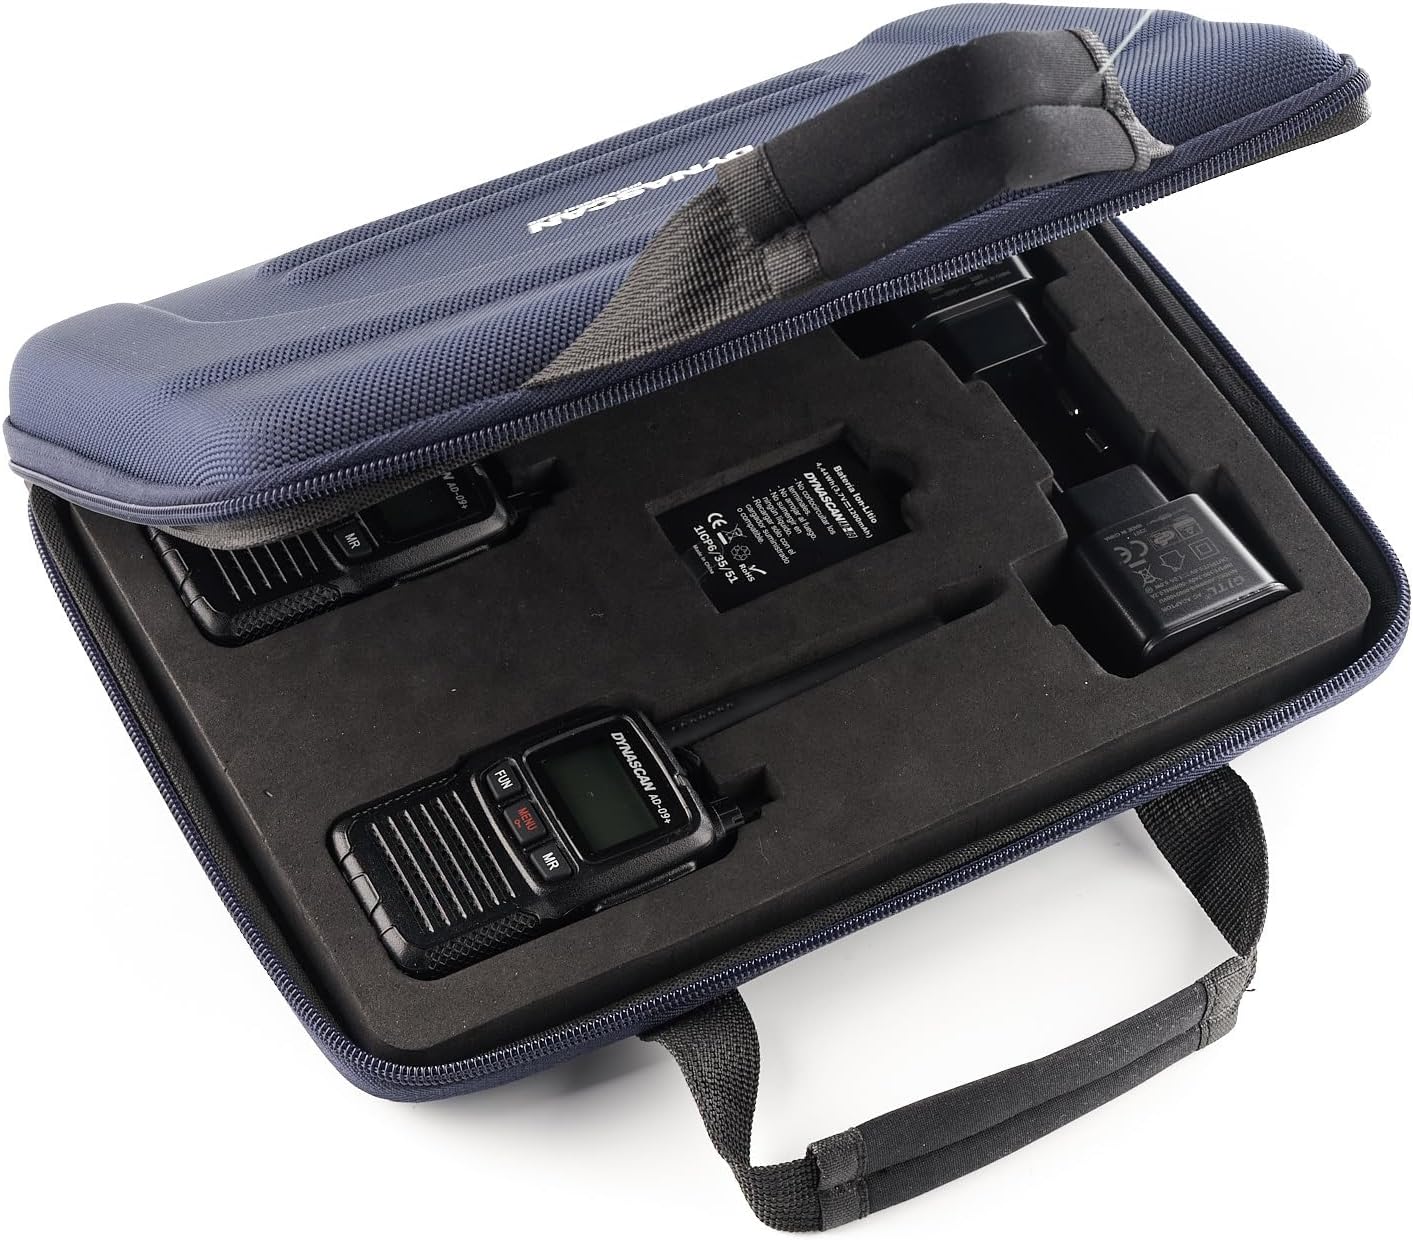
Image: The PNI Dynascan AD-09+ radios and accessories stored in their protective carrying case.
Product Overview
Familiarize yourself with the main components and controls of the PNI Dynascan AD-09+ radio.

Image: Front view of the radio, highlighting the display and main function buttons (FUN, MENU, MR).

Image: Side view of the radio, showing the PTT, FM, and Power buttons.

Image: Back view of the radio with the belt clip attached.

Image: Top view of the radio, showing the antenna connection point and the channel/volume knob.
Setup
- Install the Battery:
Locate the battery compartment on the back of the radio. Slide the battery cover latch (refer to image) to open. Insert the Li-Ion battery, ensuring the contacts align. Close the cover and secure the latch.
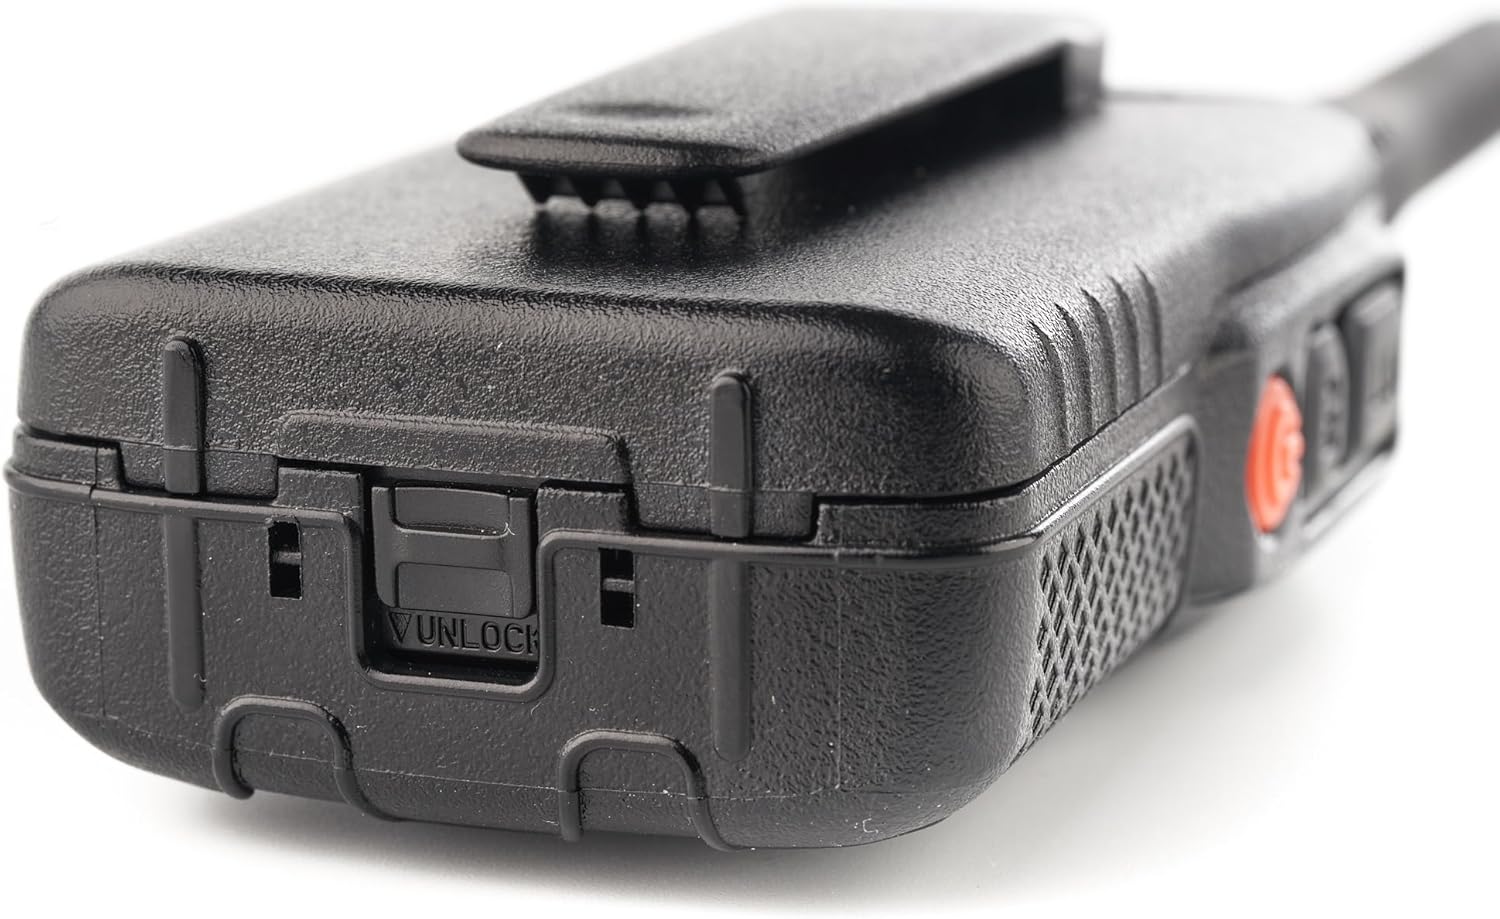
Image: Battery compartment latch.
- Attach the Antenna:
Screw the antenna clockwise into the connector on top of the radio until it is finger-tight. Do not overtighten.
- Charge the Battery:
Connect the USB cable to the radio's charging port and the other end to the wall power adapter. Plug the adapter into a power outlet. The radio's indicator light will show charging status. A full charge typically takes several hours. Ensure the radio is turned off during charging for optimal results.

Image: Radio connected to the USB charging cable.
- Attach the Belt Clip:
Align the belt clip with the designated slots on the back of the radio and secure it with the provided screws.
- Connect Headset (Optional):
If using a headset, plug it into the audio accessory port on the side of the radio. Ensure it is fully inserted.
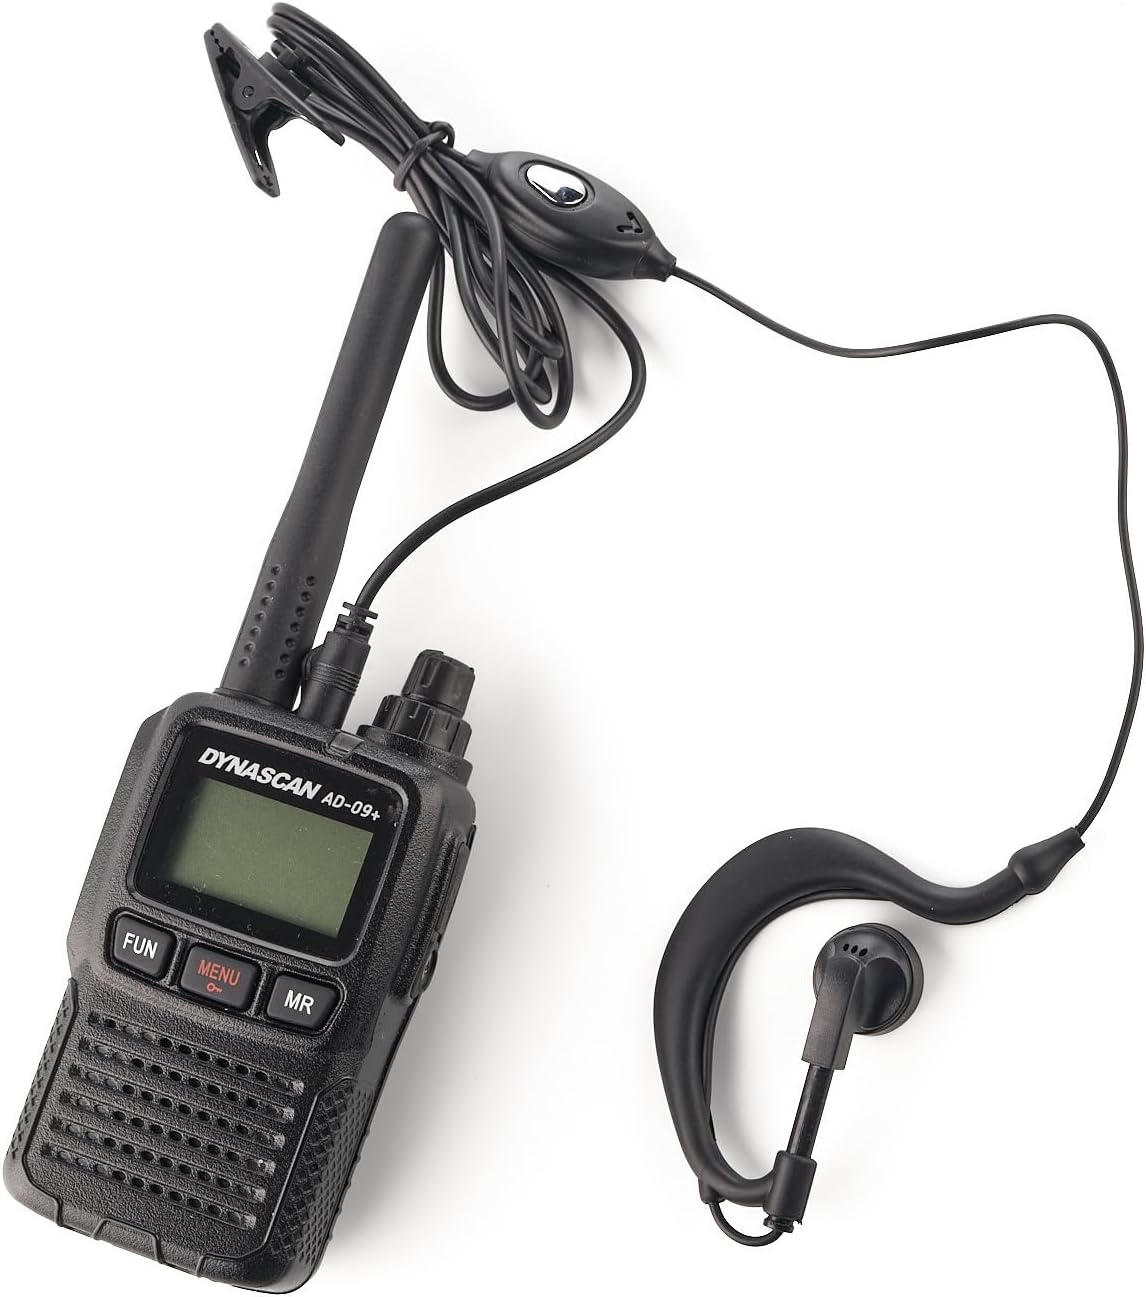
Image: Radio with headset connected.
Operating Instructions
- Power On/Off:
Press and hold the Power button (orange button on the side) to turn the radio on or off.
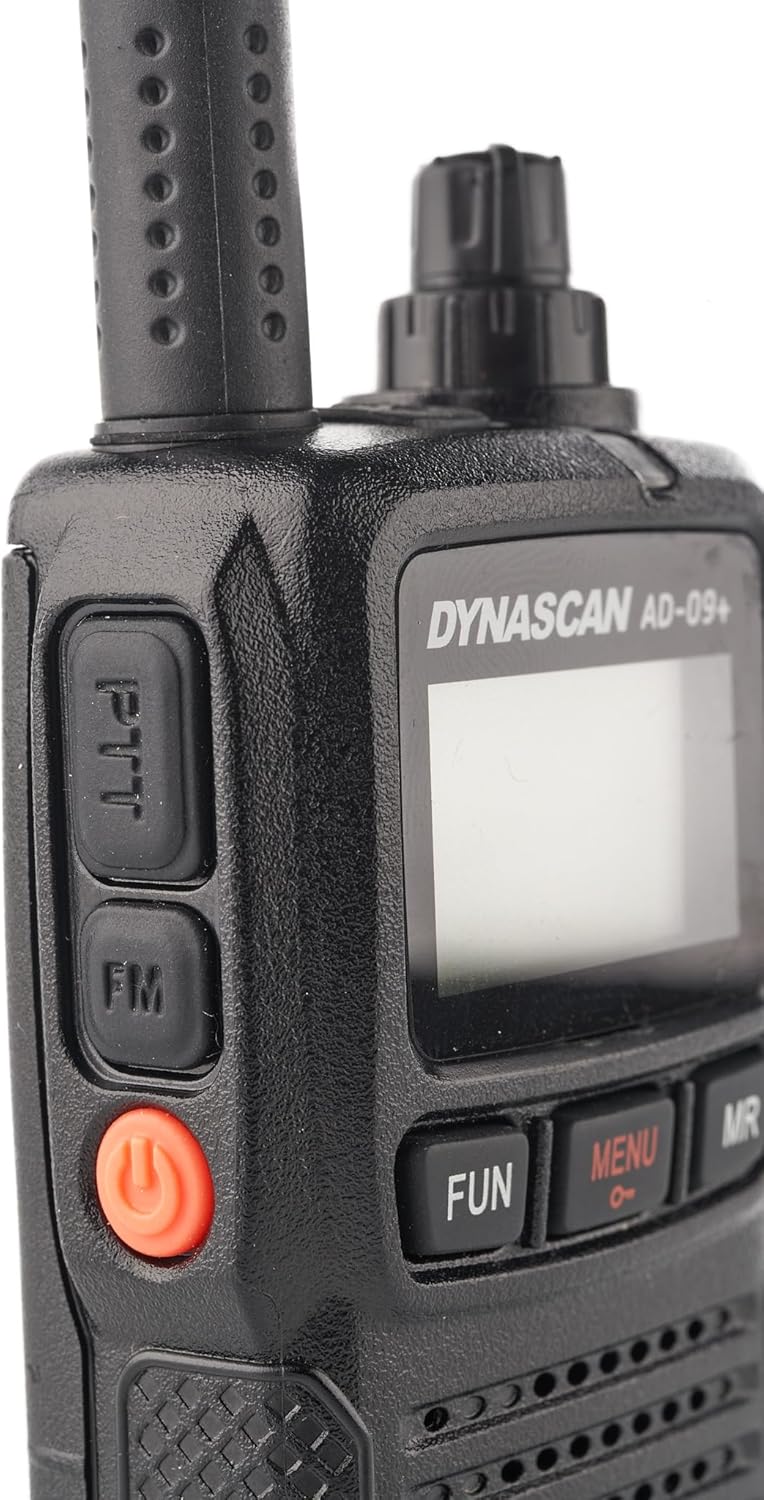
Image: Side buttons, including the orange Power button.
- Adjust Volume:
Rotate the top knob clockwise to increase volume and counter-clockwise to decrease volume.
- Select Channel:
The AD-09+ has 16 channels. Use the rotary knob on top of the radio to select the desired channel. The selected channel will be displayed on the LCD screen.
- Transmit (PTT):
To transmit, press and hold the PTT (Push-to-Talk) button on the side of the radio. Speak clearly into the microphone. Release the PTT button to listen.
- Monitor Function:
Press the FUN button to activate the monitor function, allowing you to listen to weak signals on the current channel.
- Menu Navigation:
Press the MENU button to access radio settings. Use the channel knob to scroll through options and the PTT button to confirm selections. Settings include CTCSS/DCS codes, VOX sensitivity, and other advanced features.
- Memory Recall (MR):
Press the MR button to recall stored memory channels or functions.
- Keypad Lock:
To prevent accidental changes, activate the keypad lock feature through the menu. Refer to the menu section for specific steps.
- FM Radio:
Press the FM button on the side to activate the FM radio function (88-108 MHz). Press again to exit FM mode.
Maintenance
- Cleaning: Use a soft, damp cloth to clean the radio's exterior. Do not use harsh chemicals or solvents.
- Battery Care: To prolong battery life, avoid overcharging and fully discharging the battery. Store the radio and battery in a cool, dry place when not in use for extended periods.
- Antenna: Ensure the antenna is securely attached. Do not bend or force the antenna, as this can damage the connector.
Troubleshooting
| Problem | Possible Cause | Solution |
|---|---|---|
| Radio does not power on. | Battery is low or not installed correctly. | Charge the battery. Reinstall the battery, ensuring proper contact. |
| Cannot transmit or receive. | Incorrect channel or privacy code (CTCSS/DCS). Out of range. | Verify channel and privacy code settings. Move closer to the other radio. Check antenna connection. |
| Poor audio quality. | Low battery. Weak signal. Obstructions. | Charge the battery. Move to an open area. Adjust squelch level if available in menu. |
| Keypad is unresponsive. | Keypad lock is active. | Deactivate keypad lock through the menu. |
Specifications
| Feature | Detail |
|---|---|
| Product Code | PNI-DYN-AD-09 |
| Type | PMR446 Portable Radio |
| Frequency | 446.00625 - 446.19375 MHz (UHF) |
| Channels | 16 Channels |
| Channel Spacing | 12.5 kHz (PMR) |
| Output Power | 0.5 W PMR |
| Power Supply | 3.7 V Li-Ion Battery (1200 mAh) |
| Autonomy (5/5/90) | Up to 12 hours |
| Operating Temperature | -20 ~ +55 degrees Celsius |
| Weight | 120 grams |
| Dimensions (L x H x D) | 50 x 25 x 80 mm (160 mm with antenna) |
| Audio Accessory Pin | 1-pin |
| Special Features | Keypad Lock, Call Tones, Key Tones, Low Battery Indicator, Automatic Power Saver, Channel Monitor, Squelch, TOT (Time-Out Timer), External Speaker Output, FM Radio (88-108 MHz) |
| Material | ABS |
| Maximum Range | Urban area: ~3 km; Open field: 4-6 km; Mountain: ~10 km |
| Water Resistance Level | Waterproof |
Warranty and Support
The PNI Dynascan AD-09+ radio comes with a 2-year manufacturer's warranty.
For technical support, warranty claims, or service inquiries, please contact your retailer or the official Dynascan support channels. Keep your proof of purchase for warranty validation.