
1. Introduction
This manual provides comprehensive instructions for the safe and effective use of the ANENG AOS02 2-in-1 Handheld Oscilloscope Multimeter. This device integrates the functionalities of a digital oscilloscope and a smart multimeter, offering a versatile tool for electrical measurements and waveform analysis. Please read this manual thoroughly before operation to ensure proper usage and to prevent potential hazards.

Image 1.1: Overview of the ANENG AOS02 Handheld Oscilloscope Multimeter and its key features.
2. Safety Information
Adherence to safety precautions is critical when operating electrical testing equipment. Failure to follow these guidelines may result in electric shock, injury, or damage to the device or other equipment.
- The multimeter mode complies with CAT III 1000V safety levels.
- The oscilloscope mode complies with CAT II 600V safety levels.
- The device meets CE certification requirements.
- Features safety overload protection.
- Equipped with 10A/250V and 200mA/250V dual ceramic fuses for enhanced safety.
- Always inspect test leads for damage before use.
- Do not use the device if it appears damaged or is operating abnormally.
- Ensure proper input terminal connections for the selected measurement function.
3. Setup
3.1 Package Contents
Verify that all items listed below are present in your package:
- 1 x ANENG AOS02 Oscilloscope Multimeter
- 1 x Combination Lead (includes 4 connection sockets, 2 PVC cables, 2 copper needles, 2 U-shaped inserts, 2 meter pens, 2 alligator clips)
- 1 x Multimeter Test Lead
- 1 x Temperature Cable
- 1 x Charging Cable
- 1 x Oscilloscope Probe
- 1 x Oscilloscope Test Lead
- 1 x Instruction Manual
- 1 x Storage Bag

Image 3.1: Contents of the ANENG AOS02 package.
3.2 Device Overview
Familiarize yourself with the main components of the ANENG AOS02:

Image 3.2: ANENG AOS02 Oscilloscope Multimeter with accessories.

Image 3.3: Front panel and input terminals.
- Display: 2.8-inch IPS screen for clear readings and waveform display.
- Function Buttons (F1-F4): Context-sensitive buttons for menu navigation and specific functions.
- REL Button: Short press for relative value measurement.
- AUTO RANGE Button: Short press to obtain waveform automatically (oscilloscope mode) or toggle manual/auto range (multimeter mode).
- HOLD/SAVE Button: Short press for data hold (multimeter mode), long press to save data (oscilloscope mode).
- MODE Button: Press to switch between oscilloscope and multimeter modes.
- MENU Button: Enter the main menu.
- Arrow Keys: For navigation and setting adjustments.
- Input Terminals: Dedicated ports for 10A, mA, COM (common), and VΩHz measurements.
4. Operating Instructions
4.1 Power On/Off
To power on the device, long press the power button (usually integrated with the REL button). To power off, long press the power button again.
4.2 Switching Between Modes
The ANENG AOS02 can operate as an oscilloscope or a multimeter. Press the MODE button to toggle between these two functions.

Image 4.1: One-click conversion between modes.
4.3 Multimeter Operation
In multimeter mode, the device can measure various electrical parameters:
- DC/AC Voltage: Connect test leads to VΩHz and COM terminals. Select appropriate range or use auto-ranging.
- DC/AC Current: Connect test leads to 10A or mA and COM terminals. Ensure correct terminal selection based on expected current.
- Resistance: Connect test leads to VΩHz and COM terminals.
- Capacitance: Connect test leads to VΩHz and COM terminals.
- Diode Test: Connect test leads to VΩHz and COM terminals.
- Frequency: Connect test leads to VΩHz and COM terminals.
- Temperature: Use the provided temperature cable connected to the appropriate terminals.

Image 4.2: Multimeter display showing a DC voltage measurement.
4.4 Oscilloscope Operation
In oscilloscope mode, the device displays waveforms and allows for analysis:
- Connecting Probe: Connect the oscilloscope probe to the dedicated input terminal.
- Automatic Measurement: Press the AUTO RANGE button for automatic waveform display and scaling.
- Trigger Modes: The device supports automatic, normal, and single-time trigger modes. Adjust settings via the menu.
- Vertical Sensitivity: Adjust the vertical scale (V/div) using the appropriate controls or menu options. Range: 200mV/div to 10V/div.
- Horizontal Scanning Range: Adjust the time base (s/div) using the appropriate controls or menu options. Range: 8/50ns/div to 20S/div.
- Waveform Parameters: Various waveform parameters can be set and analyzed.

Image 4.3: Oscilloscope display showing a square wave.

Image 4.4: Adjusting waveform parameters with the oscilloscope probe.
4.5 Data Storage and Export
To save measurement data, long press the SAVE key. Data can be exported and viewed on a computer. Connect the device to a computer using the provided charging cable. Then, press the MENU key to enter the menu and navigate to the third page to select "Data Save" (F3) to view the stored data.

Image 4.5: Data storage and computer viewing.
5. Maintenance
5.1 Charging the Battery
The ANENG AOS02 features a built-in 2000mAh rechargeable lithium-ion battery. Use the provided charging cable to connect the device to a USB power source. The display will indicate charging status.

Image 5.1: Charging the ANENG AOS02.
5.2 Fuse Replacement
The device is protected by dual ceramic fuses (10A/250V and 200mA/250V). If the current measurement function fails, the fuse may need replacement. Refer to the internal diagram for fuse locations. Ensure the device is powered off and disconnected from all circuits before attempting fuse replacement. Use only fuses of the specified type and rating.
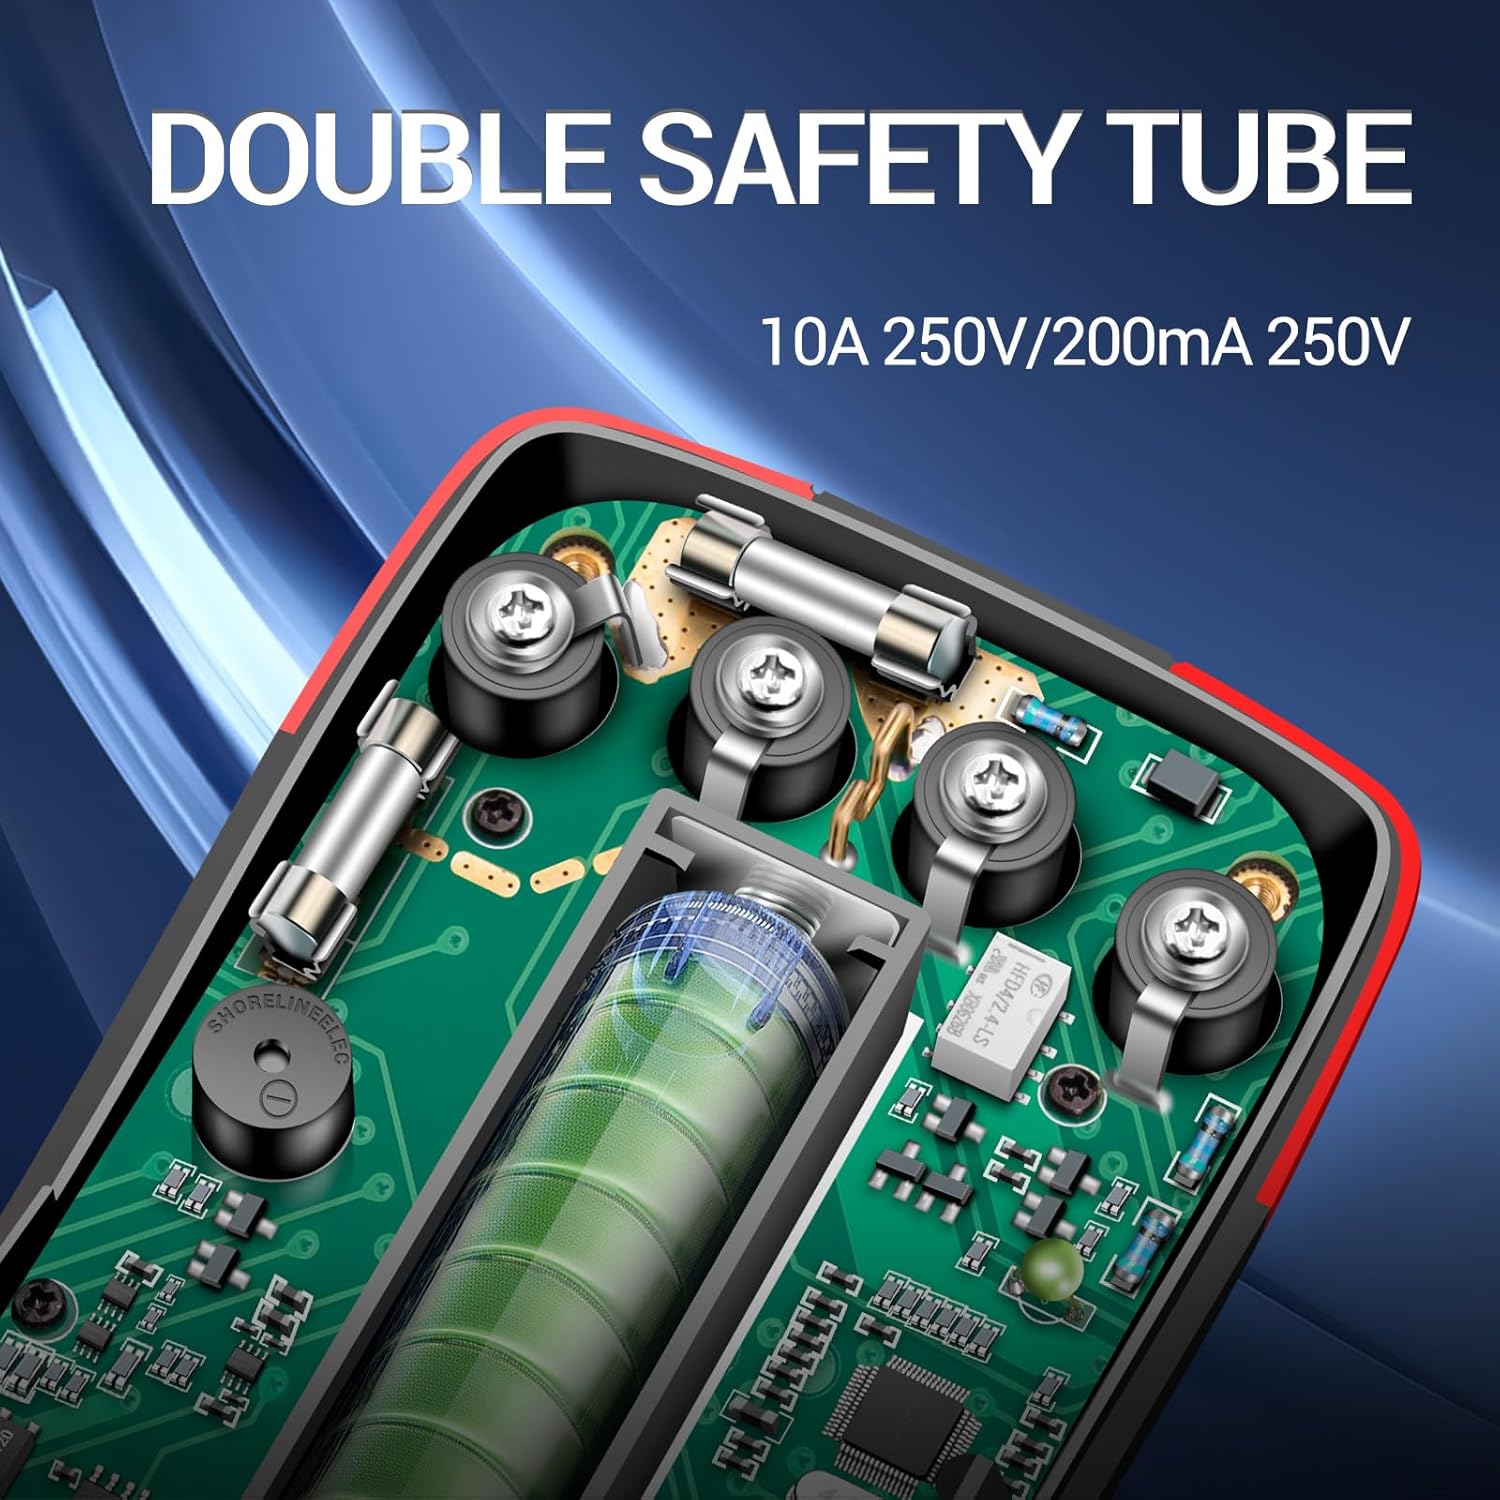
Image 5.2: Internal view showing dual safety fuses.
5.3 Cleaning
Clean the device with a soft, damp cloth. Do not use abrasive cleaners or solvents. Ensure the device is dry before use.
6. Troubleshooting
If you encounter issues with your ANENG AOS02, consider the following:
- No Power: Check battery charge. Ensure the power button is pressed and held sufficiently.
- Incorrect Readings: Verify test lead connections and ensure the correct measurement mode is selected. Check for damaged test leads.
- Current Measurement Failure: The fuse may be blown. Refer to Section 5.2 for fuse replacement.
- Display Issues: Ensure the device is not exposed to extreme temperatures. Restart the device.
For persistent issues, refer to the warranty and support information.
7. Specifications
| Feature | Specification |
|---|---|
| Model | AOS02 |
| Display | 2.8-inch IPS Display, 9999 Counts |
| Oscilloscope Bandwidth | 10MHz |
| Sampling Rate | 48MSa/s |
| Record Length | 64Kbyte |
| Vertical Sensitivity | 200mV/div - 10V/div |
| Horizontal Scanning Range | 8/50ns/div - 20S/div |
| Time Base Accuracy | 20ppm |
| High Voltage Input | ±400V |
| Multimeter Functions | DC/AC Voltage, Current, Resistance, Capacitance, Diode, Frequency, Temperature |
| Battery | 2000mAh Rechargeable Lithium Ion |
| Safety Rating (Multimeter) | CAT III 1000V |
| Safety Rating (Oscilloscope) | CAT II 600V |
| Fuses | 10A/250V, 200mA/250V Dual Ceramic |
| Dimensions | 9.57 x 5.28 x 2.68 inches |
| Weight | 1 Kilogram (2.2 Pounds) |
8. Warranty and Support
ANENG provides lifetime service and technical support for this electrical tester. For assistance, please contact ANENG customer service or visit the official ANENG store.
Official ANENG Store: ANENG Store on Amazon


