1. Introduction

Figure 1.1: Meloya Digital Wall Clock with Remote Control
This image provides an overall view of the Meloya Digital Wall Clock and its accompanying remote control.
This manual provides detailed instructions for the setup, operation, and maintenance of your Meloya Digital Wall Clock. Please read this manual thoroughly before using the product to ensure proper functionality and longevity.
The Meloya Digital Wall Clock features a dynamic RGB display with large 3-inch digits, offering clear visibility from a distance. It supports both 12-hour and 24-hour time formats, includes a remote control for easy setup, and offers adjustable brightness levels. Its sleek design makes it suitable for various rooms including living rooms, kitchens, garages, and bedrooms.
2. Package Contents

Figure 2.1: Package Contents
This image displays all components included in the product packaging, ensuring you have everything needed for setup.
Please verify that all the following items are included in your package:
- 1x Meloya Digital Wall Clock
- 1x Remote Control
- 1x USB Power Cable (10 ft long)
- 1x USB Power Adapter
- 1x User Manual
- 1x Measuring Ruler (for installation)
- 2x Adhesive Hooks
- 2x Plastic Anchors
- 1x CR2032 Battery (pre-installed or included for backup memory)
3. Product Overview

Figure 3.1: Rear Panel Components
This image highlights the key components on the back of the clock, essential for setup and basic adjustments.
Familiarize yourself with the main components of your Meloya Digital Wall Clock:
- Front Display: Large 3-inch LED digits for time, with dynamic RGB color options.
- Remote Control: Used for setting time, date, alarms, brightness, and color modes.
- Hanging Hole: Located on the back for wall mounting.
- Easy-Setting Buttons (DOWN, UP, SET): Located on the top rear of the clock for basic adjustments if the remote is unavailable.
- Hidden Power Interface (DC5V/1A): USB-C port for connecting the power cable.
- Backup Battery Compartment: Holds one CR2032 battery to maintain time settings during power outages.
4. Setup and Installation
4.1 Power Connection
- Insert the small end of the provided 10-ft USB power cable into the Hidden Power Interface on the back of the clock.
- Connect the larger USB-A end of the cable to the included USB Power Adapter.
- Plug the USB Power Adapter into a standard electrical outlet. The clock display will illuminate.
Note: The clock requires continuous power via the USB cable to operate. The included CR2032 battery is for backup memory only, preserving settings during power interruptions, not for powering the display.
4.2 Backup Battery Installation (if not pre-installed)
- Locate the Backup Battery Compartment on the back of the clock.
- Open the compartment cover.
- Insert one CR2032 battery, ensuring the positive (+) side faces upwards.
- Close the compartment cover securely.
4.3 Placement Options
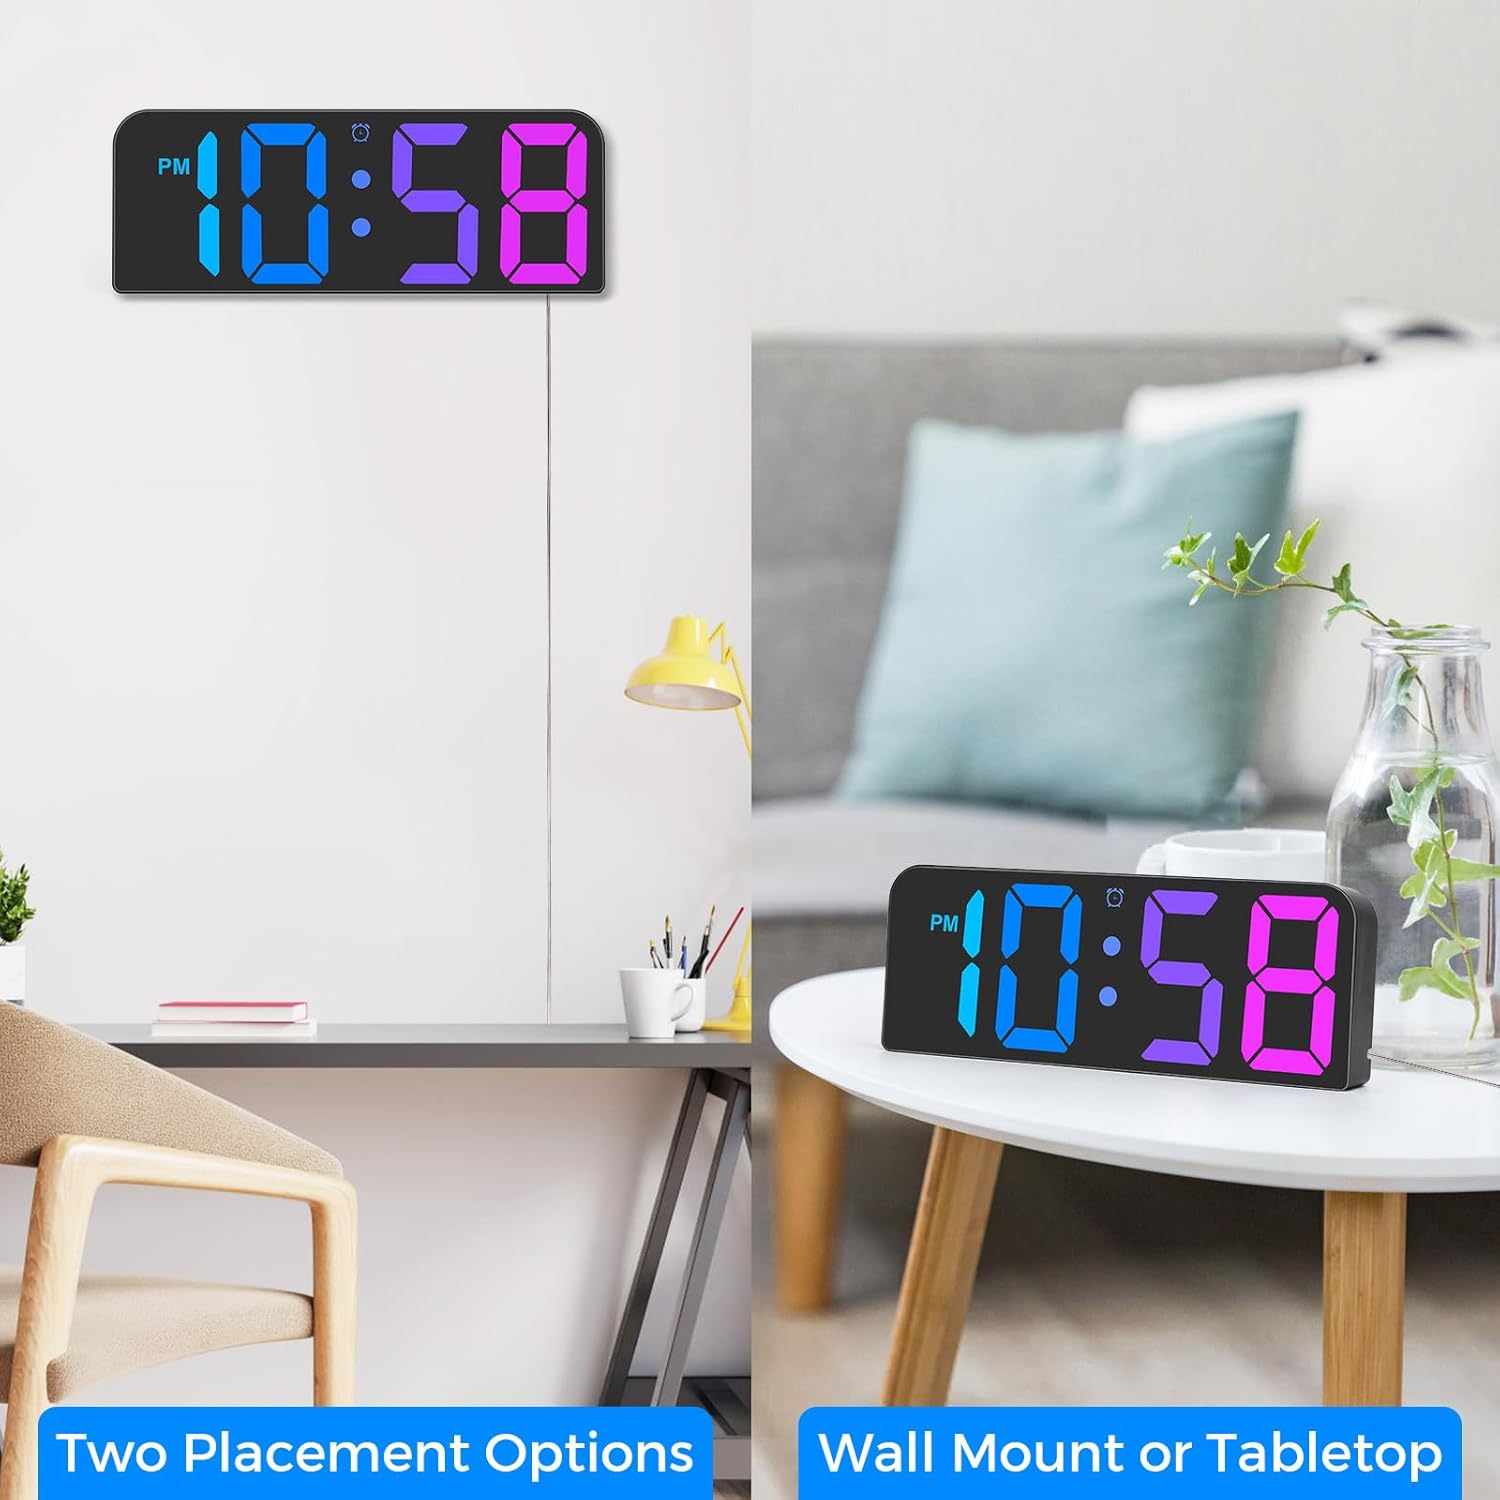
Figure 4.1: Wall Mount or Tabletop Placement
This image illustrates the versatility of the clock, showing it both mounted on a wall and resting on a flat surface.
Your Meloya Digital Wall Clock offers two primary placement options:
- Wall Mounting: Use the hanging hole on the back of the clock. The included measuring ruler, adhesive hooks, and plastic anchors can assist with secure installation. Ensure the wall surface is clean and dry before applying adhesive hooks.
- Tabletop Placement: The clock can be placed on any flat, stable surface such as a desk, shelf, or nightstand.
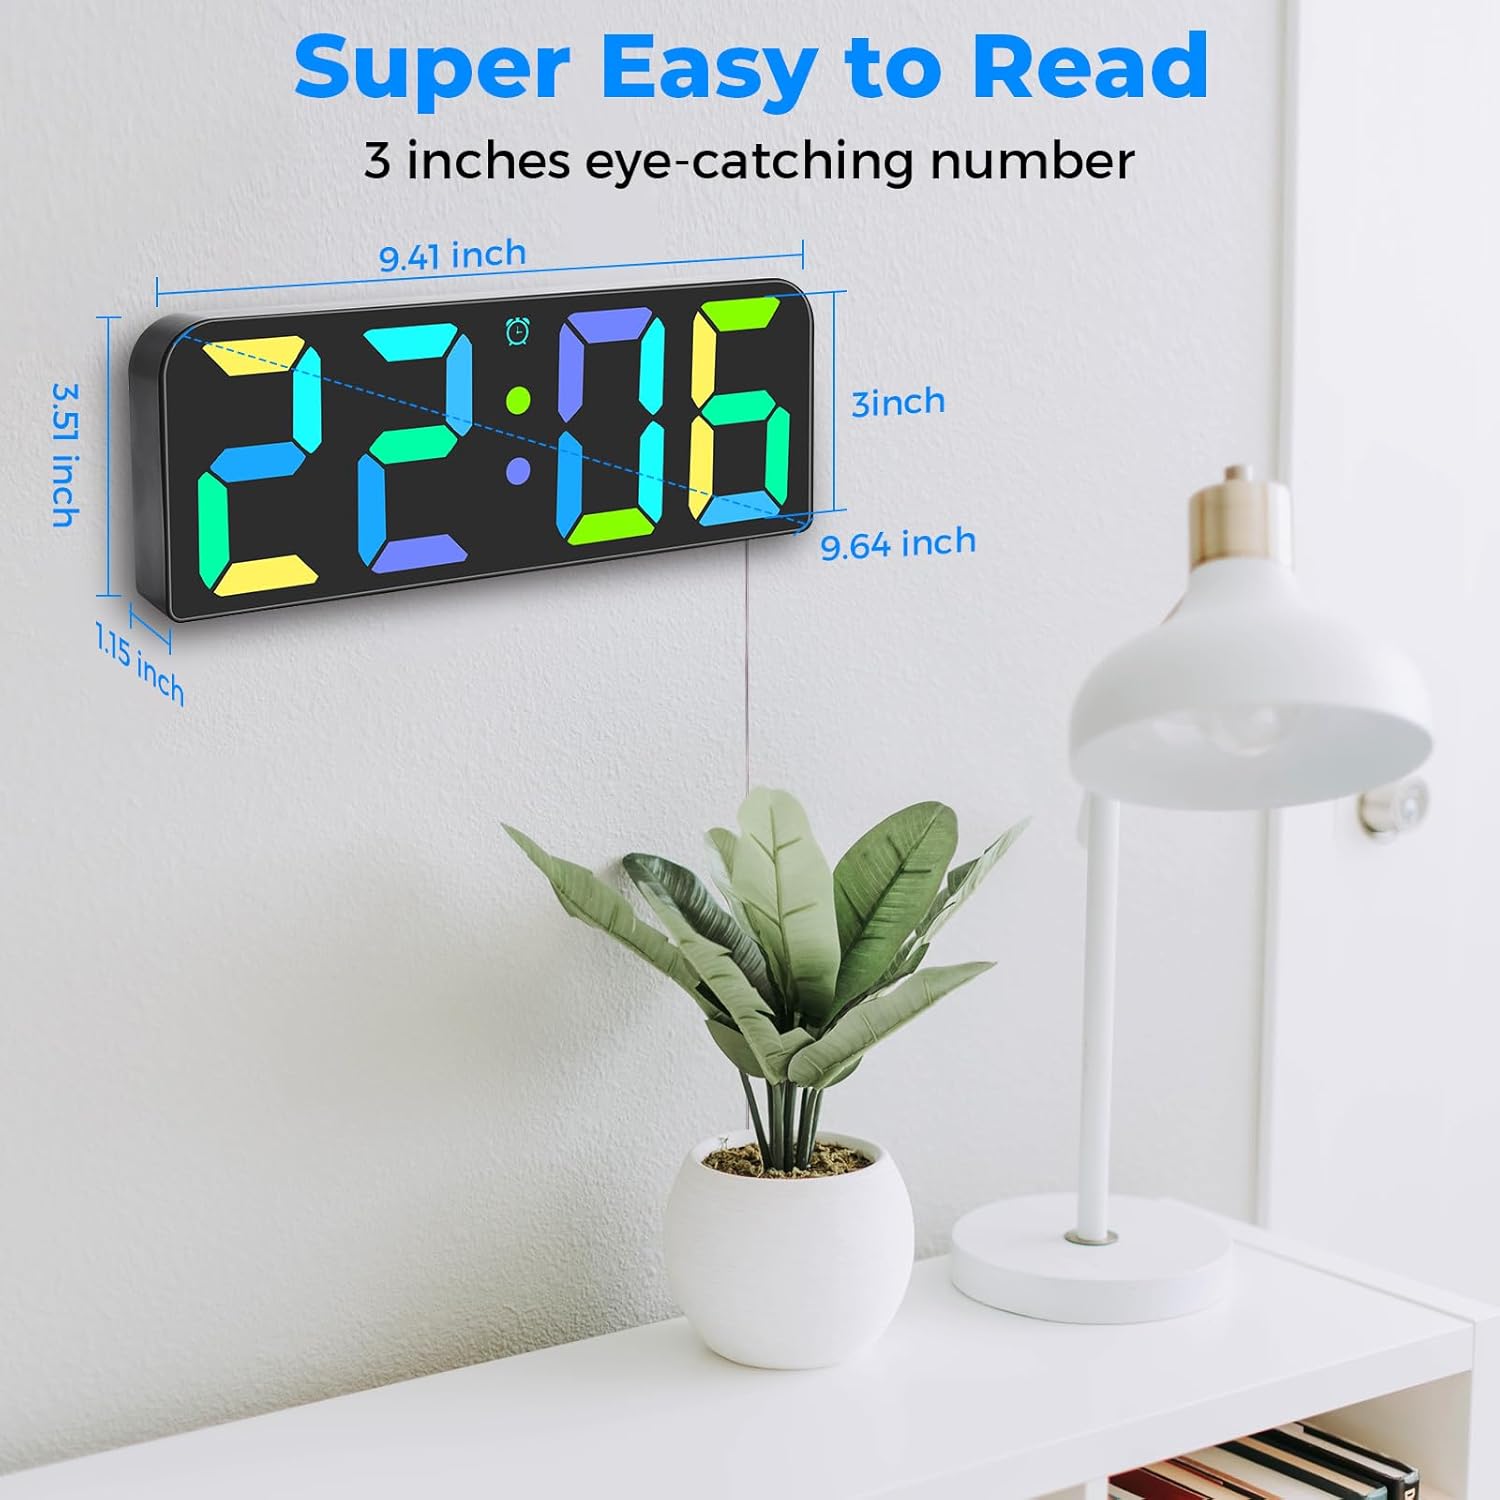
Figure 4.2: Clock Dimensions
This image provides a visual representation of the clock's physical dimensions, aiding in placement decisions.
Consider the clock's dimensions (approximately 9.41 inches wide x 3.51 inches high x 1.15 inches deep) when choosing a location.
5. Operation
5.1 Initial Time and Date Setting
The clock is primarily set using the included remote control. Ensure the remote has working batteries.
- Press the SET button on the remote control to enter time setting mode.
- Use the UP and DOWN buttons to adjust the hour.
- Press SET again to move to minute adjustment, then use UP and DOWN.
- Continue pressing SET to cycle through setting the year, month, and day, adjusting each with UP and DOWN.
- Press SET one last time to exit setting mode.
5.2 12/24 Hour Format

Figure 5.1: 12/24 Hour Format Options
This image demonstrates how the clock displays time in both standard 12-hour and military 24-hour formats.
To switch between 12-hour (with AM/PM indicator) and 24-hour (military) time formats:
- Press the dedicated 12/24H button on the remote control. The display will instantly switch formats.
5.3 Brightness Adjustment

Figure 5.2: 3-Level Brightness
This image visually represents the three distinct brightness settings available on the clock, allowing users to choose based on ambient light.
The clock features 3 adjustable brightness levels (Bright, Medium, Soft). To adjust:
- Press the BRIGHTNESS button (often represented by a sun icon) on the remote control to cycle through the levels.
5.4 RGB Color Display
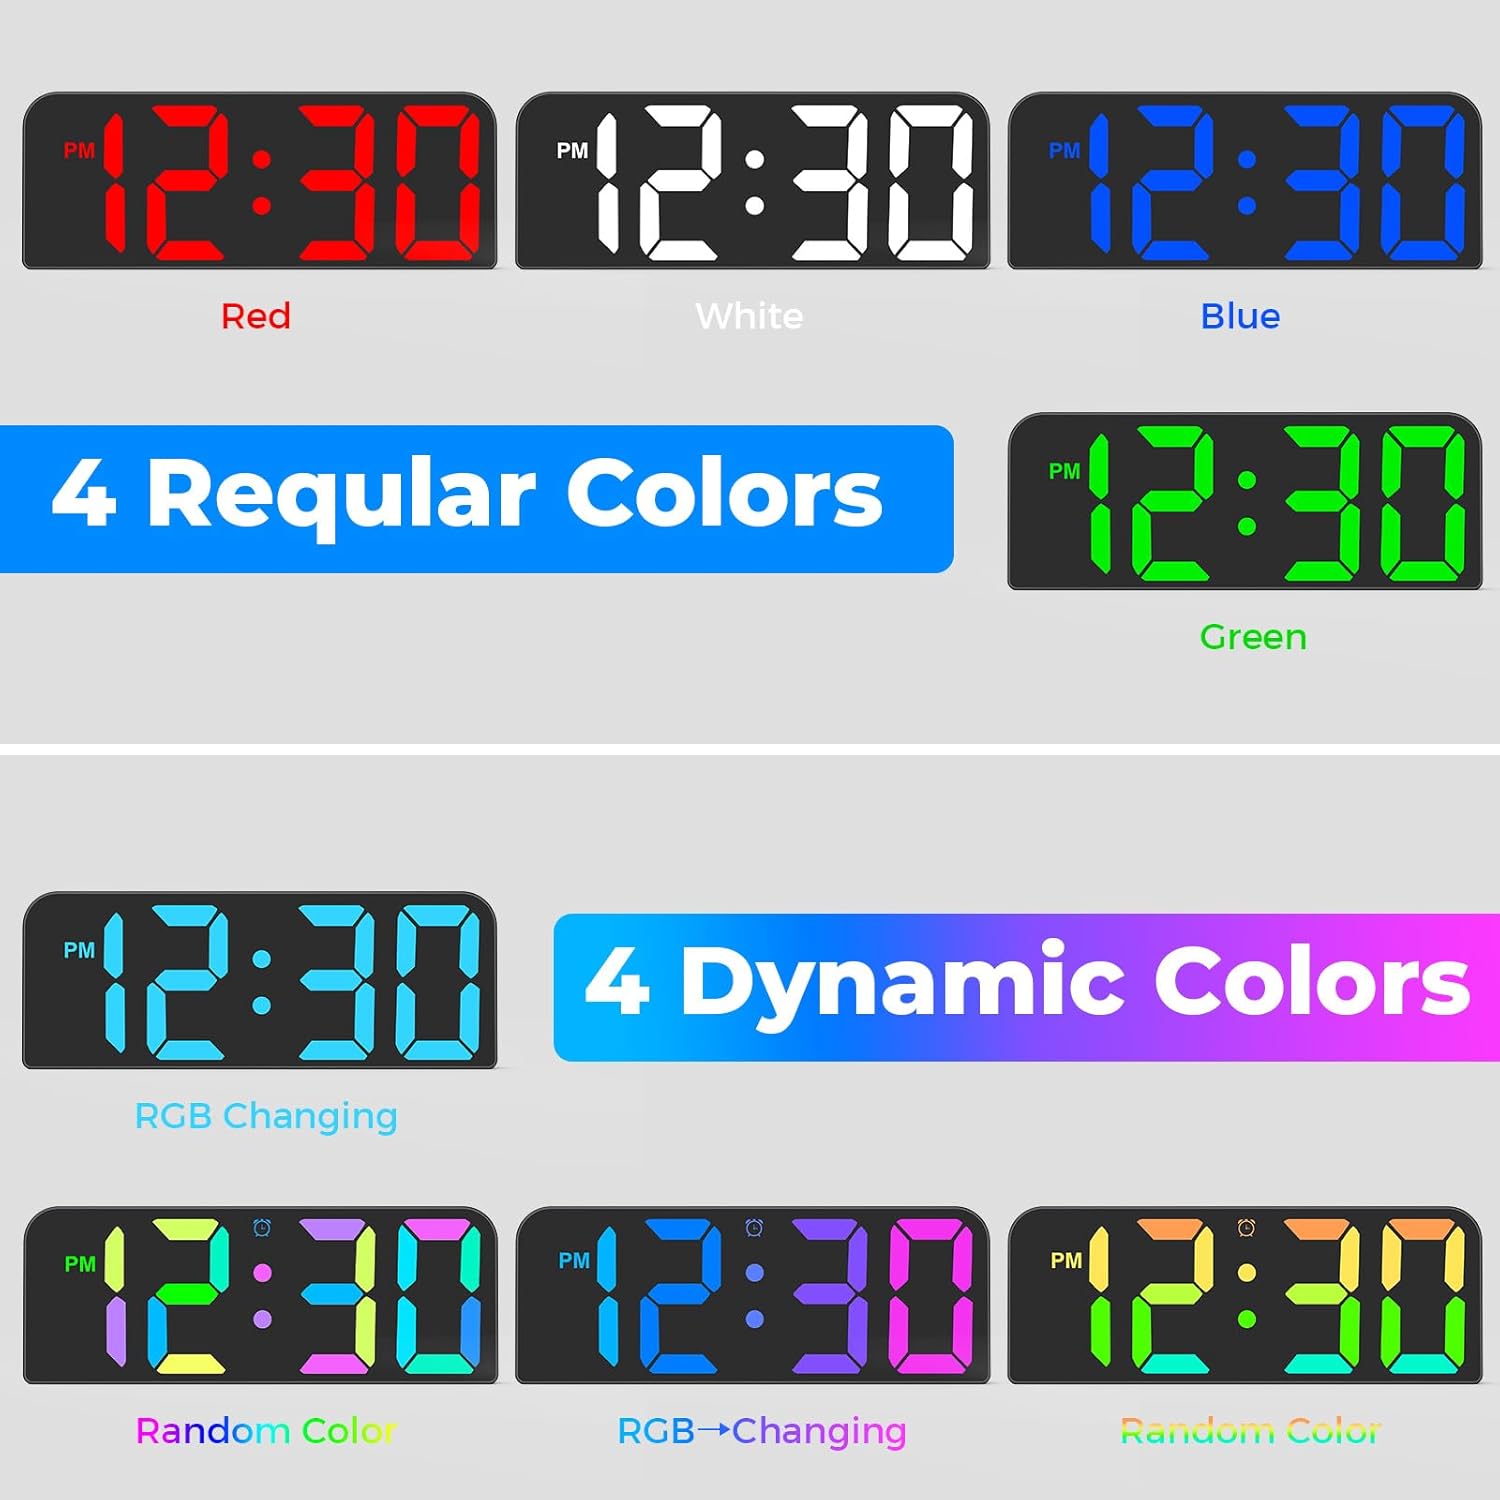
Figure 5.3: RGB Color Options
This image showcases the wide range of static and dynamic RGB color options available for the clock's display.
The clock offers a vibrant RGB color display with both static and dynamic color modes:
- Static Colors: Use the dedicated color buttons on the remote (e.g., Red, Green, Blue, White) to select a fixed color.
- Dynamic Colors: Press the RGB or MODE button on the remote to cycle through dynamic color-changing modes.
5.5 Alarm Settings
The clock supports setting multiple alarms (up to 3). Refer to your remote control's specific buttons for alarm setting (often labeled with an alarm clock icon).
- Press the ALARM button on the remote to enter alarm setting mode.
- Use UP and DOWN to set the desired alarm time.
- Press ALARM again to confirm and move to the next alarm or exit.
- To activate/deactivate an alarm, press the corresponding alarm button (e.g., AL1, AL2, AL3) on the remote. An alarm icon will appear on the display when active.
6. Maintenance
- Cleaning: Use a soft, dry cloth to wipe the clock's display and body. Avoid abrasive cleaners or solvents, as they may damage the surface.
- Battery Replacement: If the clock loses time settings frequently during power outages, the CR2032 backup battery may need replacement. Follow the steps in Section 4.2.
- Storage: If storing the clock for an extended period, disconnect it from power and remove the backup battery.
7. Troubleshooting
| Problem | Possible Cause | Solution |
|---|---|---|
| Clock display is off. | No power connection or power outage. | Ensure the USB power cable is securely connected to the clock and the power adapter is plugged into a working outlet. Check the power source. |
| Clock loses time settings after power outage. | Backup battery (CR2032) is dead or not installed. | Install or replace the CR2032 backup battery. Ensure it is inserted correctly. |
| Remote control not working. | Remote battery is dead or line of sight is blocked. | Replace the remote control battery. Ensure there are no obstructions between the remote and the clock. Point the remote directly at the clock. |
| Display is too dim or too bright. | Brightness setting is not optimal. | Use the BRIGHTNESS button on the remote to cycle through the 3 brightness levels. |
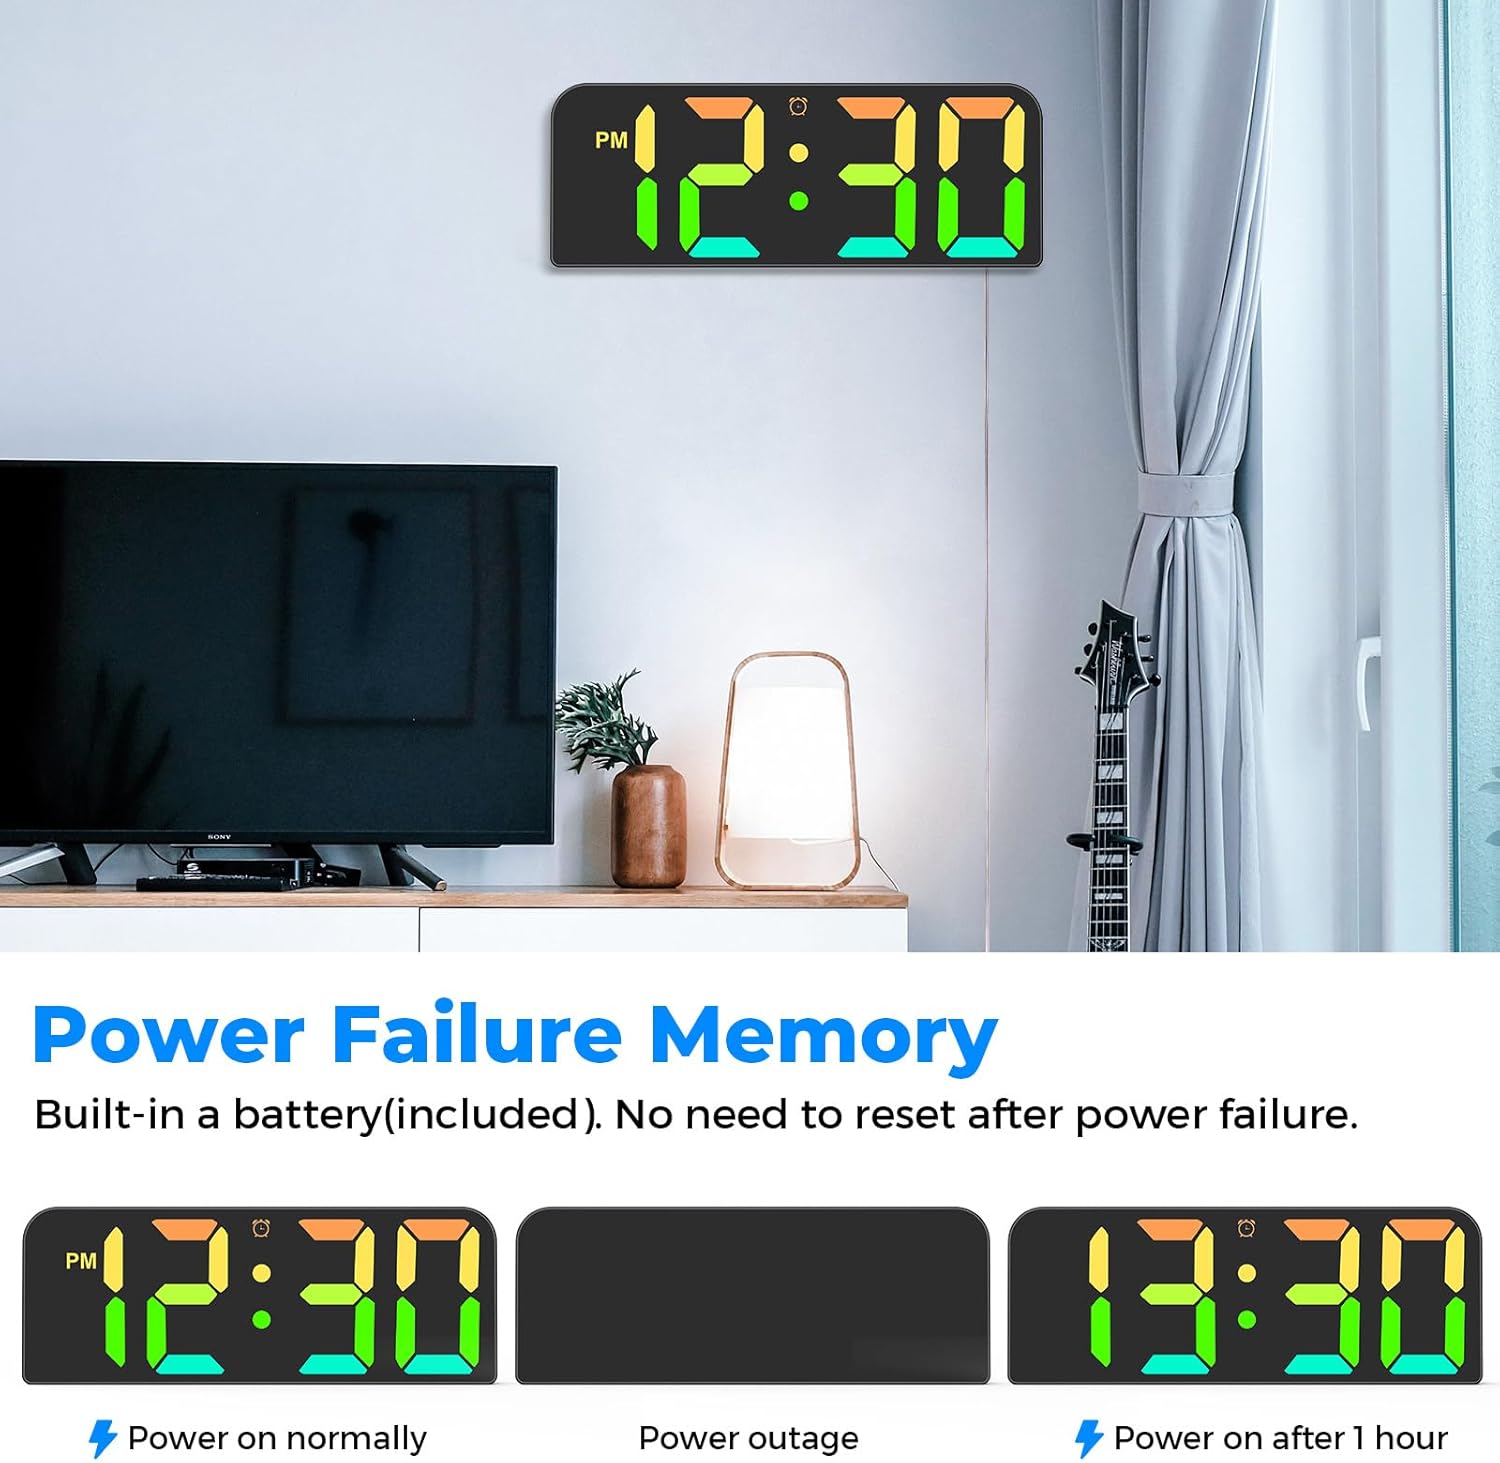
Figure 7.1: Power Failure Memory
This image demonstrates the clock's ability to retain time settings during a power outage due to its built-in backup battery.
8. Specifications
| Feature | Detail |
|---|---|
| Brand | Meloya |
| Model Number | GH0730 |
| Display Type | LED display |
| Digit Size | 3 inches (approx.) |
| Time Format | 12-hour / 24-hour selectable |
| Brightness Levels | 3 levels adjustable |
| Special Features | Dynamic RGB Display, Remote Control, Silent Clock, Power Failure Memory, 10ft Long USB Cable |
| Power Source | Corded Electric (DC5V/1A via USB) |
| Backup Battery | 1 x CR2032 (included) |
| Material | Plastic |
| Mounting Type | Wall Mount / Tabletop |
| Product Dimensions (W x H x D) | Approx. 9.41 x 3.51 x 1.15 inches |
| Product Weight | 381 g |
9. Warranty and Support
For warranty information, technical support, or any inquiries regarding your Meloya Digital Wall Clock, please contact the seller or manufacturer directly through the platform where you purchased the product. Keep your purchase receipt as proof of purchase.

