
HORLAT B0C9937J1J
HORLAT Mini Projector User Manual
Model: B0C9937J1J
Introduction
Thank you for purchasing the HORLAT Mini Projector. This portable projector is designed to provide a versatile and immersive viewing experience, supporting 5G WiFi, Bluetooth 5.1, and Full HD 1080P content. This manual will guide you through the setup, operation, maintenance, and troubleshooting of your new device to ensure optimal performance and longevity.

Image: The HORLAT Mini Projector, a compact device with a lens on the front and control buttons on top, displayed against a vibrant, colorful projection.
Safety Information
Please read all safety instructions before using the projector. Keep this manual for future reference.
- Do not block the ventilation openings. Ensure adequate airflow around the projector.
- Do not look directly into the projector lens when the lamp is on. The bright light can cause eye damage.
- Do not place the projector in unstable locations.
- Avoid exposing the projector to rain, moisture, or extreme temperatures.
- Use only the power adapter supplied with the projector.
- Unplug the projector during lightning storms or when unused for long periods.
Package Contents
Verify that all items are present in your package:
- HORLAT Mini Projector
- Remote Control (AAA batteries not included)
- Power Adapter
- HDMI Cable
- AV Cable
- User Manual
Product Overview
Familiarize yourself with the components of your HORLAT Mini Projector.

Image: The HORLAT Mini Projector with its dimensions (7 inches length, 4.72 inches width, 2.75 inches height) and net weight (22 oz) highlighted, demonstrating its compact size and portability. It shows the projector supporting a tripod, being easily held, and fitting into a backpack.

Image: A diagram illustrating the short-focal lens capability of the projector, showing projection distances from 0.6m (21 inches) to 3.5m (180 inches). It also highlights 4P Keystone Correction, 50% Zoom, and a built-in speaker.
The projector features a compact design, making it highly portable. It includes a short-focal lens for flexible placement, a built-in speaker, and various ports for connectivity. The top panel houses intuitive controls for easy navigation.
Setup
1. Power Connection
Connect the supplied power adapter to the projector's DC input port and then plug it into a power outlet.
2. Placement and Projection
Place the projector on a stable, flat surface. Thanks to its short-focal lens, the projector can project a large image from a short distance, ranging from 1.8 feet (for a 21-inch screen) up to 5 feet or more for larger screens. For optimal viewing, a dark environment is recommended.
3. Focus and Keystone Correction
Adjust the focus ring on the lens until the image is clear. If the image appears trapezoidal, use the keystone correction features:
- ±15° Vertical Keystone Correction: Adjusts vertical distortion.
- 4P Keystone Correction: Allows individual adjustment of all four corners of the projected image for precise alignment.
- 4D Keystone Correction: Provides horizontal and vertical digital keystone adjustments.
Use the remote control to access these settings. The 50% Zoom function allows you to reduce the screen size without moving the projector, adjusting from 100% down to 50%.

Image: A visual representation of the projector's zoom function (up to 50%) and various keystone correction methods, including digital 4P, digital 4D, and ±15° keystone correction, demonstrating how to customize the projected image.
Operating
1. Turning On/Off
Press the power button on the projector or the remote control to turn the unit on or off.
2. Input Sources
The HORLAT Mini Projector supports multiple input sources:
- HDMI: Connect devices like TV sticks, PCs, laptops, gaming consoles (PS4, Switch), or DVD players.
- USB: Play media directly from a USB flash drive.
- AV: Connect older devices using the provided AV cable.
- Audio (3.5mm): Connect external speakers or headphones.
Use the "Source" button on the remote or projector to select the desired input.

Image: An illustration showing the various connection ports on the projector (AV, 3.5mm Audio, USB, HDMI, DC) and examples of compatible devices such as computers, USB drives, PS4, DVD players, TV sticks, audio players, laptops, Nintendo Switch, and cameras.

Image: A projected screen displaying various streaming service logos (HBO, Prime Video, Hulu, YouTube, Plex, ESPN, Netflix) with the projector and a TV stick (not included) in the foreground, demonstrating compatibility with streaming devices.
3. Wireless Connectivity (WiFi & Bluetooth)
The projector features 5G+2.4G dual-band WiFi and Bluetooth 5.1 for seamless wireless connections.
- WiFi Screen Synchronization: Connect your smartphone (iOS or Android) to the projector via WiFi for screen mirroring. The built-in Eshare system ensures smooth, lag-free mirroring for movies and games. Ensure both devices are on the same WiFi network.
- Bluetooth 5.1: Connect external Bluetooth speakers or headphones for enhanced audio. Bluetooth 5.1 offers faster and more stable audio synchronization with a wider transmission range compared to older versions.
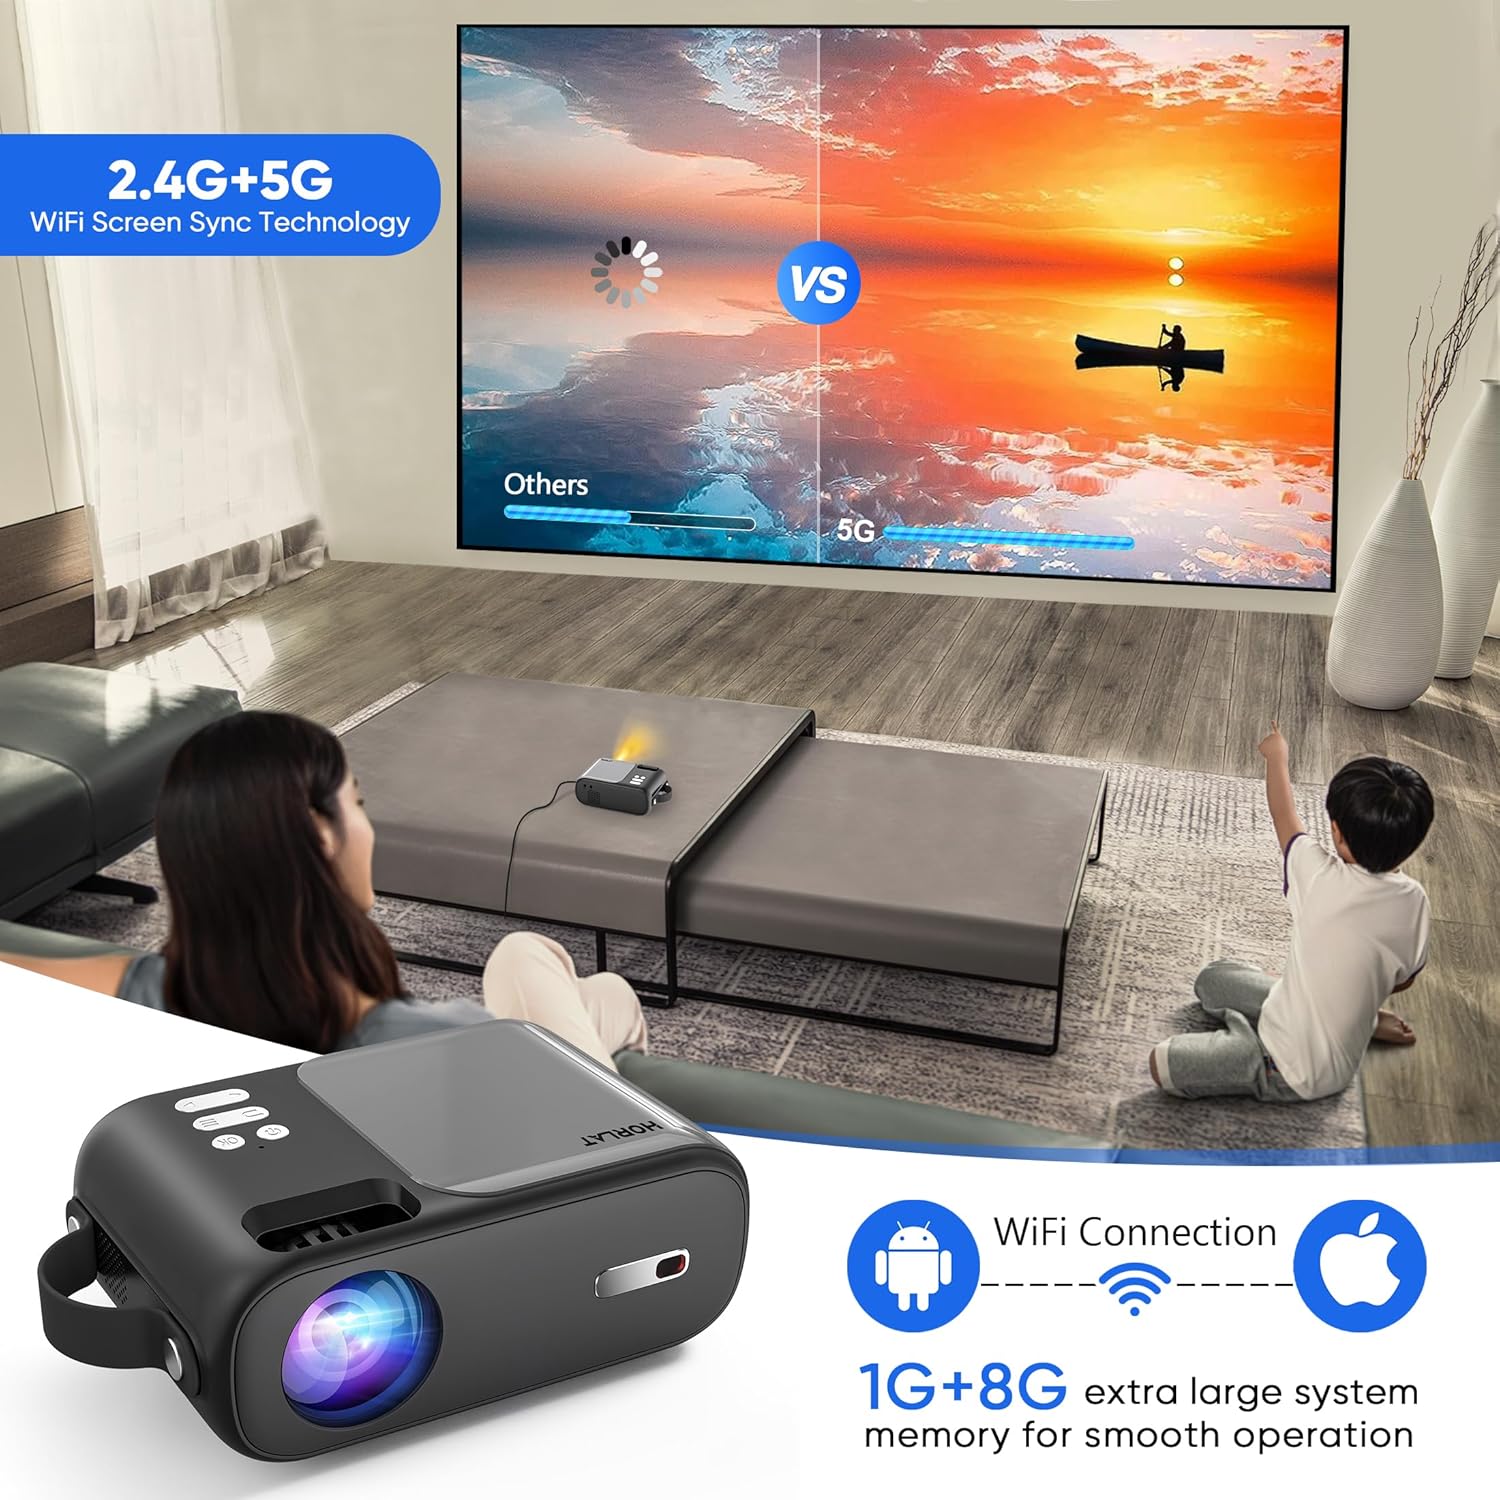
Image: A scene showing a family watching a movie projected onto a wall, with an overlay illustrating the 2.4G+5G WiFi Screen Sync Technology and 1G+8G system memory for smooth operation, emphasizing wireless connectivity for Android and Apple devices.

Image: A person playing a guitar, with the sound wirelessly connected via Bluetooth 5.1 from a smartphone to the projector, demonstrating the projector's capability to act as a Bluetooth speaker.
4. Audio Output
The projector has a built-in speaker. For a more immersive audio experience, connect external speakers or headphones via the 3.5mm audio jack or Bluetooth.
5. Remote Control
The remote control provides full functionality for navigating menus, adjusting settings, changing input sources, and controlling playback. Insert two AAA batteries (not included) before first use.
Maintenance
Proper maintenance ensures the longevity and performance of your projector.
- Lens Cleaning: Use a soft, lint-free cloth specifically designed for optical lenses to gently wipe the projector lens. Do not use abrasive cleaners or excessive force.
- General Cleaning: Wipe the projector's exterior with a soft, dry cloth. Avoid using liquid cleaners directly on the device.
- Ventilation: Ensure the ventilation openings are clear of dust and obstructions to prevent overheating. The projector features a noise-reducing cooling system for efficient heat dissipation.
- Storage: When not in use, store the projector in a cool, dry place, away from direct sunlight and extreme temperatures.

Image: A composite image highlighting the projector's portability, its support for tripods, its 4-layer coated-glass lens, and its noise-reducing cooling system, illustrating key design and functional aspects.
Troubleshooting
If you encounter issues with your projector, refer to the following common problems and solutions:
| Problem | Possible Solution |
|---|---|
| No image or "No Signal" |
|
| Blurry image |
|
| No sound or low volume |
|
| WiFi connection issues |
|
Specifications
| Feature | Detail |
|---|---|
| Brand | HORLAT |
| Model | B0C9937J1J |
| Native Resolution | 1280 x 720P (Supports 1080P) |
| Brightness | 9000 Lumens |
| Contrast Ratio | 9000:1 |
| Connectivity Technology | Wireless Bluetooth WIFI (5G+2.4G), HDMI, USB, AV, Audio (3.5mm) |
| Keystone Correction | ±15°/4P/4D |
| Zoom Function | 50% |
| Item Weight | 2.42 pounds |
| Product Dimensions | 4.7 x 7 x 2.75 inches |
| Color | Grey |
| Special Features | Built-In Wi-Fi, Portable, Wireless, Diffuse Reflection Eye Protection, Timer Shutdown |
Warranty and Support
HORLAT provides a 3-year factory repair warranty with free replacement parts for this product. If you have any questions or require technical assistance, please do not hesitate to contact our professional support team. We are committed to providing 24/7 service to ensure your satisfaction.
For support, please refer to the contact information provided on the product packaging or the official HORLAT website.
Related documentsB0C9937J1J


Ask a question about this manual
Ask about setup, troubleshooting, compatibility, parts, safety, or missing instructions. Manuals+ will review the question and use this page’s manual context to help answer it.