
Introduction
This manual provides detailed instructions for the safe and efficient operation, maintenance, and troubleshooting of your De'Longhi All-in-One Combination Coffee Maker & Espresso Machine, Model COM532M. Please read all instructions carefully before using the appliance and retain this manual for future reference.
Important Safety Information
- Always ensure the appliance is unplugged before cleaning or maintenance.
- Do not immerse the appliance, power cord, or plug in water or other liquids.
- Keep the appliance out of reach of children.
- Use only De'Longhi recommended accessories and spare parts.
- Do not operate the appliance if it has a damaged cord or plug, or if it malfunctions or has been damaged in any manner.
- Place the appliance on a stable, level surface, away from hot surfaces or open flames.
What's Included
Upon unpacking, verify that all components are present:
- De'Longhi All-In-One Combination Coffee and Espresso Machine
- Glass Coffee Pot - 10 cup
- Gold Tone Coffee Filter
- Single Shot Filter Basket
- Double Shot Filter Basket
- POD Filter Basket
- Measuring Spoon
- Descaling Solution
- Charcoal Water Filter
- Instruction Manual & Quick Start Guide (this document)
Product Overview
The De'Longhi COM532M combines a drip coffee maker and an espresso machine with an advanced milk frother. It features a dual heating system for simultaneous brewing and a digital touchscreen for intuitive control.
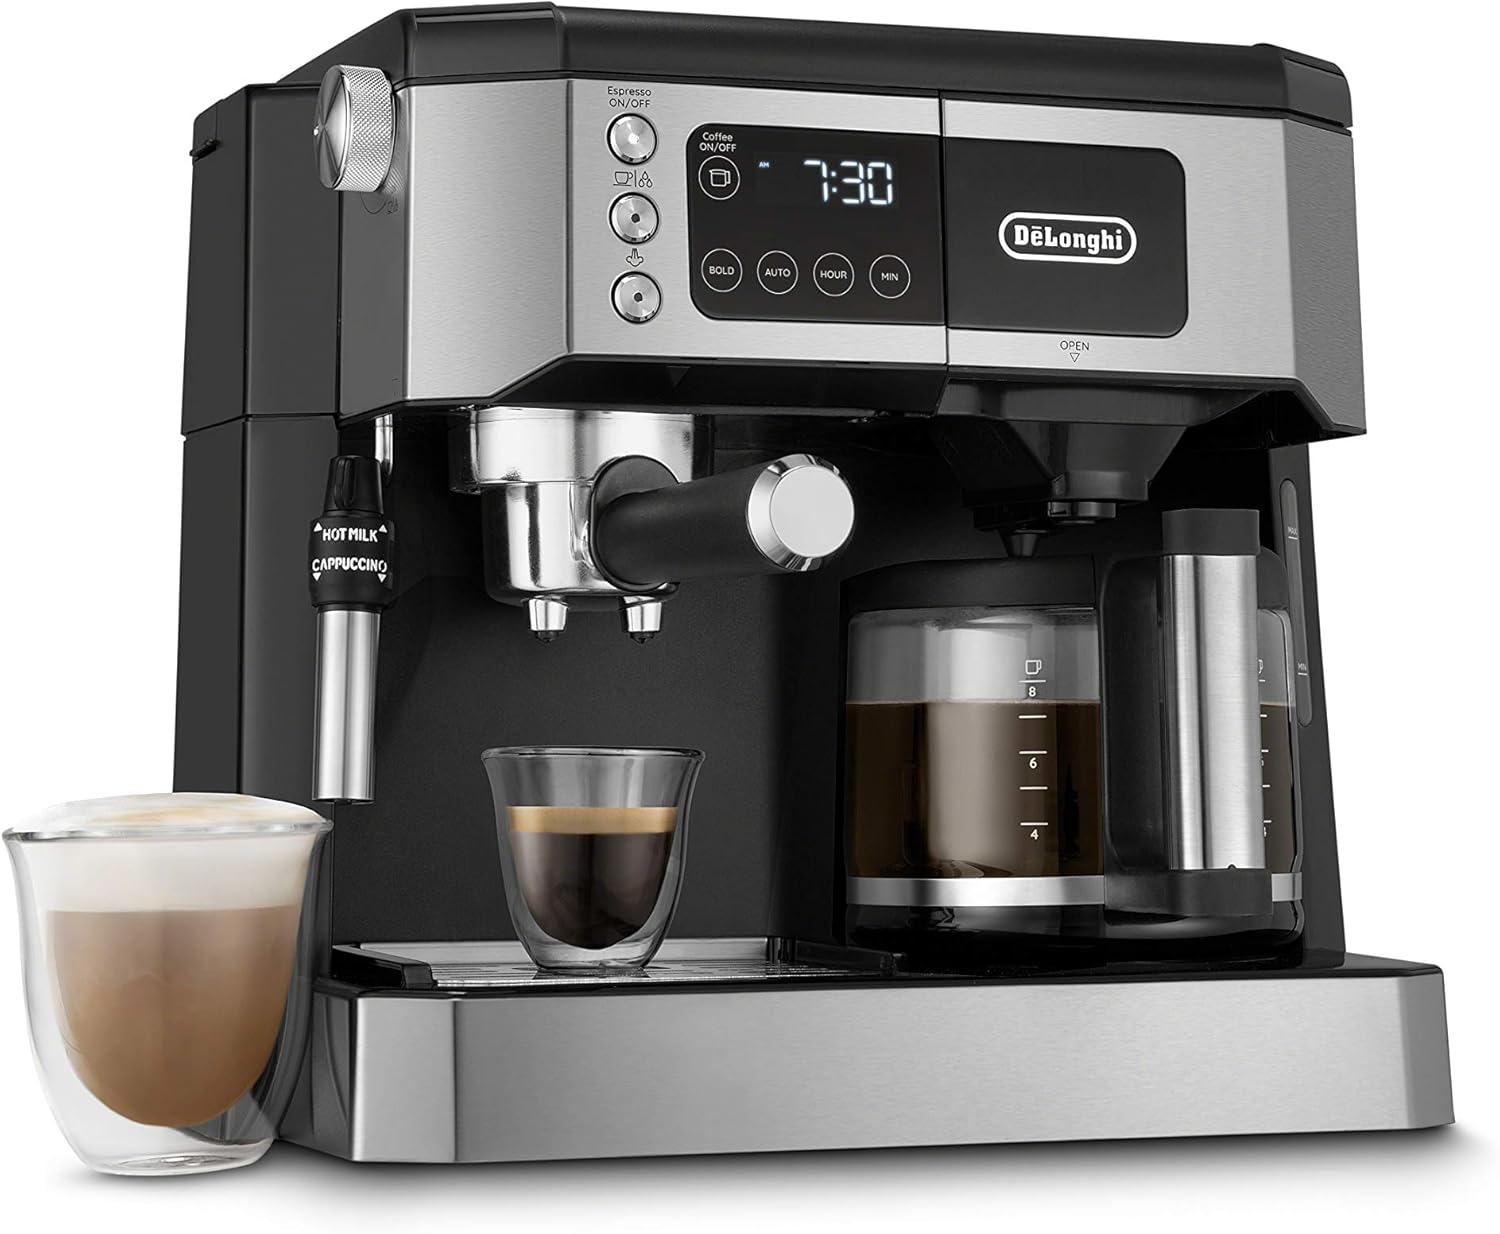
Figure 1: Front view of the De'Longhi COM532M Combination Coffee and Espresso Machine.

Figure 2: Close-up of the digital touchscreen and control buttons for coffee and espresso functions.

Figure 3: Exploded view illustrating the various removable components of the machine, including water reservoir, coffee filter basket, portafilter, and measuring spoon.
Setup
- Unpacking: Carefully remove all packaging materials and ensure all components listed in 'What's Included' are present.
- Placement: Position the machine on a flat, stable, heat-resistant surface. Ensure adequate clearance around the machine for ventilation.
- Initial Cleaning: Before first use, wash the glass carafe, portafilter, filter baskets, and water reservoir with warm soapy water. Rinse thoroughly and dry.
- Water Filter Installation: Install the charcoal water filter into the water reservoir as per the filter instructions. Fill the water reservoir with fresh, cold water.
- First Use Cycle (Priming): Perform a rinse cycle without coffee to clean internal components. Refer to the 'Operating Instructions' for specific steps for both coffee and espresso sides.
Operating Instructions
A. Drip Coffee Maker Operation
- Fill Water Reservoir: Open the lid of the coffee maker side and fill the water reservoir with fresh, cold water up to the desired level indicated on the side.
- Add Coffee Grounds: Place the Gold Tone permanent filter (or a paper filter) into the filter basket. Add desired amount of ground coffee. For optimal flavor, use 1 scoop (provided) per cup.
- Place Carafe: Ensure the glass carafe is correctly positioned on the warming plate.
- Brew Coffee: Press the 'Coffee ON/OFF' button. The machine will begin brewing.
- Bold Setting: To enhance coffee strength, press the 'BOLD' button before brewing.
- Programmable Timer: To set a delayed brew time, use the 'HOUR' and 'MIN' buttons to set the current time, then press 'AUTO' and set the desired brew start time.

Figure 4: Illustration of filling the coffee maker's water reservoir and adding ground coffee to the filter basket.
B. Espresso Machine Operation
- Fill Water Reservoir: Ensure the espresso side water reservoir is filled with fresh, cold water.
- Prepare Portafilter: Insert the appropriate filter basket (single, double, or POD) into the portafilter. Add ground espresso or an espresso pod. Tamp ground coffee firmly.
- Attach Portafilter: Securely attach the portafilter to the espresso group head.
- Place Cup: Position an espresso cup(s) on the drip tray beneath the portafilter.
- Brew Espresso: Press the 'Espresso ON/OFF' button. The machine will preheat, then brew.

Figure 5: The portafilter shown with various filter baskets for single shot, double shot, and espresso pods.
C. Milk Frothing
- Prepare Milk: Fill a frothing pitcher with cold milk (dairy or non-dairy) to just below the spout.
- Position Steam Wand: Submerge the steam wand tip just below the surface of the milk.
- Activate Steam: Turn the steam knob to the 'Steam' position.
- Froth Milk: Move the pitcher up and down to create foam. For micro-foam (latte), keep the tip submerged. For more foam (cappuccino), keep the tip closer to the surface.
- Clean Wand: After frothing, wipe the steam wand immediately with a damp cloth and purge a small amount of steam to clear any milk residue.

Figure 6: The advanced steam wand frothing milk in a pitcher, with a freshly brewed espresso shot in a glass.
Maintenance
A. Daily Cleaning
- Drip Tray: Empty and clean the drip tray and grid daily.
- Portafilter & Filter Baskets: Rinse after each use.
- Steam Wand: Clean immediately after each use as described in 'Milk Frothing'.
- Carafe: Wash the glass carafe after each use.
- Exterior: Wipe the exterior of the machine with a soft, damp cloth.
B. Descaling
Regular descaling is essential to maintain machine performance and extend its lifespan. The frequency depends on water hardness and usage. The machine will indicate when descaling is required. Use the provided De'Longhi descaling solution and follow the instructions on the descaling solution packaging and in the machine's quick start guide.
C. Water Filter Replacement
Replace the charcoal water filter approximately every two months, or as indicated by the machine, to ensure optimal water quality for brewing.
Troubleshooting
If you encounter issues with your machine, consult the following common solutions:
| Problem | Possible Cause | Solution |
|---|---|---|
| Coffee not brewing / Espresso not dispensing | No water in reservoir; Clogged filter; Machine not preheated. | Fill water reservoir; Clean filter/portafilter; Allow machine to preheat fully. |
| Weak coffee/espresso | Insufficient coffee grounds; Coarse grind; Descaling needed. | Increase coffee amount; Use finer grind; Perform descaling cycle. |
| Milk not frothing properly | Steam wand clogged; Insufficient steam pressure; Milk not cold enough. | Clean steam wand; Ensure machine is ready for steam; Use cold milk. |
| Machine making unusual noises | Air in system; Descaling needed. | Run a hot water cycle to prime; Perform descaling cycle. |
For issues not listed or if problems persist, contact De'Longhi customer support.
Specifications
- Brand: De'Longhi
- Model Number: COM532M
- Color: Black
- Product Dimensions: 11.02"D x 14.52"W x 12.79"H
- Coffee Maker Type: Espresso Machine & Drip Coffee Combo
- Specific Uses: Cappuccino, Espresso, Latte, Drip Coffee
- Included Components: POD filter, Measuring scoop, Charcoal filter, Single coffee filter, Gold Tone permanent filter, Double coffee Filter, De'Longhi All-In-One Combination Coffee and Espresso Machine, 10 cup carafe for drip coffee
- Operation Mode: Fully Automatic
- Voltage: 120V
- Human Interface Input: Touchscreen
- Coffee Input Type: Pods and Ground Coffee
- Item Weight: 13.67 pounds
- UPC: 044387053204

Figure 7: Product dimensions: 11.02 inches Depth, 14.52 inches Width, 12.79 inches Height.
Warranty and Support
Your De'Longhi All-in-One Combination Coffee Maker & Espresso Machine (Model COM532M) is covered by a 1-Year Limited Warranty from the date of purchase. This warranty covers defects in materials and workmanship under normal use.
For warranty claims, technical support, or to purchase replacement parts, please visit the official De'Longhi website or contact their customer service department. Please have your model number (COM532M) and proof of purchase available.