Important Safety Information
WARNING: To reduce the risk of fire, electric shock, or injury, read all instructions before operating this appliance.
- Ensure the freezer is connected to a properly grounded electrical outlet with the correct voltage and amperage as specified in the product specifications.
- Do not operate the freezer with a damaged power cord or plug. If damaged, contact qualified service personnel.
- Maintain adequate ventilation around the freezer. Do not block air vents.
- Keep flammable materials and vapors away from the freezer.
- Always unplug the freezer before cleaning, performing maintenance, or moving it.
- Do not store explosive substances such as aerosol cans with a flammable propellant in this appliance.
- This appliance is intended for commercial use only.
- Ensure the freezer is placed on a level, stable surface capable of supporting its weight when fully loaded.
Package Contents
Verify that all components are present upon unpacking:
- Nexel Reach In Freezer Unit
- Assembly Guide
- Adjustable PVC Wire-Coated Shelves (Quantity: Varies by configuration, typically 6-8)
- Casters (4, with 2 locking)
- Shelf Clips/Brackets
Setup
1. Unpacking and Inspection
Carefully remove all packaging materials. Inspect the freezer for any shipping damage. Report any damage to the carrier immediately. Retain packaging materials until the unit has been inspected and is operating correctly.
2. Placement
Position the freezer on a strong, level surface away from direct sunlight, heat sources, and areas with high humidity. Ensure there is adequate clearance (at least 6 inches) around the back and sides for proper ventilation and heat dissipation. This is crucial for efficient operation and longevity of the unit.

Image: Rear view of the freezer, highlighting the ventilation area at the bottom. Proper clearance around this area is essential for cooling performance.
3. Caster Installation
If not pre-installed, attach the casters to the bottom of the freezer. Two of the casters are typically equipped with locking mechanisms. Install these locking casters on the front of the unit to prevent unwanted movement. Ensure all casters are securely tightened.

Image: A close-up of one of the freezer's caster wheels, showing the wheel and the locking lever.
4. Shelf Installation
Insert the shelf clips into the desired slots on the interior shelf rails. Ensure all clips are at the same height for a level shelf. Place the PVC wire-coated shelves onto the clips. Adjust shelf height as needed for your storage requirements.

Image: Detail of the adjustable shelf rail and a wire shelf resting on its clips inside the freezer.
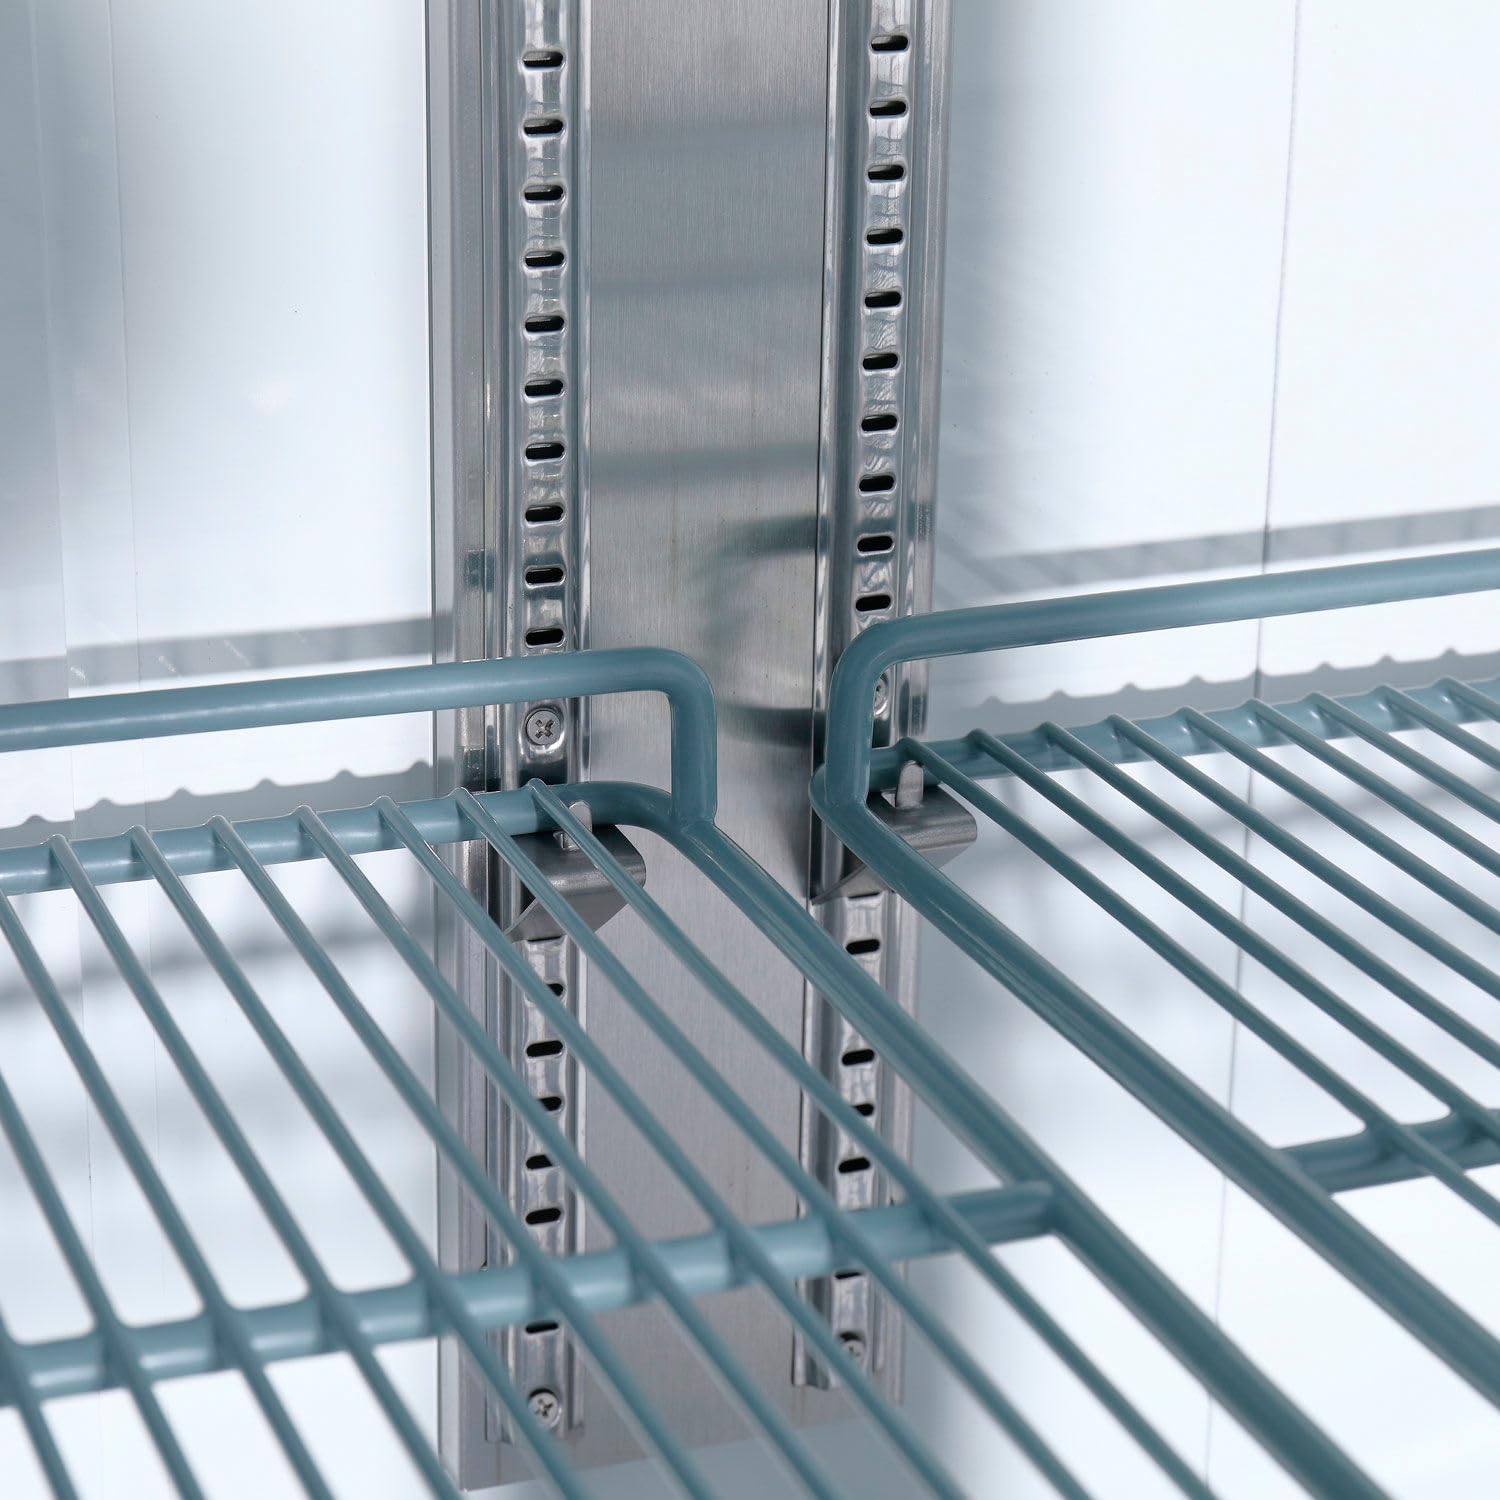
Image: A closer view of a PVC wire-coated shelf, showing its construction and how it sits on the support clips.

Image: The interior of the freezer, displaying multiple wire shelves arranged for storage.
5. Initial Cleaning
Before first use, clean the interior and exterior of the freezer with a mild detergent and warm water. Rinse thoroughly and dry completely. Do not use abrasive cleaners or solvents.
6. Power Connection and Initial Startup
After the freezer has been in its final position for at least 2 hours (to allow refrigerants to settle), plug the unit into a dedicated, grounded electrical outlet. The freezer will begin to cool. Allow the unit to operate empty for several hours (e.g., 4-6 hours) to reach its set temperature before loading with products.
Operating Instructions
1. Digital Thermostat and Temperature Control
The freezer is equipped with a digital thermostat and LED display for precise temperature control. The display shows the current internal temperature. To adjust the temperature:
- Press the "SET" button once. The current set temperature will flash.
- Use the Up (▲) and Down (▼) arrow buttons to adjust the desired temperature.
- Press the "SET" button again to confirm the new setting. The display will return to showing the actual internal temperature after a few seconds.

Image: The digital control panel showing the temperature display, SET button, and up/down arrows, along with light and power switches.
2. Light and Power Switches
Separate switches are provided for the interior lighting and the main power to the unit. Use the "Light Switch" to turn the internal LED lighting on or off. The "Power Switch" controls the main power to the compressor and cooling system.
3. Loading the Freezer
Distribute products evenly on the shelves. Do not overload shelves or block the internal air circulation vents. Allow space between items for proper airflow, which is essential for maintaining consistent temperatures throughout the freezer.

Image: The Nexel Reach In Freezer with its two glass doors closed, showcasing its overall design.
4. Door Operation
The freezer features two transparent glass doors. Ensure doors are closed firmly after each use to maintain internal temperature and energy efficiency. The doors are equipped with handles for easy opening.

Image: The freezer with one glass door open, revealing the interior and shelves.

Image: A close-up of the two sturdy handles on the glass doors.
Maintenance
1. Regular Cleaning
- Interior: Clean the interior regularly with a mild, non-abrasive cleaner and warm water. Rinse and dry thoroughly. Remove shelves for easier cleaning.
- Exterior: Wipe down the stainless steel exterior with a soft cloth and a stainless steel cleaner or mild detergent. Avoid abrasive pads.
- Door Gaskets: Inspect door gaskets for cracks or tears. Clean them regularly to ensure a tight seal. A poor seal can lead to increased energy consumption and temperature fluctuations.
2. Condenser Coil Cleaning
The condenser coil, located at the bottom rear of the unit, should be cleaned every 30-90 days, depending on the operating environment. A dirty condenser coil reduces cooling efficiency and can lead to compressor failure. Always unplug the unit before cleaning the condenser coil. Use a stiff brush or vacuum cleaner to remove dust and debris from the fins.
3. Defrosting
This freezer features an automatic defrost system. However, if excessive ice buildup occurs, manually defrost the unit by turning off the power and allowing the ice to melt. Remove all products before manual defrosting. Do not use sharp objects to remove ice.
Troubleshooting
| Problem | Possible Cause | Solution |
|---|---|---|
| Freezer not cooling |
|
|
| Excessive noise |
|
|
| Door not sealing properly |
|
|
If troubleshooting steps do not resolve the issue, contact qualified service personnel.
Specifications
| Feature | Detail |
|---|---|
| Brand | Nexel |
| Model Name | 243221 |
| Part Number | CFD-2FF-G-HC |
| Capacity | 47 Cu. Ft. |
| Product Dimensions (D x W x H) | 32.25" x 54" x 82.5" |
| Item Weight | 495 Pounds |
| Material Type | Stainless Steel |
| Color | Silver |
| Doors | 2 Glass Doors |
| Included Components | Assembly Guide |
| Certification | Reach |
Warranty and Support
For warranty information and technical support, please refer to the included Assembly Guide or contact Nexel customer service directly. Keep your purchase receipt for warranty claims.
Contact Information: Refer to the official Nexel website or the documentation provided with your purchase for the most current contact details.


