
Introduction
This manual provides detailed instructions for the installation, operation, and maintenance of your deleyCON 24-Port CAT 7 Patch Panel Set. This professional patch panel is designed for efficient network management in both private and professional IT environments, supporting high-speed data transmission up to 10 Gbit/s and 600 MHz.
The set includes a 19-inch rack-mountable patch panel and 24 CAT 7 Keystone modules, ensuring optimal signal transmission for modern network applications.
Setup Instructions
Follow these steps to properly install your deleyCON 24-Port CAT 7 Patch Panel.
1. Unpacking and Inspection
Carefully unpack all components. Verify that all parts are present:
- 1x deleyCON 24-Port Patch Panel (1U, 19-inch)
- 24x deleyCON CAT 7 Keystone Modules
- Mounting screws and cage nuts
- Cable ties
- Grounding cable (pre-assembled)
Inspect all components for any signs of damage. If any parts are missing or damaged, contact deleyCON support.
2. Mounting the Patch Panel
The patch panel is designed for standard 19-inch rack installation.
- Position the patch panel in the desired 1U slot within your 19-inch network rack.
- Align the mounting holes on the patch panel with the rack rails.
- Secure the patch panel using the provided mounting screws and cage nuts. Ensure it is firmly attached to prevent movement.

Image: Rear view of the deleyCON 24-Port Patch Panel, highlighting the cable management bar and pre-assembled grounding cable.
3. Installing Keystone Modules
The patch panel is modular, allowing for easy installation of the CAT 7 Keystone modules.
- Take one CAT 7 Keystone module.
- Align the module with an empty port on the front of the patch panel.
- Gently push the module into the port until it clicks securely into place.
- Repeat for all desired ports.

Image: Front view of the deleyCON 24-Port Patch Panel with some keystone modules installed, demonstrating the modular design.

Image: A detailed view of an individual deleyCON CAT 7 Keystone Module.
4. Wiring the Keystone Modules (LSA+ Terminals)
Connect your network installation cables to the LSA+ insulation displacement terminals on the rear of each keystone module.
- Carefully strip the outer jacket of your CAT 7 installation cable (solid conductor, AWG 22-25) to expose the twisted pairs.
- Refer to the color-coded diagram on the keystone module (TIA568A or TIA568B standard). Ensure consistency across all connections.
- Untwist the wire pairs and insert each individual wire into the corresponding LSA+ terminal slot.
- Use an LSA+ punch-down tool to firmly press each wire into its terminal, cutting off any excess wire.
- Secure the cable with a cable tie to the strain relief on the keystone module.

Image: Step-by-step illustration of how to wire a CAT 7 Keystone Module using the LSA+ terminals, showing color codes for TIA568A/B.
5. Grounding the Patch Panel
The patch panel features a pre-assembled grounding cable for safety and optimal performance, especially with shielded cables.
- Connect the grounding cable from the patch panel to a reliable ground point in your network rack or electrical system.
- Ensure a secure connection to prevent electrical hazards and reduce electromagnetic interference.
Operating Instructions
Once the patch panel and keystone modules are installed and wired, operation is straightforward.
- Connecting Devices: Use standard RJ45 patch cables to connect your network devices (e.g., computers, switches, routers) to the front RJ45 ports of the installed keystone modules.
- Disconnecting Devices: To disconnect a device, gently press the release tab on the RJ45 connector and pull the patch cable out of the port.
- Cable Management: Utilize the cable management bar at the rear of the patch panel and the provided cable ties to organize and secure your installation cables, ensuring a tidy and efficient setup.
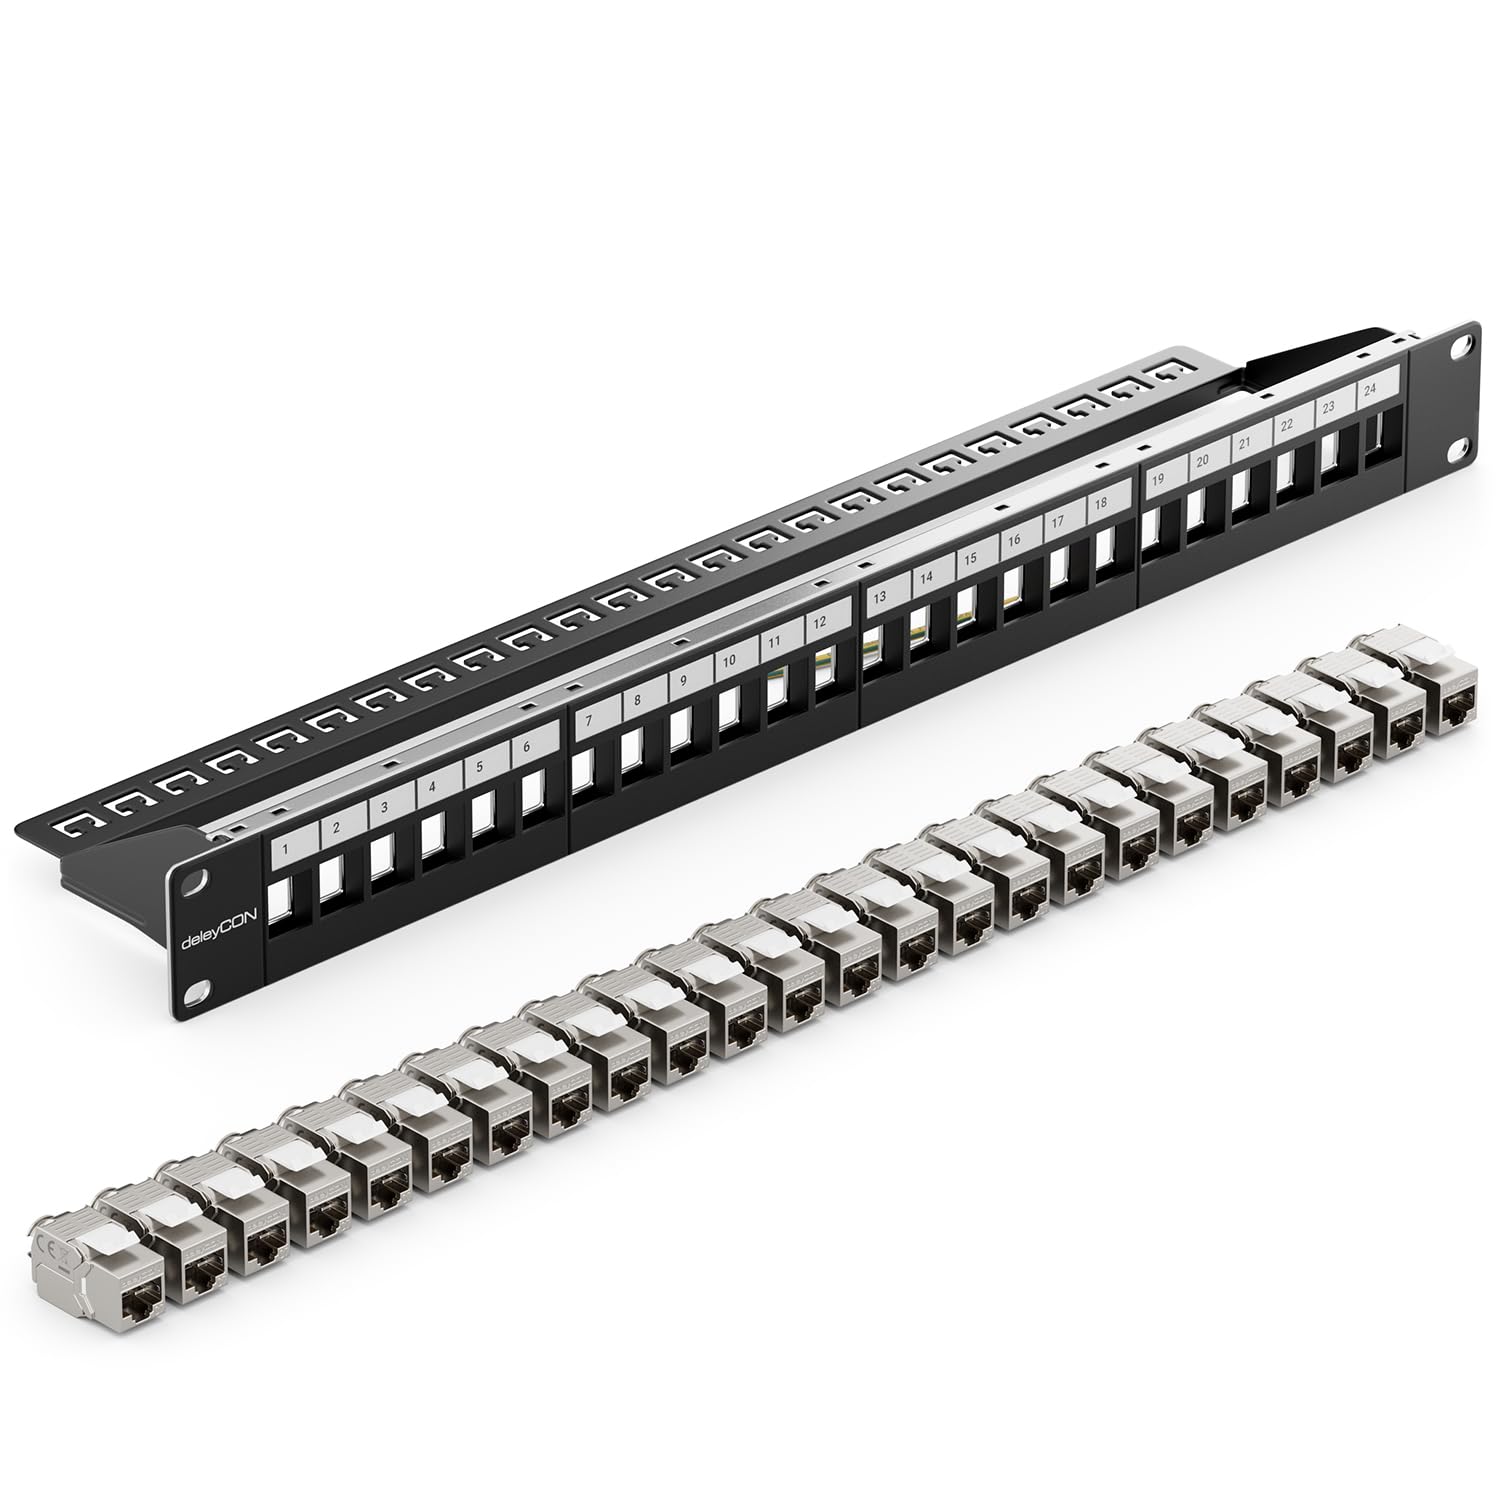
Image: The deleyCON 24-Port Patch Panel fully assembled with keystone modules, ready for patch cable connections.
Maintenance
Regular maintenance ensures the longevity and optimal performance of your patch panel.
- Cleaning: Periodically clean the exterior of the patch panel and the RJ45 ports with a soft, dry, lint-free cloth. Avoid using liquid cleaners directly on the ports.
- Connection Check: Occasionally inspect all cable connections (both front patch cables and rear installation cables) to ensure they are secure and free from damage.
- Cable Management: Re-organize cables as needed to maintain good airflow and prevent strain on connections.
Troubleshooting
If you encounter issues with your network connection through the patch panel, consider the following:
| Problem | Possible Cause | Solution |
|---|---|---|
| No network connection | Loose cable connection, incorrect wiring, faulty cable. |
|
| Slow network speed | Cable damage, interference, incorrect cable category. |
|
| Keystone module not seating correctly | Misalignment, obstruction. |
|
If problems persist after attempting these solutions, please contact deleyCON customer support.
Specifications
Key technical specifications for the deleyCON 24-Port CAT 7 Patch Panel Set:
- Model Number: MK6014
- Ports: 24x RJ45 (via Keystone Modules)
- Category: CAT 7 (Keystone Modules)
- Transmission Speed: Up to 10 Gbit/s
- Bandwidth: Up to 600 MHz
- Housing: Fully shielded metal housing
- Rack Compatibility: 19-inch rack installation
- Height Units: 1 HE (1U)
- Front Connection: 24x Keystone module sockets
- Rear Connection (Keystone): LSA+ insulation displacement terminal, 8-pole
- Wire Gauge (Keystone): Solid conductor / solid conductor AWG 22-25
- Color Coding (Keystone): TIA568A / TIA568B
- Product Dimensions: 48 x 10.5 x 4.5 cm
- Weight: 1.02 kg
- Color: Black (RAL 9005 jet black)
- Manufacturer: deleyCON
- Country of Origin: China
- First Available Date: June 22, 2023
Compatible Devices: LAN connection cables, network cables, Ethernet cables, RJ45 cables, twisted pair cables, data cables, Cat cables (category cable), network connection cables, UTP/FTP/STP cables, Ethernet patch cables, home networks, NAS devices, switches, modems, routers, PowerLAN, network printers, servers, laptops, personal computers, televisions, DSL routers, Fritzbox, VoIP phones, PoE devices, network cameras, network connections, control cabinets, Smart TVs, game consoles, access points, desktop PCs, internet radios, media players, network components, notebooks, receivers, surround amplifiers, TV boxes, TV decoders, TV receivers, video game consoles, and more.
Warranty Information
For detailed warranty information regarding your deleyCON 24-Port CAT 7 Patch Panel Set, please refer to the warranty card included with your product or visit the official deleyCON website. Warranty terms and conditions may vary by region and product type.
Customer Support
If you require technical assistance, have questions about your product, or need to report an issue, please contact deleyCON customer support. You can typically find contact information (phone, email, or support portal) on the official deleyCON website or in the product packaging.
Manufacturer: deleyCON
Website: www.deleycon.com (Please check for the correct regional website)