1. Introduction
This manual provides instructions for the Cooler Master MasterLiquid 240L Core liquid CPU cooler. This advanced cooling solution features a redesigned Gen S dual-chamber pump for improved water flow and pressure, a customized copper base for efficient heat transfer, and an enlarged radiator surface for enhanced cooling performance. It includes newly designed 120mm fans and high-quality CryoFuze thermal paste for optimal thermal conductivity.
Please read this manual thoroughly before installation and operation to ensure proper use and to prevent damage to the product or your system.
2. Safety Information
Observe the following safety guidelines to prevent injury or damage:
- Ensure your computer system is powered off and unplugged from the wall outlet before installation or maintenance.
- Handle components with care to avoid damage.
- Do not open the liquid cooler's pump or radiator; it is a sealed unit.
- Keep the product away from water or other liquids.
- Use only the provided accessories and mounting hardware.
- Consult a qualified technician if you are unsure about any installation steps.
3. Package Contents
Verify that all components are present in the package:
- MasterLiquid 240L Core AIO Liquid Cooler (Radiator, Pump/Cold Plate, Tubing)
- 2x 120mm Fans
- Mounting Hardware for Intel and AMD Sockets
- CryoFuze Thermal Paste
- Fan Splitter Cable (if included)
- User Manual
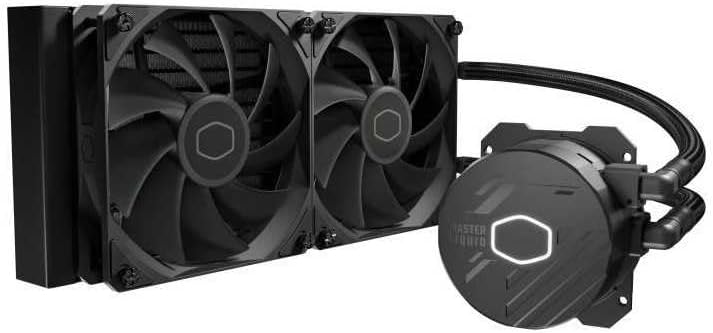
Image 1: Overview of the Cooler Master MasterLiquid 240L Core AIO Liquid Cooler, showing the radiator, two attached fans, and the pump/cold plate unit connected by tubing.
4. Setup and Installation
Follow these general steps for installing your liquid CPU cooler. Refer to the detailed diagrams in the included physical manual for specific socket instructions.
4.1 Prepare the Motherboard
- Install the appropriate backplate for your CPU socket (Intel or AMD) onto the rear of the motherboard.
- Secure the standoffs through the motherboard mounting holes from the front.
4.2 Mount the Radiator and Fans
- Attach the two 120mm fans to the radiator using the long screws provided. Ensure the fan airflow direction is optimal for your case (typically exhausting air out or intaking air in).
- Mount the radiator assembly to an available 240mm fan mount location in your PC case (e.g., top, front). Use the shorter screws to secure the radiator to the case.
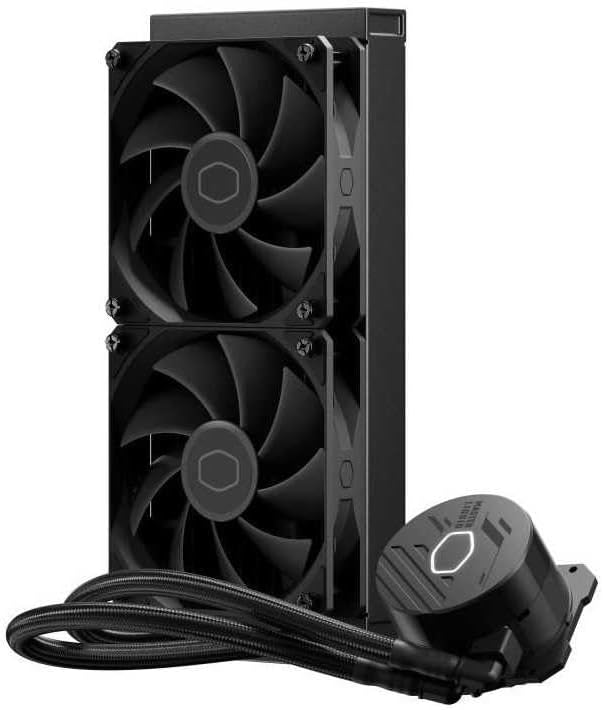
Image 2: Side view of the radiator with two 120mm fans mounted, illustrating the compact design for case installation.

Image 3: A detailed view of one of the 120mm fans included with the cooler, highlighting its blade design and mounting points.
4.3 Install the Pump/Cold Plate
- Clean the CPU surface with isopropyl alcohol to remove any old thermal paste or residue.
- Apply a small amount of the included CryoFuze thermal paste to the center of the CPU's integrated heat spreader (IHS). A pea-sized dot is usually sufficient.
- Align the pump/cold plate bracket with the standoffs on the motherboard.
- Gently place the pump/cold plate onto the CPU, ensuring even contact.
- Secure the pump/cold plate with the thumb screws or nuts, tightening them in a cross pattern until snug. Do not overtighten.

Image 4: A close-up of the pump/cold plate unit, featuring the illuminated Cooler Master logo and the 'MasterLiquid' branding.
4.4 Connect Cables
- Connect the pump's 3-pin power cable to the CPU_FAN or AIO_PUMP header on your motherboard.
- Connect the fan cables to the fan splitter cable (if used), then connect the splitter to a CPU_OPT or SYS_FAN header on your motherboard. Alternatively, connect fans directly to available fan headers.
5. Operating Instructions
Once installed, the MasterLiquid 240L Core operates automatically. Ensure your motherboard's BIOS/UEFI settings are configured to allow the CPU_FAN or AIO_PUMP header to run at full speed or a consistent high speed to ensure adequate pump operation. Fan speeds can be adjusted via BIOS/UEFI or motherboard software for optimal balance between cooling performance and noise levels.
6. Maintenance
The MasterLiquid 240L Core is a sealed, maintenance-free unit. However, periodic cleaning is recommended:
- Dust Removal: Every 3-6 months, use compressed air to clean dust from the radiator fins and fan blades. Ensure fans are not spinning during cleaning to prevent damage.
- Cable Management: Periodically check that all cables are securely connected and not interfering with fan operation.
- Visual Inspection: Occasionally inspect the tubing and connections for any signs of leaks or damage.
7. Troubleshooting
If you encounter issues with your liquid cooler, consider the following:
7.1 High CPU Temperatures
- Check Pump Connection: Ensure the pump's power cable is securely connected to the CPU_FAN or AIO_PUMP header and receiving power. Verify BIOS settings.
- Thermal Paste: Confirm that thermal paste was applied correctly and evenly between the CPU and cold plate. Reapply if necessary.
- Cold Plate Contact: Ensure the cold plate is making firm, even contact with the CPU. Tighten mounting screws in a cross pattern.
- Fan Operation: Verify that both fans are spinning correctly and are connected to a power source.
- Radiator Airflow: Ensure the radiator fins are not clogged with dust, restricting airflow. Clean if necessary.
7.2 Excessive Noise
- Fan Noise: Check if fan speeds are set too high. Adjust fan curves in BIOS/UEFI or software. Ensure no cables are hitting fan blades.
- Pump Noise: A slight hum from the pump is normal. Excessive gurgling or grinding might indicate air bubbles. Gently tilt your PC case to help dislodge air bubbles. Ensure the pump is running at a consistent speed.
7.3 Leaks
- If you observe any liquid leakage, immediately power off your system and unplug it. Contact Cooler Master support. Do not attempt to repair the unit yourself.
8. Specifications
| Feature | Specification |
|---|---|
| Brand | Cooler Master |
| Model Number | MLW-D24M-A17PK-R1 |
| Color | Black |
| Cooling Method | Water |
| Compatible Devices | Computer |
| Radiator Dimensions (L x W x H) | 27.7 x 12 x 2.7 cm |
| Fan Size | 120mm |
| Max Fan Rotation Speed | 1800 RPM |
| Noise Level | 27.2 Decibels |
| Power Connector Type | 3-pin (Pump) |
| Voltage | 12 Volts |
| Wattage | 7.2 Watts |
| Material (Cold Plate) | Copper |
9. Warranty and Support
Cooler Master products are backed by a limited warranty. For specific warranty terms and conditions, please refer to the warranty card included with your product or visit the official Cooler Master website. For technical support, product registration, or to inquire about replacement parts, please visit www.coolermaster.com/support.


