
AMZCNC Standard US 12AWG to 2/0AWG
Contents
AMZCNC Hydraulic Crimping Tool User Manual
Model: Standard US 12AWG to 2/0AWG
1. Product Overview
The AMZCNC Hydraulic Crimping Tool is designed for efficient and secure crimping of electrical cables, particularly for battery and welding cables, power wires, and general electrical applications. It features a hydraulic mechanism for powerful crimping with minimal effort, ensuring reliable connections that comply with UL or SAE standards.
This tool kit includes 9 sets of American Standard dies, ranging from 12 AWG to 2/0 AWG, providing versatility for various wire gauges. Its ergonomic design and 360° rotatable head enhance usability and access in confined spaces.

Image: The AMZCNC Hydraulic Crimping Tool shown with its included American Standard dies and examples of crimped wires.
2. Safety Information
WARNING:
- Always read the instruction manual thoroughly before using the tool.
- Do not use the tool without the appropriate dies installed.
- Always wear proper personal protective equipment, including safety glasses and gloves, to protect yourself from potential hazards.
- Ensure the workpiece is stable and secure before crimping.
- Do not exceed the rated crimping force of 8 US TON.
- Keep hands and fingers clear of the crimping jaws during operation.
- Store the tool in its case in a dry, secure place away from children and unauthorized users.
3. Package Contents
Verify that all items are present in your package:
- 1 x AMZCNC Hydraulic Crimping Tool
- 9 Sets of American Standard Dies (12 AWG, 10 AWG, 8 AWG, 6 AWG, 4 AWG, 2 AWG, 1 AWG, 1/0 AWG, 2/0 AWG)
- 1 x Durable Storage Case
- 1 x Instruction Manual (this document)
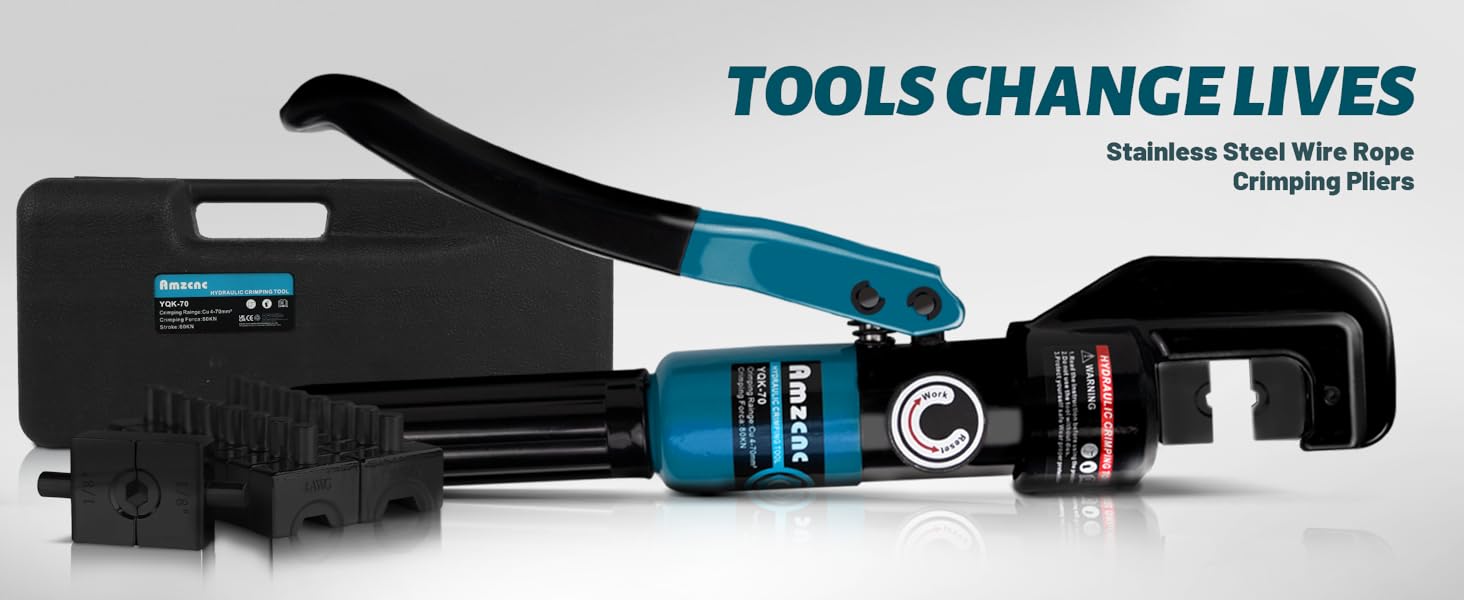
Image: The hydraulic crimping tool and its complete set of dies neatly organized within the included storage case.

Image: A detailed view of the nine pairs of American Standard dies, each clearly marked with its corresponding AWG size.
4. Setup
- Select the Correct Die: Identify the appropriate die size (AWG) that matches the cable and connector you intend to crimp. The dies are clearly marked.
- Insert Dies: Open the crimping head by rotating the "Work/Reset" knob to the "Reset" position (if not already there) and pulling the movable jaw open. Carefully insert the two halves of the selected die into the crimping head, ensuring they are seated correctly.

Image: Step-by-step visual guide demonstrating the proper insertion of the two die halves into the crimping tool's head.
- Close Crimping Head: Push the movable jaw back into place until it clicks or is securely closed around the dies.
5. Operating Instructions
Follow these steps for effective crimping:
- Prepare Cable and Connector: Strip the insulation from your cable to the appropriate length for your chosen connector. Insert the bare wire into the connector barrel.
- Position for Crimping: Place the cable and connector into the selected die opening in the crimping head. Ensure the connector is centered within the die. The tool's head can rotate 360° to facilitate access in various working conditions.

Image: A detailed view of the crimping head, highlighting its ability to rotate 360 degrees for optimal positioning during crimping.
- Engage Hydraulic Mechanism: Rotate the "Work/Reset" knob to the "Work" position. This engages the hydraulic pump.

Image: A close-up shot illustrating the rotation of the "Work/Reset" knob to the "Work" setting, preparing the tool for crimping.
- Perform Crimping: Pump the handle repeatedly until the dies fully close and the crimp is complete. You will feel increased resistance as the crimp forms. Continue pumping until the pressure relief valve activates (a slight click or release of pressure), indicating maximum crimping force has been applied.

Image: Visual representation of the crimping action, with the user pumping the handle to apply hydraulic pressure.
- Release Pressure: Once the crimp is complete, rotate the "Work/Reset" knob to the "Reset" position. This will release the hydraulic pressure and allow the dies to open.

Image: Depiction of the final step in the crimping process, showing the knob being turned to the "Reset" position to release pressure and open the dies.
- Remove Crimped Connector: Remove the securely crimped cable and connector from the tool.
Video Demonstration:
Video: A demonstration of the AMZCNC Hydraulic Crimping Tool in use, showing die insertion, operation, and the crimping process. (Source: Seller NBMAZAK)
6. Maintenance
- Cleaning: After each use, wipe down the tool and dies with a clean, dry cloth to remove any dirt, debris, or metal shavings.
- Lubrication: Periodically apply a light coat of machine oil to the moving parts of the crimping head and dies to ensure smooth operation and prevent rust.
- Storage: Store the tool and all dies in the provided durable storage case in a dry environment to protect them from moisture and damage.
- Inspection: Regularly inspect the dies for wear or damage. Replace any worn or damaged dies to ensure consistent and reliable crimps. Check the tool for any signs of leaks or damage to the hydraulic system.
7. Troubleshooting
| Problem | Possible Cause | Solution |
|---|---|---|
| Tool does not crimp fully or pressure is weak. |
|
|
| Dies do not open after crimping. |
|
|
| Crimped connection is loose or deformed. |
|
|
8. Specifications
| Feature | Detail |
|---|---|
| Brand | AMZCNC |
| Model Number | Standard US 12AWG to 2/0AWG |
| Crimping Range | 12 AWG - 2/0 AWG (American Standard) |
| Rated Crimping Force | 8 US TON |
| Stroke | 0.5 Inch |
| Included Dies | 9 Sets (12, 10, 8, 6, 4, 2, 1, 1/0, 2/0 AWG) |
| Head Rotation | 360° |
| Tool Material | Alloy Steel |
| Handle Material | Carbon Steel |
| Grip Type | Ergonomic |
| Color | Cyan |
| Item Weight | 4 Pounds |
| Product Dimensions | 12.6"L x 5.5"W |
| Power Source | Manual Hydraulic (No Batteries Required) |
| Country of Origin | China |

Image: A visual representation of the tool alongside a table detailing its key specifications and parameters.
9. Warranty and Support
The AMZCNC Hydraulic Crimping Tool comes with a one-year warranty from the date of purchase.
If you encounter any issues or require assistance with your product, please contact AMZCNC customer service. You can reach us for repair or replacement if there is any fault with the tool within the warranty period.
For further support, please visit the official AMZCNC store on Amazon: AMZCNC Store
Ask a question about this manual
Ask about setup, troubleshooting, compatibility, parts, safety, or missing instructions. Manuals+ will review the question and use this page’s manual context to help answer it.