
JONR ED12
JONR ED12 Wet and Dry Vacuum Cleaner Instruction Manual
Model: ED12
1. Introduction
Thank you for choosing the JONR ED12 Wet and Dry Vacuum Cleaner. This manual provides essential information for the safe and efficient operation, maintenance, and troubleshooting of your new appliance. Please read this manual thoroughly before first use and keep it for future reference.
2. Important Safety Instructions
WARNING: To reduce the risk of fire, electric shock, or injury, read all instructions before using this appliance.
- Always operate the appliance on a dry, level surface.
- Do not immerse the appliance in water or other liquids.
- Keep hair, loose clothing, fingers, and all parts of body away from openings and moving parts.
- Use only as described in this manual. Use only manufacturer's recommended attachments.
- Do not use with damaged cord or plug. If appliance is not working as it should, has been dropped, damaged, left outdoors, or dropped into water, return it to a service center.
- Do not pull or carry by cord, use cord as a handle, close a door on cord, or pull cord around sharp edges or corners. Do not run appliance over cord. Keep cord away from heated surfaces.
- Do not unplug by pulling on cord. To unplug, grasp the plug, not the cord.
- Do not handle plug or appliance with wet hands.
- Do not put any object into openings. Do not use with any opening blocked; keep free of dust, lint, hair, and anything that may reduce air flow.
- Turn off all controls before unplugging.
- Use extra care when cleaning on stairs.
- Do not use to pick up flammable or combustible liquids, such as gasoline, or use in areas where they may be present.
- Do not pick up anything that is burning or smoking, such as cigarettes, matches, or hot ashes.
- Do not use without filters in place.
- This appliance is for household use only.
3. Package Contents
Please check the package contents to ensure all items are present and in good condition:
- Main Body x 1
- Power Adapter x 1
- Cleaning Brush x 1
- Charging Dock x 1
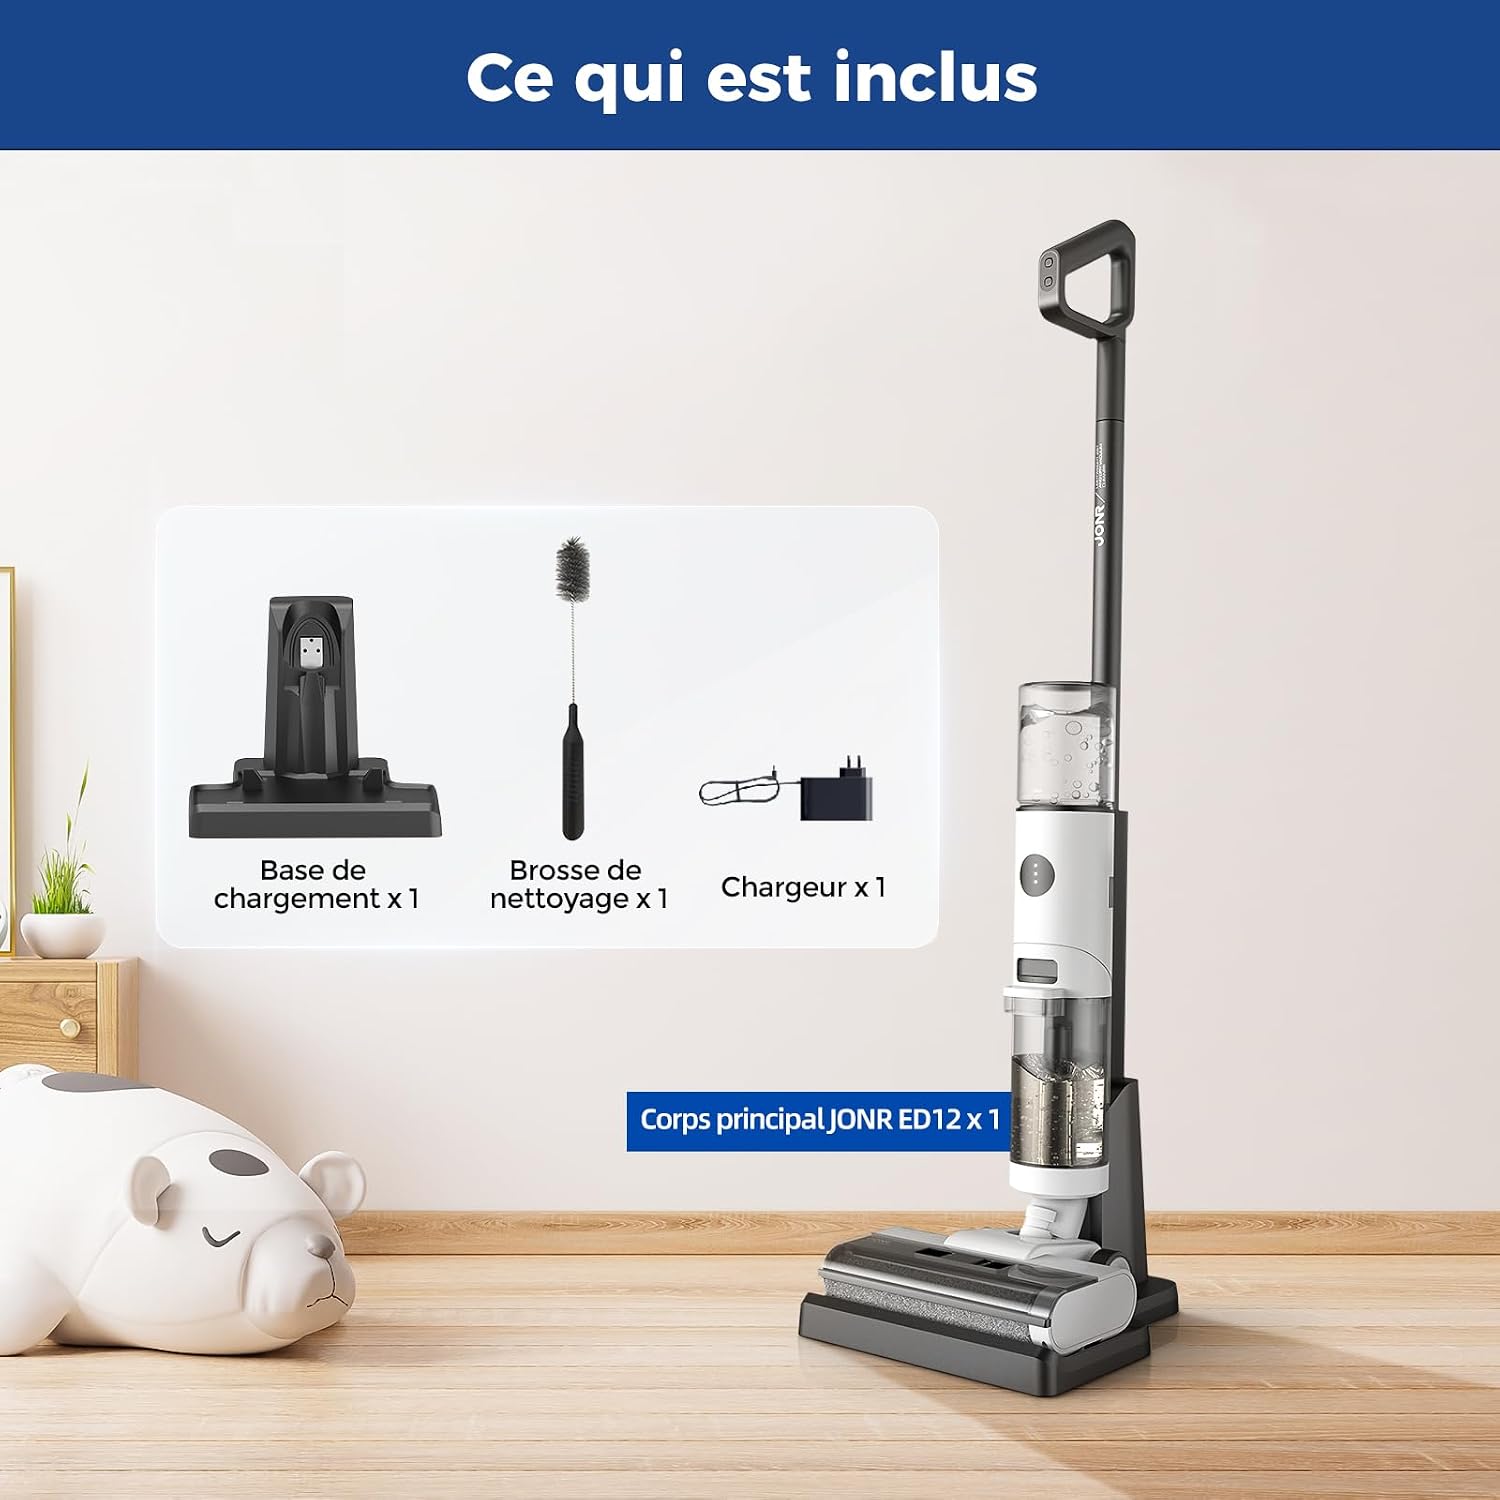
Figure 3.1: Illustration of the JONR ED12 vacuum cleaner and its included accessories: the main unit, charging dock, power adapter, and cleaning brush.
4. Product Overview
Familiarize yourself with the components of your JONR ED12 Wet and Dry Vacuum Cleaner:

Figure 4.1: The JONR ED12 Wet and Dry Vacuum Cleaner with its charging dock and cleaning brush. The image highlights the sleek design and primary components.
4.1 Key Features
- Enhanced Edge Cleaning: Cleans edges and corners with precision, reaching within 0.1 inches.
- Large Water Tanks: Features an 850ml clean water tank and a 450ml dirty water tank, reducing the frequency of refills and emptying.
- 35-Second Self-Cleaning: Advanced self-cleaning function eliminates manual brush washing.
- Anti-Tangle Design: Effectively captures hair and pet fur without tangling, ensuring odor-free cleaning.
- Efficient 3-in-1 Cleaning: Vacuums, mops, and wipes simultaneously, saving time and energy.
- Lightweight and Self-Propelled: Weighing 3.6 kg with automatic forward propulsion for effortless cleaning.
- Low Noise Operation: Operates at a low noise level (75 dB), minimizing disturbance.
- Versatile Hard Floor Cleaning: Suitable for various sealed hard floors including wood, tile, and more.

Figure 4.2: Close-up view demonstrating the JONR ED12's edge cleaning capability, showing its ability to clean close to walls and into corners.

Figure 4.3: The JONR ED12 in action, illustrating its dual-tank system that ensures cleaning is always done with fresh water, preventing the spread of dirty water.
5. Setup and First Use
5.1 Assembly
- Carefully unpack all components from the box.
- Insert the handle into the main body until it clicks securely into place.
- Place the charging dock on a flat, stable surface near a power outlet.
- Connect the power adapter to the charging dock and plug it into the wall outlet.
5.2 Charging the Battery
Before first use, fully charge the JONR ED12. A full charge takes approximately [Insert Charging Time if available, otherwise omit].
- Place the vacuum cleaner onto the charging dock. Ensure the charging contacts align.
- The LED screen on the vacuum will indicate charging status.
- Once fully charged, the indicator will change (e.g., turn solid green or show 100%).
5.3 Filling the Clean Water Tank
- Locate the clean water tank (850ml capacity) on the main body of the vacuum.
- Remove the tank from the unit.
- Open the tank cap and fill with clean tap water. For optimal cleaning, you may add a small amount of non-foaming, floor-cleaning solution specifically designed for wet vacuums. Do not exceed the MAX fill line.
- Securely close the tank cap and reinsert the tank into the vacuum until it clicks.
6. Operation
The JONR ED12 is designed for efficient wet and dry cleaning of sealed hard floors.
6.1 Powering On/Off
- To turn on the vacuum, press the ON/OFF button located on the handle.
- To turn off, press the ON/OFF button again.

Figure 6.1: Diagram showing the location of the ON/OFF button and the automatic cleaning mode button on the handle of the JONR ED12.
6.2 Cleaning Modes
The JONR ED12 offers two cleaning modes:
- Standard Auto Mode: Ideal for everyday cleaning and light spills. The vacuum automatically adjusts suction and water flow.
- Power Max Mode: For tougher messes and heavily soiled areas, providing maximum suction and water output.
To switch between modes, press the Mode button on the handle.

Figure 6.2: Visual comparison of the JONR ED12 operating in Automatic Mode for general cleaning and Max Mode for more intensive cleaning of spills.
6.3 Cleaning Procedure
- Ensure the clean water tank is filled and the dirty water tank is empty.
- Turn on the vacuum and select the desired cleaning mode.
- Tilt the vacuum back to engage the brush roll and begin cleaning. The self-propelled feature will assist in movement.
- Move the vacuum slowly over the floor, allowing it to vacuum, mop, and wipe simultaneously.
- For best results, overlap passes slightly.
- The vacuum is designed to leave minimal water residue, allowing for quick drying.

Figure 6.3: The JONR ED12 demonstrating its ability to clean various types of sealed hard floors, including wood, tile, and stone, effectively removing different kinds of spills and debris.
7. Maintenance
Regular maintenance ensures optimal performance and extends the lifespan of your JONR ED12.
7.1 Self-Cleaning Function
After each use, it is recommended to run the self-cleaning cycle:
- Place the vacuum cleaner back on the charging dock.
- Ensure there is sufficient clean water in the clean water tank.
- Press the self-cleaning button (refer to Figure 6.1 for location).
- The 35-second self-cleaning cycle will begin, cleaning the brush roll and internal pathways.
- Once complete, empty the dirty water tank.

Figure 7.1: A diagram illustrating the automatic self-cleaning process of the JONR ED12, showing how clean water flushes through the system to clean the brush and is then collected as dirty water.
7.2 Emptying the Dirty Water Tank
Empty the dirty water tank after each use or when the MAX fill line is reached.
- Remove the dirty water tank (450ml capacity) from the main body.
- Open the tank and carefully pour out the dirty water and debris.
- Rinse the tank thoroughly with clean water.
- Ensure the filter inside the dirty water tank is clean. Rinse if necessary.
- Allow the tank and filter to air dry completely before reassembling.
7.3 Cleaning the Brush Roll
While the self-cleaning function is effective, occasional manual cleaning of the brush roll may be necessary, especially if there is excessive hair or debris.
- Turn off and unplug the vacuum.
- Remove the brush roll cover.
- Remove the brush roll. Use the provided cleaning brush to remove any tangled hair or debris.
- Rinse the brush roll under running water.
- Allow the brush roll to air dry completely before reinserting.
7.4 Filter Maintenance
The HEPA filter should be cleaned regularly and replaced periodically to maintain suction performance.
- Remove the filter from the dirty water tank.
- Tap the filter gently to remove loose debris.
- Rinse the filter under cool running water. Do not use detergent.
- Allow the filter to air dry completely for at least 24 hours before reinserting.
- Replace the filter every 3-6 months, depending on usage.
8. Troubleshooting
If you encounter issues with your JONR ED12, please refer to the following table before contacting customer support.
| Problem | Possible Cause | Solution |
|---|---|---|
| Vacuum does not turn on. | Battery is low or depleted. | Charge the vacuum fully. |
| No suction or weak suction. | Dirty water tank is full. Brush roll is tangled or blocked. Filter is clogged. Clean water tank is empty. |
Empty the dirty water tank. Clean the brush roll. Clean or replace the HEPA filter. Refill the clean water tank. |
| Water leakage. | Water tanks not properly installed. Tank caps not securely closed. Damaged tank. |
Ensure both clean and dirty water tanks are correctly seated and clicked into place. Check that tank caps are tightly sealed. Contact customer support if a tank is damaged. |
| Poor cleaning performance. | Insufficient water/solution. Brush roll is dirty. Incorrect cleaning mode. |
Refill clean water tank. Clean the brush roll. Switch to Power Max mode for tougher messes. |
| Self-cleaning function not working. | Insufficient clean water. Vacuum not properly seated on charging dock. |
Ensure clean water tank is filled. Re-seat the vacuum firmly on the charging dock. |
9. Specifications
| Feature | Detail |
|---|---|
| Model Number | ED12 |
| Brand | JONR |
| Color | Ed12- Black & White |
| Product Dimensions (L x W x H) | 28.19 x 27 x 111.99 cm |
| Item Weight | 3.63 Kilograms (8 Pounds) |
| Power | 200 Watts |
| Voltage | 22.2 Volts (DC) |
| Noise Level | 75 dB |
| Runtime | 30 minutes |
| Special Feature | Self-cleaning |
| Filter Type | HEPA Filter |
| Surface Recommendation | Hard floors |
| Power Source | Battery Powered |
| Clean Water Tank Capacity | 850 ml |
| Dirty Water Tank Capacity | 450 ml |
10. Warranty and Support
JONR products are manufactured to the highest quality standards. For warranty information, technical support, or service inquiries, please refer to the warranty card included with your product or visit the official JONR website. Keep your purchase receipt as proof of purchase.
For further assistance, you may contact JONR customer service through their official channels.
Related documentsED12


Ask a question about this manual
Ask about setup, troubleshooting, compatibility, parts, safety, or missing instructions. Manuals+ will review the question and use this page’s manual context to help answer it.