
1. Introduction
Thank you for choosing the GGM Gastro BKZG1269N Beer Cooler with Tap. This professional-grade appliance is designed for efficient cooling and dispensing of draft beer, accommodating two 50-liter kegs. This manual provides essential information for the safe installation, operation, and maintenance of your unit. Please read it thoroughly before use and retain it for future reference.
2. Safety Instructions
To ensure safe operation and prevent damage, observe the following safety guidelines:
- Electrical Safety: Ensure the power supply matches the unit's requirements (220-240V, 50Hz). Always connect to a grounded outlet. Do not operate with a damaged power cord or plug. Disconnect power before cleaning or maintenance.
- Refrigerant (R290): This unit uses R290 (Propane) as a refrigerant, which is flammable. Do not damage the refrigerant circuit. Only qualified personnel should service the unit. Ensure adequate ventilation during installation and operation.
- Ventilation: Maintain sufficient clearance around the unit for proper airflow to the condenser. Blocked ventilation can lead to overheating and reduced efficiency.
- Placement: Install the unit on a stable, level surface capable of supporting its weight (approx. 100 kg empty, plus kegs). Avoid direct sunlight or heat sources.
- Cleaning: Use mild, non-abrasive cleaning agents. Do not spray water directly onto electrical components.
- Children and Unauthorized Personnel: Keep children and unauthorized individuals away from the appliance.
- Intended Use: This appliance is designed for cooling and dispensing beverages. Do not use it for storing hazardous materials or for purposes other than its intended use.
3. Product Overview
The GGM Gastro BKZG1269N is a robust and efficient beer cooler designed for commercial use. It features a durable construction and user-friendly design.
Key Features:
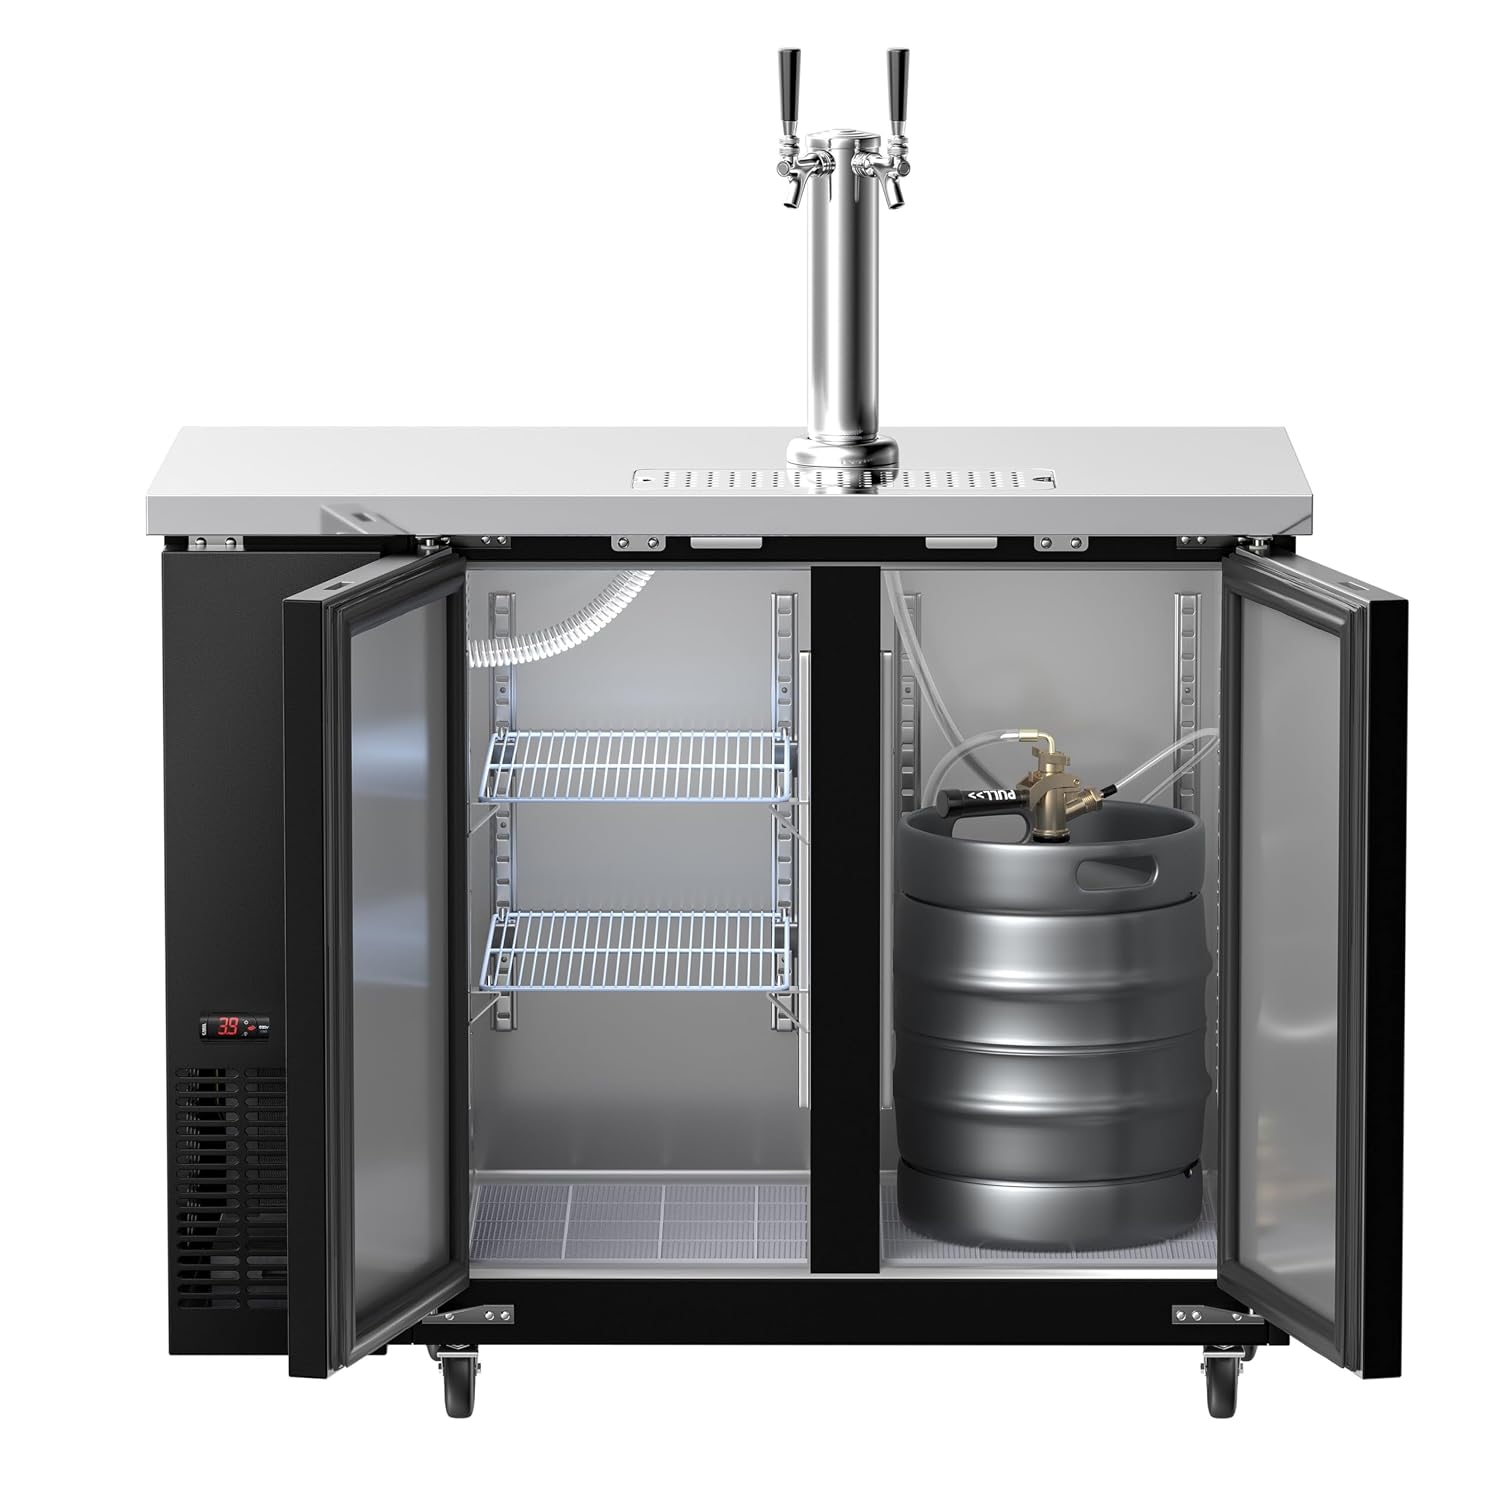
- Capacity for two 50-liter kegs (total 335 liters).
- Two self-closing doors with integrated locks.
- LED interior lighting.
- Integrated drip tray with drain on the stainless steel work surface.
- Black painted steel body with stainless steel interior.
- Digital thermostat for temperature control (0°C to 5°C).
- Forced-air cooling system with side-mounted evaporator.
- Environmentally friendly R290 refrigerant.
Components:


4. Setup
The unit is delivered in an assembled state. Follow these steps for initial setup:
4.1 Unpacking and Inspection
- Carefully remove all packaging materials.
- Inspect the unit for any shipping damage. Report any damage to the carrier and supplier immediately.
- Remove all protective films and tapes from the surfaces.
4.2 Placement
- Place the beer cooler on a firm, level surface. Use the adjustable feet (if present) or casters to ensure stability.
- Ensure adequate ventilation. Maintain a minimum clearance of 10 cm (4 inches) from walls or other objects on all sides, especially where the condenser is located (typically the side with the ventilation grille).
- Avoid placing the unit near heat-generating appliances or in direct sunlight to optimize cooling performance and energy efficiency.
4.3 Electrical Connection
- Before plugging in, allow the unit to stand upright for at least 2-4 hours to allow the refrigerant to settle.
- Connect the power cord to a dedicated, grounded electrical outlet (220-240V, 50Hz).
4.4 Initial Cleaning
- Before first use, clean the interior and exterior surfaces with a mild detergent and a soft cloth. Rinse with clean water and dry thoroughly.
- Clean the drip tray and its grid.
4.5 Keg and Tap Installation
- Place the two provided storage racks inside the cooler if desired.
- Carefully place up to two 50-liter kegs inside the cooler.
- Connect the beer lines from the tap tower to the keg couplers.
- Connect the CO2 gas lines to the keg couplers. Note: A pressure reducer for the gas bottle is not included and must be acquired separately.
- Ensure all connections are secure and leak-free.
5. Operating Instructions
5.1 Powering On/Off
- Locate the On/Off switch on the unit (typically near the control panel).
- Press the switch to turn the unit ON. The digital display will illuminate.
- To turn OFF, press the switch again.
5.2 Temperature Adjustment
- The unit features a digital thermostat for precise temperature control.
- The factory-set temperature range is typically between 0°C and 5°C.
- Refer to the specific digital controller manual (if provided separately) for detailed instructions on adjusting the temperature settings. Generally, there are 'Set' or 'Mode' buttons and 'Up'/'Down' arrows to modify the set point.
5.3 Dispensing Beer
- Ensure the CO2 gas supply is connected and the pressure is set correctly (refer to your keg supplier's recommendations).
- Place a glass under the tap.
- Pull the tap handle forward to dispense beer.
- Push the tap handle back to close the tap.
- After dispensing, ensure the drip tray is not overflowing.

6. Maintenance
Regular maintenance ensures optimal performance and extends the lifespan of your beer cooler.
6.1 Daily/Weekly Cleaning
- Exterior: Wipe down the exterior surfaces with a damp cloth and mild detergent. Dry thoroughly.
- Interior: Clean the interior with a mild, food-safe cleaner. Remove any spills immediately.
- Drip Tray: Empty and clean the integrated drip tray regularly to prevent bacterial growth and odors. Remove the perforated grid for thorough cleaning.
- Tap Tower and Faucets: Clean the exterior of the tap tower and faucets. For internal cleaning of beer lines, refer to specialized beer line cleaning procedures.
6.2 Monthly/Quarterly Maintenance
- Condenser Coil Cleaning: The condenser coil (located behind the side ventilation grille) can accumulate dust and debris, reducing cooling efficiency. Disconnect power, then use a brush or vacuum cleaner to gently remove dust from the fins. Caution: Do not bend the fins.
- Door Seals: Inspect door gaskets for cracks or damage. Clean them with warm, soapy water to maintain a tight seal. Replace if damaged to prevent cold air loss.
- Drainage: Ensure the drain for the drip tray is clear and free of blockages.

7. Troubleshooting
Before contacting service, check the following common issues:
| Problem | Possible Cause | Solution |
|---|---|---|
| Unit does not power on | No power supply; Power cord unplugged; On/Off switch off; Circuit breaker tripped. | Check power outlet; Ensure cord is securely plugged in; Turn On/Off switch to ON; Reset circuit breaker. |
| Unit not cooling sufficiently | Temperature set too high; Condenser coil dirty; Poor ventilation; Door not sealed properly; Ambient temperature too high. | Adjust thermostat to a lower setting; Clean condenser coil; Ensure adequate clearance around unit; Check and clean door seals; Relocate unit if ambient temperature is excessive. |
| Beer not dispensing or dispensing slowly | CO2 tank empty or turned off; Pressure reducer incorrect or faulty; Beer lines clogged; Keg empty. | Check CO2 tank and ensure valve is open; Verify pressure settings; Clean beer lines; Replace keg. |
| Excessive noise | Unit not level; Fan obstruction; Loose components. | Ensure unit is level; Check for obstructions around fan; Contact service if noise persists. |
If the problem persists after attempting these solutions, please contact GGM Gastro customer service or a qualified technician.
8. Specifications
Detailed technical specifications for the GGM Gastro BKZG1269N Beer Cooler:
| Feature | Detail |
|---|---|
| Model Number | BKZG1269N |
| Brand | GGM Gastro |
| Product Dimensions (W x D x H) | 1240 mm x 620 mm x 1307 mm |
| Working Height | 905 mm |
| Capacity | 335 Liters (accommodates 2x 50-liter kegs) |
| Weight | 91 kg (empty) |
| Temperature Range | 0°C to 5°C (adjustable via digital thermostat) |
| Cooling Method | Forced-air cooling with side-mounted evaporator |
| Refrigerant | R290 (Propane) |
| Power Supply | 220-240V, 50Hz |
| Power Consumption | 223 Watts |
| Number of Doors | 2 (self-closing with locks) |
| Interior Material | Stainless Steel |
| Exterior Material | Black painted steel |
| Special Features | LED interior lighting, integrated drip tray with drain, adjustable temperature control |

9. Warranty and Support
For warranty information, technical support, or service inquiries, please contact your retailer or GGM Gastro directly. Ensure you have your model number (BKZG1269N) and purchase date available when contacting support.
You can visit the GGM Gastro store for more information: GGM Gastro Store
