
1. Introduction
This manual provides essential instructions for the safe and efficient operation, setup, maintenance, and troubleshooting of your OMTech 90W CO2 Laser Engraver with Water Chiller. Please read this manual thoroughly before operating the machine to ensure proper usage and to prevent damage or injury.
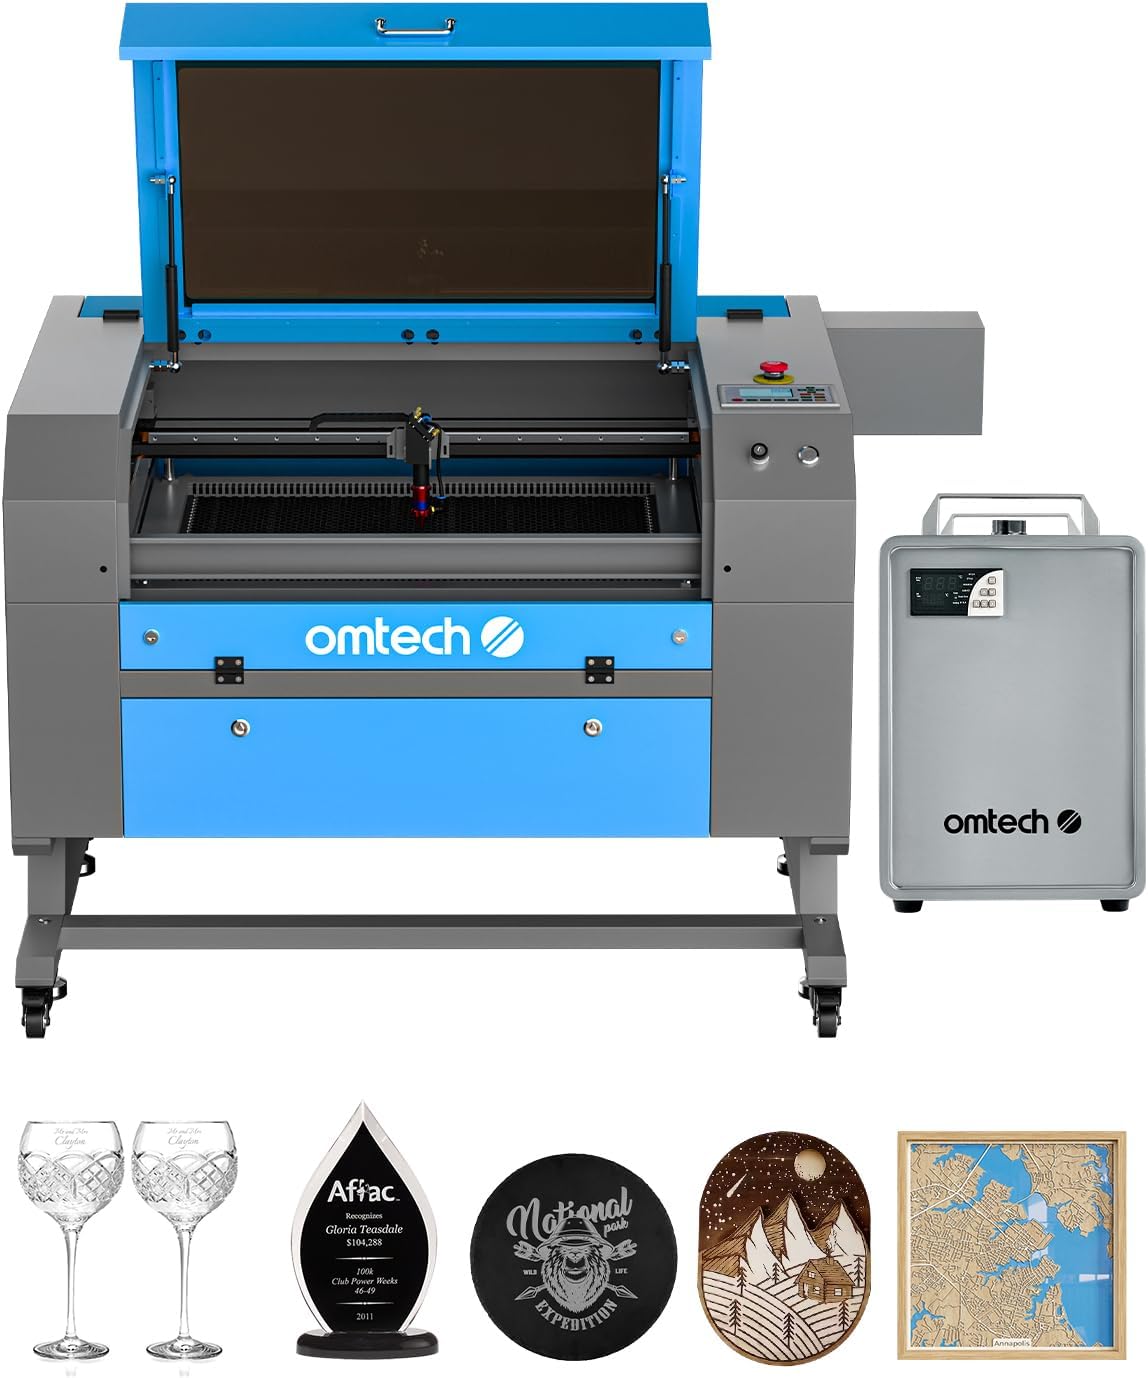
Figure 1: OMTech 90W CO2 Laser Engraver with Water Chiller and example engraved items.
2. Safety Information
Operating a laser engraver involves potential hazards. Adhere to all safety guidelines to ensure a safe working environment.
- Eye Protection: Always wear appropriate laser safety glasses when the laser is in operation.
- Ventilation: Ensure adequate ventilation to remove smoke, fumes, and dust generated during engraving and cutting. The built-in air assist helps, but external exhaust is crucial.
- Material Safety: Only engrave or cut materials approved for CO2 lasers. Avoid materials that produce toxic fumes or are highly flammable.
- Fire Hazard: Keep a fire extinguisher nearby. Never leave the machine unattended during operation. The widened viewing window is made from flame retardant material for added safety.
- Electrical Safety: Ensure the machine is properly grounded and connected to a suitable power supply. Do not operate with wet hands or in damp conditions.
- Emergency Stop: Familiarize yourself with the location and operation of the emergency stop button.

Figure 2: The laser engraver features a flame-resistant acrylic window for safe viewing during operation.
3. Product Overview
The OMTech 90W CO2 Laser Engraver is a versatile machine designed for engraving and cutting various materials. It features a 20x28 inch work area, autofocus, autolift, and air assist for enhanced precision and safety.
Key Features:
- 90W CO2 Laser Tube: High-performance Yongli H2 tube with up to 8,000 hours of usage.
- Work Area: 20"x28" (500x700 mm) honeycomb and aluminum blade beds.
- Autofocus & Autolift: Automatic focal distance adjustment and motorized workbed for easy material placement.
- Air Assist: Integrated system to remove smoke and debris, protecting optics and improving cut quality.
- Water Chiller: Bundled water chiller (LCW5200) for effective cooling during extended operation.
- 4-Way Pass-Through: Doors on all four sides to accommodate larger and longer materials.

Figure 3: The 90W laser is capable of cutting up to 1 inch acrylic and 0.4 inch wood.

Figure 4: Illustration of the high-performance Yongli H2 laser tube, designed for efficiency and longevity.
4. Setup
Proper setup is crucial for the performance and safety of your laser engraver. This section outlines the general steps for initial installation.
4.1 Unpacking and Placement
- Carefully unpack all components, including the laser engraver unit, water chiller, exhaust fan, and accessories.
- Place the laser engraver on a stable, level surface in a well-ventilated area, away from flammable materials.
4.2 Connecting the Water Chiller
- Connect the water chiller to the laser tube using the provided hoses. Ensure proper flow direction as indicated in the chiller's manual.
- Fill the chiller with distilled water or a recommended coolant.
- Power on the chiller and allow it to circulate water and reach the optimal operating temperature before starting the laser.
4.3 Exhaust System and Air Assist
- Connect the exhaust fan to the machine's exhaust port and vent it to the outside.
- Ensure the air assist compressor is connected and functioning to provide a constant stream of air to the laser head, which helps prevent flare-ups and keeps the lens clean.
4.4 Electrical Connections
- Connect the laser engraver and water chiller to appropriate power outlets.
- Connect the machine to your computer via USB or Ethernet, or prepare a USB flash drive for offline operation.
5. Operating Instructions
This section guides you through the process of operating your OMTech laser engraver for engraving and cutting tasks.
5.1 Material Preparation and Loading
- Select a suitable material for your project. Refer to the material compatibility chart below.
- Place the material onto the honeycomb or aluminum blade workbed. Use the 4-way pass-through doors for larger items.

Figure 5: The 4-way pass-through design allows for processing of larger materials.
5.2 Autofocus and Workbed Adjustment
- Utilize the autofocus function to automatically set the correct focal distance for your material.
- If manual adjustment is needed, use the autolift buttons to raise or lower the workbed.

Figure 6: The built-in autofocus and air assist systems ensure sharper and cleaner results by automatically adjusting focus and removing debris.
5.3 Software and Parameter Settings
- Prepare your design file in compatible software (e.g., LightBurn).
- Set the appropriate laser parameters (speed, power, DPI) based on your material and desired outcome.

Figure 7: The laser engraver is capable of a maximum cutting depth of 0.4 inches in basswood with a single pass.
5.4 Starting the Engraving/Cutting Process
- Send the job to the laser engraver.
- Press the start button on the machine. Monitor the process closely.
5.5 Material Compatibility
The OMTech 90W CO2 laser engraver is suitable for a wide range of materials. Always test on a scrap piece first.

Figure 8: A visual guide to materials compatible with the laser engraver for both engraving and cutting applications.
5.6 Photo Engraving Tutorial
For detailed instructions on achieving optimal photo engraving results on wood, refer to the video tutorial below.
Video 1: Detailed tutorial on achieving high-quality photo engravings on wood using a laser engraver, including software settings and material preparation.
6. Maintenance
Regular maintenance ensures the longevity and optimal performance of your laser engraver.
- Clean Optics: Regularly clean the laser lens and mirrors with appropriate cleaning solutions and wipes to maintain laser beam quality.
- Workbed Cleaning: Remove debris and residue from the honeycomb or blade workbed after each use.
- Water Chiller Maintenance: Periodically check and replace the water/coolant in the chiller. Clean the chiller's filter as needed.
- Lubrication: Lubricate guide rails and moving parts as recommended in the full product manual.
- Exhaust System: Inspect and clean the exhaust fan and ducting to ensure efficient fume extraction.
7. Troubleshooting
This section addresses common issues you might encounter during operation.
- Poor Engraving/Cutting Quality: Check focal distance, laser power settings, material type, and cleanliness of optics.
- Machine Not Starting: Verify all power connections, emergency stop button status, and water chiller operation.
- Laser Beam Not Firing: Inspect laser tube connections, power supply, and ensure safety interlocks are engaged.
- Overheating: Check water chiller function, water level, and ambient temperature.
- Software Communication Issues: Verify USB/Ethernet connection and software settings.
8. Specifications
Detailed technical specifications for the OMTech 90W CO2 Laser Engraver.
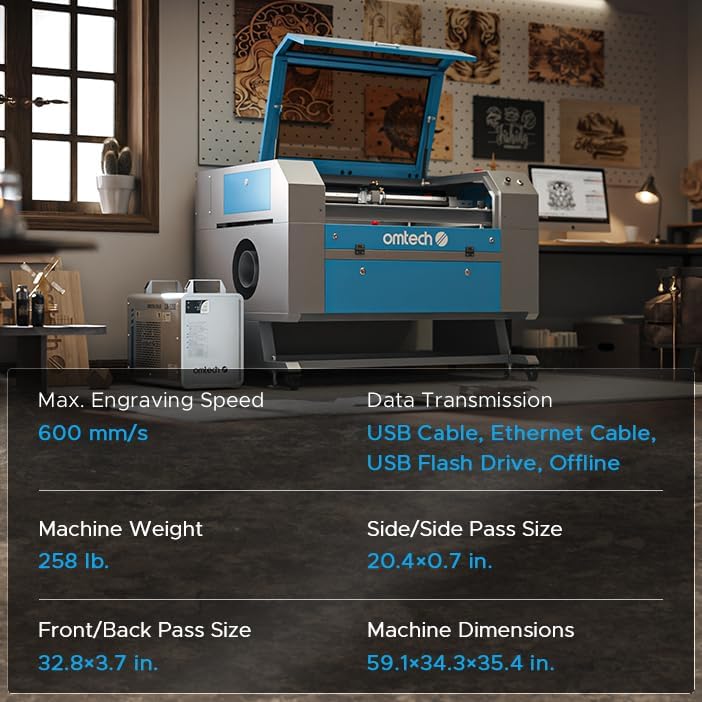
Figure 9: Key specifications including engraving speed, machine weight, pass sizes, and dimensions.
| Feature | Detail |
|---|---|
| Manufacturer | OMTech |
| Item Model Number | RYGEL-USB0705U3&LCW5200 |
| Rated Power | 90W |
| Max. Engraving Speed | 600 mm/s (23.6 ips) |
| Max. Cutting Depth | 0.4" (10 mm) in basswood (single pass) |
| Work Area | 20"x28" (500x700 mm) |
| Machine Dimensions | 59.1 x 34.3 x 35.4 inches |
| Item Weight | 258 pounds |
| Laser Class | Class 2, 0.827 mW output power |
| Material | Galvanized steel, Aluminium, Acrylic |
| Data Transmission | USB Cable, Ethernet Cable, USB Flash Drive, Offline |
9. Warranty & Support
OMTech provides comprehensive support for your laser engraver.
- Warranty: 2 Years (6 Months for Parts).
- Customer Support: Available 7 days a week, 24 hours a day.
- Email Support: SUPPORT@OMTECHLASER.COM
- Technical Support: TECHSUPPORT@OMTLASER.COM

Figure 10: The OMTech customer support team is available to assist with any inquiries.

