1. Introduction
This manual provides instructions for the installation, operation, and maintenance of the TERRAMASTER D2-320 2-Bay USB 3.2 Gen 2 RAID Storage enclosure. The D2-320 is designed to provide high-speed data storage and backup solutions for various operating systems.

Image: Front view of the TERRAMASTER D2-320 enclosure, showing the two drive bays.
Key Features:
- High-Speed Data Transfer: Utilizes USB 3.2 Gen 2 protocol for speeds up to 10Gbps. Achieves up to 521MB/s read/write with HDDs in RAID 0 and up to 1075MB/s read with SSDs in RAID 0.
- Multiple RAID Modes: Supports RAID 0, RAID 1, JBOD, and SINGLE configurations to meet diverse storage needs.
- Large Storage Capacity: Accommodates two 3.5" or 2.5" SATA HDDs/SSDs, with a maximum capacity of 22TB per drive, totaling up to 44TB.
- Efficient Heat Dissipation: Features an intelligent temperature-controlled, low-noise fan and optimized ventilation for stable operation.
- Tool-Free Drive Installation: Designed for easy installation and removal of hard drives without tools, incorporating a Push-lock mechanism.
2. Setup
2.1 Package Contents
Verify that all components are present in the package:
- TERRAMASTER D2-320 Enclosure
- USB-C to USB-C Cable
- Power Adapter
- Accessory Kit (screws for 2.5" drives, screwdriver, reset pin)
- Quick Installation Guide
2.2 Hard Drive Installation
- Gently pull the drive tray out from the enclosure.
- For 3.5" HDDs: No tools are required. Align the drive with the tray and snap it into place. The Push-lock design will secure it.
- For 2.5" HDDs/SSDs: Place the drive into the tray and secure it with the provided screws from the accessory kit.
- Slide the loaded drive tray back into the enclosure until it clicks into place.

Image: A 3.5-inch hard drive being slid into the tool-free drive tray, demonstrating the ease of installation.
2.3 RAID Mode Configuration
The D2-320 supports RAID 0, RAID 1, JBOD, and SINGLE modes. Select the desired mode using the configuration knob on the rear of the device.
- SINGLE: Each drive operates independently.
- JBOD (Just a Bunch Of Disks): Drives are concatenated to form one large volume.
- RAID 0 (Striping): Data is split across both drives for maximum performance. No data redundancy.
- RAID 1 (Mirroring): Data is duplicated across both drives for data redundancy. If one drive fails, data is preserved on the other.
To configure the RAID mode:
- Ensure the device is powered off and disconnected from your computer.
- Locate the RAID mode selection knob on the rear panel.
- Use a small screwdriver or the provided reset pin to turn the knob to your desired RAID mode (0, 1, JBOD, or SINGLE).
- Press and hold the RESET button (located near the knob) for approximately 5-10 seconds until the indicator lights flash. This confirms the RAID mode change.
- Connect the device to your computer and power it on. The system will detect the new configuration.
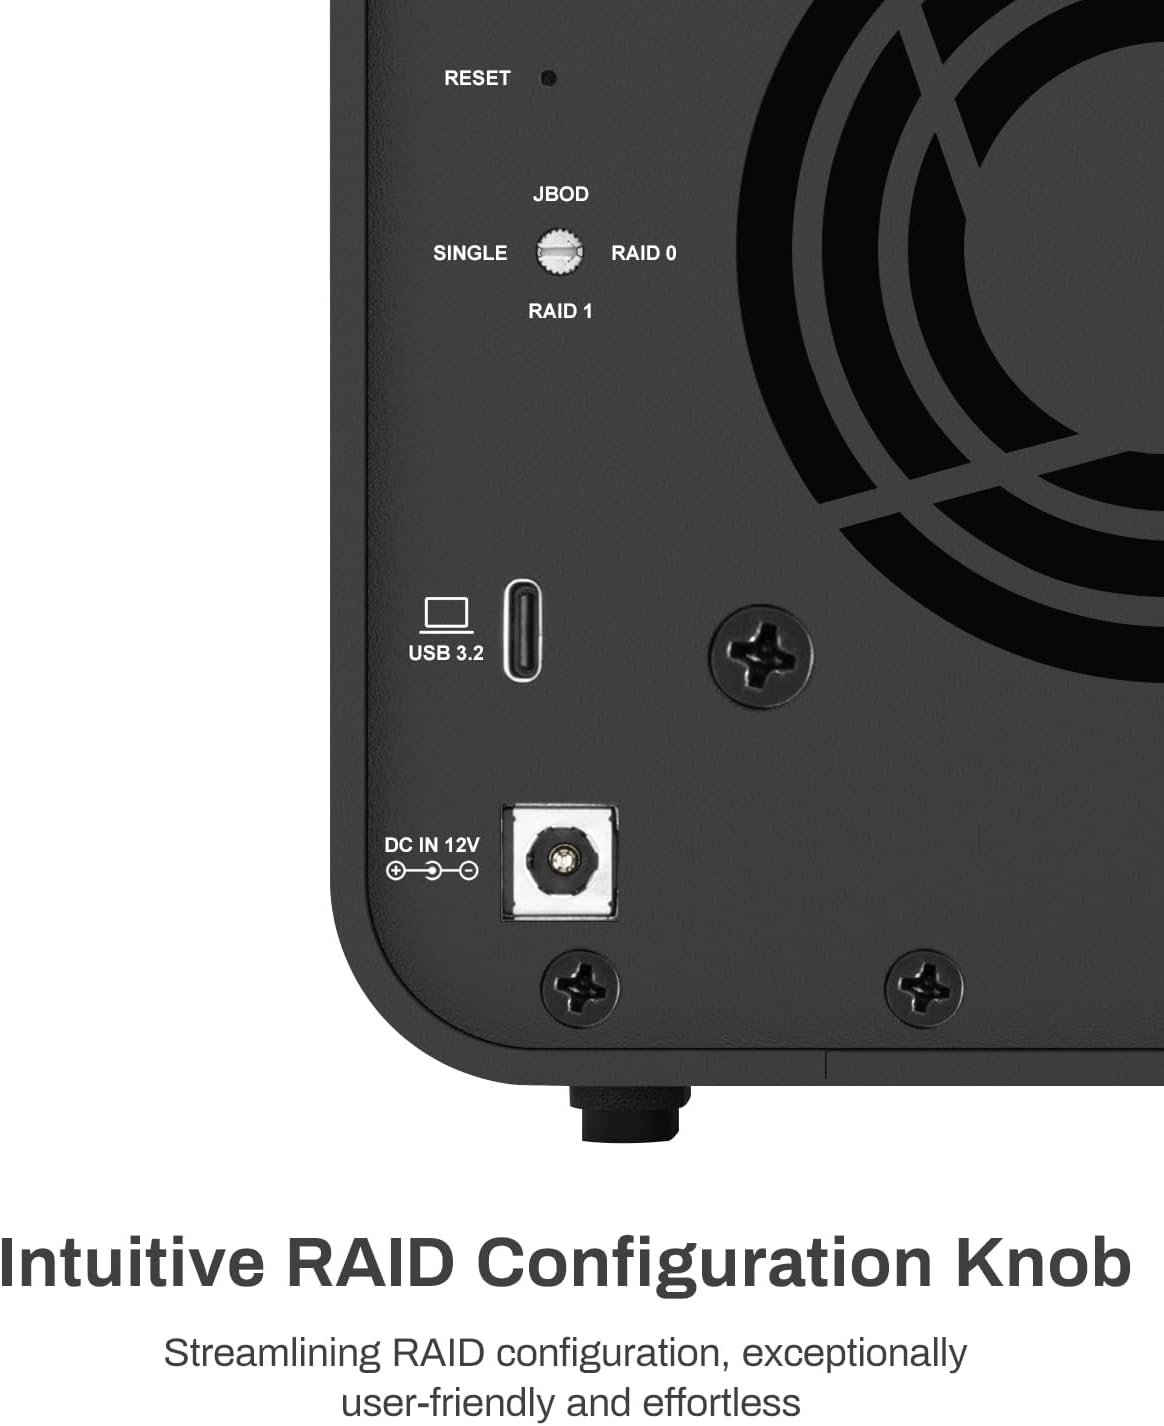
Image: Close-up of the rear panel, highlighting the RAID configuration knob and reset button.
Important: Changing the RAID mode will erase all data on the installed drives. Back up any important data before proceeding with a RAID mode change.
2.4 Connecting to Your Computer
Connect the D2-320 to your computer using the supplied USB-C to USB-C cable. The enclosure is compatible with USB 3.2 Gen 2 ports and backward compatible with USB 3.0/3.1/3.2 Gen 1, as well as Thunderbolt 3/4 ports. Connect the power adapter to the DC IN 12V port and then to a power outlet.
3. Operating Instructions
3.1 Power On/Off
Press the power button on the rear of the device to turn it on or off. The indicator lights on the front panel will illuminate when the device is powered on.
3.2 Indicator Lights
The front panel features micro-perforated indicator lights that display the operational status of the drives and the device.
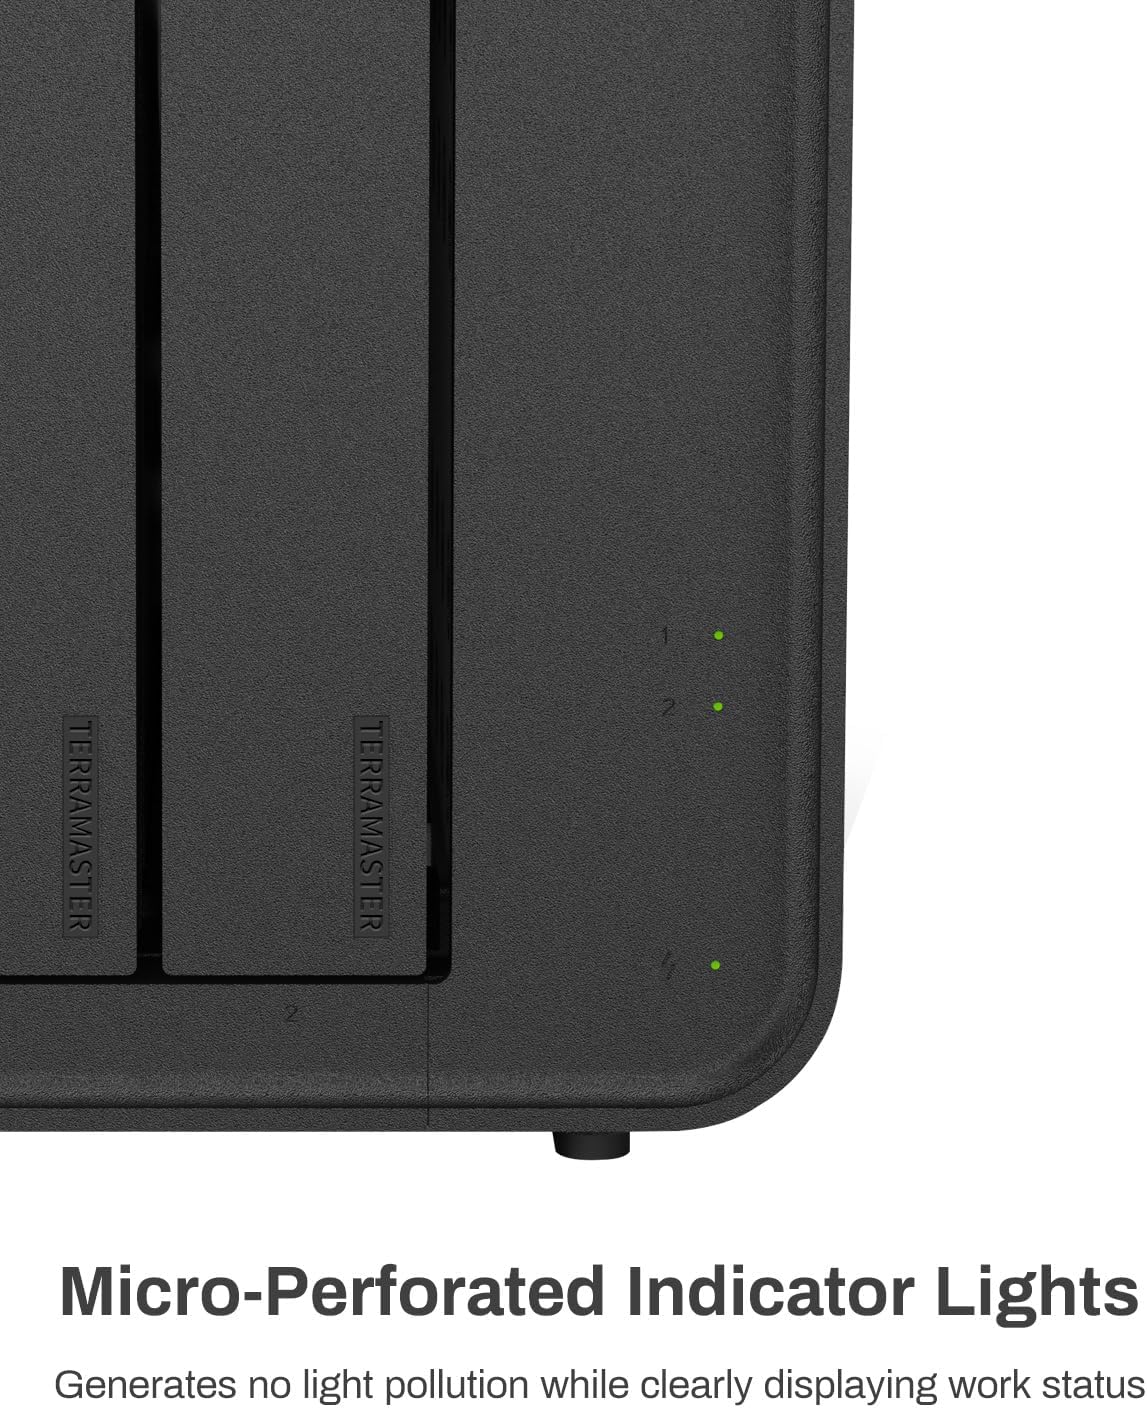
Image: Detail of the micro-perforated indicator lights on the front of the enclosure.
- Power Indicator: Indicates the power status of the device.
- Drive Indicators (1 & 2): Indicate the status of each installed hard drive. (Specific color meanings are typically in a quick start guide, but generally green for active, blinking for activity, red for error).
3.3 Data Transfer Performance
The D2-320 leverages USB 3.2 Gen 2 for high-speed data transfer. Performance varies based on drive type and RAID configuration:
- With two SATA III HDDs (e.g., 8TB x 2) in RAID 0, read/write speeds can reach up to 521MB/s.
- With two SATA III SSDs (e.g., 1TB x 2) in RAID 0, read speeds can reach up to 1075MB/s, and write speeds up to 884MB/s.

Image: The D2-320 connected to a computer, demonstrating its high-speed data transfer capabilities.
3.4 Intelligent Disk Sleep
The D2-320 supports intelligent disk sleep functionality. When your computer enters sleep mode or is powered off, the drives within the enclosure will automatically enter a low-power sleep state to conserve energy and extend drive lifespan.

Image: The D2-320 in a typical usage environment, highlighting its intelligent disk sleep feature.
4. Maintenance
4.1 Heat Dissipation
The D2-320 is equipped with an intelligent temperature-controlled fan that automatically adjusts its speed based on the internal temperature of the hard drives. This ensures optimal operating temperatures and contributes to the longevity of the drives.

Image: Diagram illustrating the intelligent cooling fan system within the D2-320 enclosure.
4.2 Noise Levels
The enclosure is designed with sound-absorbing panels to minimize operational noise. It operates at approximately 19dB(A), ensuring a quiet working environment.

Image: Close-up of the internal structure of the D2-320, highlighting the sound-absorbing panels designed to reduce noise.
5. Troubleshooting
5.1 General Issues
- Device not recognized:
- Ensure the USB cable is securely connected to both the D2-320 and your computer.
- Verify the power adapter is correctly connected and the device is powered on.
- Try connecting to a different USB port on your computer.
- Ensure the hard drives are properly installed in their bays.
- Slow data transfer speeds:
- Confirm your computer's USB port supports USB 3.2 Gen 2 (10Gbps) for optimal performance.
- Check the health of your hard drives.
- Ensure the USB cable is not damaged.
- Drive not appearing:
- For new drives, they may need to be initialized, partitioned, and formatted through your operating system's disk management utility.
- Check the drive indicator lights for any error signals.
5.2 RAID Specific Issues
- RAID 1 (Mirroring) drive failure:
- If one drive in a RAID 1 configuration fails, the data remains accessible on the healthy drive.
- To replace a failed drive, power off the D2-320, remove the faulty drive, and insert a new drive of equal or greater capacity.
- Power on the device. The system should automatically begin rebuilding the RAID array, copying data from the healthy drive to the new drive. This process can take several hours depending on drive capacity.
- Accidental RAID mode change:
- Changing the RAID mode will erase all data. If this occurs accidentally, data recovery may be possible through specialized services, but is not guaranteed. Always back up critical data.
6. Specifications
| Feature | Detail |
|---|---|
| Model Number | D2-320 |
| Brand | TERRAMASTER |
| Material | Plastic |
| Item Weight | 4.5 Pounds |
| Product Dimensions (L x W x H) | 8.74" x 4.69" x 6.06" |
| Compatible Devices | Hard Disk, SSD |
| Hard Disk Form Factor | 3.5 Inches (also supports 2.5 Inches with screws) |
| Max Number of Supported Devices | 2 |
| Data Transfer Rate | 10 Gigabits Per Second (USB 3.2 Gen 2) |
| Hardware Interface | SATA 6.0 Gb/s, USB 3.2 Gen 2 |
| Hardware Platform Compatibility | Windows, Mac, Linux |
| Color | Black |
7. Warranty and Support
TERRAMASTER products are designed for reliability and performance. For specific warranty information, please refer to the warranty card included with your product or visit the official TERRAMASTER website.
For technical support, frequently asked questions, and driver downloads, please visit the official TERRAMASTER support page:
TERRAMASTER Official Store and Support
When contacting support, please have your product model (D2-320) and serial number ready.