
RYOBI P321K
RYOBI 18V ONE+ AirStrike 18GA Brad Nailer Kit
Model: P321K
Product Overview
The RYOBI 18V ONE+ 18-Gauge Cordless AirStrike Brad Nailer (P321K) is designed for efficient and convenient nailing tasks. Featuring AirStrike Technology, this tool eliminates the need for bulky compressors, hoses, or expensive gas cartridges, offering faster setup and enhanced maneuverability. It is capable of sinking up to 2-inch nails in hardwoods and is noted for being the lightest cordless brad nailer in its class, reducing user fatigue during extended use. The P321K also includes a tool-free depth of drive adjustment for precise nail head setting and a 45% smaller nose compared to previous models (P320) for improved access in tight spaces and superior drive quality. This kit comes with a 1.5Ah battery and charger, making it a comprehensive solution for various carpentry and DIY projects, including window, door, and cabinet trim.

Image: The RYOBI 18V ONE+ AirStrike 18GA Brad Nailer, shown with its included 1.5Ah battery and charger.
Safety Information
Always observe basic safety precautions when using power tools to reduce the risk of fire, electric shock, and personal injury. Read and understand all instructions before operating this tool.
- Wear eye protection that conforms to ANSI Z87.1 standards.
- Wear hearing protection during extended use.
- Keep work area clean and well lit. Cluttered or dark areas invite accidents.
- Do not operate power tools in explosive atmospheres, such as in the presence of flammable liquids, gases or dust.
- Keep children and bystanders away while operating a power tool.
- Do not overreach. Keep proper footing and balance at all times.
- Disconnect the battery pack from the tool before making any adjustments, changing accessories, or storing power tools.
- Use the correct tool for your application. Do not force the tool.
- Store idle tools out of reach of children and do not allow persons unfamiliar with the power tool or these instructions to operate the power tool.
Setup
Charging the Battery
The RYOBI 18V ONE+ Brad Nailer kit includes a 1.5Ah Lithium-Ion battery and a compatible charger. Ensure the battery is fully charged before first use for optimal performance.
- Connect the charger to a standard electrical outlet.
- Slide the battery pack onto the charger base, ensuring it clicks into place.
- Allow the battery to charge until the indicator light on the charger signals a full charge (refer to charger manual for specific light indicators).
- Once charged, remove the battery from the charger.

Image: The 1.5Ah Lithium-Ion battery and its charger, ready for charging.
Loading Nails
This 18-gauge brad nailer uses 18GA brad nails. Always use nails of the correct size and type for your application.
- Ensure the battery pack is removed from the nailer before loading nails.
- Pull back the pusher assembly until it locks into place.
- Insert a strip of 18-gauge brad nails into the magazine, with the points facing down.
- Release the pusher assembly, allowing it to push the nails forward into the firing position.
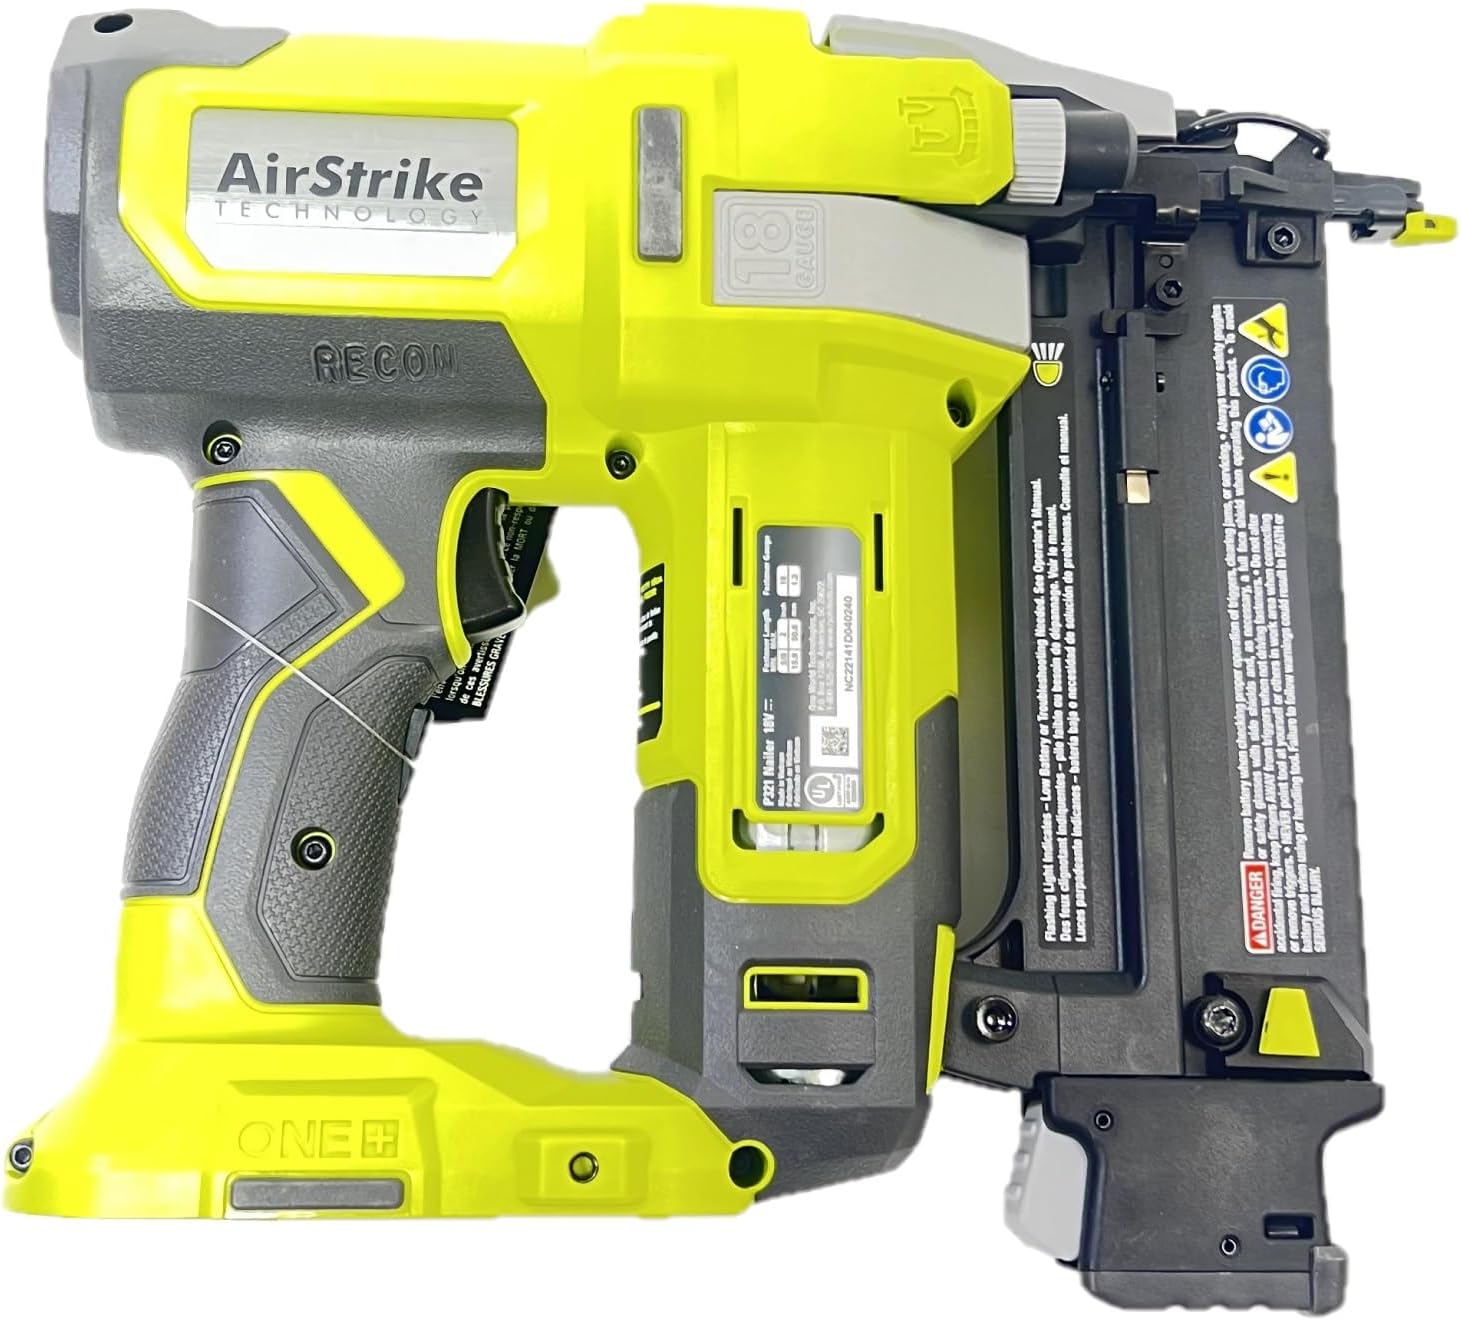
Image: Side view of the nailer, illustrating the magazine where brad nails are loaded.
Operating Instructions
Power and Depth Adjustment
The nailer features adjustable settings to optimize performance for different materials and tasks.
- Power Adjustment Dial: A convenient adjustment dial located at the back of the tool regulates air pressure speed for optimal performance. Turn the dial to increase or decrease the driving power.
- Depth of Drive Adjustment: A tool-free depth of drive adjustment is located near the head of the nailer. This allows for proper setting of nail heads, ensuring they are flush or slightly countersunk, and helps protect the work surface from tool marks.

Image: Top view of the nailer, highlighting the power adjustment dial for controlling nail depth.
General Operation
- Insert a charged battery pack into the tool until it clicks securely.
- Adjust the power and depth settings according to the material and desired nail depth. Test on a scrap piece of material first.
- Place the nose of the nailer firmly against the workpiece where the nail is to be driven.
- Press the trigger to drive the nail. The tool is designed for single sequential actuation.
- Ensure the tool is held firmly and squarely against the surface to prevent misfires or bent nails.
Maintenance
Regular maintenance ensures the longevity and optimal performance of your RYOBI Brad Nailer.
- Cleaning: Keep the tool clean and free of dust and debris. Use a dry cloth to wipe down the exterior. Do not use harsh chemicals or abrasive cleaners.
- Clearing Jams: The tool features a tool-free jam release for easy access to clear nails. If a nail jam occurs, disconnect the battery, open the jam release mechanism, remove the jammed nail, and close the mechanism securely.
- Storage: Store the tool and battery in a cool, dry place, away from direct sunlight and extreme temperatures.
- Battery Care: Fully charge batteries before storing for extended periods. Do not store batteries in a discharged state.
- Non-Marring Pads: The nailer comes with 2 non-marring pads to protect your work surface. Inspect these pads regularly for wear and replace if damaged.
Troubleshooting
Below are common issues and potential solutions for your RYOBI Brad Nailer.
| Problem | Possible Cause | Solution |
|---|---|---|
| Nailer does not fire or misfires frequently. | Low battery charge; Nail jam; Insufficient pressure on workpiece; Incorrect power setting. | Ensure battery is fully charged; Clear any nail jams (refer to Maintenance section); Apply firm, consistent pressure to the workpiece; Adjust power setting higher. |
| Nails are not driven flush or are too deep. | Incorrect depth of drive setting; Power setting too low/high; Material density. | Adjust the tool-free depth of drive; Modify the power adjustment dial; Test on scrap material to find optimal settings for your specific material. |
| Tool dents the work surface. | Excessive pressure; Worn non-marring pads; Depth of drive set too deep. | Reduce pressure applied to the tool; Check and replace non-marring pads if worn; Adjust depth of drive to a shallower setting. |
| Battery does not hold a charge or drains quickly. | Battery nearing end of life; Improper charging; Extreme temperatures. | Ensure proper charging procedure; Avoid charging/using in extreme temperatures; Consider replacing the battery if it's old or consistently underperforms. |
Specifications
| Feature | Detail |
|---|---|
| Brand | RYOBI |
| Model Number | P321K |
| Power Source | Battery Powered |
| Voltage | 18 Volts |
| Battery Type | Lithium Ion (1.5Ah included) |
| Nail Gauge | 18 Gauge |
| Item Weight | 6.5 pounds |
| Product Dimensions | 10.9 x 3.7 x 9.6 inches |
| Included Components | P321 Nailer, 1.5Ah Battery, Charger |
| Material | ABS |
| Color | Ryobi Green |
| UPC | 033287205509 |
Warranty and Support
For warranty information, technical support, or service inquiries, please refer to the official RYOBI website or contact RYOBI customer service directly. Keep your proof of purchase for any warranty claims.
This product is designed for durability and performance. Should you encounter any issues not covered in the troubleshooting section, professional assistance is recommended.
Related documentsP321K


Ask a question about this manual
Ask about setup, troubleshooting, compatibility, parts, safety, or missing instructions. Manuals+ will review the question and use this page’s manual context to help answer it.