
Jingelsye B0C84M8VBG
Jingelsye 10.1-inch Android Car Radio Stereo for Toyota Highlander (2008-2013) - Instruction Manual
Model: B0C84M8VBG
1. Product Overview
This manual provides detailed instructions for the installation, operation, and maintenance of your Jingelsye 10.1-inch Android Touch Screen Head Unit, model B0C84M8VBG. This unit is specifically designed for Toyota Highlander models manufactured between 2008 and 2013, offering an upgraded in-car entertainment and navigation experience.
Key features include a 1280x800 HD display, Android 13 operating system, 2GB RAM + 32GB ROM, 5G WiFi, Wireless CarPlay, GPS navigation, Steering Wheel Control (SWC) support, FM/RDS radio, DSP sound processing, Bluetooth 5.0, and a 1080P AHD backup camera.
2. What's in the Box
Please verify that all components listed below are included in your package:
- 1x Jingelsye 10.1-inch Android Head Unit
- 1x Backup Camera (1080P AHD)
- 1x CANBUS Decoder
- 1x GPS Module
- 1x Microphone
- 2x USB Cables
- 1x RCA Cable Set
- 1x Power Cable
- 1x Reversing Cable
- 1x Original Vehicle's USB Cable (adapter)
- 1x Radio Antenna

Figure 2.1: All components included in the package.

Figure 2.2: Detailed view of the main unit and included accessories.
3. Installation Guide
This section outlines the general steps for installing the Jingelsye car radio. Professional installation is recommended. Refer to vehicle-specific guides for dashboard panel removal.
3.1 Pre-Installation Check
- Ensure the vehicle's ignition is off and the battery is disconnected.
- Confirm all components listed in "What's in the Box" are present.
- Identify the existing car radio and surrounding dashboard panels.
3.2 Wiring Connections
Connect the various cables to the head unit as shown in the diagram and video. Ensure secure connections to prevent signal loss or malfunction.
- Connect the 4G Antenna (if applicable for your model) and GPS Antenna to their respective ports on the head unit.
- Connect the Rear Camera Signal Wire and Camera Extension Cables. The red wire on the camera signal cable typically connects to the backup light's positive (+) terminal, and the black wire to the negative (-) terminal. The reversing detection cable from the head unit connects to the camera extension cable.
- Connect the main Power Cable harness to the head unit and the vehicle's wiring.
- Integrate the CANBUS decoder with the power cable harness if your vehicle requires it for steering wheel controls or other factory features.
- Connect the Radio Antenna.
- Connect the 4-pin and 6-pin USB Cables to the head unit.
- Connect the RCA Cable set for audio/video input/output as needed.
Video 3.1: Jingelsye Wiring Video. This video demonstrates the general wiring connections for the head unit components.

Figure 3.1: Rear view of the head unit with connected cables.

Figure 3.2: Backup camera wiring diagram.
3.3 Dashboard Integration
Carefully install the head unit into the dashboard opening. Ensure all wires are tucked away safely and not pinched. Secure the unit using the appropriate mounting brackets and reassemble the dashboard panels.
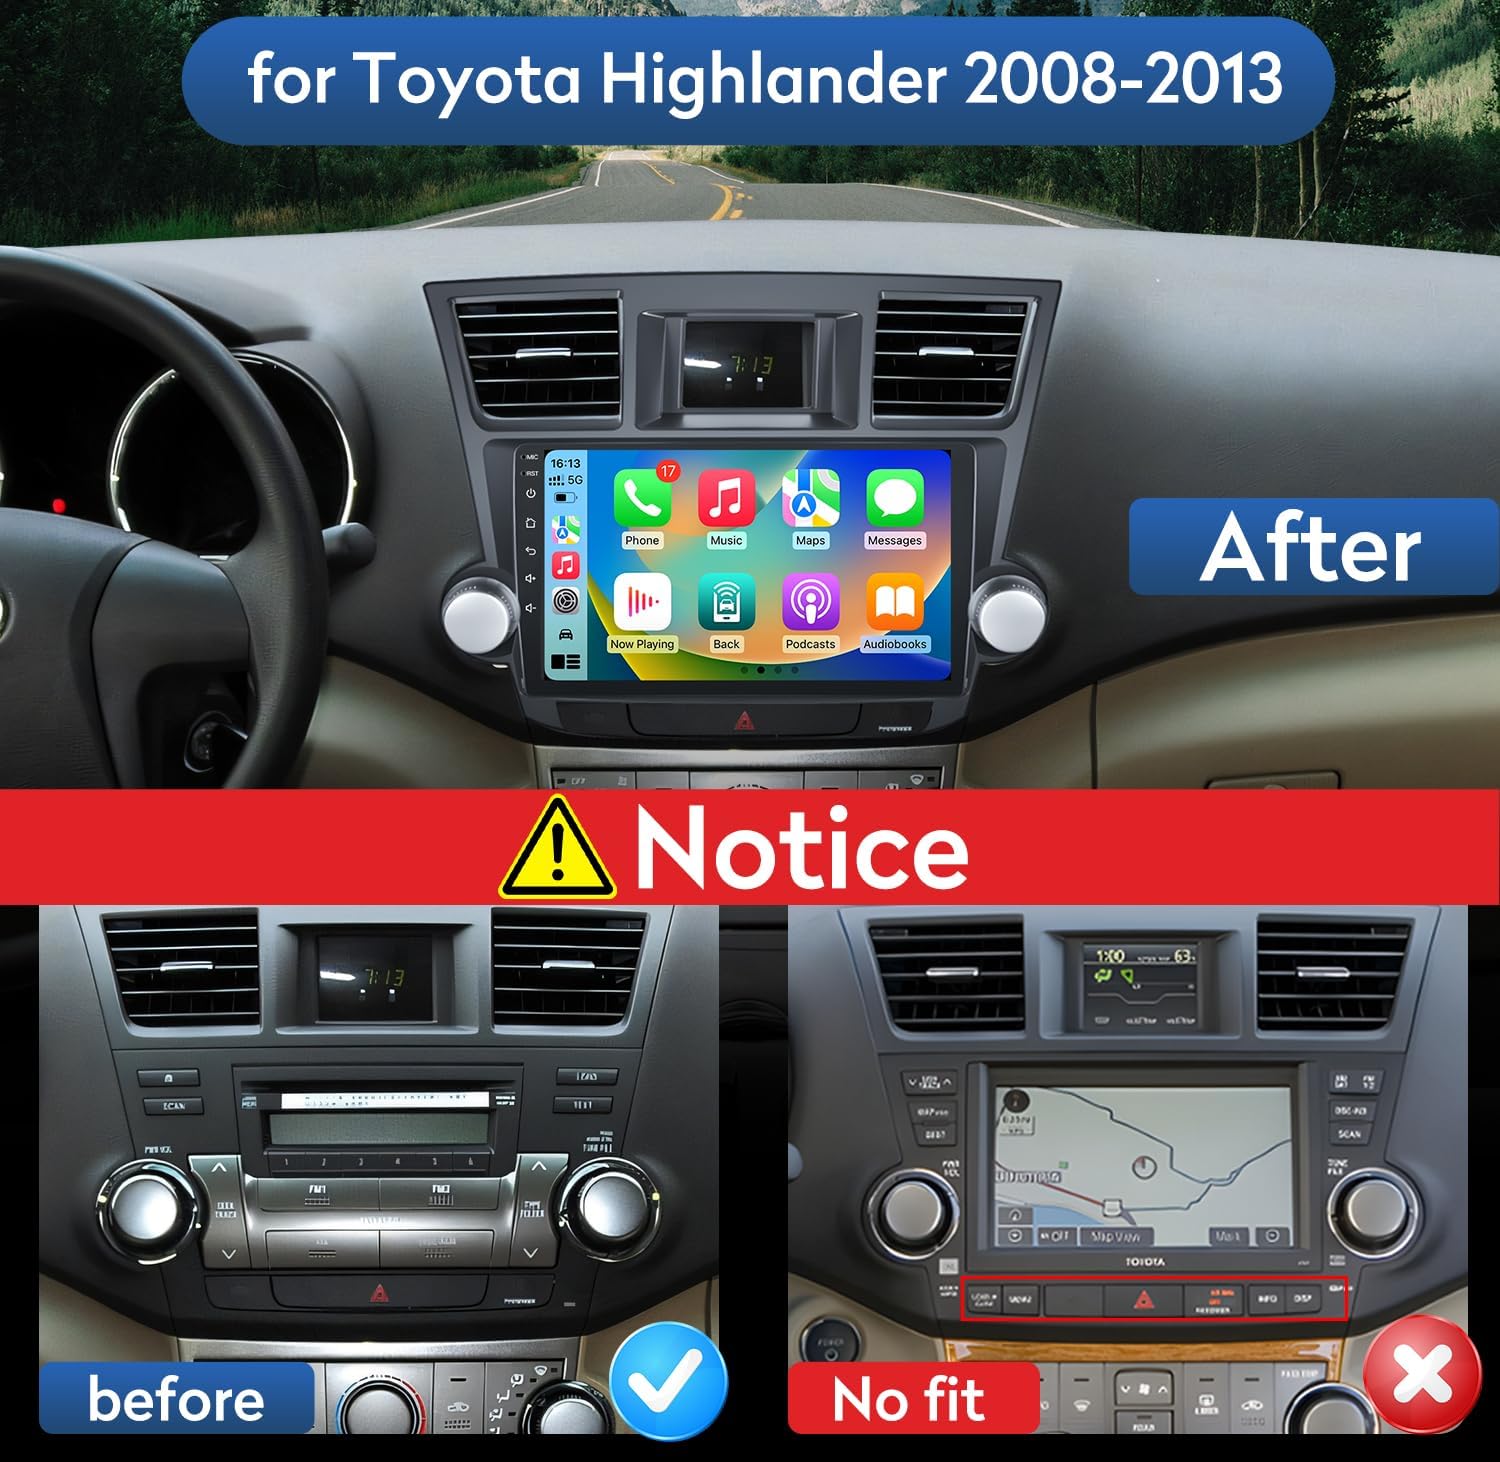
Figure 3.3: Before and after installation in a Toyota Highlander dashboard.
4. Operating Instructions
4.1 Initial Power On and Setup
- Reconnect the vehicle battery.
- Turn on the vehicle ignition. The head unit should power on automatically.
- Follow the on-screen prompts for initial setup, including language, time zone, and Wi-Fi connection.
4.2 Wireless CarPlay & Android Auto
The unit supports both Wireless CarPlay and Wired Android Auto for seamless smartphone integration.
- For Wireless CarPlay:
- Enable Bluetooth on your iPhone and pair it with the head unit.
- On the head unit, select the "Car Link 2.0" application and wait for the connection.
- For Wired Android Auto:
- Enable Bluetooth on your Android phone and pair it with the head unit.
- Connect your Android phone to the head unit using a USB cable.
- On the head unit, select the "Car Link 2.0" application and wait for the connection.

Figure 4.1: Apple CarPlay and Android Auto interfaces.

Figure 4.2: Connection steps for CarPlay and Android Auto.
4.3 GPS Navigation
The unit features a built-in GPS receiver and supports both online and offline navigation applications. Pre-installed maps for North America are included.
- To use offline navigation, ensure the necessary map data is downloaded.
- For online navigation, connect to Wi-Fi or use your phone's hotspot.

Figure 4.3: GPS Navigation interface.

Figure 4.4: GPS Navigation capabilities.
4.4 Bluetooth 5.0
Connect your smartphone via Bluetooth for hands-free calling, music streaming (A2DP), and phonebook access.
- Go to the Bluetooth settings on the head unit and your phone.
- Search for and select the head unit's Bluetooth name to pair.

Figure 4.5: Bluetooth 5.0 for hands-free calls and music.

Figure 4.6: Bluetooth 5.0 and GPS Navigation features.
4.5 FM/RDS Radio
Access FM radio stations with RDS (Radio Data System) support for station information.
- Tune to your desired frequency (87.5-108MHz).
- Use the auto-scan function to find and preset stations.

Figure 4.7: FM Radio interface.

Figure 4.8: FM/RDS Radio functionality.
4.6 Steering Wheel Controls (SWC)
After proper wiring and CANBUS connection, you can configure your vehicle's steering wheel buttons to control the head unit functions.
- Access the SWC settings in the head unit's menu.
- Follow the on-screen instructions to map each steering wheel button to its desired function (e.g., volume up/down, track skip, mode).

Figure 4.9: Steering Wheel Controls setup.
4.7 Mirror Link
Mirror your smartphone screen (iOS/Android) onto the head unit display via USB or Wi-Fi.
- Connect your phone via USB or ensure both devices are on the same Wi-Fi network.
- Select the Mirror Link application on the head unit and follow the pairing instructions for your specific phone model.

Figure 4.10: Mirror Link functionality.
5. Key Features
5.1 High-Definition IPS Touch Screen
The 10.1-inch 1280x800 HD IPS touch screen provides vibrant colors, sharp visuals, and a wide viewing angle for an enhanced user experience.
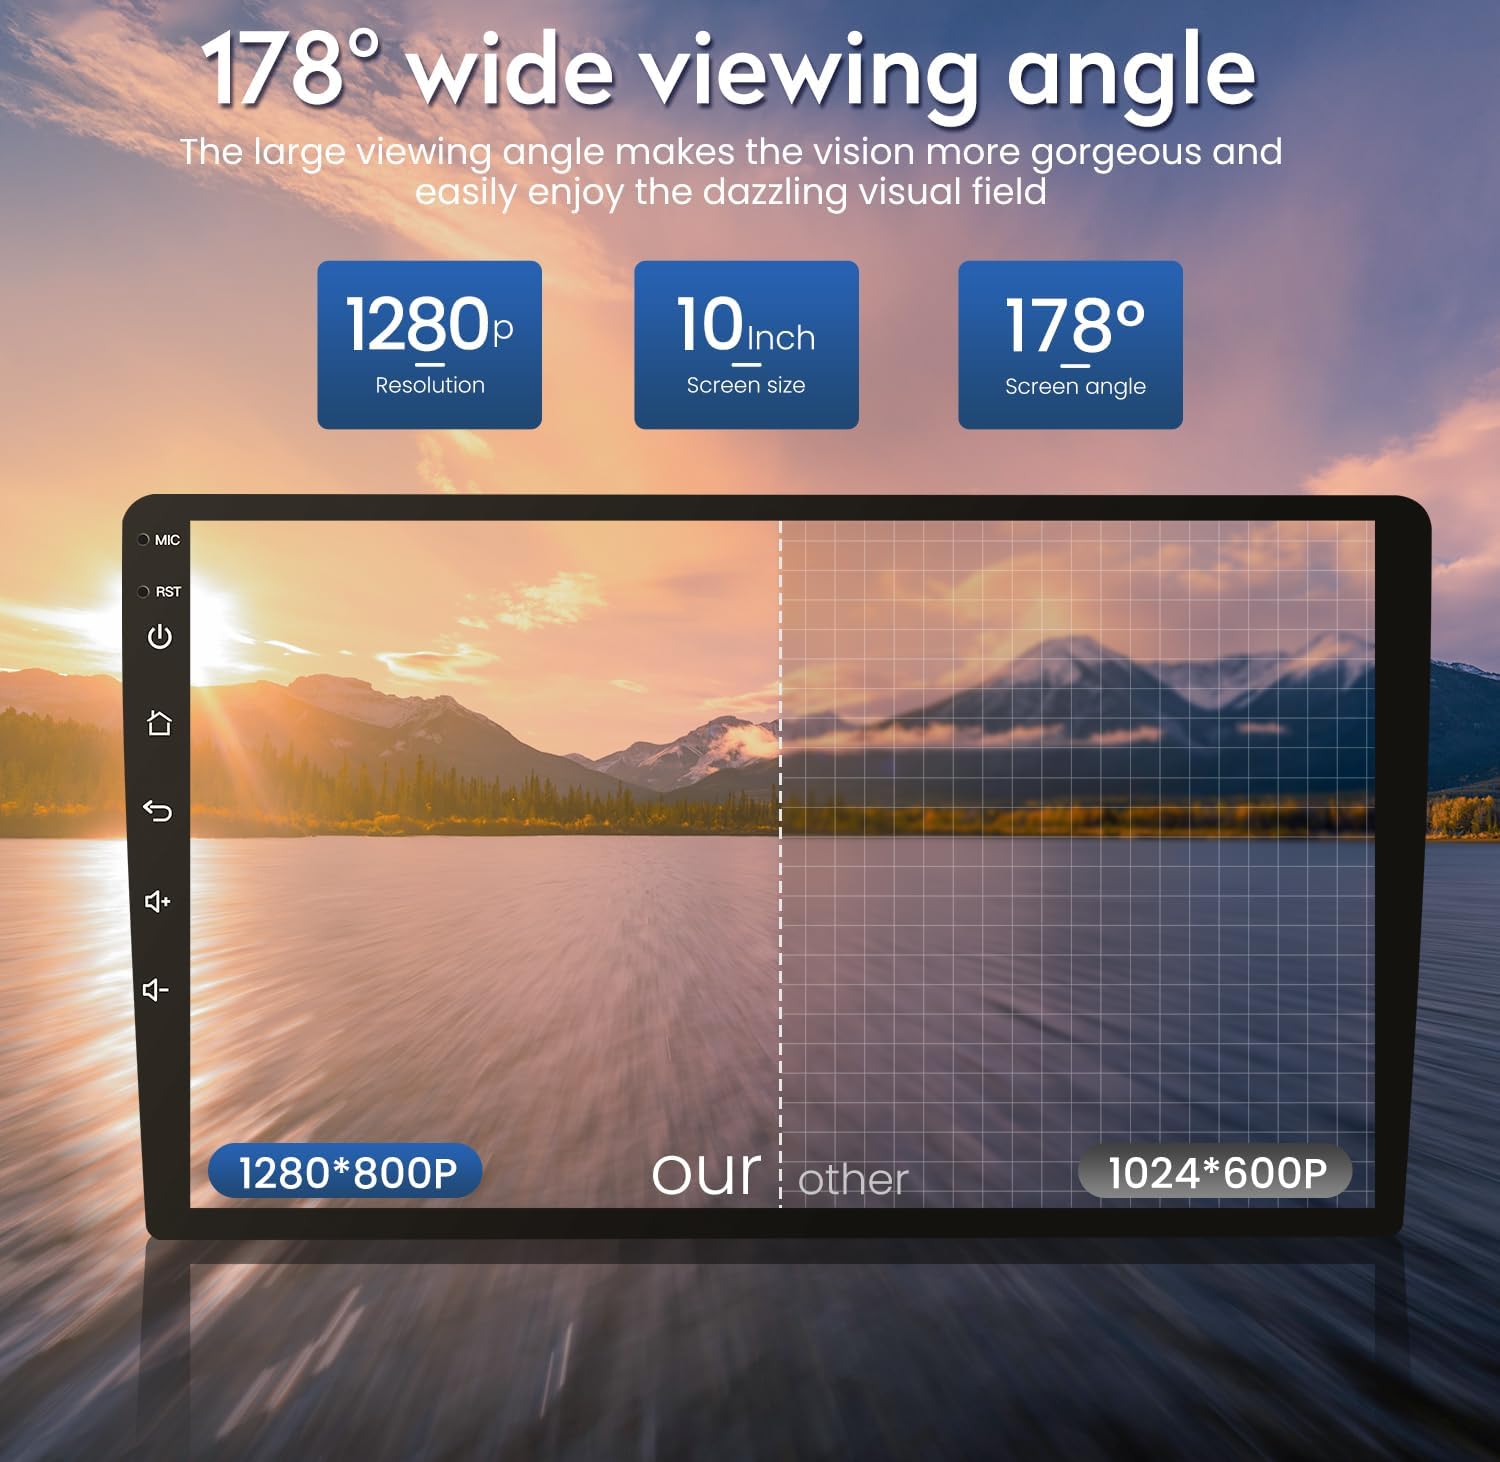
Figure 5.1: 1280x800 IPS Screen with 178° wide viewing angle.

Figure 5.2: Full HD 1280x800 IPS Screen benefits.
5.2 Digital Sound Processor (DSP)
The built-in 36-band DSP allows for precise audio customization, offering various sound styles (Folk, Rock, Classic, Jazz) and an immersive listening experience.

Figure 5.3: Professional DSP sound customization.

Figure 5.4: Built-in DSP for enhanced audio.
5.3 5G WiFi Connectivity
Stay connected with ultra-fast 5G Wi-Fi, enabling rapid media streaming, online access, and downloading applications.
Figure 5.5: Wi-Fi Function for online access and app downloads.

Figure 5.6: WiFi Connection for software and online maps.
5.4 1080P AHD Rear Camera
The included AHD backup camera provides a 1080P high-resolution, 170-degree ultra-wide-angle view with IR night vision, automatically activating when reversing.
Figure 5.7: HD Reverse Camera features.
6. Specifications
| Feature | Specification |
|---|---|
| Brand | Jingelsye |
| Model Name | Highlander |
| Screen Size | 10.1 Inches |
| Resolution | 1280*800 |
| Display Type | IPS |
| Operating System | Android 13 |
| Memory (RAM) | 2GB |
| Storage (ROM) | 32GB |
| Connectivity Technology | Bluetooth 5.0, USB, Wi-Fi (5G) |
| GPS | Built-in GPS receiver, supports offline/online navigation (North America maps included) |
| Special Features | Wireless CarPlay, Wired Android Auto, Backup Camera (1080P AHD), Steering Wheel Control (SWC), FM/RDS Radio, DSP 36 EQ HiFi |
| Audio Output Mode | Stereo |
| Mounting Type | Dashboard Mount |
| Compatible Vehicle Type | Toyota Highlander 2008-2013 |
7. Troubleshooting
This section provides solutions to common issues you might encounter.
- No Power:
- Check all power cable connections.
- Ensure the vehicle's battery is properly connected and charged.
- Verify the fuse in the power cable is intact.
- No Sound:
- Check speaker wiring connections.
- Ensure volume is not muted or set too low.
- Verify audio settings in the DSP menu.
- GPS Signal Loss:
- Ensure the GPS antenna is securely connected and placed in an unobstructed location (e.g., dashboard, not under metal).
- Check if offline maps are downloaded or if there's an active internet connection for online maps.
- CarPlay/Android Auto Not Connecting:
- Ensure Bluetooth is enabled and paired on both devices.
- For Wired Android Auto, try a different USB cable.
- Restart both the head unit and your smartphone.
- Ensure the "Car Link 2.0" app is selected on the head unit.
- Steering Wheel Controls Not Working:
- Verify CANBUS decoder is correctly installed and connected.
- Access the SWC learning function in the head unit settings and re-program the buttons.
- Backup Camera Not Displaying:
- Check the rear camera signal wire and extension cable connections.
- Ensure the camera is receiving power (often from the reverse light circuit).
- Verify the reversing cable from the head unit is correctly connected to the reverse trigger.
8. Warranty and Support
Jingelsye is committed to providing high-quality products and excellent customer service. If you encounter any issues or have questions regarding your product, please contact our support team.
- Warranty Information: Please refer to the warranty card included in your package or visit the official Jingelsye website for detailed warranty terms and conditions.
- Customer Support: For technical assistance, troubleshooting, or general inquiries, please contact Jingelsye-US customer service. Contact details can typically be found on the product packaging or the official brand website.
We recommend keeping your purchase receipt as proof of purchase for warranty claims.
Ask a question about this manual
Ask about setup, troubleshooting, compatibility, parts, safety, or missing instructions. Manuals+ will review the question and use this page’s manual context to help answer it.