
TMEOSK Garden Scarifier-TME01
Contents
TMEOSK 13-Inch 12Amp 2-in-1 Electric Lawn Dethatcher and Scarifier User Manual
Model: Garden Scarifier-TME01
1. Introduction
This manual provides comprehensive instructions for the TMEOSK 13-Inch 12Amp 2-in-1 Electric Lawn Dethatcher and Scarifier, model Garden Scarifier-TME01. It covers product assembly, safe operation, maintenance procedures, troubleshooting common issues, and detailed product specifications. This tool is designed to remove thatch and dead plant material from lawns, promoting healthier grass growth.
Important Safety Information
Always read and understand all safety warnings and instructions before operating this appliance. Failure to follow the warnings and instructions may result in electric shock, fire, and/or serious injury. Keep this manual for future reference.
- Wear appropriate personal protective equipment, including eye protection, hearing protection, and sturdy footwear.
- Ensure the work area is clear of debris, children, and pets.
- Never operate the machine in wet conditions or rain.
- Always disconnect the power supply before performing any maintenance, cleaning, or when the machine is unattended.
- This machine is not a lawnmower. It is specifically designed for dethatching and scarifying lawns.
2. Product Overview
The TMEOSK 2-in-1 Electric Lawn Dethatcher and Scarifier is equipped with a powerful 12-amp motor and a 13-inch working width. It features interchangeable cylinders for dethatching and scarifying, a large collection bag, and adjustable settings for optimal lawn care.

Figure 2.1: Overall view of the TMEOSK 2-in-1 Electric Lawn Dethatcher and Scarifier. This image shows the complete assembly of the unit, including the handle, motor housing, wheels, and collection bag.
Key Features:
- 2-in-1 Functionality: Easily switch between dethatching and scarifying modes with interchangeable cylinders.
- Powerful Motor: 12-amp motor for efficient removal of thatch and dead plants.
- Adjustable Depth Control: 4-position depth settings to suit various lawn conditions.
- Adjustable Handle Height: 3-rod handle height adjustment for comfortable operation.
- Large Collection Bag: 31.7-quart (30-liter) removable collection bag for debris.
- Safety Features: Dual safety switch design to prevent accidental startup.
- Easy Storage: Tool-free quick-lock and folding handle for compact storage.
3. Setup and Assembly
The TMEOSK Dethatcher and Scarifier requires some assembly before first use. Follow these steps carefully.
3.1 Unpacking
- Carefully remove all components from the packaging.
- Check the contents against the packing list to ensure all parts are present and undamaged.
- Retain packaging materials for future storage or transport.
3.2 Handle Assembly
Attach the upper and lower handle sections to the main unit using the provided knobs and bolts. Ensure all connections are secure.
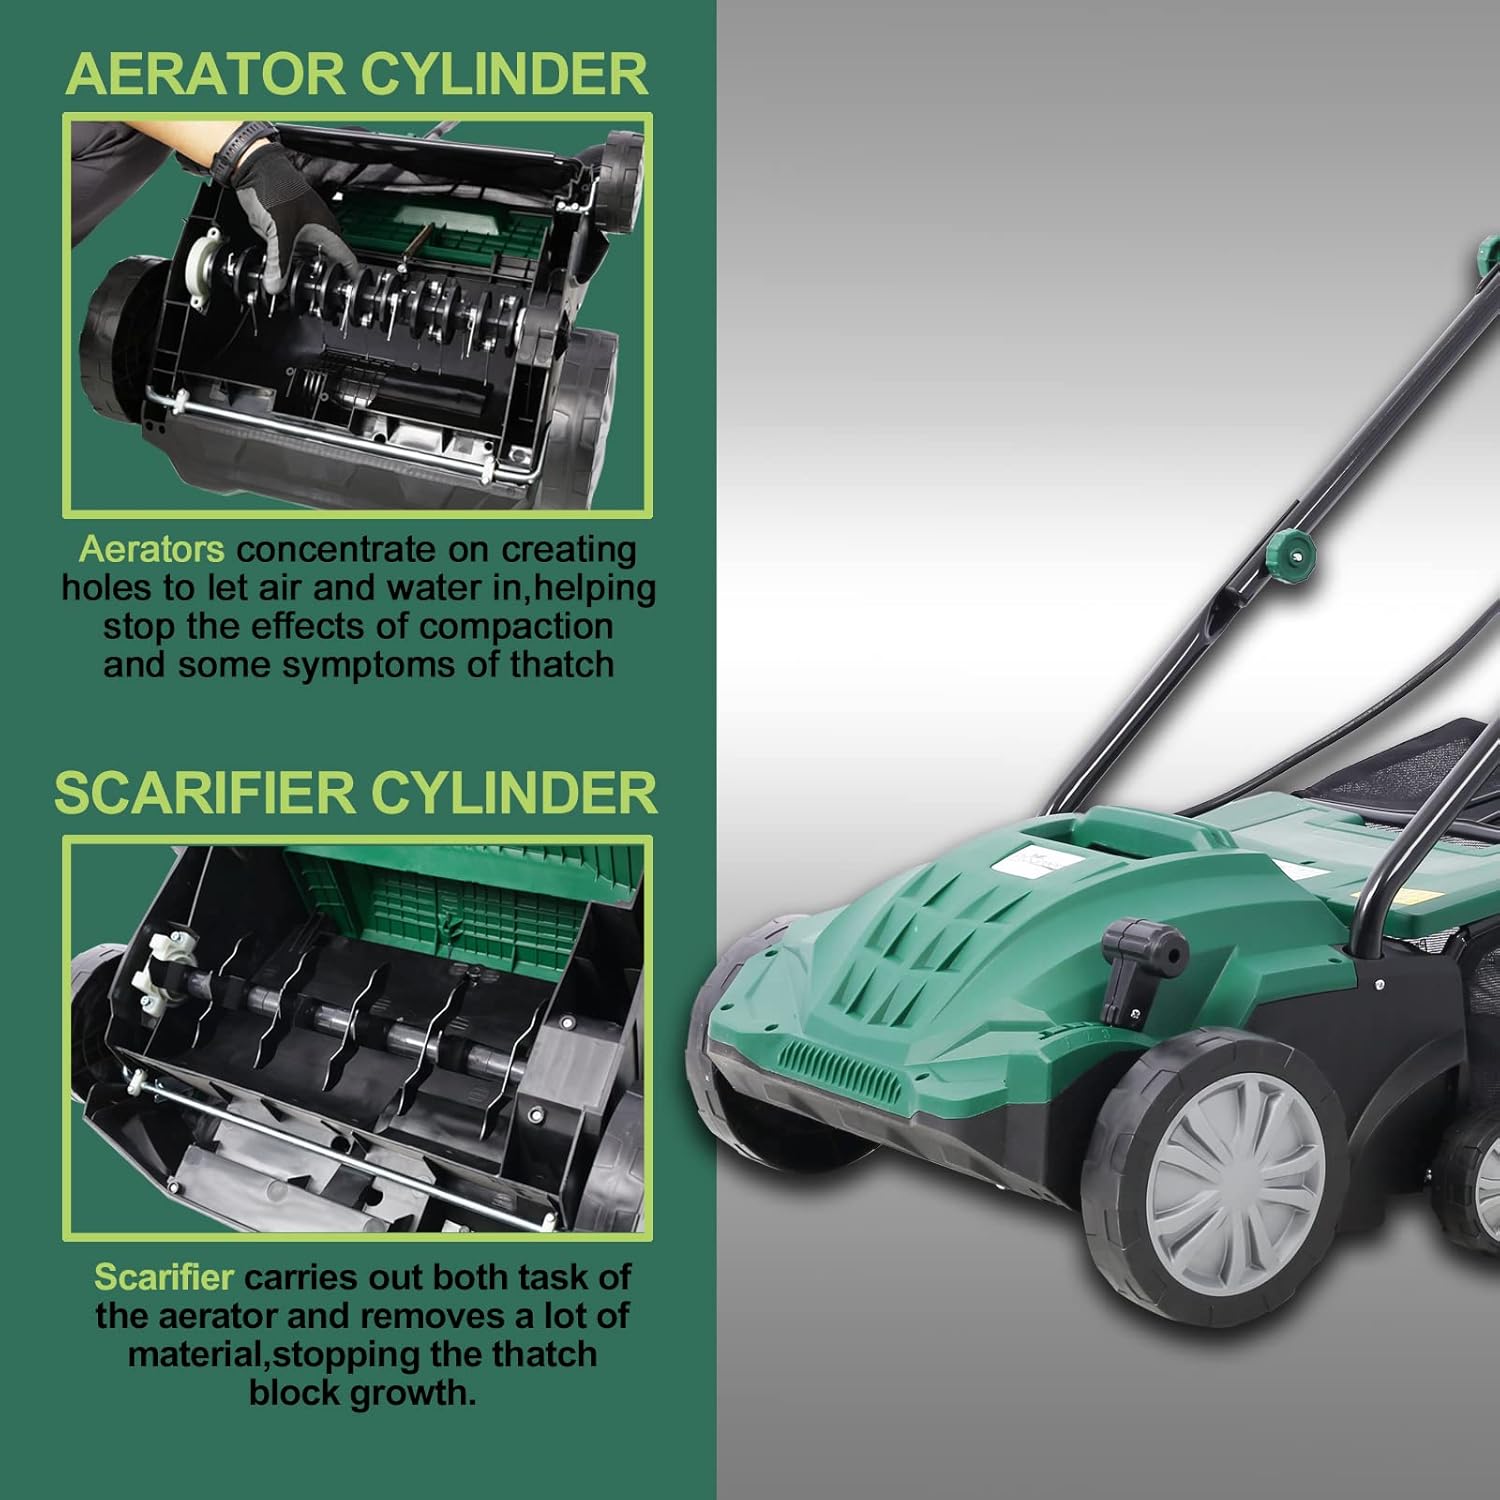
Figure 3.1: Exploded view of the dethatcher and scarifier components. This image illustrates the various parts of the machine, including the handle, motor unit, and interchangeable cylinders, which are essential for assembly.
3.3 Collection Bag Attachment
Hook the collection bag onto the designated attachment points at the rear of the machine. Ensure it is securely fastened to prevent debris from escaping during operation.

Figure 3.2: Attaching the grass collection bag. This image shows a hand securing the collection bag to the rear of the dethatcher unit, demonstrating the correct method for attachment.
3.4 Cylinder Installation (Dethatcher or Scarifier)
The unit comes with two interchangeable cylinders: one for dethatching (tines) and one for scarifying (blades). To install or change a cylinder:
- Disconnect the power supply.
- Locate the cylinder access cover, usually at the bottom or side of the unit.
- Follow the instructions in the diagram to release and remove the currently installed cylinder.
- Insert the desired cylinder (dethatcher or scarifier) and secure it in place.
- Close the access cover securely.
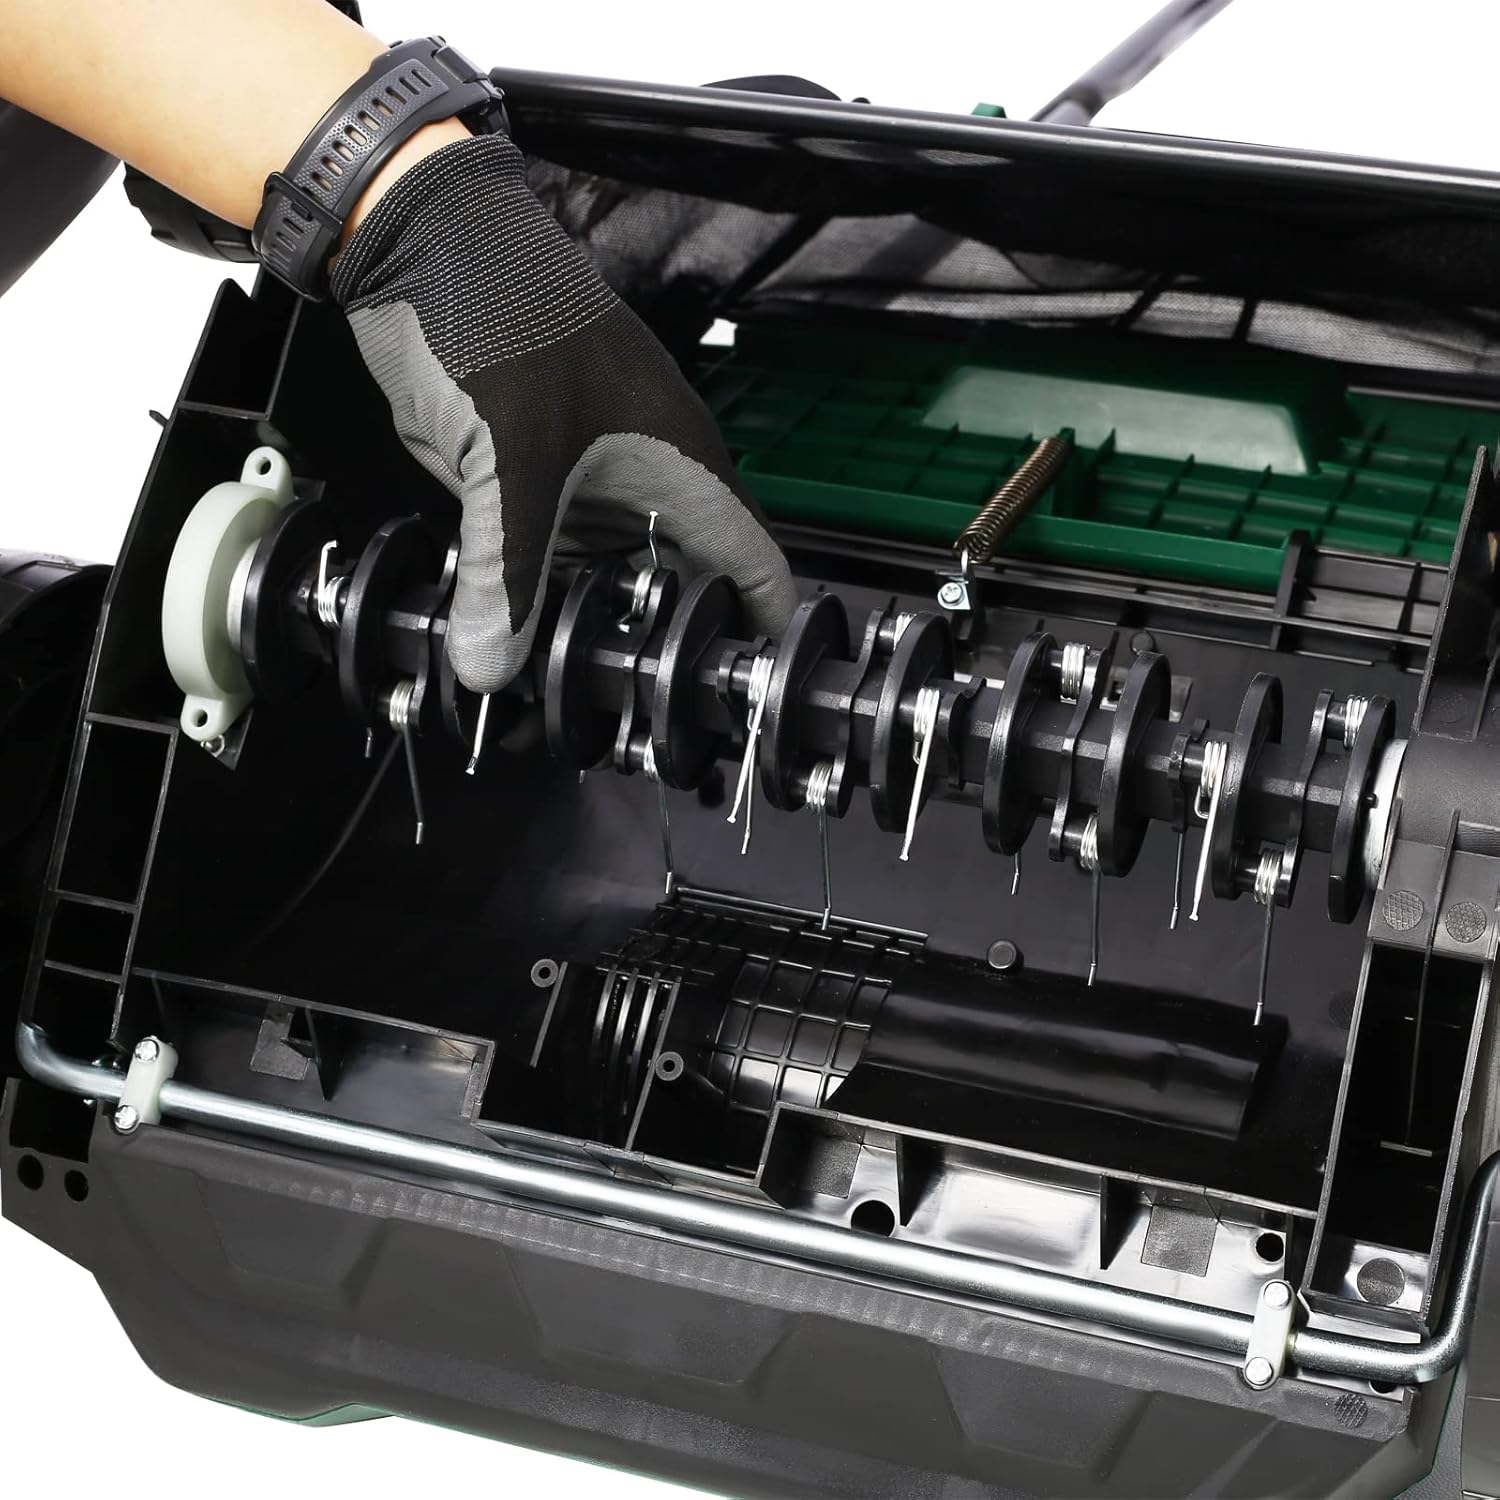
Figure 3.3: Cylinder installation and removal. This image depicts a hand manipulating the dethatcher cylinder within the machine, illustrating the process of changing or maintaining the cylinder.
4. Operating Instructions
Before operating, ensure all safety checks are complete and the unit is properly assembled.
4.1 Adjusting Depth
The unit features a 4-position depth control system. Adjust the lever to select the desired working depth. Start with a higher setting for light dethatching and gradually decrease for more aggressive removal of thatch or scarifying.

Figure 4.1: Adjustable cylinder knob. This image highlights the knob used to adjust the working depth of the dethatcher/scarifier, showing various depth settings from -0.47" to 0.16".
4.2 Adjusting Handle Height
The handle can be adjusted to three different heights for user comfort. Loosen the quick-lock knobs on the handle, adjust to the desired height, and then securely tighten the knobs.
4.3 Starting and Stopping the Machine
- Connect the power cord to a suitable outdoor extension cord and then to a grounded power outlet.
- To start, press the safety button (usually located on the handle) and then pull the operating lever. Release the safety button while holding the operating lever.
- To stop, release the operating lever. The machine will automatically shut off.

Figure 4.2: Advanced 2-in-1 Walk Behind Scarifier with labeled components. This image points out key features such as the safety switch for double protection, scarifier carry handle, height adjustment system, and strong wheels.
4.4 Operating Tips
- Work in straight, overlapping lines across your lawn.
- Avoid operating on excessively wet or dry lawns. Slightly moist conditions are ideal.
- Empty the collection bag regularly to maintain optimal performance and prevent clogging.
- The working width is 13 inches, allowing for efficient coverage.

Figure 4.3: 13-inch dethatching path. This image illustrates the effective working width of the machine, showing how it removes dead plant layers to improve lawn health.
5. Maintenance
Regular maintenance ensures the longevity and optimal performance of your TMEOSK Dethatcher and Scarifier.
5.1 Cleaning
- Always disconnect the power supply before cleaning.
- Use a dry cloth to wipe down the exterior of the machine.
- Remove any grass, thatch, or debris from the tines/blades and the underside of the deck using a brush or scraper.
- Clean the collection bag after each use.
5.2 Cylinder Inspection and Replacement
Regularly inspect the tines/blades for wear or damage. Worn or damaged components should be replaced to maintain effective performance. Refer to section 3.4 for cylinder replacement instructions.

Figure 5.1: Close-up view of cylinder maintenance. This image shows a hand inspecting or working on the dethatcher cylinder, emphasizing the importance of regular checks for wear and tear.
5.3 Storage
- Clean the machine thoroughly before storing.
- The handle can be folded for compact storage using the quick-lock mechanism.
- Store the unit in a dry, secure location, out of reach of children.
6. Troubleshooting
This section addresses common issues you might encounter with your dethatcher/scarifier.
| Problem | Possible Cause | Solution |
|---|---|---|
| Machine does not start | No power supply; Safety switch not engaged; Operating lever not pulled | Check power connection; Ensure safety button is pressed before pulling lever; Pull operating lever fully |
| Poor dethatching/scarifying performance | Incorrect depth setting; Worn tines/blades; Collection bag full | Adjust depth setting; Inspect and replace tines/blades if worn; Empty collection bag |
| Excessive vibration or noise | Loose components; Damaged cylinder; Debris caught in cylinder | Check all fasteners; Inspect cylinder for damage and replace if necessary; Disconnect power and clear any debris |
| Motor overheats | Overloading the machine; Blocked ventilation slots | Reduce workload, do not force the machine; Clean ventilation slots; Allow motor to cool down |
7. Specifications
Detailed technical specifications for the TMEOSK 13-Inch 12Amp 2-in-1 Electric Lawn Dethatcher and Scarifier.
| Feature | Specification |
|---|---|
| Brand | TMEOSK |
| Model Number | Garden Scarifier-TME01 |
| Power Source | AC Electric |
| Motor | 12 Amp |
| Cutting Width | 13 Inches |
| Operation Mode | Automatic |
| Collection Bag Capacity | 31.7 Quart (approx. 30 Liters) |
| Depth Control | 4-Position Adjustable |
| Handle Height Adjustment | 3-Rod Adjustable |
| Product Dimensions (L x W x H) | 44.5" x 23.6" x 40.9" |
| Material | Metal |
| Assembly Required | Yes |
| UPC | 768604859805 |

Figure 7.1: Product dimensions. This image provides a visual representation of the dethatcher's length, width, and height, indicating 40.2" length, 20.1" width, and 37.4" height.
8. Warranty and Support
8.1 Warranty Information
TMEOSK products are manufactured to high-quality standards. For specific warranty details, including coverage period and terms, please refer to the warranty card included with your product or contact TMEOSK customer service. Keep your proof of purchase for warranty claims.
8.2 Customer Support
If you have any questions, require technical assistance, or need to order replacement parts, please contact TMEOSK customer support. Contact information can typically be found on the product packaging, the official TMEOSK website, or your purchase documentation.
Ask a question about this manual
Ask about setup, troubleshooting, compatibility, parts, safety, or missing instructions. Manuals+ will review the question and use this page’s manual context to help answer it.